Mosaic Tile Kitchen Backsplash (Design Styles)
Here we share our mosaic tile kitchen backsplash designs including what it is, the different styles, shapes, images of materials, grouting tips, and best adhesive to use for mosaic tile backsplash.
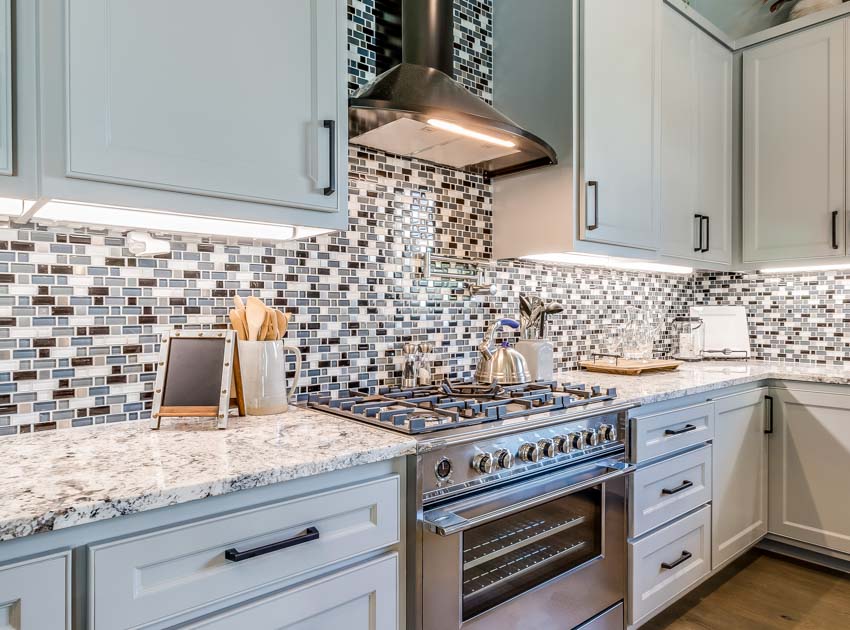
With so many designs to choose from, using a mosaic tile kitchen backsplash not only can elevate the look of your kitchen but creates an opportunity to showcase your own unique personality in your home.
No design is impossible with these beautiful tile pieces, from geometric patterns in subdued hues to colorful abstracts. If you’re deciding on the design elements for your kitchen, you can draw inspiration from your mosaic tile kitchen backsplash, taking a cue from its color scheme, texture, and patterns. [toc]
What Is Mosaic for a Backsplash?
The mosaic tiles are small, thin, hardwearing finishing materials usually made from stone, ceramic, porcelain, wood, glass, metal, or baked clay. Recycled materials such as broken tiles or glass can also be made into a mosaic installation.
Mosaic tiles that are commercially manufactured either in a loose or mesh-bound form and come in standard sizes:
• 1 inch x 1 inch
• 2 inches x 2 inches
• 1 inch x 2 inches
A backing material is needed for mosaic tiles to adhere to the substrate or wall, which is standard for mesh-bound forms.
The most common and affordable backing material is a concrete backer board which can be cut easily into ¼” and ½” thick sheets and is readily available in almost all home and construction material shops.
Mosaic tiles have been used for centuries and started as a form of artwork in many countries. Combining traditional to contemporary mosaic designs, mosaic tile backsplash designs are extensive with a variety of materials, finishes, patterns, colors, shapes, and sizes.
Another important consideration for mosaic tile types of kitchen backsplash is the grouting and the backing material. There’s an extensive selection of grout types today with more striking and bolder colors, but the classic white grout is still popular.
There are many commercial mosaic tiles backing, but the most cost-effective option is the concrete backer as they are cheap but perform well as a backing material. The board comes in 1/4-inch and ½-inch thick sheets.
Mosaic Backsplash Tile Designs
Mosaic Subway Tile
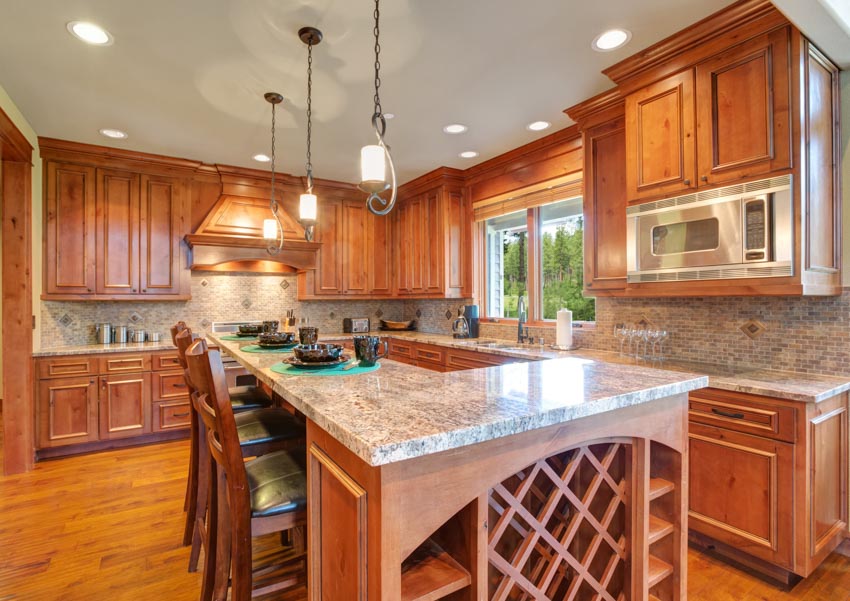
Mosaic versions can be purchased as individual tiles or per sheet, where each band of subway mosaics is measured per square foot for easier installation. The horizontal mosaic is usually installed inset to larger subway tiles creating a cohesive look with the tile accent.
These small tiles can appear to be flushed or beveled. The small subway tiles come in a variety of materials, where glass, metal, and ceramic in the flushed installation are the most common options for the kitchen due to their easier maintenance.
Subway Tile Patterns and Designs:
• Stacked
• Bullnose
• Herringbone
• Crosshatch
• Pinwheel
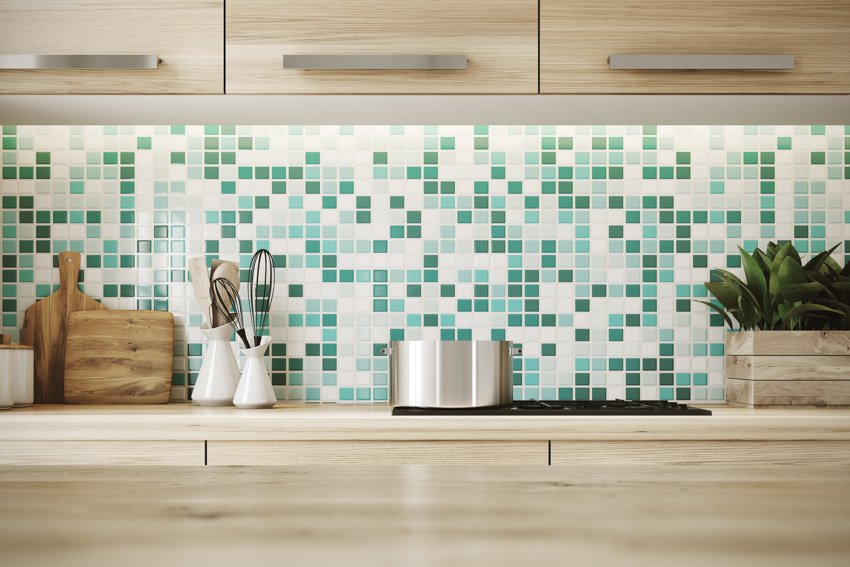
Penny Tile
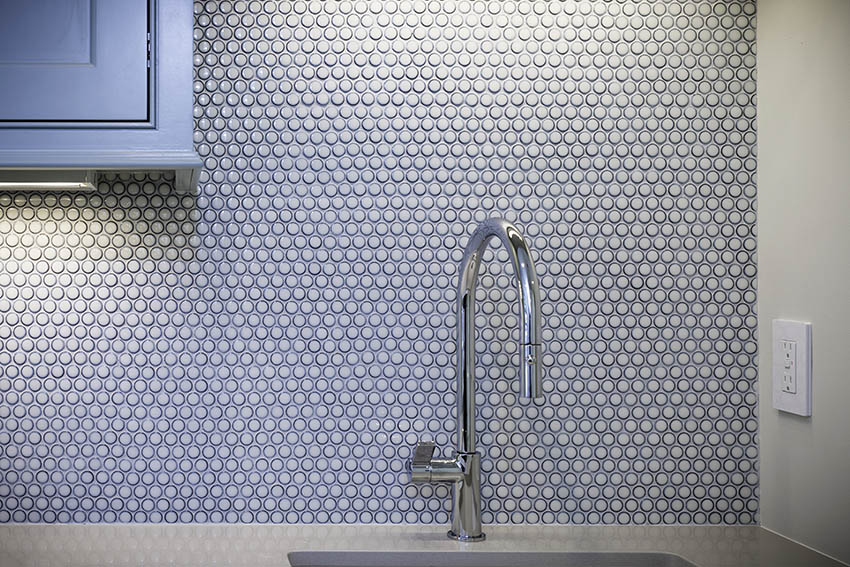
The round penny tiling conveys a fun and positive vibe but can also create a somber and relaxed atmosphere with pastel and neutral colors. The ombre effect is also a popular design layout for penny tiles, as it creates a smooth transition between colors.
The standard size of penny tiles is 3/4 inch or 32 x 29 mm to 1 inch in diameter. The penny tiles can be expansively installed on your entire backsplash or create a break among larger tiles. Like any mosaic tile, penny tiles can be bought individually or per sheet.
They come glazed or unglazed with a variety of materials, but metal and glass are the most luxurious and recommended for their easy cleaning and maintenance.
Even using a single color or shade, such as a blue penny tile backsplash with brass or gold grouting, can create a striking backdrop to a kitchen backsplash.
Penny Tile Patterns and Designs:
• Ombre
• Checkerboard style
• Stripe Effect (Alternate subway and penny tiles)
• Multi-gray penny tiles
• Real penny tiles
Square Tile
Moreover, the straight-edged pieces can be flush against a countertop or wall cabinet as well as for common kitchen tiling like the subway tiles creating a unique mix of shapes.
The versatility of these squares make them a popular option for kitchen backsplashes to create geometric to intricate tile designs. Mosaic square tiles usually come ½ inch x ½ inch in size and come in a variety of materials.
Square Tile Patterns and Designs:
• Grid pattern
• Checkerboard
• Staggered
• Square Grid stripe
• Diamond Grid
• Diagonal Grid
• Zig zag (Alternating colors)
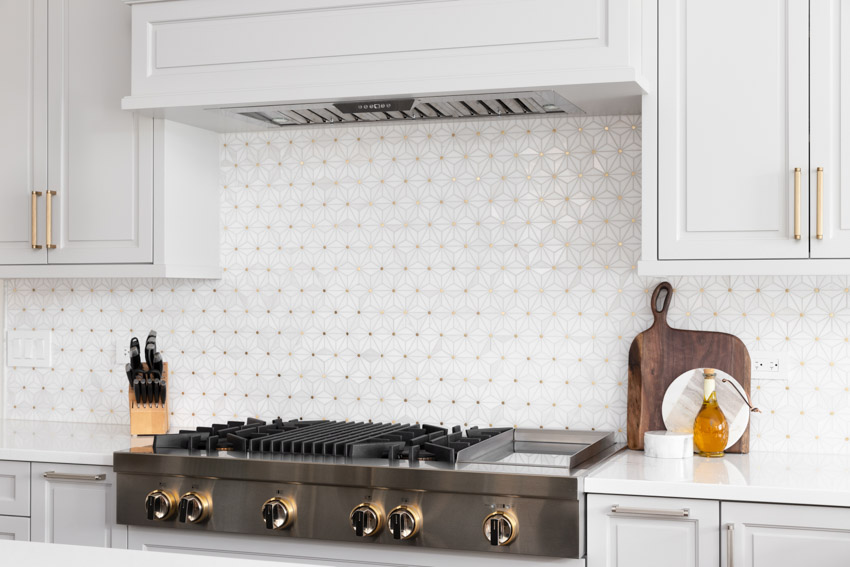
Hexagon Tile
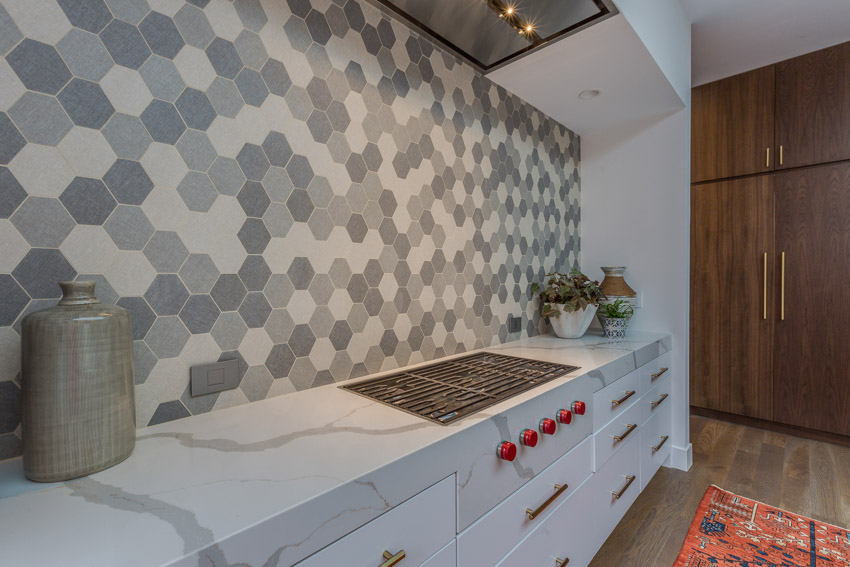
Hexagon mosaics’ typical size is ½ inch by ½ inch and can be bought for individual pieces or in a particular sheet size where individual hexagon mosaics are arranged for a specific pattern.
Varieties of the honeycomb mosaics are picket or elongated, where two parallel sides are usually twice longer than the rest, thus creating the picket shape. Hexagon backsplash tiles can be used to create larger hexagons or other shapes, creating a continuous visual interest in your backsplash kitchen.
Hexagon Tile Patterns and Designs:
• Ombre Effect
• Half Black and Half White Tile
• X Pattern (Black and White)
• Partial Installation on Backsplash
Octagon Tile
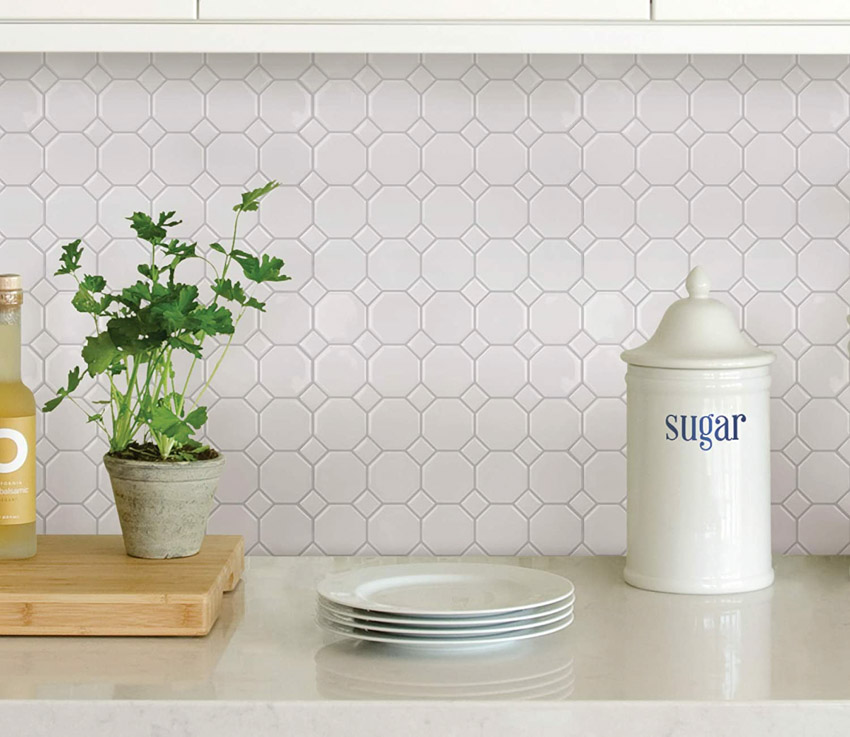
A classic favorite from Victorian times, the octagon mosaic is a small tile with eight sides and eight vertices. Aside from having equal sides, octagon mosaic tiles can come with a variation of having four smaller corner sides creating a truncated square appearance.
A vintage mosaic shape is now a popular option for kitchen owners who want to add an eye-catching backsplash with a familiar geometric pattern.
The octagon mosaic can be incorporated into modern kitchen interiors thanks to the extensive modern variations of the classic tile shape, such as monochromatic, pastel, and flushed edges with gold or silver grouting.
Octagon mosaics are commonly sized at ½ inch x ½ inch. The octagon tiles’ most identifiable layout is where the tiles are laid at 45 degrees with smaller tiles placed in between the intersections.
Octagon Tile Patterns and Designs:
• Grid: White Octagon Tiles with Black Square Tile Inserts
• Elongated Octagon Forms Cross Pattern with Square Tile Inserts
• Rhetoric Composition
Diamond Mosaic
Diamond mosaics can be arranged in various patterns, creating larger forms, such as the 3D cube, a popular modern interior feature. The 3D cube is made by arranging three diamond mosaics to create an isometric view of a cube.
The illusion creates an interesting backdrop in a matte or glossy finish. Diamond mosaics can also be used as inserts between or among larger tiles.
Diamond Tile Patterns and Designs
• Tri-color Diamond in Grid Pattern
• Rhombus forming 3D Cube
• Diamond Grid with Truncated Edges and Small Square inserts
• Elongated Diamond in Horizontal Grid Layout
Herringbone Tile
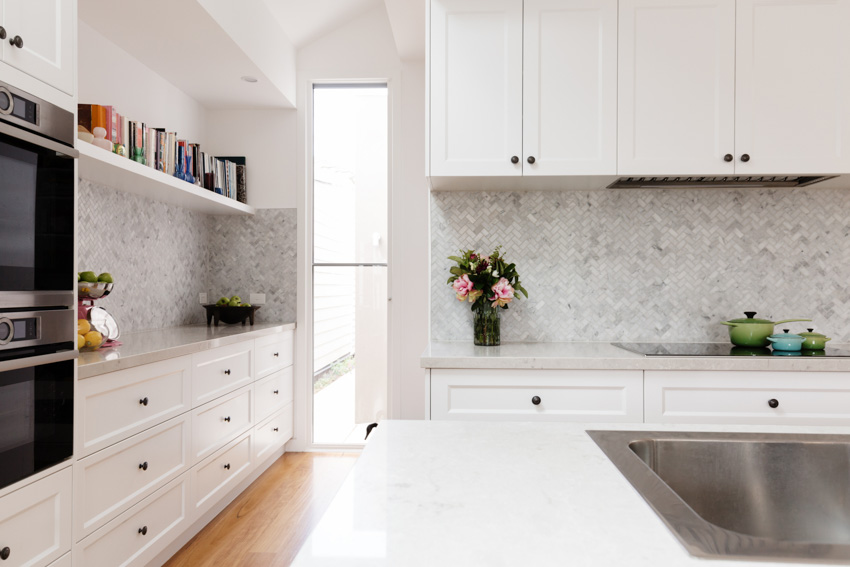
Every rectangle creates a 90-degree angle to another rectangle where the pair offsets the other pairs above and below, creating an overlapping effect.
Typically, the block edge length will have a 2:1 or 3:1 ratio. The herringbone mosaic can be used sparingly together with other larger-sized tiles but can also look stunning with a full field of herringbone mosaic on a kitchen backsplash.
Herringbone Tile Patterns and Designs
• Alternating Three Colors in Diagonal Orientation
• Vertical Orientation
• 90 Degree Orientation
Chevron Tile
![]()
However, a chevron mosaic tiling will have each end of the rectangular adjoined together, creating a straight line, usually oriented vertically.
Chevron Tile Patterns and Designs
• Offset Black and White Alternating Colors Vertical Orientation
• Rainbow Colors with Grunge Effect in Horizontal Orientation
• White-washed Chevron tiles with Black Grouting
Spanish Mosaic
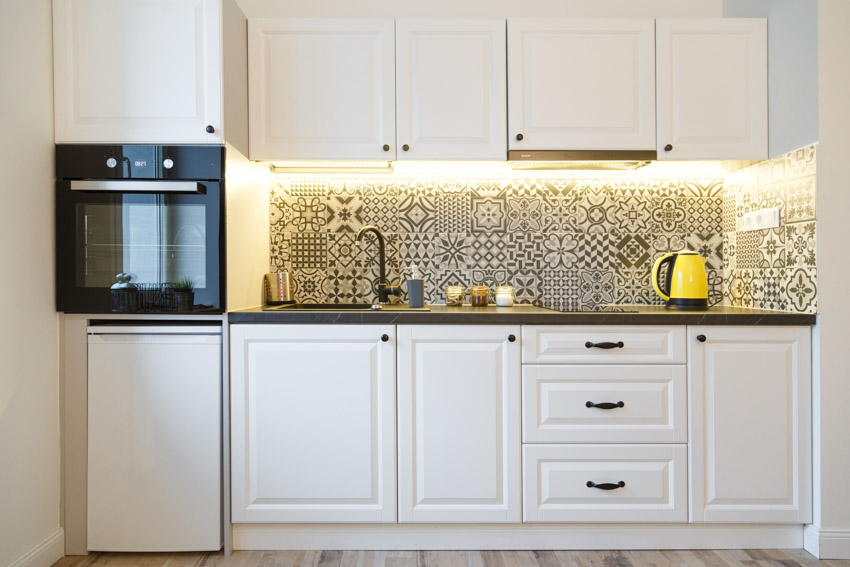
A traditional mosaic type is called “Majolica,” or tiles with a milky-white glaze. Adding these unique, often handmade Spanish mosaic tiles will truly breathe life and Mediterranean personality into your kitchen backsplash effortlessly.
Their colorful design can be an effective contrast to a monochromatic colored tile, or you can get inspiration from their colors and patterns in selecting the rest of the design elements in your kitchen.
Arabesque Tile
Arabesque tiles were popular during the Renaissance until the 19th century and are widely used to decorate European buildings and houseware and extensively used in Moorish or Arabic interior and architectural design.
Arabesque mosaic tiles commonly come in 2 inches by 2 inches or 2 inches b 2 ½ inches sizes and in a variety of finishes, colors, and materials.
A unique finish in tiles that’s popular in arabesque mosaic tiles is the iridescent glass finish, where the individual tiles appear to change color depending on the quality of light hitting the surface. The changing colors also happen when viewing the mosaic tiles from different angles.
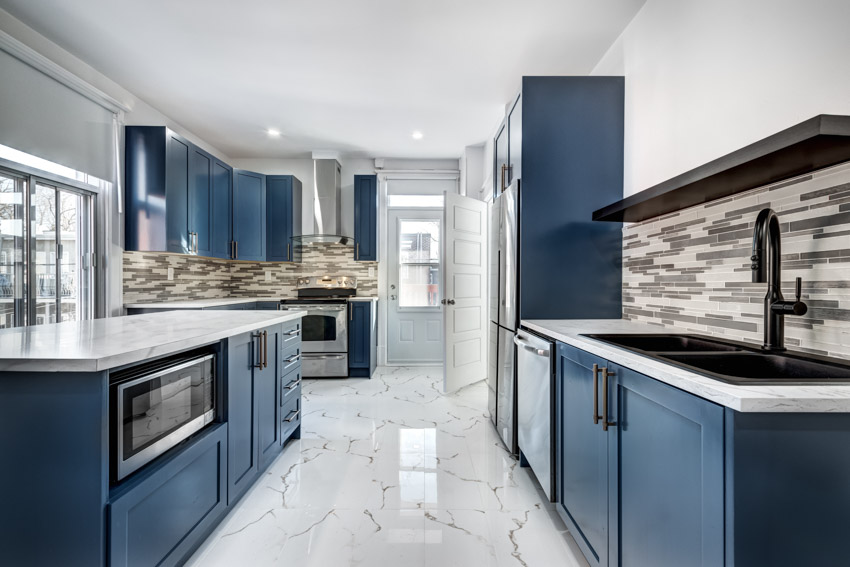
Linear Mosaic
Horizontal lines are the epitome of the modern theme making the linear mosaic tile backsplash the perfect design option if you need to add an accent element that goes with your contemporary kitchen.
A huge selection of linear mosaic tile options is available to fit every budget and style. For instance, create a luxury backdrop in your kitchen with a combination of metallic and frosted glass linear tiles.
The glossy tiles are arranged randomly with a variety of lengths but uniform in height with square inserts between the frosted glass tiles.
The surfaces on both materials are textured, simulating the look of bricks. The luminous and glossy finish against changing lights creates a striking and opulent backdrop in your kitchen.
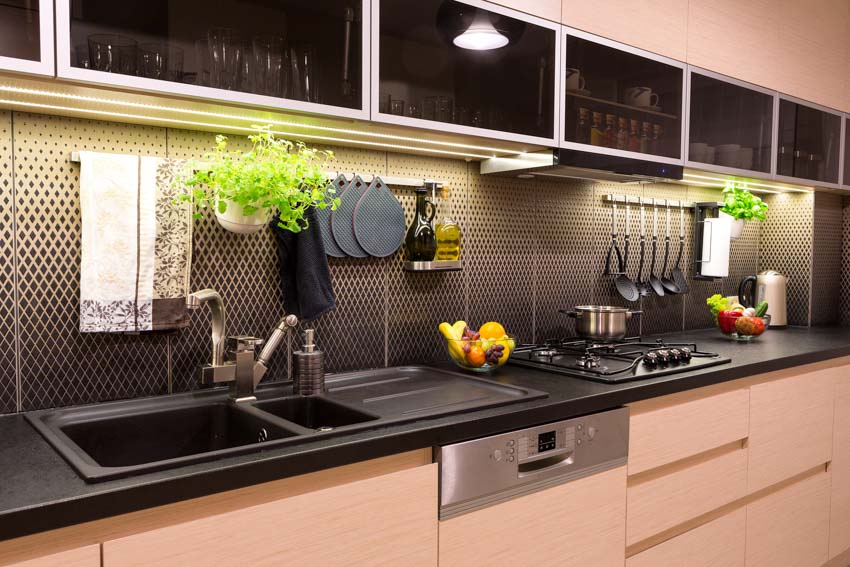
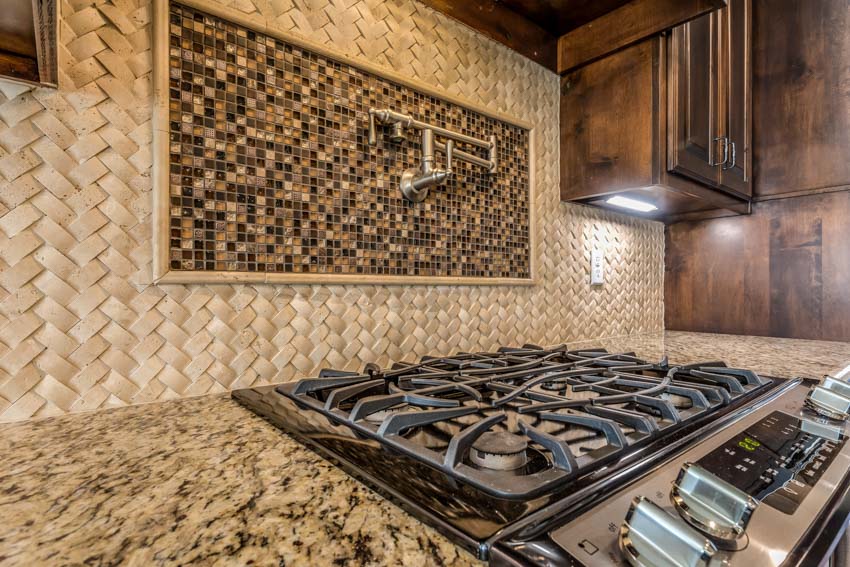
Mosaic Materials
Porcelain Tile
There are hundreds, if not more, mosaic design selections made of porcelain available in local hardware and construction shops with varying colors, textures, patterns, materials, and finishes.
This means it’s easy to find the right porcelain mosaic tile to match your personal taste or inspired kitchen design. A porcelain backsplash using a mosaic design is cost-effective, and even homeowners with a limited budget can get a stunning backsplash that looks like marble tiling.
Other than quarried stone, simulated textures that are hard or impossible to install as kitchen backsplash, such as wood, are possible with the porcelain mosaic tile.
Ceramic Tile
Lighter than quarried stone and porcelain but more durable than vinyl or glass tiles, a ceramic mosaic backsplash is ideal for lightweight substrates such as drywall.
Moreover, the lighter material means it’s easier to handle and has good workability. Ceramic tile is also easier to cut compared to that of porcelain or quarried stone, making it possible to install ceramic mosaic insets into existing tile installations or flush them against a corner or edge.
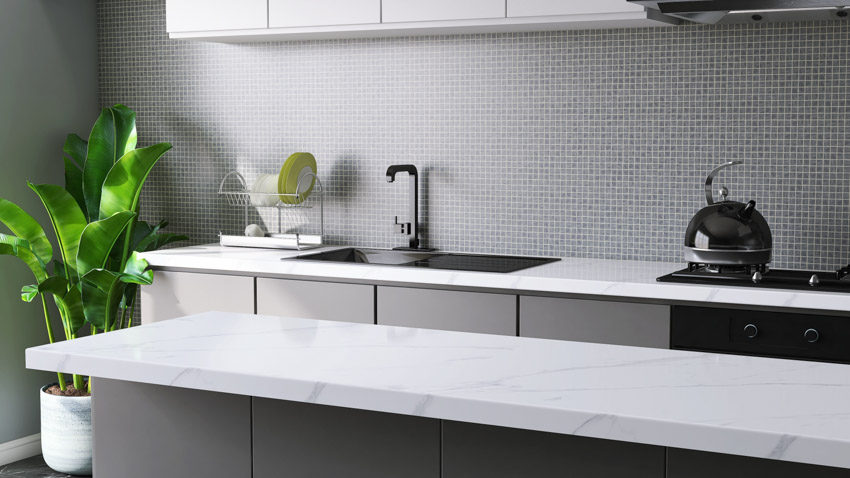
Glass Tile
The impervious surface of glass mosaic tiles also makes it even more suitable as a backsplash material behind a countertop area, as grime and stains don’t seep through the glass.
Most glass mosaic tiles manufactured are heat, fire, and UV resistant, which means they are also ideal for walls behind stoves and cooking ranges. Moreover, outdoor kitchens can install a glass tile backsplash as they are frost-proof, making it a durable protective layer for your outdoor kitchen walls.
Due to its fluidity during manufacturing, glass mosaic tiles can come in any size and shape, but the most common kitchen backsplash mosaic tiles come in ½ inch by ½ inch square shapes. Making it more versatile to install in different designs.
Glass mosaics can be combined with other mosaic materials, such as stone or metal, as accent pieces due to their translucent and glossy finish.
Marble Tile
The popular white marble, such as a Carrara marble backsplash, matches well with modern or traditional kitchens, and its soft grayish-to-bluish veining can add a striking aesthetic without overwhelming the space.
Other marble backsplash design options are available under marble mosaics, such as rhombus mosaic tiles, long octave polished designs, and white marble Italian floral mosaics, the variety of designs to choose from is wide.
Peel and Stick Tile
With its manufacturing process, there are endless designs to choose from, and they are readily available in almost all home improvement shops locally and online.
Have a stunning simulated look of Moroccan mosaics or retro-inspired tiling without the complicated and costly process of installing them on your kitchen backsplash. It’s quick and easy, which means there is no need to get a professional to install the peel and stick backsplash with a mosaic design.
Copper Tile
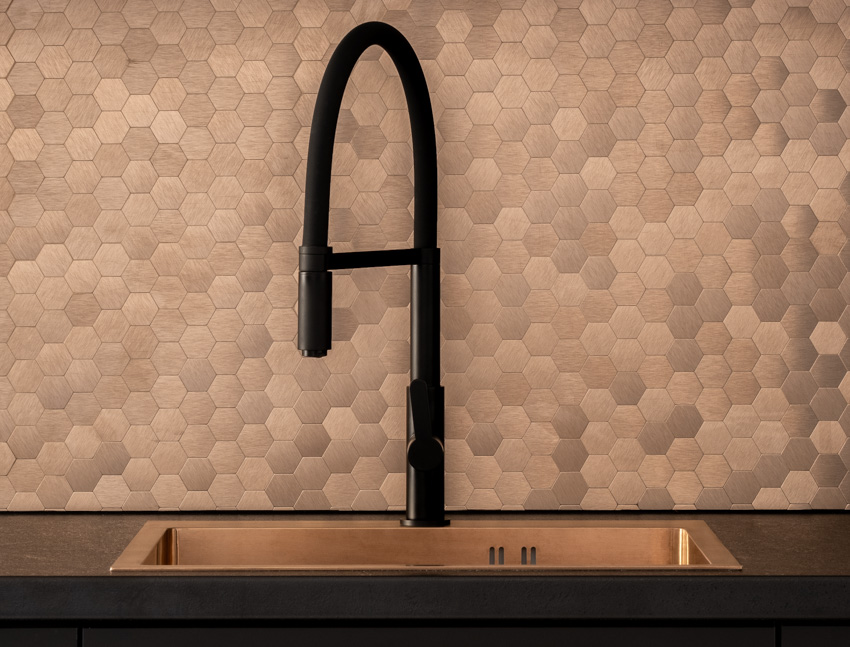
There are numerous ways to utilize the rich sheen of copper mosaics. A simple square copper mosaic can be laid as insets against white or black tiles or line up a backsplash edge to create a transition between materials.
Despite its metallic look, the copper’s red-orange color adds a cozy feel to a visual installation because its malleable material can easily shape into intricate details. Textured copper tiles are also available, featuring organic to geometric patterns.
Mosaic Grout
Aside from being a fundamental design aspect, getting the suitable grout spacing for a particular mosaic material reduces the number of tiles from chipping off or getting thrown off from the intended layout or design.
While there are no hard rules on grouting spacing or laying out, your mosaic tiles need guidelines and recommendations to achieve consistency and visual balance for your kitchen backsplash.
TCNA, or Tile Council of North America (formerly Tile Council of America), recommends using the tile’s material as a reference in assigning the tile grout spacing.
Tile manufacturers suggest grout joints should be at least 1/8 inch to 3/16 inches. In addition, grouting spaces with more than 1/8 inch may need additional grouting with sand. However, in most installations an unsanded grout is used for kitchen backsplash.
Instances between the mosaic tiles create lines. Therefore, the more mosaic tiles installed, the more visible the grout lines will be. Thinner grout lines are a popular modern feature as they aim for a more minimalist approach; the lesser the grout area, the lesser the crevices present for grime and dirt to adhere.
But again, it is important to consider your mosaic tile material, as there are materials that work better with thicker grout. For mosaic tiles, thinner grout works well in general because they are unlikely to have lippage or unevenness in the layout.
A sleek and leveled finish is needed to appreciate a mosaic installation in your kitchen backsplash. With their small size, unleveled mosaic tiles are more noticeable unless installing mosaic sheets.
Thus, the thinner the grout, the more obvious uneven surfaces are. Field movement joints or also called soft joints, should be considered.
Field Movement Occurrence:
• 20 feet to 25 feet: Interior Applications
• 8 feet to 12 feet: Exterior Applications.
Generally, a minimum of 3/8 inch to ¼ inch is recommended for joint expansion, but it is highly visible compared to your 1/8-inch or 1/16-inch grout joint.
Best Adhesive For Mosaic
The mosaic, backing, and wall material are considerations when selecting the best adhesive for your mosaic tile backsplash.
PVA – Polyvinyl Adhesive
Primarily used indoors, PVA is safe to use as it is less toxic. The adhesive’s strong consistency can hold on dense and heavy tiles.
Aside from adhering tiles to a surface, PVA can be mixed with water to create a sealing solution. A 50:50 ratio, or whatever rate the recommendation the manufacturer specifies, should be followed for best results.
Adhesives for Cement (Thinset)
For convenience, some brands may not be as strong for cement tiles, compared to mixtures you do yourself since everyone’s use case can be different.
Depending on the type of tile, the orientation of the tile, the surface texture, and environmental factors, these can affect the performance of the glue over time.
Unlike PVA, Thinset can work in an outdoor environment. It can even be used on uneven surfaces. What’s great about using this adhesive is its ease of use. The consistency is that of cake icing, making it easy to apply.
The consistency should also allow it to mold well onto a surface. The use of this adhesive is extensive. By just adding an acrylic medium, it can be made to be water-proof, furthering its range of applications.
Liquid Nails
This type of adhesive works great for adhering heavy tiles onto a surface. The glue requires a cartridge gun or smaller packets that can be squeezed out like toothpaste.
Depending on the manufacturer’s specifications, liquid nails are expected to bond many kinds of materials except plastics like polyethylene and polypropylene.
For tile installation jobs that need to be done quickly, liquid nails can dry in as fast as 15 minutes to hold the tile in place but to reach its maximum strength; it can take up to a week to cure, so it’s best to be cautious when moving around newly glued tiles.
Once a tile gets messed up, it will be a hassle to reinstall or replace it. They are pretty strong, after all. Some are rated to hold at least a hundred pounds. Liquid nails are great for indoor and outdoor use, so that they can be a handy general-purpose construction adhesive.
The catch is that it cannot be as convenient to use as it is advised not to allow the glue to come in contact with skin, and the work area should be well-ventilated. Lastly, it should not be used to glue mirrors as the chemical reaction will destroy the reflectivity of the mirror.

Epoxy Resin
A strong adhesive that can be used for a variety of projects. Anything from adhering objects together to creating a permanent clear display to preserve artwork (provided it’s been vacuumed), Epoxy Resin is a very versatile material.
Anyone wanting to use this adhesive should be a quick worker for what it can do. The two chemical components mixed are a hardener and a resin. These two chemicals should be mixed just before application.
Gluing items should be ready as there is a short working time before the solution becomes too sticky to make adjustments after the resin has been applied. The work area should also be a well-ventilated space due to the fumes that are toxic. This is not an adhesive suited for beginners.
Clear Silicone
Best used for surfaces that need to preserve their look. Clear silicone dries clear and will simply work well with glass surfaces and mirrors. When used on tiles, the underside should be coated well. Watch out for excess silicone when gluing tiles, and wipe it off immediately. Silicone can handle heavy loads.
Mastic
A gel with the consistency of peanut butter that is used for adhering tiles and other objects but can also be used to patch up holes in walls. It is best to read the specifications to find out where it can be used, as this will likely not work with surfaces exposed to moisture.
The gel can be applied using a palette knife. Essentially, the gel is spread on the surface like butter on bread. Of course, best judgment should be practiced to gauge whether or not enough mastic has been applied.
Mastic does not do well when dealing with pressure, so using tile floors are not recommended. It is also not recommended for exterior locations, especially if exposed to moisture is an occurrence. This is best used for gluing tiles on walls.
Can You Paint Mosaic?
So, can you paint a mosaic tile backsplash? Yes, you can paint over a mosaic tile installation, given that proper steps and products are used to make your paint adhere to your existing mosaic tile.
Best Paints to Use According to Mosaic material:
• Glass Mosaic: Enamel Paint
• Stone Mosaics: Latex or Acrylic-Based Paints
• Metal Mosaics: Oil-based Paints such as Enamel Paint
• Porcelain Mosaics: Enamel or Epoxy Paint
Surface Preparation:
1. Clean Mosaic Tiles: Using a sponge and soap, remove the dirt and grime on your mosaic tiles. Warm water can help remove the oils more effectively.
2. Leave the Surface Dry: Using a clean cloth, wipe the surface dry, reaching corners and crevices.
3. Lightly Buff the Surface: With an extra fine sandpaper, create a rough surface to help the paint to adhere. This method is important, especially for glossy surfaces such as glass.
4. Cover Sections with Painter’s Tape: Use the tape on near surfaces that don’t need painting. This will help protect these areas while getting a cleaner and leveled edging between materials. Also, wrap fixtures such as the sink or faucet with plastic to protect these as well.
5. Apply a Deglosser: The deglosser will help to remove or dull out existing finishes on the mosaic surface.
6. Paint a Coat of Bonding Primer: Apply a coat of bonding primer on your mosaic wall. This coating will help seal off your material and creates a surface to which paint can easily adhere.
You can breathe new life and personality into your home with a mosaic tile kitchen backsplash. The small tiles have been a favorite design element for centuries, and we’re seeing that evolving tastes haven’t deterred the love for this versatile medium.
What do you think of mosaic tile products? Are you planning a mosaic remodel? Let us know your thoughts in the comments below. See more related information in our article about backsplash behind the stove on this page.
To showcase highly specific designs, some images on this website use advanced AI-generation software to illustrate ideas and room inspiration. See our editorial policy to learn more.