Kitchen Remodel Timeline (Planning & Construction)

It is not surprising to know that a complete kitchen remodel is not an easy task. Thus, it is understandable for a client to be apprehensive regarding the duration of their kitchen remodel timeline. Even so, not understanding how long you would be unable to use your kitchen may be frustrating. Depending on the complexity of the project, a kitchen renovation might last somewhere around a few months to a year or longer. The processes and phases of a kitchen remodel are the same for many projects, although the scope of the remodel may differ. What to anticipate when starting a kitchen remodel in your house will be discussed in today’s article. We will walk you through the basics of a comprehensive kitchen remodel, highlighting the various stages of work in planning, designing, and the entire renovation process. [toc]
Kitchen Remodel Timeline
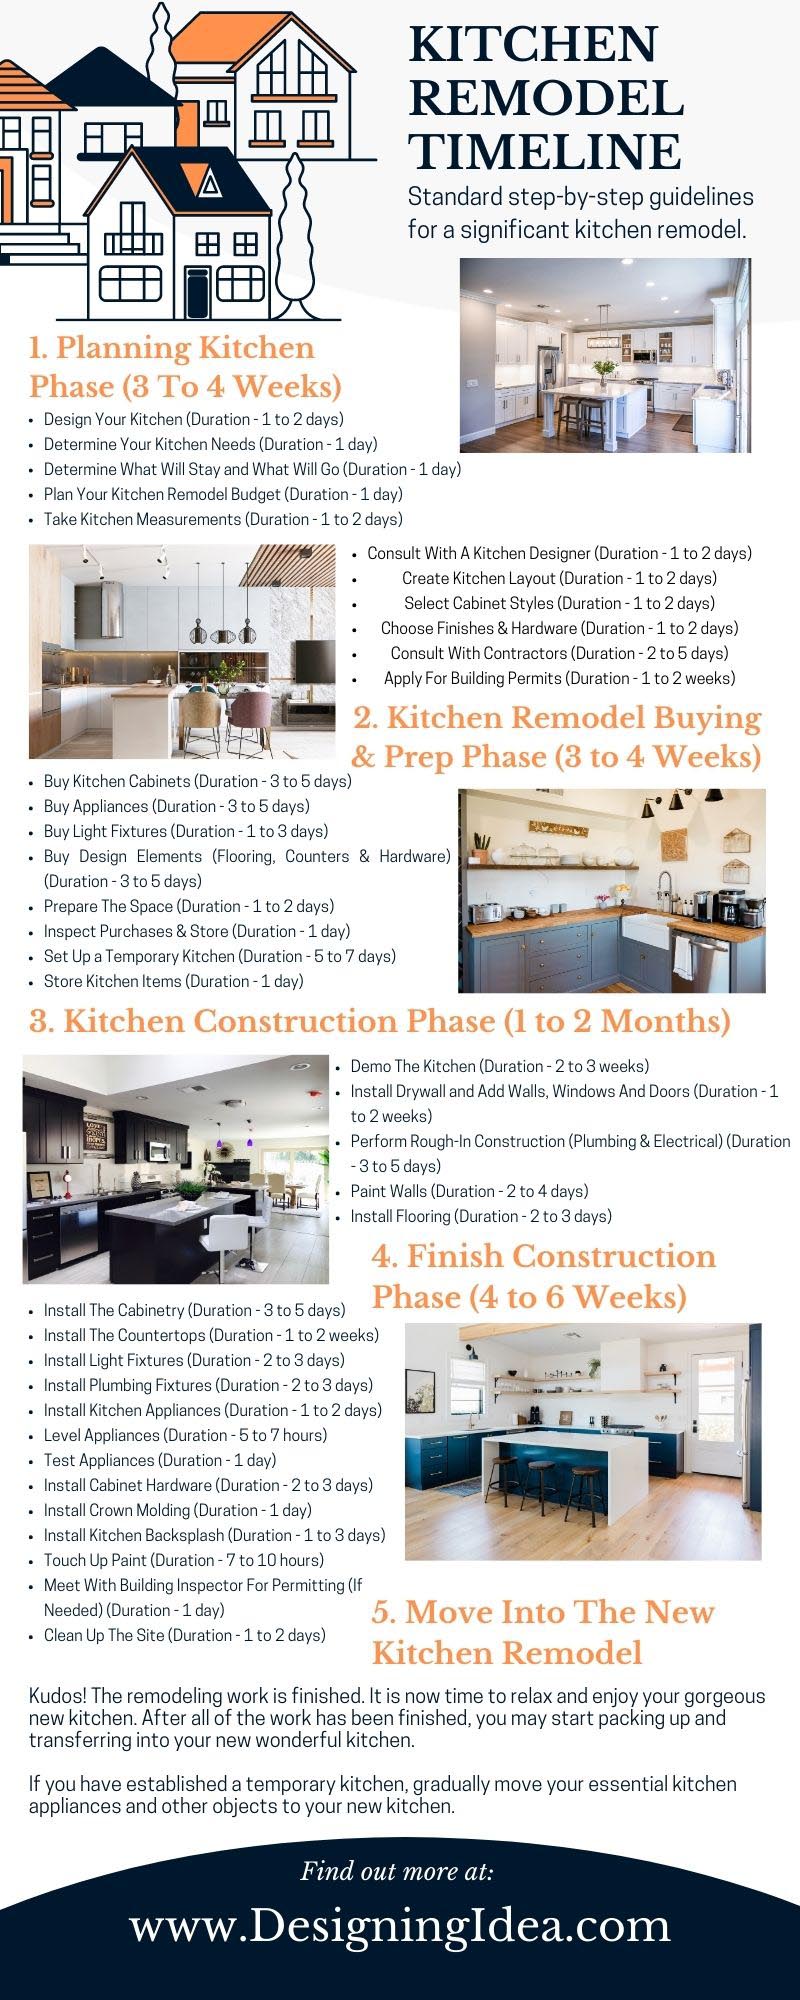
The steps listed below are the most standard step-by-step guidelines for a significant kitchen remodel.
• Gradual Kitchen Deconstruction/Demolition
• Rough-in Work (Framing and Plumbing)
• Assessment by a Professional
• Building the Walls
• Installation of Doors and Windows
• Placement of Cabinets and Pipework
• Replacing Appliances
• New Flooring Installation
However, keep in mind that every remodeling project is different, and a renovator might have reasonable grounds to deviate slightly from the steps outlined here.
Planning Kitchen Phase (3 To 4 Weeks)

The planning phase during any kitchen remodel project is crucial in numerous aspects. Starting your kitchen remodel with merely a simple design plan would be a great place to start. However, the entire planning process usually takes 3 to 4 weeks. These suggestions will make sure that you finish up with a well-remodeled kitchen you love rather than being forced to make unexpected mid-project sacrifices and be upset.
• Design Your Kitchen (Duration – 1 to 2 days): You have the freedom to design your own kitchen to ensure that you will get a new kitchen that will suit your needs and preferences.
However, if you are not a highly creative individual or just do not know precisely what you are going for, we recommend working with a professional. A competent kitchen designer may be worth the extra money you spend on your renovation.
• Determine Your Kitchen Needs (Duration – 1 day): Take into account how you currently use your kitchen by determining your needs. Identify the answers to these or similar questions: do you enjoy cooking tasty meals for a huge family daily? Or are you and your partner the only ones ordering takeaway food? Are you trying to significantly boost your house’s value and add kitchen upgrades that buyers want, since you intend to sell it soon?
You must have accurate answers to these key questions, in addition to those concerning your particular design preferences and other details, before you begin your kitchen remodel project.
• Determine What Will Stay and What Will Go (Duration – 1 day): Reusing pre-existing cabinets or appliances in your design plan can lead to significant savings if your kitchen remodeling budget is on the smaller side.
For example, if your current kitchen features handmade genuine wooden cabinets that are only a bit aged-looking or outdated, you can think about getting them spruced up with fresh paint, hardware, or reorganization within your space rather than completely upgrading them with newer cabinets.
But if some of the furnishings are extremely unsightly due to their oldness and some types of appliances are not safe to work with anymore, then maybe it is time to let them go.
• Plan Your Kitchen Remodel Budget (Duration – 1 day): A full kitchen remodel, according to professional kitchen designers and builders, costs nearly $25,000 on average, whereas minor renovations normally cost around $10,000 to $15,000.
A completely new kitchen could be among the most pricey remodeling projects you can tackle, but property investors generally believe that these remodels are the greatest thing you can do to increase market value. Hence, make sure to prepare a realistic budget.
• Take Kitchen Measurements (Duration – 1 to 2 days): To begin your basic kitchen design planning, simply take a few easy kitchen measurements. Assemble your measuring supplies, determine the ceiling height, and measure the width of the walls.
Determine the width, height, and space between the door as well as the surrounding walls for doors and walk-throughs. Determine your appliances’ width and height as well. If you are dealing with a contractor, they can assist you in gathering precise measurements.
• Consult With A Kitchen Designer (Duration – 1 to 2 days): You can speak with a kitchen design consultant to acquire a proper remodeling project plan.
You will have to pick your preferred plan as well as the items that will be employed to construct your new design during these sessions.
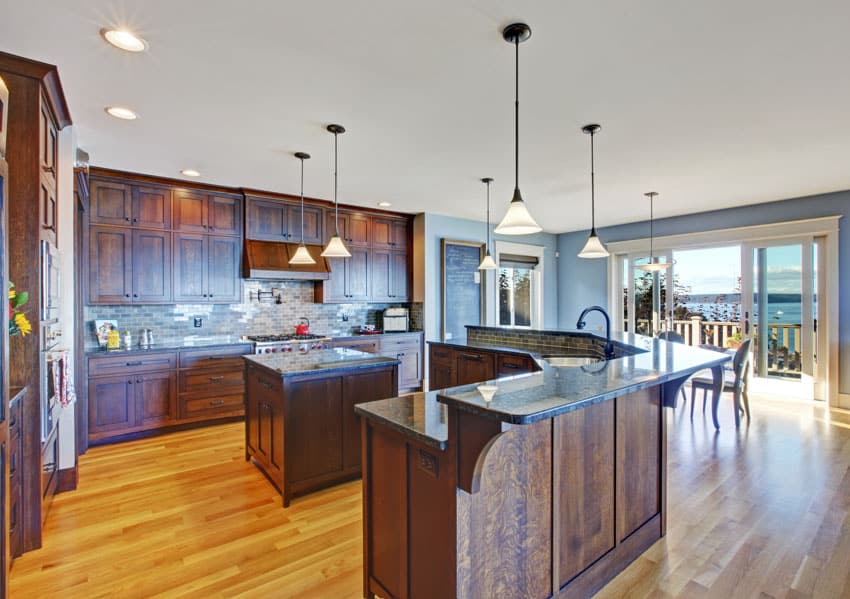
• Create Kitchen Layout (Duration – 1 to 2 days): To build the ideal layout, you have to provide spacious walkways, streamline movement through the kitchen, and minimize corners.
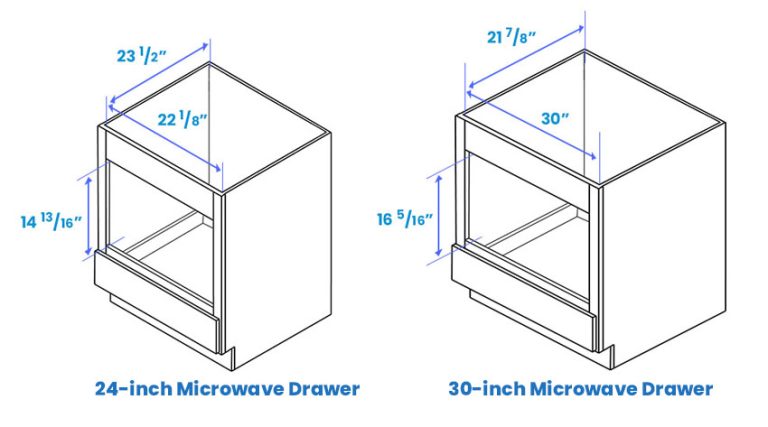
Furthermore, you must identify the proper height for specific appliances, such as microwaves, as well as determine the function of the island. Make a landing zone near appliances.
Do not forget to plan out where you will put the countertops, organize the range area, and coordinate the electrical outlets and wiring. If you plan on installing an island, you’ll want to ensure there is proper clearance around each side.
You will also want to think carefully about appliance placement and ease of use. It’s a good idea to avoid installing an oven directly next to a refrigerator as it can interfere with cooling. Creating a proper kitchen work triangle is a good idea to maximize food prep and clean-up.
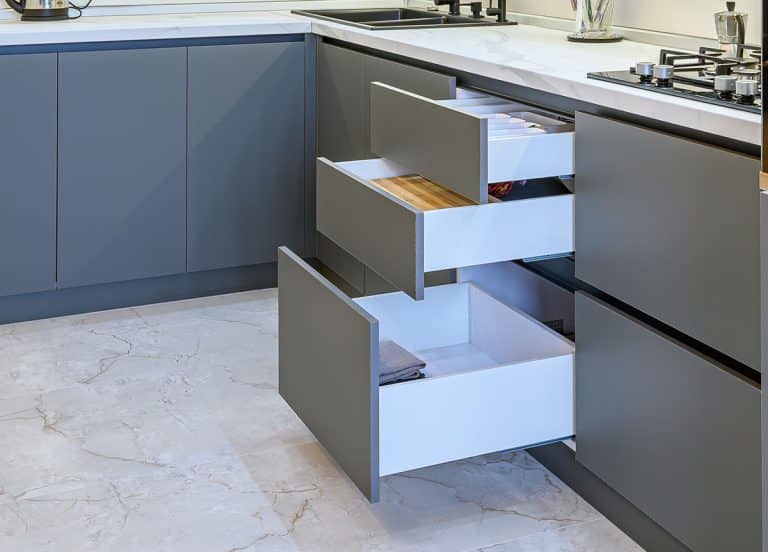
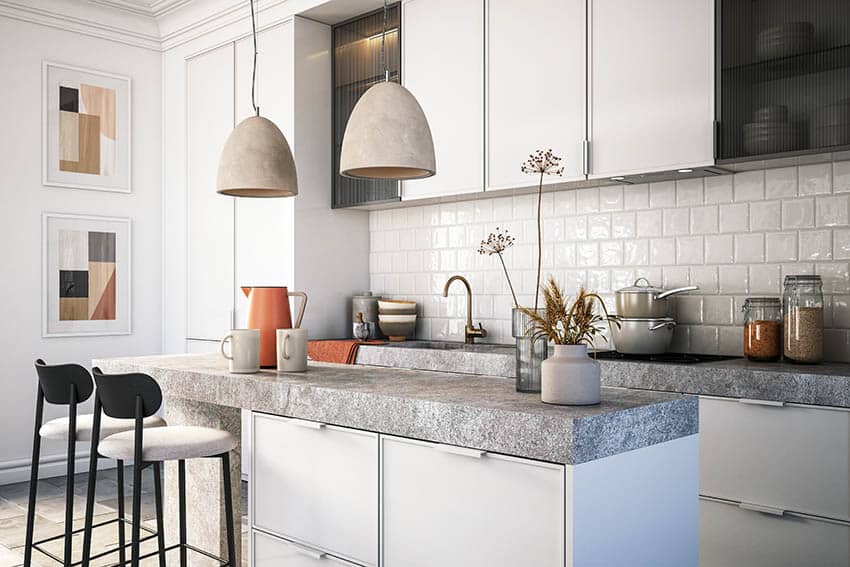
• Select Cabinet Styles (Duration – 1 to 2 days): Aside from style and décor, your cabinets should be very useful for storage and organization
As a result, you should examine your cooking patterns to determine what type of cabinets will ultimately benefit you as well as your family in terms of food preparation.
You should also consider whether you want a customized or prefabricated culinary space, the materials wanted, how much storage you need, and how you wish the elements to be arranged.
• Choose Finishes & Hardware (Duration – 1 to 2 days): Your hardware must complement the aesthetic of the room while still being functional. Thus, while determining whether to use a knob or a pull, personal taste is crucial.
Obtain samples of the knobs or handles you intend to purchase. Check how they match your hands by placing them against a cabinet drawer.
It is easy to select the proper finish once you have decided on the type, dimensions, style, and material for the cabinet hardware. There are numerous finishes to select from, including brushed, polished, matte, satin, antiqued, oil-rubbed, burnished, aged, and painted.
• Consult With Contractors (Duration – 2 to 5 days): After you have reviewed your design ideas and verified your decisions, your project will be assigned to a project manager and contractors who will begin your remodeling process.
• Apply For Building Permits (Duration – 1 to 2 weeks): A building permit authorizes you to start renovating a part of your home legitimately. Hence, it is essential for most construction or renovation projects to guarantee workers’ safety and conformity with construction, building, and zoning standards.
Kitchen Renovation Phase: Buying & Prep Phase (3 to 4 Weeks)
The buying and preparation phases are among the most challenging and tiring processes during the kitchen remodeling project. This phase could last 3 to 4 weeks. (It depends on your budget and schedule)
• Buy Kitchen Cabinets (Duration – 3 to 5 days): The first step is to learn about cabinet features as well as the quality of different cabinet building materials. Based on this, you have to assess the pricing in relation to the product’s quality. Set a reasonable budget.
Since cabinetry accounts for the majority of the cost of building a new kitchen, homeowners should consult with a professional to learn about the various cabinet quality classes.
Kitchen cabinets are classified into three types based on how they are created and sold: stock, custom, and semi-custom. When purchasing cabinets, do not be afraid to ask for assistance in determining cabinet sizes. If possible, examine a cabinet model attentively to identify the signs of a high-quality cabinet.
• Buy Appliances (Duration – 3 to 5 days): Everything you need to know about the appliances you will need to buy for your kitchen remodel will be disclosed by your routines and cooking style.
It could help to make a list of the functions you want in your appliances. Identifying which functionalities are most important to you can help you narrow down your options when you go shopping.
Ranges, ovens, cooktops, refrigerators, range hoods, dishwashers, and microwaves are just a few of the major appliances to consider buying for your kitchen.
• Buy Light Fixtures (Duration – 1 to 3 days): There are four important levels of light required to brighten the space appropriately. Ensure that you purchase the following light fixtures in your soon-to-be-remodeled space:
1. Ambient Light Fixtures: This soft light permeates the space and reflects off the ceiling. These types of lighting fixtures are the primary source of illumination.
2. Task Light Fixtures: This light source illuminates work areas such as countertops where food is being prepared.
3. Accent Light Fixtures: This highlighting fixture gives the environment depth and character.
4. Decorative Light Fixtures: Decorative lighting’s objective is to give appeal to the kitchen.
• Buy Design Elements (Flooring, Countertops & Hardware) (Duration – 3 to 5 days): When it comes to selecting a material for your flooring, there are several factors to consider. Is there a lot of traffic in the area? Is your budget limited? The point is that you must get the proper flooring material for your needs.
Furthermore, as with flooring, selecting a countertop is influenced by a variety of aspects, ranging from appearance and texture to price and maintenance.
Countertops can be made from a variety of materials, including granite, marble, porcelain, stainless steel, and manufactured quartz. Consider purchasing the ones that are suitable for your necessities and cooking habits.
The final decorating element, the hardware, will tie the entire project together and give it a unique flair that represents your style. Cabinet hardware is available in a range of designs, sizes, materials, and finishes. Make sure they match the rest of your kitchen’s décor.
• Prepare The Space For Installation (Duration – 1 to 2 days): You must clear the area by removing or relocating everything from the cabinets, shelves, and countertops.
Moving any furniture is also a smart option to keep it secure and protected. Consider removing any mirrors, paintings, or artwork from neighboring rooms as well.
• Inspect Purchases Upon Arrival & Store (Duration – 1 day): Once your purchased appliances, cabinets, or other elements arrive, take time to inspect them if there are no issues or defects.
• Set Up a Temporary Kitchen (Duration – 5 to 7 days): During the remodeling process, there will be a long time when you will not be able to use a proper culinary space for you to cook meals, wash the dishes, and so on.
Hence, you have to set up a temporary space that has all of the basic appliances and elements of a properly functioning kitchen. If you have a spare room in your house, you can use this as your temporary cooking area.
Keep your temporary cooking area away from bustling areas and renovation zones. It should also have proper ventilation. A laundry room, for example, would make an excellent temporary space, although you have to completely separate the food preparation locations from dirty garments and potentially toxic detergents.
Laundries are good because they are already damp. However, because of the harmful objects that lie beneath, caution must be exercised. Ascertain that you have adequate storage space and proximity to running water.
• Store Kitchen Items (Duration – 1 day): You have to store the essential items you have in your temporary cook space. It should have all of the things you need for preparing meals, cleaning the dishes, heating water and food, and many more.
Microwaves, toaster ovens, portable stoves, and compact electric grills will come in handy while cooking home-cooked meals.
Kitchen Construction Phase (1 to 2 Months)
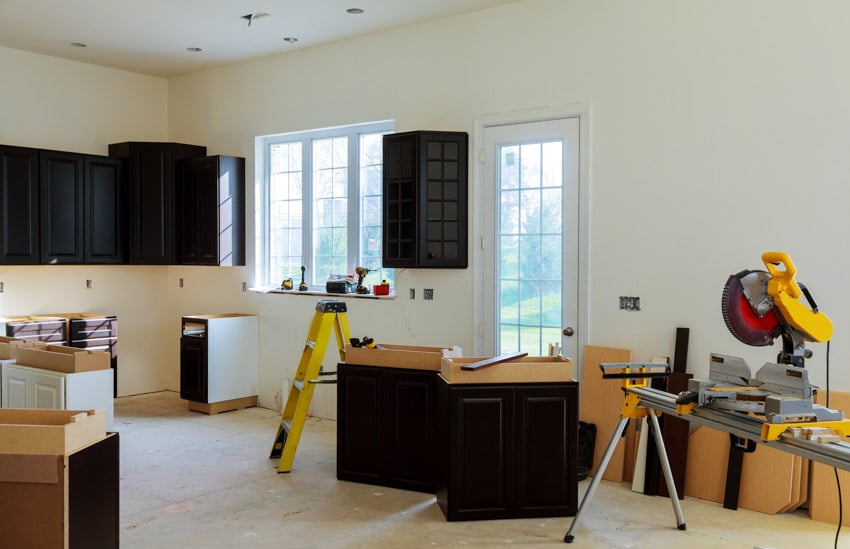
The construction phase is probably the most time-consuming part of the entire process, which may take 1 to 2 months.
• Demo The Kitchen (Duration – 2 to 3 weeks): A gradual deconstruction or demolition is normally the first step in every remodel. Before you can start creating a dramatic new environment, you must first deconstruct and discard what is obsolete or worn out.
This is the period where you will remove whatever you do not wish to maintain, such as ruined walls, outdated cabinets, flooring, fixtures, and so on.
Although some homeowners choose to handle this process independently, it is generally advisable to employ a professional contractor to perform the process. Skilled workers understand how to safely avoid plumbing and pipes lying behind walls or underneath cabinets.
Should you decide to do it yourself, you have to ensure that you switch off the water before you begin. It is also a smart option to have a plan in place for the waste, such as a large garbage bin or a truck for transporting the trash away.
• Install Drywall and Add Walls, Windows, and Doors (Duration – 1 to 2 weeks): When the remodeling project has passed inspection, it is time to complete the walls. In accordance with your project management plan, you can hang, attach, and finish drywall.
This involves any drywall required for a countertop or other sections. Consider employing a contractor to complete the process if you are not proficient in this field.
After the drywall has been installed, any doors or windows can be installed. If you keep the same architecture as your existing kitchen, you may not require any additional work for this step. Just wipe down your old ones with a thorough cleaning and seal any current cracks around the windows to improve insulation more efficiently.
If you are installing replacement doors or windows in the area, be certain that they are adequately insulated. Most of a home’s annual energy costs are attributed to wasted cold and warm air.
Unprotected windows not only reduce the convenience of your room, but they can also cost you a lot of money in heating and air conditioning expenses.
Aside from that, you want to ensure they have trimming installed to allow for more precise cabinet installation. Forgetting to do so may result in gaps, which may lead to worse problems later in the remodel timeline.
• Perform Rough-In Construction (Plumbing & Electrical) (Duration – 3 to 5 days): The execution of rough-in work, along with any framing and plumbing, is the next step in the remodel construction phase.
Consider this step to be something to deal with walls or what happens within the walls. Most of the utility rough-in work must be performed before drywall and flooring are put in. This allows for the inspection of the wiring as well as the installation of electric outlets, fixture boxes, and controls.
• Paint Walls (Duration – 2 to 4 days): Hardly anything completes the look more than fresh paint colors on the walls.
This stage can be completed before the installation of the cabinets or as the final step in the remodeling construction phase. Depending on the size of the area to be painted, it merely takes 2 to 3 days to paint your kitchen walls.
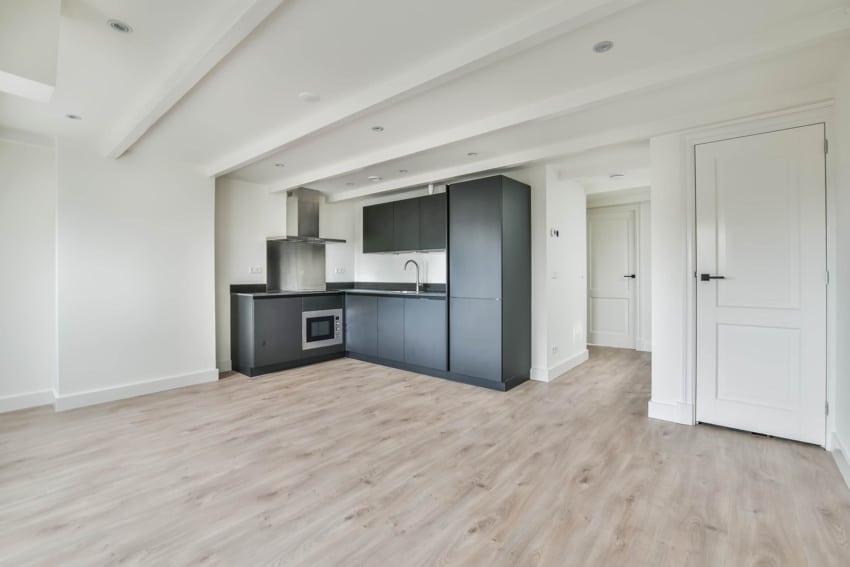
• Install Flooring (Duration – 2 to 3 days): Ultimately, new flooring must be installed. This should be done before installing cabinets. You have to choose the flooring colors and styles that complement your individual taste and flair.
With so many alternatives available—vinyl, ceramic, hardwood, marble, and so on —there is indeed something for every design.
Finish Construction Phase (4 to 6 Weeks)
The following steps are the final ones you have to undertake, which might last 4 to 6 weeks.
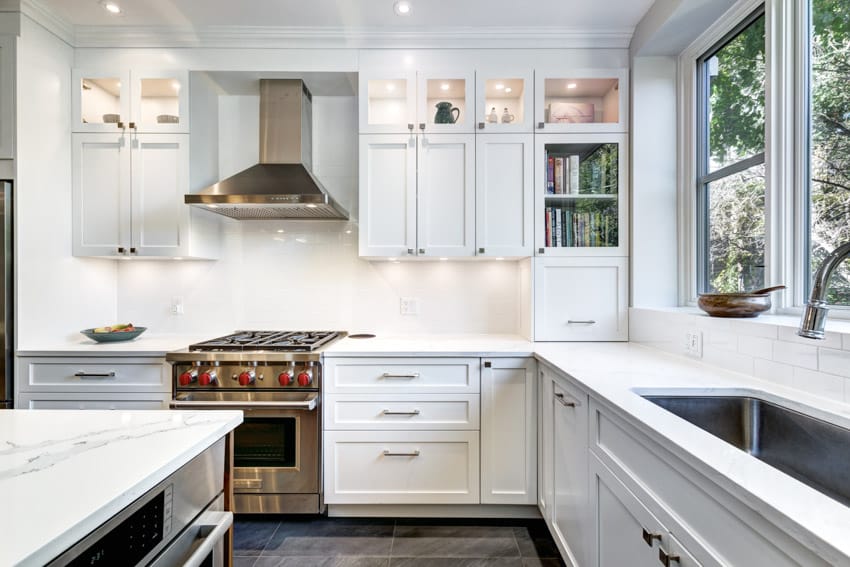
• Install The Cabinetry (Duration – 3 to 5 days): After the electrical development is finished, your flooring installation will commence. This usually takes around a week and your cabinets are often finished and delivered around this timeframe.
It is now time to install the major component, new cabinetry. It will take 3 to 5 days to install your cabinets.
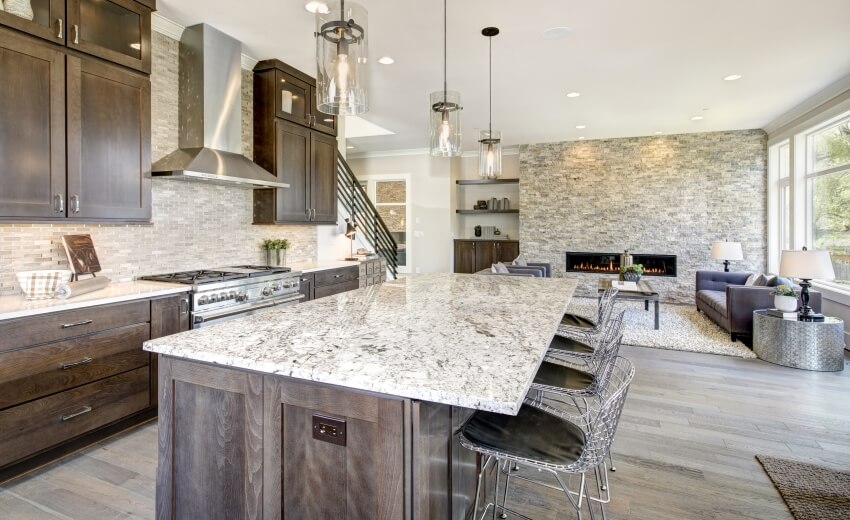
• Install The Countertops (Duration – 1 to 2 weeks): The fabrication of your countertops starts with the production of a template, which will be developed after the cabinets have been placed.
It will take roughly one week to accomplish the manufacturing of most types of kitchen countertops. The cabinet builders will then come back to your home and install the countertops.
Countertop installation requires more time. This is also caused by the fact that countertops must be precisely shaped to accommodate items such as your sink as well as other appliances. You may have to wait a few weeks for all of the countertops to be in position and get fully sealed.
• Install Light Fixtures (Duration – 2 to 3 days): As the final remodeling phase nears completion, you will need to finish off any remaining details and install the other essential elements, particularly light fixtures.
Allow 2 to 3 days for this stage. Make sure to add ambient, task, decorative, and accent light fixtures to create the ideal illumination.
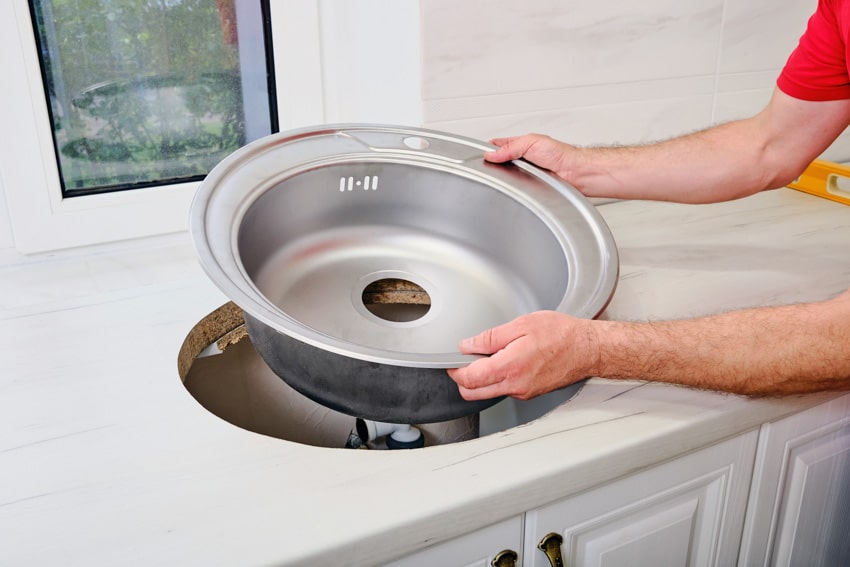
• Install Plumbing Fixtures (Duration – 2 to 3 days): The placement of plumbing fixtures is the next step in the remodeling phase. It may take 1 to 2 days after your countertops have been put in to install these plumbing connections.
During this period, components such as the sink, faucet, and garbage disposal should be added. This is also the moment when some small plumbing concerns may arise. If needed, receive advice or assistance from a trained specialist.
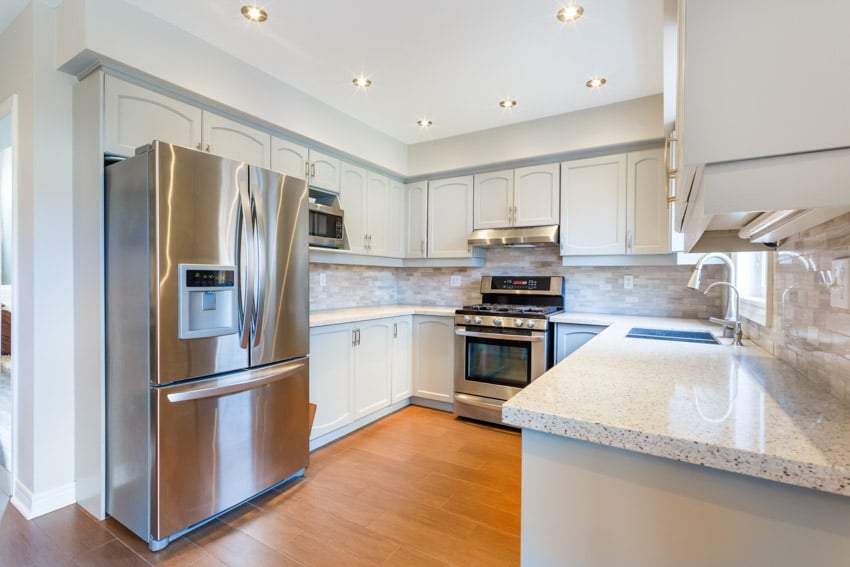
• Install Appliances (Duration – 1 to 2 days): The installation would be quick whether you are reusing existing appliances or if your completely new appliances have just arrived from the store.
Such appliances normally include a microwave, stove, refrigerator, and other appliances. If you are installing premium appliances such as a wine chiller or a water filter unit, now would be the time to install them.
• Level Appliances (Duration – 5 to 7 hours): Level all of your appliances and double-check their connections. Although it may not appear to be a major requirement, keeping your appliances level aids in ensuring that they work properly and may help them live longer by laying less pressure on the mechanical components.
• Test Appliances (Duration – 1 day): Electrically faulty appliances might cause fire risks or electric shocks. A refrigerator or microwave, for example, can be hazardous if not properly checked and maintained.
Electrical appliance testing is usually classified into two types – hot and cold tests. Hot tests are performed with the unit powered on, whereas cold tests are performed with the unit unplugged. Consult a professional to ensure that this test is carried out thoroughly.
• Install Cabinet Hardware (Duration – 2 to 3 days): Cabinet hardware is one of the remodel’s finishing details. Installing new hardware would be the ideal way to complete your new style for the food preparation area, particularly if you are doing a full remodel.
Install your current hardware for a quick and easy update, or finish off your new cabinets with sets of new drawer pulls.
• Install Crown Molding (Duration – 1 day): Crown molding, the ornate lining installed along where a wall reaches the ceiling, is another option for quick touch-ups. This is not required, but it can provide the space with a more professional appearance. Crown molding is generally used for decorative purposes.
• Install Backsplash (Duration – 1 to 3 days): Additional elements like your backsplash and any tiles you selected with your designer should now be placed. These tiles will take approximately 1 to 2 days to install, and the grouting will take another day.
Although tile backsplashes are not normally difficult to install, this particular tile work requires a level of creativity that not all renovation professionals might be able to attain. Specialized tile expertise will almost certainly be required to achieve a successful installation.
• Touch Up Paint (Duration – 7 to 10 hours): As you walk around your nearly finished remodeled space, you may see some chipped paintwork that probably occurred during the other installation steps. The touch-up paint will cover things up, and after polishing, the new paint will mix in better with the old.
• Meet With Building Inspector For Permitting (If Needed) (Duration – 1 day): You can schedule a thorough inspection by a building inspector if a building permit is needed.
These are held during normal business hours. Inspections are performed to ensure that construction, mechanical, plumbing, electrical, technical, and specific codes are followed.
• Clean Up The Site (Duration – 1 to 2 days): Within several days of installing your last hanging light fixture, you or the renovation professionals must verify that your cooking area is hygienic and ready for food preparation.
Of course, unwanted materials placed outside as well as waste bins, will need to be removed. Make sure that all of the debris is cleared out to ensure cleanliness in your newly remodeled food preparation space.
Moving into the Remodeled Kitchen
Kudos! The remodeling work is finished. It is now time to relax and enjoy your gorgeous new culinary space. After all of the work has been finished, you may start packing up and transferring into your new, wonderful space.
If you have established a temporary space for cooking, gradually move your essential appliances and other objects to the new area. Whether you did it all yourself or hired an expert contractor, you should now be happy that you have a beautiful space to make new memories.
Remodelling Schedule Checklist for Kitchen Reworks

If you are planning a remodeling project, here is a scheduling checklist that you may follow to keep organized.
• Make A Priority And Expectation List: What is your long-term goal? Added space? Improved design? Simply new appliances? When would you like the job completed?
• Establish Your Budget: What do you want to spend your money on? Replacement or updated appliances and additional square footage, or merely painted cabinetry and a new refrigerator?
Consider your options immediately before you begin remodeling. Do not, however, forget to budget for minor features like the hardware on new cabinets as well as drawer organizers.
• Select A Color Scheme Or Design Style: Pick colors and materials that complement the remainder of the home’s design.
• Find Out Where To Get Your Materials, Appliances, As Well As Permits: Explore eco-friendly construction materials and energy-saving appliances. If the budget allows, purchase them, or at the very least, be aware of the specifications, like the size of any appliance you are planning on placing.
• Make a Logistics Plan: Verify delivery times to ensure you receive all materials on time. Hire a contractor or free your schedule if you are performing the task yourself.
Will the remodel necessitate so much demolition that you will need to block off adjacent rooms from dirt or loud sounds? Where will you cook and dine during the renovation? Inform yourself about building codes.
• Expect Challenges and Potential Issues: Is it possible to repurpose the old hood vent piping? Is the new oven powered by the same energy source? Will you have to relocate any gas lines? Is it possible to use the present wiring?
Will the new oven or refrigerator fit through the existing doorways? Do you have enough space in your garage or house to keep supplies and appliances until they’re installed? Make sure to get clear answers to these potential issues.
• Start Making A Logical Timeline: Create a list that observes a realistic timeline. For example, do not purchase or replace cabinets until the measurements of new appliances are known.
• Be Imaginative: Consider recycled floorboards, glass pane cabinetry, uniquely painted walls, and other unconventional design elements for a one-of-a-kind style.
Kitchen Renovation Add-Ons That Take the Most Time
Some renovation add-ons are just so necessary that you cannot resist not doing them. However, these add-ons can take a lot of time, thus extending the remodeling timeline.
Custom Cabinets: There are numerous reasons why homeowners prefer custom cabinets over prefabricated or semi-custom alternatives.
The kitchen’s layout may need a custom design, the homeowner might have a particular style in mind, or the possibilities for semi-custom cabinets accessible locally could be hindered. Adding custom cabinets to your remodel phase, although a preferable option, may be very time-consuming.
Hence, be sure you establish a plan to shorten the timeline and expedite the remodeling process. Custom cabinet planning is now possible online, with a choice of design tools accessible from major interior design and home construction stores.
The very last step you would like to do is make an appearance at the carpenter’s without a clear understanding of the style, design, and arrangement of your cabinets, thus, conducting your homework ahead of time would be helpful.
When it comes to custom cabinets, another one of the most important considerations is cost. Custom cabinets are consistently the most expensive choice, with semi-stock and stock cabinets both costing significantly less.
However, there are techniques to avoid going beyond your budget on custom cabinets, such as focusing on core design aspects and eliminating extras such as glazing, complex woodworking, or specialized storage solutions.
Custom Tiling: When revamping or upgrading, you want it to perfectly represent your individuality, style, and character. You can accomplish this by having low-cost custom tiles.
Custom tiles can provide a fun touch that reflects what you want in the culinary space. It can, however, be time-consuming as well. Thus, you might want to have custom tiling performed by a professional.
Custom tiles create not just unique flooring but also a perfect backsplash for any space. You will not have to speculate whether the design will match the color palette and the overall look of the sapce since it will be completely customized and manufactured just for you.
Furthermore, because custom tiles are manufactured specifically for you, they will fit precisely wherever you desire them to be.
Custom Countertops: Custom-designed countertops are among the quickest ways to increase the profitability and visual appeal of your house. When you consider the benefits of a custom countertop, it is indeed a no-brainer.
The three primary benefits of custom countertops are the application of long-lasting materials, smooth installation, template-making programs, and custom manufacturing that ensures a precise fit the first time.
On the contrary, just like the above-mentioned add-ons, custom countertops can also take a lot of time, which might cause the remodel timeline to extend.
Professional contractors can build your custom countertops according to your precise dimensions and needs. Compared to standard prefabricated countertops, a custom one provides a smoother countertop installation and a more polished aesthetic.
Changes In Design: Maybe you want to relocate your stove or add under-cabinet lighting. In this case, you will need to consult with an electrician about any repairs or changes that must be completed. This will all take around 1 to 2 days to accomplish.
Occasionally, structural alterations, such as new windows, walls, or doorways, are required. Do-it-yourselfers must speak with an expert before making major structural adjustments, such as removing walls.
If your potential changes are mostly aesthetic, like repainting cabinets rather than changing them, or if you are updating extensively but keeping the original structure, your remodeling project may take less time than the average.
Massive structural modifications, on the other hand, are expected to necessitate a prolonged timeline. It is quite easy to get lost in the aesthetics of your newly renovated space, but it is also crucial to consider the logistical considerations. Changing gas lines, walls, rewiring, and modifying light fixtures all add lengthy time to your project.
Best Time to Renovate a Kitchen
If You Have a Relatively Open Schedule: Many homeowners choose to arrange a remodel during a calmer period in their household’s schedule. Remodeling is guaranteed to create conflicts. Hence, it is indeed best not to add that to an already hectic schedule.
Although it differs for every family, numerous homeowners remodel throughout the summer since it is a more flexible season. Summer vacations, youngsters’ camps, and more relaxing schedules can frequently alleviate the stress of renovation.
If You Have Alternative Dining Plans: Dining out daily can be exhausting and costly. However, you might need to establish alternative meal prep places while your cooking area is being renovated. A compact mini-fridge and microwave might work for some.
An outdoor barbeque is the ideal choice for others. This is another reason why countless homeowners prefer to remodel during the warmer months.
If The Weather Conditions Are Favorable For Construction Projects: Weather is an important issue for remodeling initiatives if you reside in a cold area. Installing doors or windows in freezing conditions is not practical. Indoor remodeling, on the other hand, occurs all year.
If your project is limited to the inside, a winter remodel could be ideal. However, when the snow is falling, you might discover that employing a contractor is simpler and less costly. But ensure you have a dry place to store cabinetry and enough space indoors for installing a temporary cook space.
Seasonal Sales and Discounts: The typical remodeling cost in the United States is currently around $30,000 to $40,000. It is no surprise that remodelers are searching for a good price.
If you belong to them, you can now arrange your shopping phase around particular seasons of the year when there are significant discounts on home supplies.
Materials can be purchased during Black Friday and spring discounts in April and May. Even if you are not going to apply them right immediately, it helps to purchase and keep your products ahead of time. Keeping supplies on hand might also help you stay on track with your project’s timeline.
Special Occasions and Holidays: Numerous homeowners want to finish remodeling projects before the holidays, a commencement exercise, or another important occasion.
If you desire a new one before your next big celebration, you can already start arranging it six months ahead of time. As with typical projects, this will allow for any unanticipated delays. Relatively simple projects could only take a couple of months.
Lead Times for Products: Although you can renovate with off-the-shelf components, most kitchens require at least a few custom-order items. Begin your buying and organizing beforehand because the things you desire may have extended lead periods.
Best Overall Time to Start Remodeling Your Kitchen
With all these factors considered, the best time to start a remodeling project is in the summer to early fall. This provides the best weather conditions and allows one to find ample alternative dining options or leave the house entirely for a family vacation.
Fall remodels may offer good weather and have better contractor availability than the busy summer months. The important thing for many homeowners is that their house is back together before the holidays, especially if they plan on hosting friends and family.
Kitchen Redesign Timeline Infographic
See more related content in our article about kitchen cabinet design software on this page.
To showcase highly specific designs, some images on this website use advanced AI-generation software to illustrate ideas and room inspiration. See our editorial policy to learn more.

Upload a photo and get instant before-and-after room designs.
No design experience needed — join 2.39 million+ happy users.
👉 Try the AI design tool now