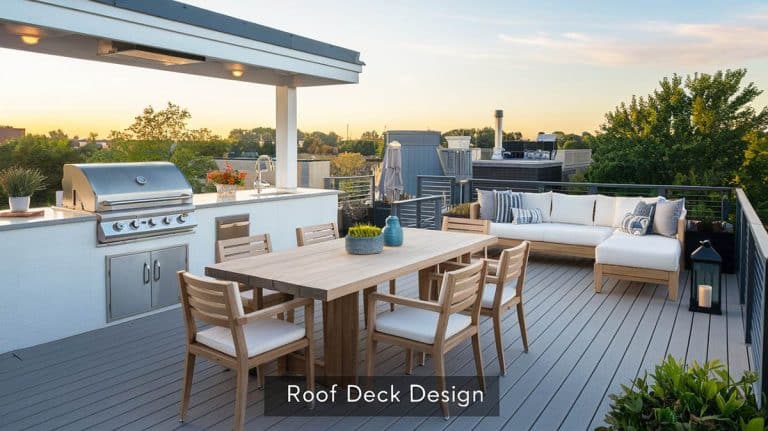
15 Types of Patios (Flooring Materials To Use)

A patio can be a beautiful addition to any backyard, and it can even be a great place to relax with friends and family. Your house is unique, and – like your house, your patio should reflect your own personal style. More than just improving curb appeal, a new patio can improve the lifestyle of those who enjoy it. Serving as an extension of a home’s living area, selecting the best type of patio for one’s specific needs is essential to a successful build or remodel of the outdoor feature. Luckily, you have plenty of choices when it comes to patio design. Before you make your choice, let’s take a close look at some of your options.
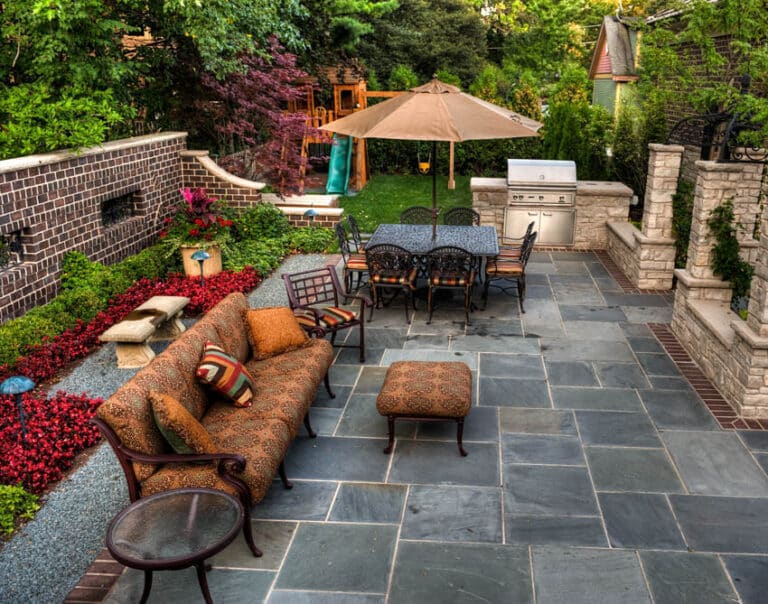
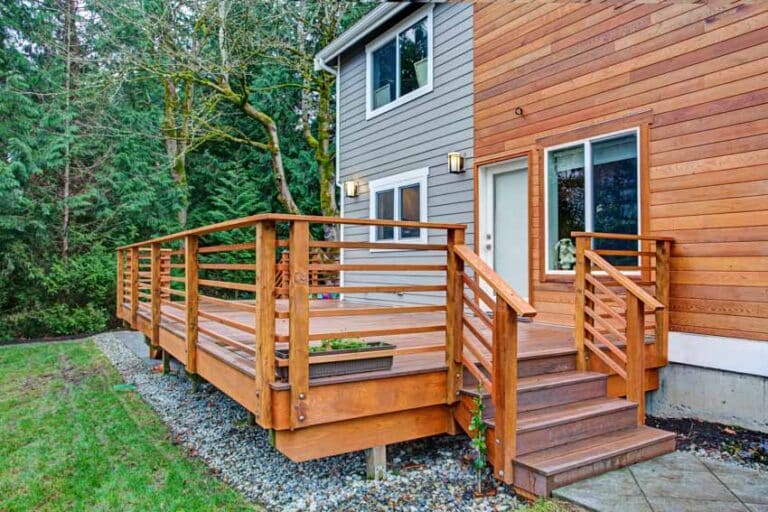
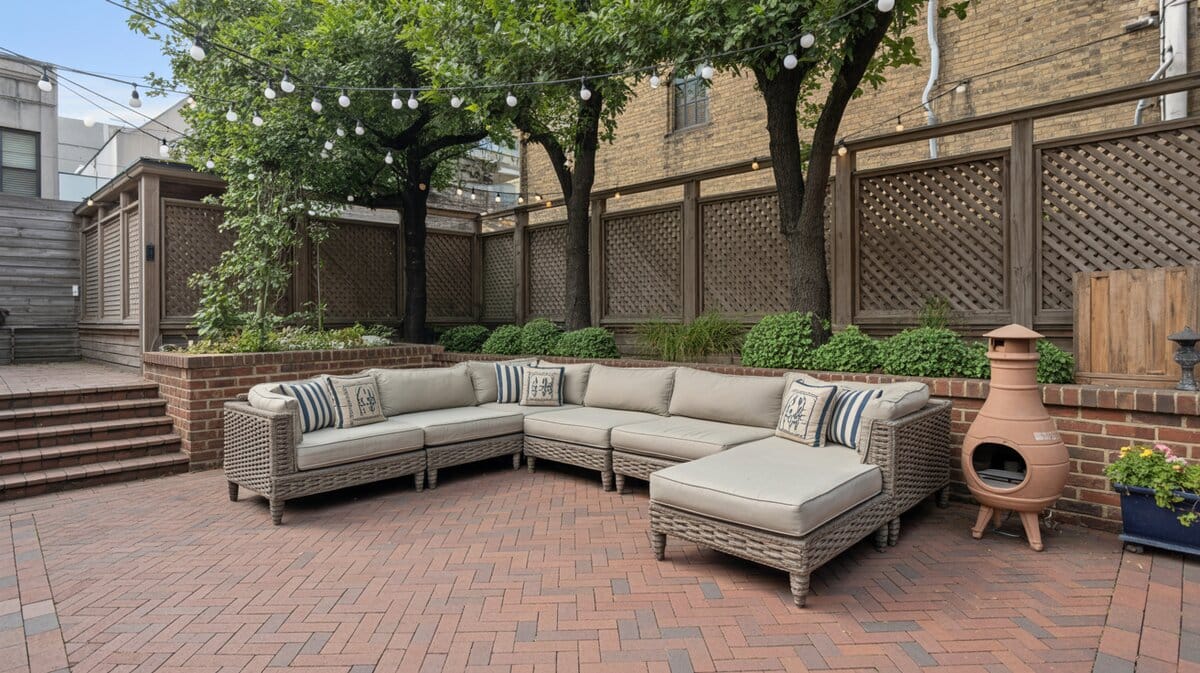
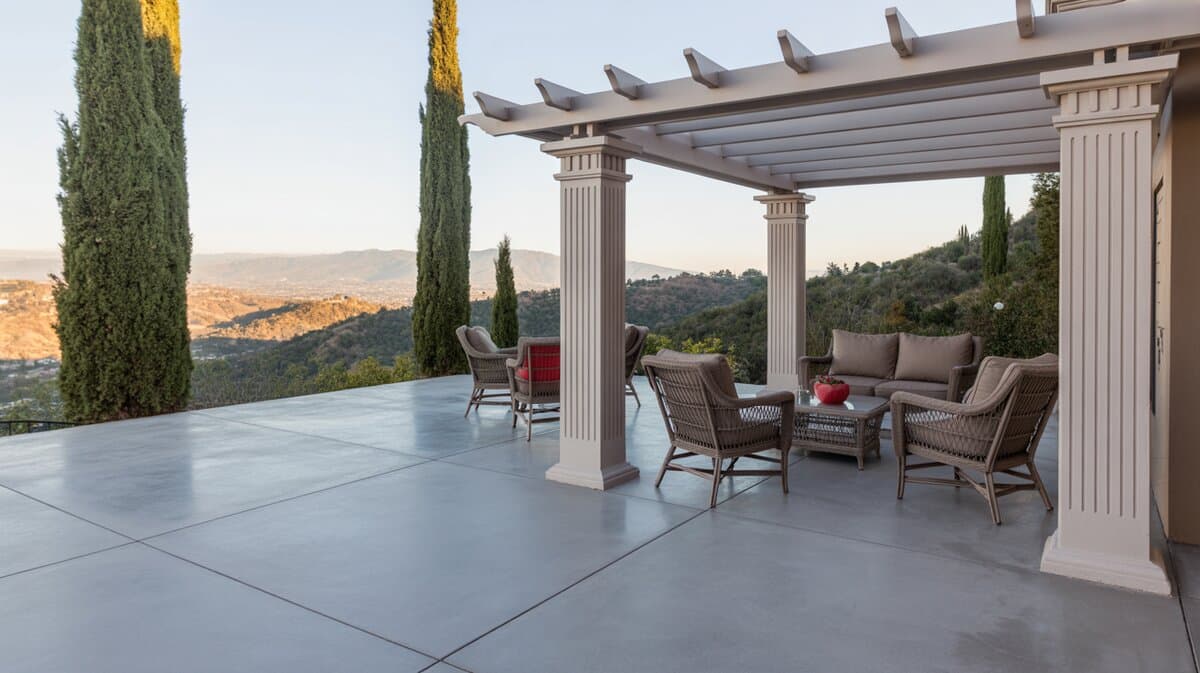
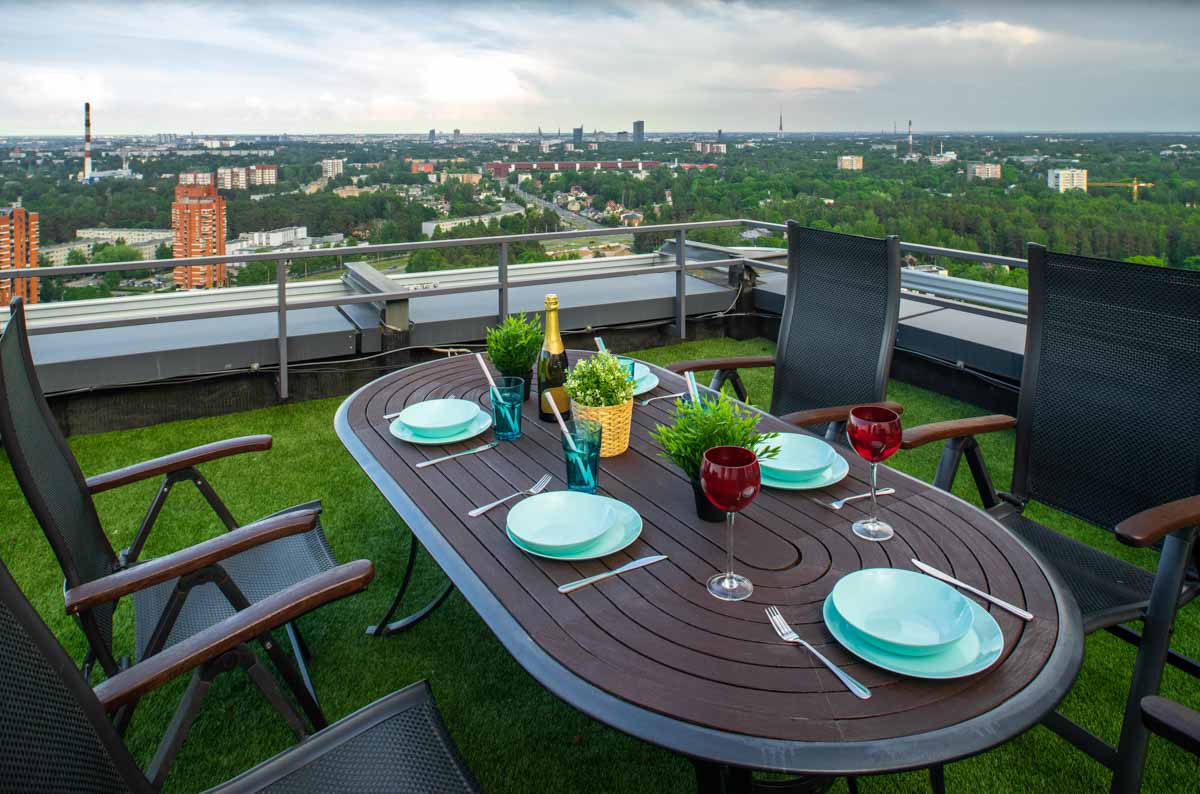
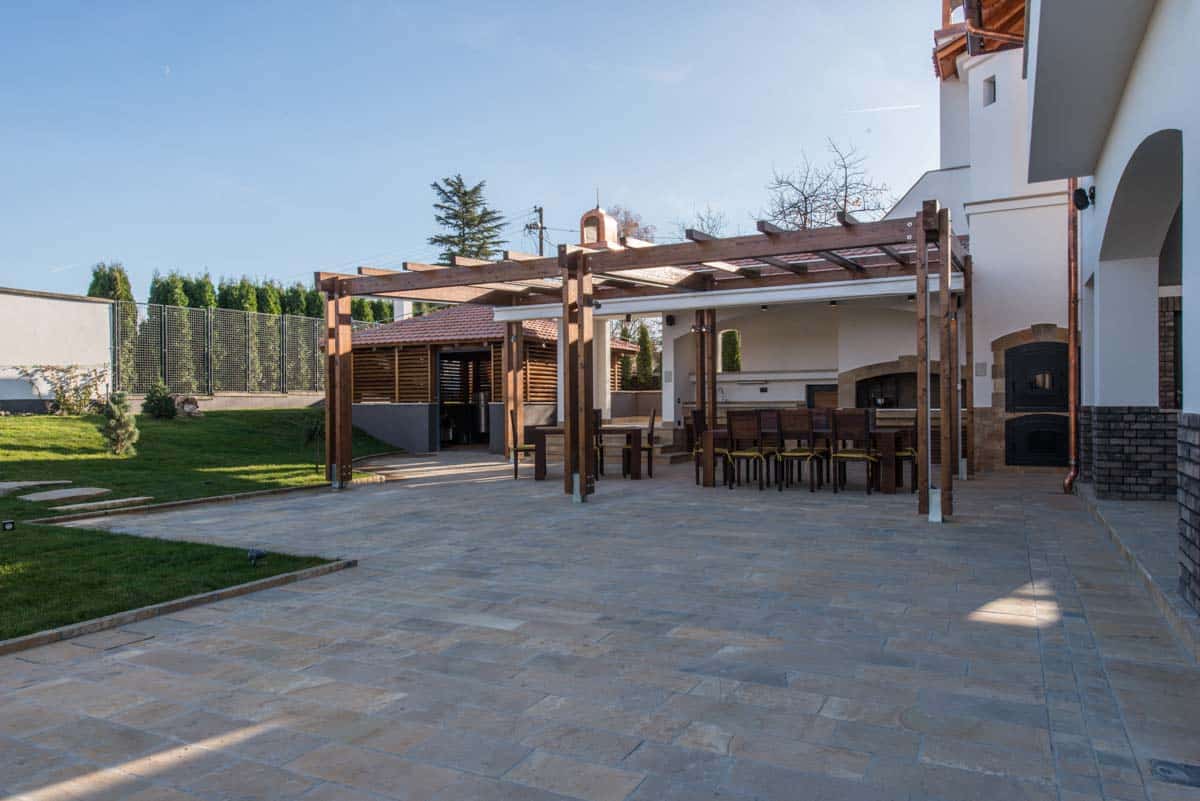
Paver Patios
Here is a breakdown of the different types of pavers used for patios and what to expect, including their cost, durability, required maintenance, ease of installation as a DIY project, and what conditions they work best for.
Cost, durability, upkeep, and DIY difficulty for 16 common patio materials
| Material | Cost / sq ft | Durability | Maintenance | DIY | Best For |
|---|---|---|---|---|---|
| Paver | $2–$22 | ●●● | ●●● Low | Moderate | High traffic; versatile patterns |
| Brick | $3–$15 | ●●○ | ●●● Low | Moderate | Classic look; moderate climates |
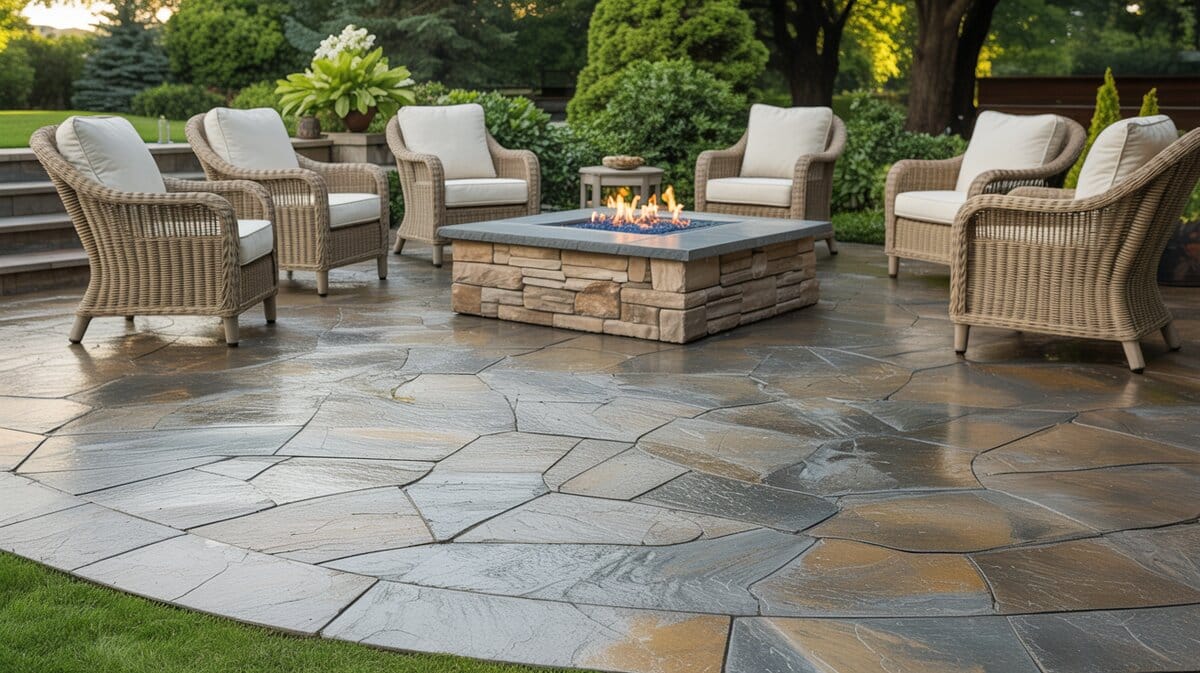
| Flagstone | $12–$28 | ●●● | ●●● Low | Moderate | Natural, upscale landscape style |
| Gravel / Pea Gravel | $1.50–$2 | ●○○ | ●●○ Medium | Easy | Budget patios; informal gardens |
| Slate | $10–$25 | ●●● | ●●○ Medium | Moderate | Modern look; wide color range |
| Concrete (standard) | $6–$10 | ●●● | ●●○ Medium | Pro Only | Large areas; cost-effective base |
| Exposed Aggregate | $8–$12 | ●●● | ●●○ Medium | Pro Only | Pool surrounds; high traction |
| Salt Finish Concrete | $7–$11 | ●●● | ●●○ Medium | Pro Only | Slip resistance near pools |
| Stamped Concrete | $10–$18 | ●●● | ●●○ Medium | Pro Only | Mimics stone/brick at lower cost |
| Artificial Turf | $2–$15 | ●●○ | ●●● Low | Easy | Green look without lawn care |
| Composite (WPC) | $15–$30 | ●●● | ●●● Low | Moderate | Long lifespan; rot resistant |
| Outdoor Carpet | $0.50–$3.50 | ●○○ | ●●○ Medium | Easy | Budget cover; protects wood decks |
| Sandstone Tile | $5–$35 | ●●○ | ●●○ Medium | Moderate | Warm organic tones; covered patios |
| Bluestone | $5–$12 | ●●● | ●●● Low | Moderate | Wet areas; pools; Northeast homes |
| Travertine | $15–$30 | ●●● | ●●○ Medium | Moderate | Upscale look; stays cool in sun |
| Sand | ~$4/bag | ●○○ | ●●○ Medium | Easy | Kid-friendly; ultra-low budget |
| ●●● High | ●●○ Medium | ●○○ Low · Costs are estimates and vary by region, material grade, and labor. | |||||
Paver patios are a relatively low-maintenance option when it comes to patio material. However, it does come at a higher cost. Typically, you’ll be paying around $12 to $22 per square foot. You can reduce the cost to around $2 to $8 per square foot. It should be noted that the installation of paver patios is much longer than other options. Many estimates put the installation time of 3 to 5 days for a professional team to install a paver patio.
A big part of this is the fact that paver patios take a lot of prep work before the material itself is laid down. The first step is to remove any dirt or grass down to the subsoil level. In some places, this is as deep as a foot and a half. Then, gravel must be added and then leveled. After that, about an inch of bedding sand needs to be installed, and after that, you can install the pavers themselves. Once the paving stones are set out, PVC or metal edging needs to be used with edge spikes at a measurement of at least every foot.
Once the pavers are set, you’ll want to use a broom to brush sand into the gaps between them. You’ll then want to vibrate these into place. Finally, the patio will need to be cleaned and sealed. You can make your patio last even longer if you use a seal for patios that is weatherproof. Patios with paver material are usually made of concrete, clay brick, or even natural stone. These are most often installed as concrete in the form of small but various sized pieces with different colors, patterns, and textures.
We will take a deeper look at other types of concrete patios that you have to choose from later. Unlike other concrete options, paver patios don’t need time to set and if you walk across them immediately you won’t cause any damage.
Another con of paver patios is that weeds tend to grow through them. Some people try to avoid this by using polymer sand to prevent this problem. It’s possible to redo a paver patio if it is run over with weeds in case things get out of hand, though. To end on a positive note, a great benefit of paver patios is that they aren’t as prone to weather-related problems. They won’t contract and crack as easily as other options during cold snaps and winter months.
Brick Patios
Brick patios are a classic option for patios and have a rather widespread appeal. The traditional choice is red brick but there are many other color options as well such as brown, black, tan, cream, gray, buff, and even pink. The bricks used for patios aren’t the same “builder” bricks you might see in walls, though. These bricks are thinner but still durable enough to handle people frequently working across your patio, whether it’s on a gazebo, deck, porch, balcony, or sunroom. Proper drainage is essential to ensure that the bricks last a long time, and choosing the right type of tile can also make a difference in your budget.
If you want to install these bricks yourself, you’ll be paying $3 to $5 per square foot. On the other hand, for a professional installation, you’ll pay around $12 to $18 per square foot. However, you’ll want to keep in mind if you are installing these bricks yourself, you’ll probably need a brick saw. If you don’t own one of these they will cost around $60 to $95 to rent. This consideration is essential for maintaining your budget.
An aspect of cost to pay attention to is whether to set the bricks in sand or mortar. Setting them in sand is cheaper but the bricks are likely to shift. While mortar settings are more expensive, you won’t have to worry about the bricks becoming uneven. Another design facet of brick patios are the placement of the bricks. These include patterns such as;
● Stacked Bond,
● Running Bond,
● Combination Stack/Running Bond,
● 45-Degree Herringbone,
● 90-Degree Herringbone,
● Single Basketweave,
● Double Basketweave, and;
● Boxed Basketweave
The downside to brick patios is they don’t react well to cold climates like a paver patio. This means that you might have trouble with bricks cracking after a while. You might also experience issues such as weeds and grass growing through – particularly when dealing with sand-set brick. Fortunately, brick is rather easy to maintain. All you have to do is to occasionally power wash or use hydrogen peroxide or vinegar to keep your brick patio looking like new. See more brick patio ideas here.
Flagstone Patios
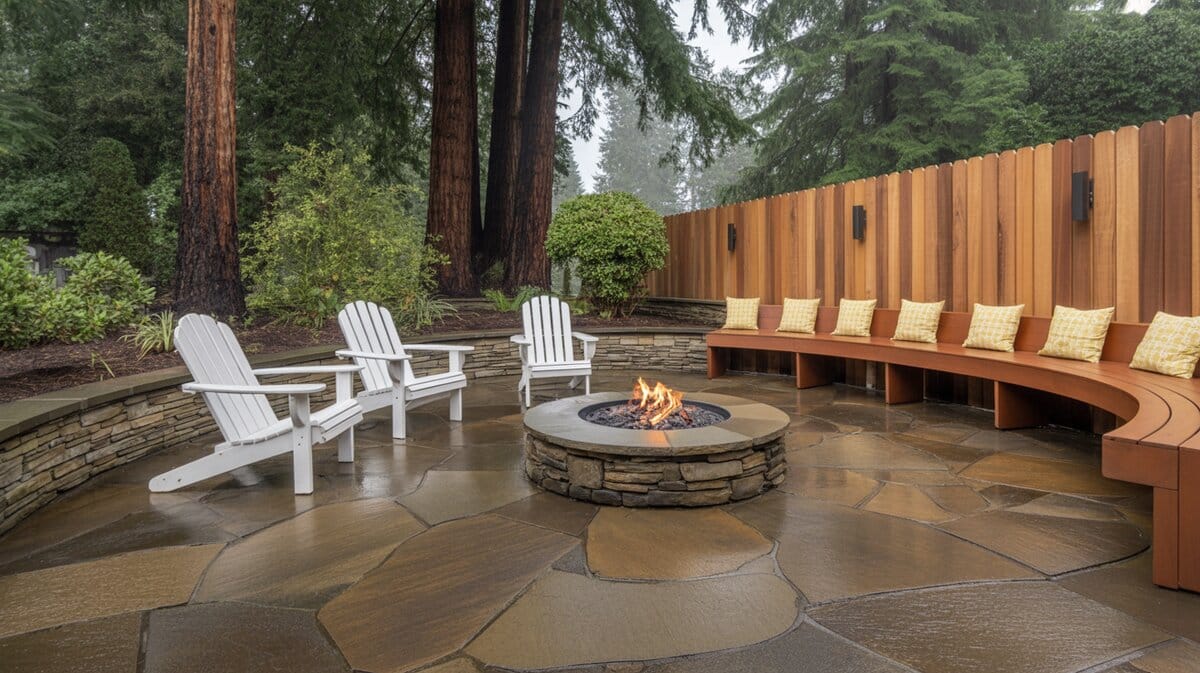
Flagstones are installed in the form of thick slabs of stone, usually around 1 to 3 inches. Unlike the paver or brick patios we’ve looked at so far, these don’t use regular, repeated designs. Instead, flagstones come in irregular shapes that will give your patio a one-of-a-kind appearance.
Natural flagstone is an ideal material for creating landscape floors. It’s attractive and durable and blends well with both formal and informal landscapes. – The Complete Guide to Masonry & Stonework, Creative Publishing International
On average, a professional installation of a flagstone patio costs around $12 to $28 per square foot. Most homeowners choose to have a professional install their patio when they use flagstone because, unlike an option like brick, it’s harder to place pieces together.
A professional contractor can have the job done quickly and you won’t need to worry about uneven spacing. If you’re pretty handy and want to do the installation yourself, the material alone will probably cost around $3 to $10 per square foot.
There are plenty of options when it comes to flagstone. While you can definitely find almost all of these options online, if you choose something local, it’s far more likely to blend seamlessly with your yard’s environment.
Another distinction when it comes to flagstones is whether to use flat stones or uneven ones. Keep in mind the intended usage, such as a flat surface for a sunroom or an uneven one for a more rustic outdoor setting. While uneven flagstones have a natural charm and can add an interesting architecture to your patio area, there are some drawbacks.
Some find it difficult to navigate uneven terrain, which could impact the choice of patio materials. If you are worried about items such as wheelchairs, walkers, or even someone just tripping, you might want to consider a flat option like pavers, which can still offer an attractive structure for walkways and garden spaces.
One of the biggest benefits when it comes to types of stone patios is that it’s going to last you a long time. To keep your flagstones lasting even longer, some advice suggests that you don’t seal them. Sealing flagstone can deteriorate and discolor much faster in the sun. In contrast, a different surface material might hold up better in such conditions.
On the topic of the sun, there are some weather drawbacks of flagstone. When the sun is beating down on it, it’s going to get pretty hot underfoot. When it rains, your flagstone will get slippery to navigate as well. That being said, flagstone performs structurally well in almost any environment, making it still a worthwhile option for your patio area.
The maintenance of flagstone is rather simple as well. Generally, all you need to do regularly is to sweep away debris that would stain the stones or cause mold growth. When mold does grow, bleach can take care of it quickly and harsher chemicals can be used for rust and grease. You might also see that your flagstone needs to be adjusted if it’s set in sand. Flagstone set in concrete doesn’t have this problem.
Gravel Patios
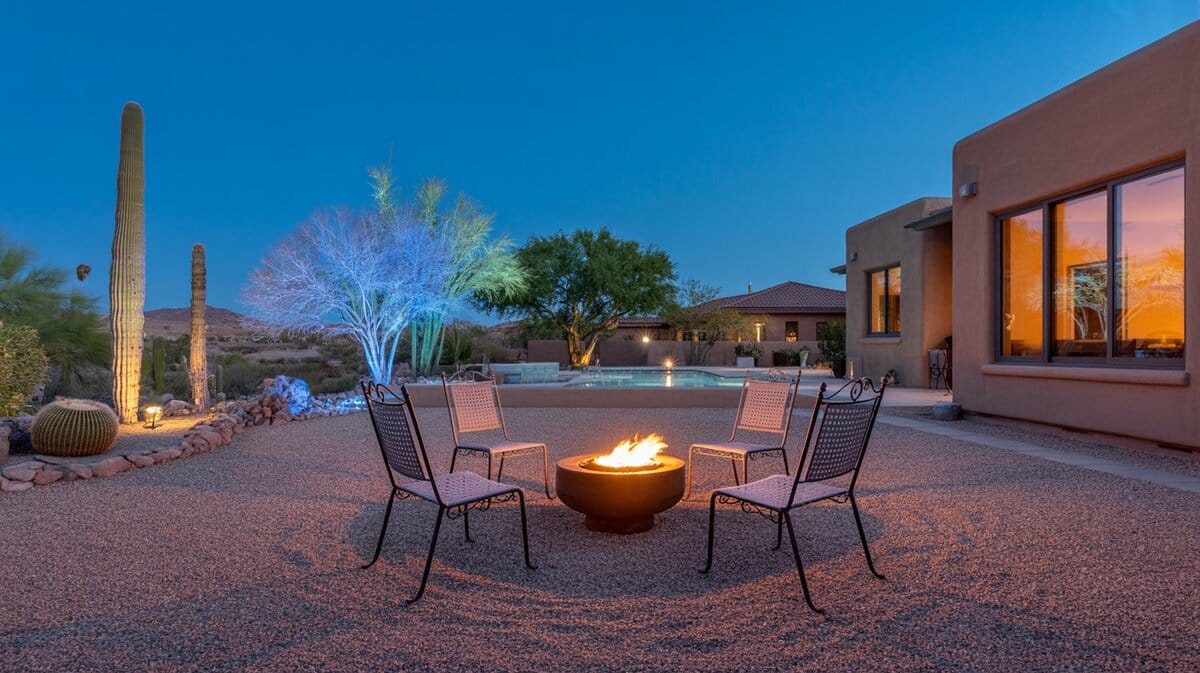
Gravel patios are one of the most inexpensive choices one can select for the backyard. The most common material used in gravel patios is pea gravel. On average, the material for a pea gravel patio can cost as little as $2 or less per square foot. To keep your gravel patio looking its best, you’ll need to buy new gravel every 3 years for upkeep. Other gravel options that fall within this cost range include decomposed granite.
Pea gravel can be made of granite, dolostone, limestone, or other rocks while decomposed granite is, of course, made of granite. These are crushed into rather small pieces. At their smallest, they can be the size of sand grains or as big as ¼-inch.
The biggest problem with gravel patios is that they don’t have a uniform surface like brick or paver patios. Because of this, problems such as patio furniture sinking down into the gravel is common. To help prevent this, you’ll want to use stabilizers in your patio. Whether or not you use stabilizers will affect your cost but not by much. For patios with stabilizers, you’ll be paying approximately $2 per square foot while you’ll only pay about $1.50 if you don’t use stabilizers.
A great thing about gravel patios is that they won’t get slick or flooded when it rains. This is because it allows rain to travel through it and soak directly into the ground. This property also helps erosion in your backyard. In addition, this means that you don’t need to worry about installing this material on an incline like you need to with other materials like paver.
One of the most appealing things about gravel patios, besides the price, is that they can be an easy DIY project. Following professional advice to create an attractive and practical surface, you can create your own unique patio area that connects seamlessly with walkways and garden spaces, truly enhancing your outdoor living experience.
When you are installing a gravel patio, you will want to make sure that you use a landscape barrier to separate the gravel of the patio from the dirt underneath. In addition, incorporating patio pavers, based on personal preference, such as travertine, can provide a more organized and appealing look to the space.
Fences or fence installations can also help define the patio area and protect it from any dirt or debris carried by the wind. If you don’t use a landscape barrier, your patio will be less beautiful and more of a muddy mess the first time it rains after installation. You might be concerned about a snowy gravel patio. After all, how can you shovel something that is rather loose? For a light snow, you can simply use a leaf blower. This will blow the snow away without disturbing the gravel.
To deal with deeper and denser snow, try shoveling as much as you can without upsetting your gravel’s placement. Then, you can use salt to melt it. Putting salt down is also a great preemptive measure if you know snow is coming. An attractive alternative to gravel is the use of river rocks to create a patio sitting area. See more gravel patio ideas here.
Slate Patios
Natural stone slate patios are beautiful and come in a variety of shades to get the look you want. There are slate varieties in shades of red, blue, black, gray and brown giving you plenty of options when it comes to color. They also come from the manufacturer as rectangular cut tiles, or as irregular-shaped rough stones to help you get a perfect design.
Not only do slate tiles look great as a backyard patio they are also durable and made from 100% natural stone. In addition, slate tiles can be installed as a DIY project, however it can be a heavy endeavor to install. Now on the downside slate does require a bit of routine maintenance to keep it looking attractive. It can also be considered more expensive when compared to other flooring alternatives.
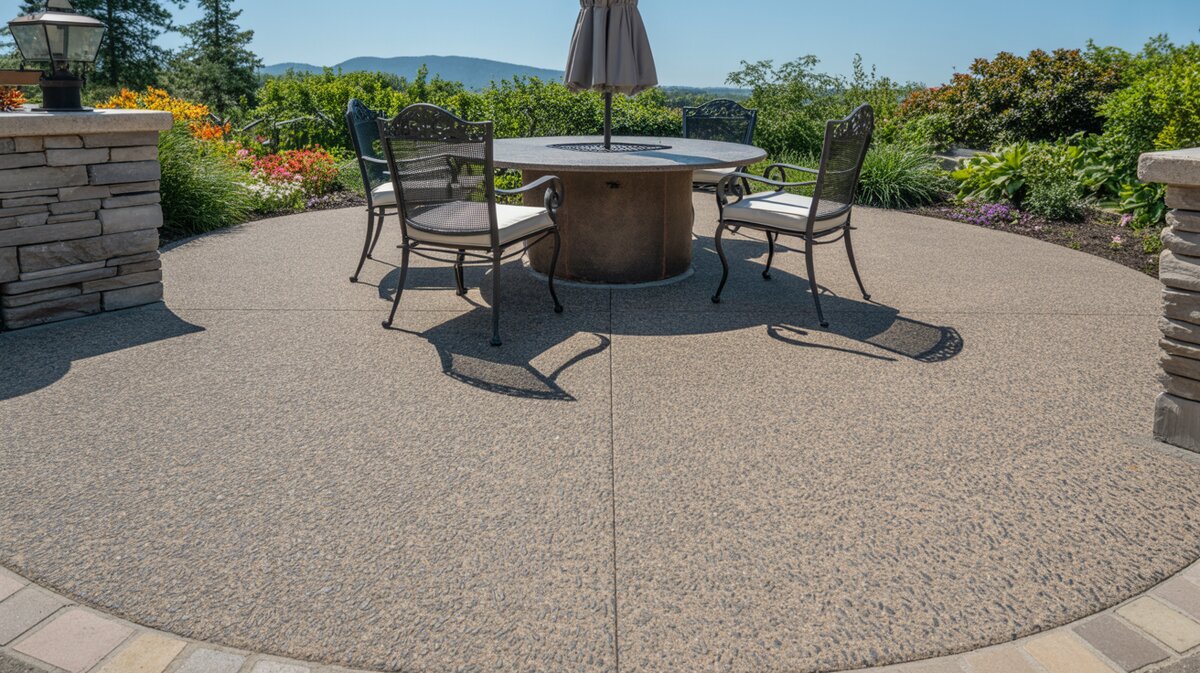
Concrete Patios
Concrete is a versatile option for your patio because it comes in various finishes and colors. As a general estimate, you can expect to pay about $6 to $12 per square foot of concrete. The first pro of concrete patios is that it is incredibly durable. It doesn’t shift according to climate and over time like other options and rebar can be used make concrete stronger.
Unfortunately, coloring in concrete does fade in the sun if dyed. When it comes to structural breakdown, you might see that you need to repair cracks and chipping. When these structural problems arise, they can be a pain to fix especially if you’re trying to match decorative concrete. It can be costly to repair them but other than this, they are rather easy to maintain. The main thing you need to make sure to do regularly is to sweep and hose it down in order to keep the space clean and well-maintained.
There are a few safety concerns when it comes to concrete. The main one is that it is very hard and gets slippery when it’s wet. Chips and cracks make the risk of tripping worse. Because of this, some households with children go with another option. However, you can reduce how slick concrete gets by choosing a stamped design.
Types of Concrete Finishes for Patios
We mentioned earlier that concrete is versatile in its design options. The most basic is a polished, smooth, dye-free concrete floor. This is done with a trowel. A broom can be used to create a slightly ridged finish that will help prevent a slippery when wet surface. You can also choose to use edging to add beveled edges. This technique can also be used to craft joints where concrete is expected to crack.
Exposed aggregate finishes are also used to help with slip resistance. This is the type of finish you see on city sidewalks and it’s done by washing away the top layer of concrete. To spruce this finish up, other materials such as limestone or rose quartz might be used.
Salt finishes where rock salt is layered on top of concrete is an alternative option to provide slip resistance. Salt finish is a technique for adding style to regular concrete patios. To achieve this result, course rock salt is added to the surface of the concrete and then washed away. Salt-finish concrete is often used around pools.
Stamped concrete patios use inlaid designs to mimic other materials such as brick, slate or flagstone. It is highly desired due to its beauty, cost and low maintenance. Concrete might also be colored in a variety of ways. Pigments can be added during the mixing process and stain is applied before concrete is sealed. Sealing usually uses acid.
Artificial Turf
Restful and invigorating, green colors are the perfect setup for a patio ground cover, and artificial turf can deliver that stunning patio look without the tedious maintenance needed. Quality artificial turf is not hard to come by, and many types of synthetic turf offer features to match the specific needs of clients. Artificial turf has a shorter height and is conventionally used for sports venues. It is different from artificial grass, which has a longer height and is fluffier.
An artificial grass patio is mainly made from nylon, polyethylene, or polypropylene, but there are also biobased turfs as an alternative if you want to have an eco-friendlier material. These bio-based synthetic materials can be made from polyethylene fibers made from sugarcane with a soy-based backing.
• Polyethylene – Moderate to Heavy Foot Traffic: Among the other types of synthetic turf, polyethylene is the most natural-looking. It is also soft to the touch, which makes it great for homes with kids and pets.
While it does not absorb water, polyethylene, like polypropylene, is engineered to absorb water. Under the sun, polyethylene can retain heat, but most turf products are UV-resistant, which means they can retain their color much longer.
Cost: $3 to $10 per square foot
• Polypropylene – Light to Moderate Foot Traffic: The perfect patio covering for low-traffic use, polypropylene is a more affordable option compared to nylon and polyethylene turfs. It also doesn’t retain heat as much as its alternatives, which means it stays cooler during the summer months. Another advantage of polypropylene is that it won’t stain.
The downside of this type of patio is that it is susceptible to static electricity buildup, especially during months with low humidity. Debris and hair can easily get caught in the strands, which means regular cleaning may be needed, especially when trees or plants are nearby the patio area.
Cost: $2 to $5 per square foot
• Nylon – Heavy Foot Traffic: Also known as polyamide and a recommended sports cover, it is a great option for patios that receive a lot of foot traffic. Generally, the more durable option is compared to polypropylene and polyethylene, and with regular maintenance and use, it can last up to 20 years.
However, its durability makes it less soft compared to other types of artificial turf. Nylon turf patios are also great for places with high temperatures, but since they are semi-permeable, they can absorb water, which makes them not an advisable ground cover for households with pets.
Cost: $5 to $15 per square foot
Ideal Features
• 25-30 mm: looks freshly cut
• 30-38 mm: naturally looking
• Yarn Denier: 10,000–11,500 denier/texturized monofilament polyethylene
Underlayment
• Foam pad: best for concrete or tarmac bases
• Must have built-in drainage holes to allow water or pet urine to flow.
Disadvantages
• High heat absorption contributes to global warming.
Composite Materials
Since their availability, composite materials can deliver long-lasting patio builds covering longer and wider ground and giving homeowners more extensive design options. Combining the strengths of two or more materials to produce a blend of desirable properties is a major factor that makes composite materials a sustainable solution for an outdoor feature.
Take, for instance, recycled plastic films combined with reclaimed wood fibers. The plastic components provide durability and a level of impermeability for the composite patio, while the natural fibers of reclaimed wood give that workability and organic quality.
Wood Plastic Composite, or WPC, is a widely known type of composite material that combines wood fibers and plastic materials. The wood components are typically made from reclaimed or recycled wood, which generally makes up 45% to 55% of the WPC.
Meanwhile, the rest are plastic materials such as HDPE, polyethylene, or polypropylene. However, despite the plastic element, it is designed to look like real wood, with a variety of designs that mimic the color, texture, and finish of natural wood.
A patio area receives more than just foot traffic and will need to withstand constant temperatures and weather conditions. Due to the composite material’s plastic component, it has minimal shrinkage, which usually occurs more lengthwise.
Even when installed near vegetation or wooded areas, WPC is likely to rot as it is resistant to insects. WPC is very durable, but in case of damage, WPC is easily repaired with conventional tools.
• Capped Wood Composite: A variation of WPC, the capped version has a protective surface layer that makes it a great option when staining is a concern.
It also does not fade or scratch easily, making the capped composite decking a low-maintenance patio flooring. For this reason, capped wood composite is a preferred patio material when near a pool or other outdoor water features.
• Composite Bamboo Patio Deck: The patio ground cover is an alternative to your typical wood lumber that combines bamboo fibers and recycled wood. This eco-friendly patio material offers a moisture- and insect-resistant option, which also means it has a stable composition that won’t shrink or expand easily.
• Aluminum Composite: A combination of aluminum cores enveloped by a polymer shell. The structure of this material composite makes it fire-resistant and lightweight, and it is commonly designed with slip-resistant features.
Material Cost: WPC: $15–30 per square foot.
Outdoor Carpet
Made to withstand outdoor conditions, the outdoor carpet is an excellent alternative to the more common patio ground cover when aiming for an affordable option that offers a softer surface.
Outdoor types of carpets available in the market have usually low piles and a loop pile to maintain a strong and durable ground cover. Since outdoor carpets are made with close fibers, most products are made from synthetic materials.
Outdoor carpets can function as added protection for wood-paneled patios, keeping outdoor furniture from scraping the surface of the wood. It is stylish and can come in a myriad of styles and colors to choose from.
• Polypropylene – Heavy Foot Traffic: A type of outdoor carpet that feels like natural fiber underfoot. Aside from having a durable build, it does not fade under constant sun exposure and won’t stain. though not advisable near barbecue areas or pits as it is highly flammable.
• Berber Carpet – Heavy Foot Traffic: It is a type of fiber construction for outdoor carpets that can be made from nylon or polypropylene, which gives it durability, excellent resistance to stains, does not absorb moisture, and can withstand exposure to UV rays.
• Jute and Sisal – light to medium foot traffic: An eco-friendly option for outdoor carpets that can withstand minimal to medium use. Jute and sisal outdoor carpets are examples of non-synthetic materials that are good patio covers, especially in areas that have minimal rain.
The downside of jute and sisal is that they can stain and fade over time. The material’s ability to absorb moisture means mold and mildew can grow through the fibers.
• Marine Carpet – For Patios Near Water Environments: An excellent option for patios near swimming pools or water features on landscapes, marine carpet is water-repellent thanks to its stain- and fray-resistant polypropylene fiber component.
This outdoor carpet also has good traction and drainage, making it safe to walk on, especially in areas exposed to constant moisture or water.
Material Cost: $0.50 to $3.50 per square foot
Sandstone Tile
With its organic quality, sandstone tile is a great option for a patio ground cover. The warm colors can range from yellow, brown, pink, white, black, tan, red, and gray due to the impurities within the minerals.
Though usually perceived as a soft stone, sandstone tile is actually a very durable natural material as it is made largely of quartz grain and feldspar, two components that are known to be weather-resistant. Sandstone tiles have a refined appearance with sometimes swirls of gradient whites or browns, which makes an attractive patio material and works with any style.
The downside of sandstone tiles is that they are porous, which means they can absorb water and moisture, making them susceptible to mold, mildew, and bacteria buildup when not properly treated. Sandstone tiles are recommended in dry areas.
Material cost: $5 to $35 per square foot.
Bluestone
A variation of sandstone, bluestone is a visually appealing patio material that’s versatile for any hardscape application. It is particularly used for outdoor projects with heavy foot traffic due to its density and hardness. A bluestone patio is excellent for areas with colder climates, and it is highly resistant to freeze-thaw cycles.
As the term implies, bluestone comes with a blue tone with gray undertones, or blue-gray coloring. The natural color variations and veining make it an attractive grounding material for almost any style and patio use.
Since it has a grainy texture, it is a safe material in wet areas due to its good traction, but the level of roughness of the material will depend on the finish used. The natural cleft or rough surface is a commonly used finish for bluestone patios, as is the honed or thermal finish, which leaves a smoother surface.
• Pennsylvania Bluestone: A type of bluestone that is quarried in the northeastern United States, specifically in Pennsylvania. It is a sandstone that showcases its blue-gray color, often with subtle variations and occasional hints of brown, lilac, green, rust, or purple.
• New York Bluestone: New York bluestone, sometimes referred to as Catskill bluestone, is another popular type of bluestone found in the northeastern United States. It is a sedimentary stone, typically a type of sandstone or limestone, known for its blue-gray color.
• Belgian Bluestone: Belgian bluestone, also known as Petit Granit, is a limestone that originates from Belgium. It features a range of blue-gray tones with occasional fossilized shells and mineral veining.
Material Cost: $5 to $12 per square foot.
Travertine

A popular natural stone hardscape that can substitute for marble as hardscapes, travertine showcases earthy tones, ranging from cream, beige, tan, and sometimes gray. It also displays natural veining and patterns, adding organic charm to a patio setup.
A distinct feature of the stone is the natural texture that can have natural pitting and voids; these small holes will appear more over time. While travertine is very durable, the porous texture that gives it a rustic look can absorb water. It is recommended to seal travertine to maintain its longevity.
When unpolished or in a tumbled finish, the travertine patio has excellent foot traction as well as remaining cool even when left under the sun. The ground cover can withstand extreme weather conditions, making it a great patio flooring option in areas with frequent freeze-thaw cycles.
Travertine in general is a stable material in extreme temperatures, but to get a very stable travertine stone, source it from reputable suppliers. Travertine can come as pavers, tiles, or slabs, with tiles and pavers being common patio materials. Classic, noce, walnut, silver, roman, and ivory are popular color types of travertine tiles.
Material Cost: $15 to $30 per square foot.
Sand
A sand patio can be a fun and cost-effective feature in a home. Due to the tactile material, kids and pets will definitely enjoy it. Sand is an excellent option for a patio that receives minimal rainfall. To prepare the area for patio sand, debris such as rocks or vegetation should be removed. The usual depth of sand patios ranges from 4 to 6 inches, which allows a good amount of the sand to have a base.
To prevent sand from escaping the excavated area, install edge restraints, which can either be made from plastic or metal and will be installed along the perimeter of the patio. Stone or gravel should serve as a substrate, which is an excellent material to allow water to drain as well as prevent the sand from giving in.
After which, the sand is poured, ranging from 1 inch to 1.5 inches high. White sand, or beach sand, is a popular material that is white in color. The poured sand is then compacted using a screed board to achieve a level patio surface.
Material Cost: $4 (per bag, approx. 0.5 cubic-ft)
See more related content in our article about the patio surface alternatives on this page.
To showcase highly specific designs, some images on this website use advanced AI-generation software to illustrate ideas and room inspiration. See our editorial policy to learn more.