What Are The Types Of Wood Kitchen Backsplash Designs & Pros and Cons
Wood can be a stunning kitchen backsplash, an alternative to your typical wall cladding of tiles and bricks, and a natural material that elicits an overall positive visual perception. The variety of graining, coloring, and surface finish makes it a versatile and easily sourced backsplash material. Moreover, the positive cognitive effects of a wood kitchen backsplash can also help lower stress, restore the nervous system, and increase physical activity and creativity.
A kitchen backsplash can also be a great DIY project by using simple woodworking tools and standard-sized panels or reclaimed wood. It is a cheaper alternative to your standard backlash materials and can be a long-lasting wall material when sealed off properly and well-maintained. This material can be readily reused and recycled with its visual and cognitive effects. The material can only be reused for a wooden kitchen backsplash as the surface is typically stained or painted.
Wood Kitchen Backsplash Pros And Cons
Like any other construction and interior finish, a wooden kitchen backsplash offers unique features and challenges. Knowing the pros and cons of timber backsplash will help you decide whether organic material or the newly built one is the best option for your next kitchen renovation.
Pros:
1. Better Workability and Lightweight. Compared to stone, a wood backsplash is easier to cut into size and intricate shapes when desired. Its workability means installing around sockets and other wall insets are relatively easier than your stone material.
On top of your hanging cabinets, installing a backsplash can put a lot of pressure on your backing material, especially for drywall installations. Wood is lighter than stone, making it possible to have an expansive backsplash without worrying about the pressure your material has on your backing material.
2. Durable. While most homeowners will be reluctant to choose timber in a space exposed to water, wood is durable when properly treated, seasoned lumber where moisture has been dried, making it stronger and stiff.
Surface treatment is also needed to prevent water or moisture from being absorbed by the organic material. Of course, the degree of strength of the material will depend on the species of the tree.
3. Works with any Theme or Kitchen Design. From rustic panels to triangular mosaic tiles, the design possibilities to make your kitchen space stand out are endless with a wooden kitchen backsplash.
This is due to the wide range of graining and coloring of timber. The shades alone can create different moods and visual impact in your kitchen.
4. A Source of Design Inspiration. Working around your chosen timber kitchen backsplash design helps you choose other space elements. From soft and light colors that evoke a sense of calm to the deep and moody dark colors of timber, the organic material makes it the perfect design inspiration for your interior.
5. Available for a Wide Range of Budgets. With so many styles and species to choose from, timber kitchen backsplash can accommodate any budget without compromising the look of your space.
Wood cladding comes in planks, tiles, and slab forms, giving you options to choose from to accommodate your other needs, such as concerns on transportation and installation.
Wooden kitchen backsplash is also a great DIY project and can be easily installed with basic carpentry skills. The stick-and-peel panels are probably the cheapest option for a kitchen backsplash installed by simply sticking the sticky backing on your wall.
6. They are easily Replaced. Unlike tiles and other heavy materials such as quarried stone, the backsplash is easily removed, especially with self-adhesive panels, as they are easily peeled off from your wall. There are removable peel-and-place faux wood panels as well.
Cons:
1. Prone to Fire Hazards. Naturally combustible, a wooden panel wall accent can be a fire hazard, particularly when installed behind a stove. It is recommended to use a fire-retardant coating and paint to prevent the surface from being
2. Fire retardant coating and paints are the special materials that are crucial for protecting the material from heat and fire. These paints are widely used in the furniture industry to protect wood-finished homes. You can easily get them from any Home Depot store.
3. Vulnerable to Scratches and Dents. This material is generally durable, but when exposed to extreme heat or moisture, it can weaken the porous material. The surface, including the sides and backing, should be treated with a protected layer to prevent water from seeping.
4. Prone to Buckling and Warping. Natural wood that has not been kiln-dried will tend to buckle over time, especially when the surface has not been treated with a protected layer. The ends of the panel or tile should be treated as well to prevent water or moisture from seeping through.
5. Wears Overtime. Like any material, they can show some wear over time. Depending on the type of lumber and finish, the surface may need resurfacing around 10 to 20 years. The exposure to fluctuating temperatures and if located behind a sink or cooking area will increase the blemishes and damages.
Wood Backsplash Design Ideas
There are endless possibilities when it comes to your timber wall paneling, and getting to know more of the popular options can help you narrow down the best style for your kitchen.
Use Pallet Wood As Backsplash
A pallet cladding creates a rustic appeal that suits a lot of traditional themed kitchens. However, even contemporary homes love the juxtaposing organic material as it is an effective way to cozy up the kitchen amidst the sleek finishes.
The different kitchen layouts also give you other options for the pallet wall accent, such as a shiplap, beadboard, or Barnwood, giving that traditional look. Lay your pallet in a vertical or stacked pattern instead of your running bond to create a more modern look.
Another great thing about using pallet panels is the availability of materials easily sourced from salvaged timber or purchased lumber and cut to your desired design. The standard pallet 48″ x 40″ with each 3 ½” wide 5/16″ thick board is a perfect source for your repurposed pallet planks.
Try Reclaimed Wood for a Backsplash
With a relatively easy installation, a reclaimed wooden panel is the perfect DIY project for any homeowner. Moreover, there are good-quality reclaimed timber being sold, which are milled, kiln-dried, and even carefully selected and affordable. Salvage mills in your area may also have some stock wood that can offer the lumber at a more affordable price if needed.
Wood Panel Backsplash
Wood paneling is a practical design for faster installation and workability and is perfect for creating a horizontal or vertical element in your space. There are ready-made wood panels with different layouts; one example is wainscoting.
These are very affordable options but often need additional surface protection. Common planks are made from musky boards with a thickness of 2″ x 10″ x 20 cm and are often used as panels in furniture pieces.
Wood Plank Backsplash
Planks, like your pallet wood, are easily sourced from both the lumber yard and reclaimed lumber dealers. They are laid out to create different patterns just like your panels, such as the traditional herringbone, chevron, or basketweave.
Horizontal and vertical orientations are also popular as most planks can be dense, and laying out heavy planks in simple patterns can be more practical and economical.
Aside from plywood, birch planks are popular for plank cladding. The birch is known to resist dents and cracks as it is naturally shock-resistant. However, the durable timber can rot and be prone to insect attack. Be sure to apply a surface coating to protect it.
Wood Slat Backsplash
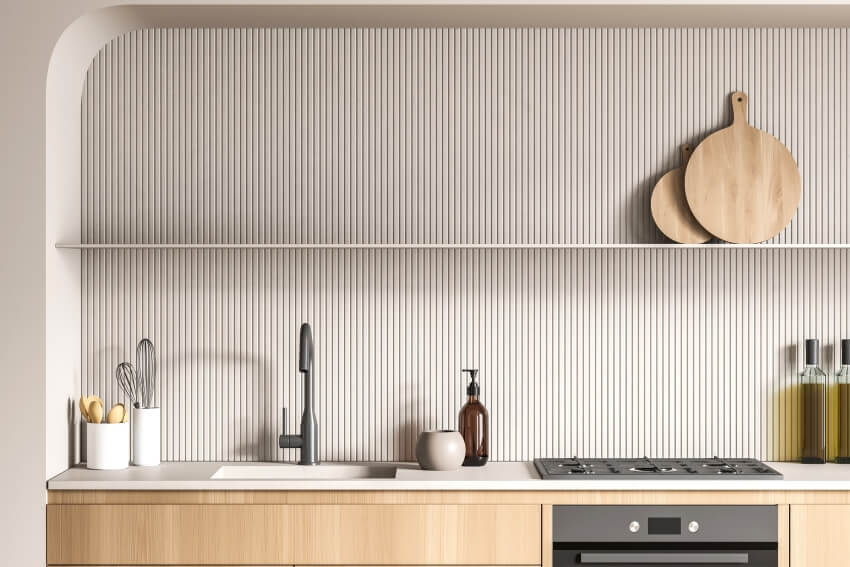
Also called wood laths, these slats, compared to planks and panels, have a thinner section, typically having ½ an inch to 2 inches wide. To create a wall paneling, timber slats are evenly spaced ¼ inch to ½ inch.
A tip in spacing your wood slats for your wall paneling is that the space should not be less than the width of the slats to avoid a zebra-stripe appearance.
Since you have a narrower width, installing slat panels can be more time-consuming compared to your planks and panels. Although more costly, using dimensional lumber slats is a way to cut labor time.
If you want to save on materials and plan to have it as a DIY project, use sheet goods to be cut by a table saw. The advantage of cutting your own slats for your wall panel is that you can get customized sizes that are suitable for your preferred design.
Whitewashed Backsplash
The beautiful texture is aesthetically appreciated, although sometimes we need to update the look to create a more modern and cleaner look, especially when it comes to the kitchen.
The white lumber wall panel is the perfect option to accommodate a bright and updated look, especially if you decide on repurposing salvaged timber. Moreover, beach-inspired, distressed, and white farmhouse kitchens are popular, and a white timber wall panel is a perfect backdrop to incorporate.
If you have an existing one installed, you can easily paint it over while retaining its natural texture. The whitewashed timber is a trendy aesthetic that captures the weathered look of vintage-themed kitchens such as modern farmhouses. To achieve the distressed appearance, white latex paint is mixed with water in a ratio of 1:1. The dissolved paint will have a thin application that allows partial surface coverage, showing some parts of the natural timber texture.
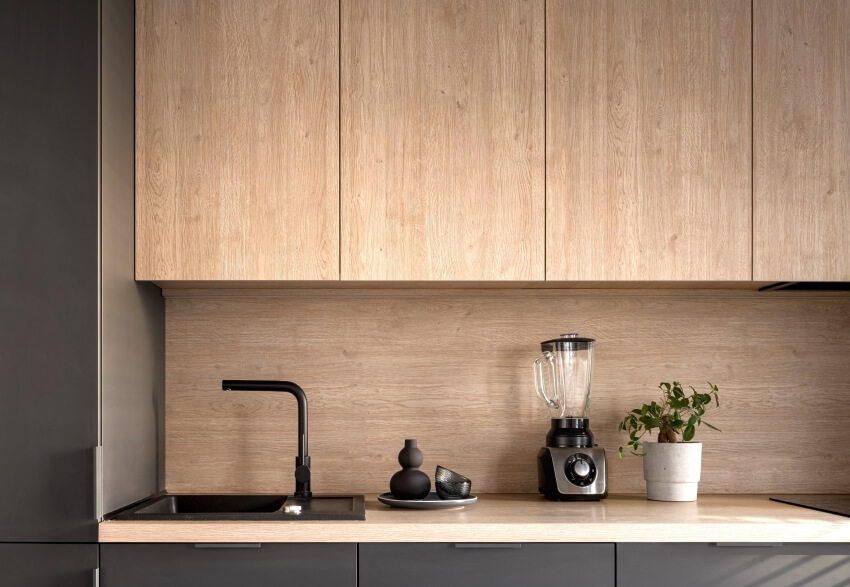
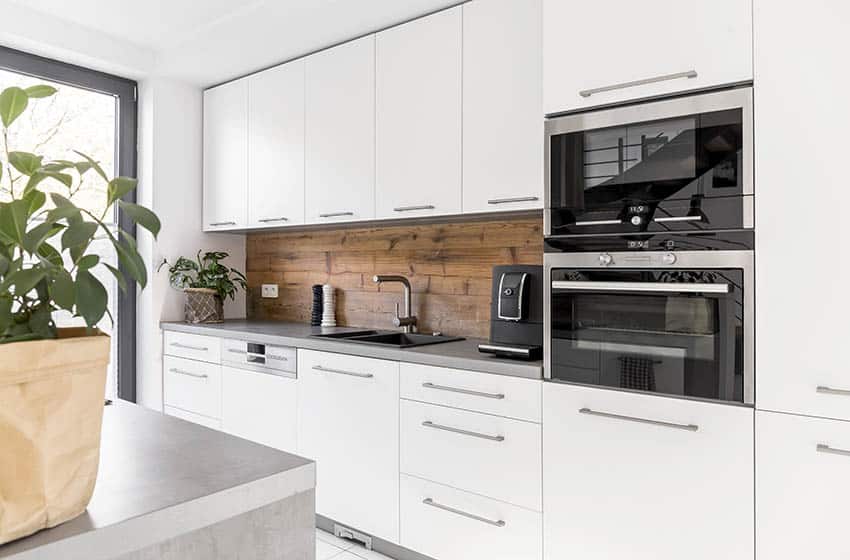
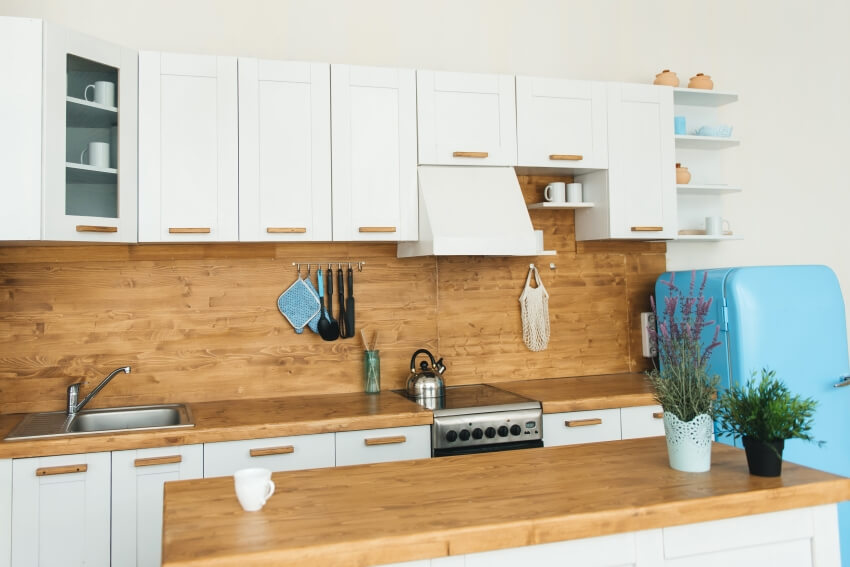
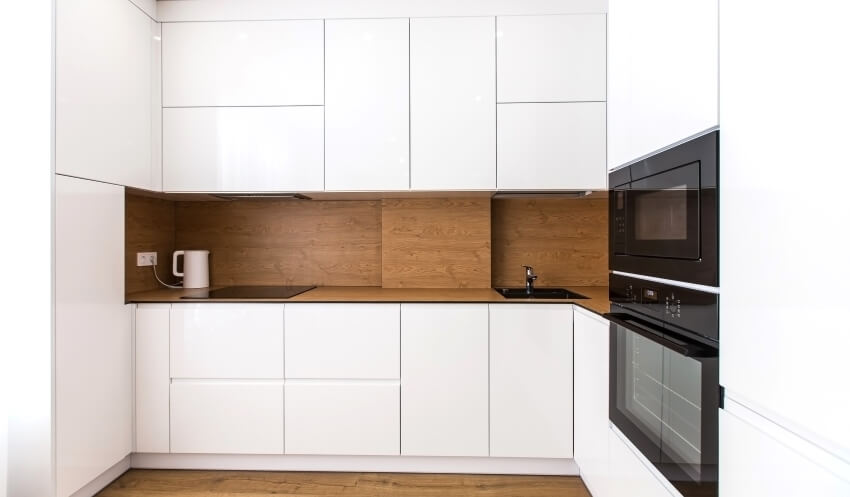
Try Modern Wood Grain Backsplash
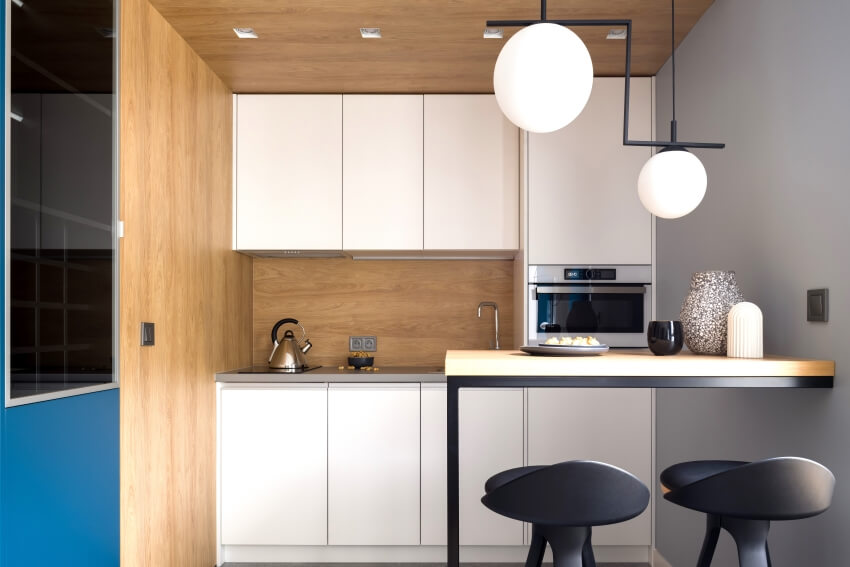
When it comes to your minimalistic sensibilities, it is quite hard to consider a wood grain wall treatment as it may seem out of place amidst the sleek and clean surfaces.
However, the right selection of species and finish can be a dynamic element in your modern kitchen. Whitewashed wall paneling is an excellent option for your modern design, or choose soft and light brown hues that work well with Scandinavian-inspired interiors.
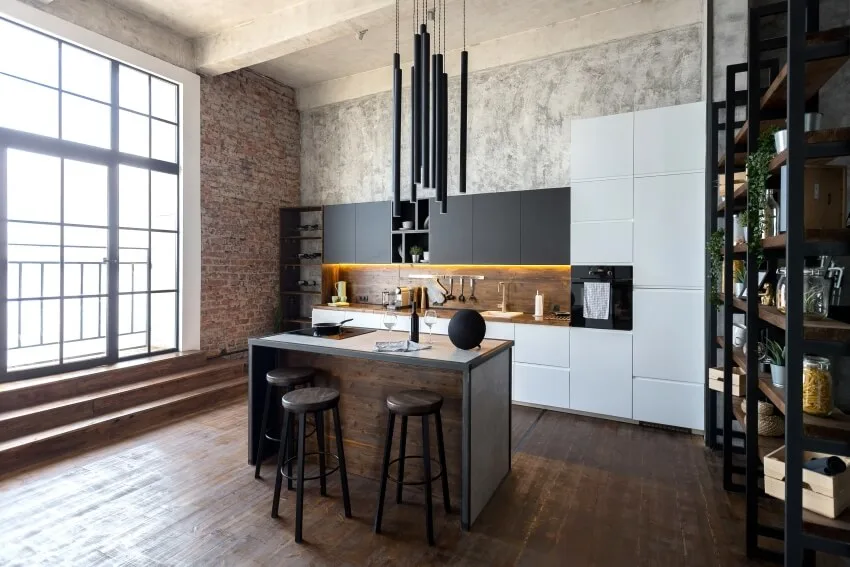
Darker hues or almost charcoal colors are great for modern industrial themes. Timber fibers that run parallel to the long axis include cherry, hard maple, and cedar.
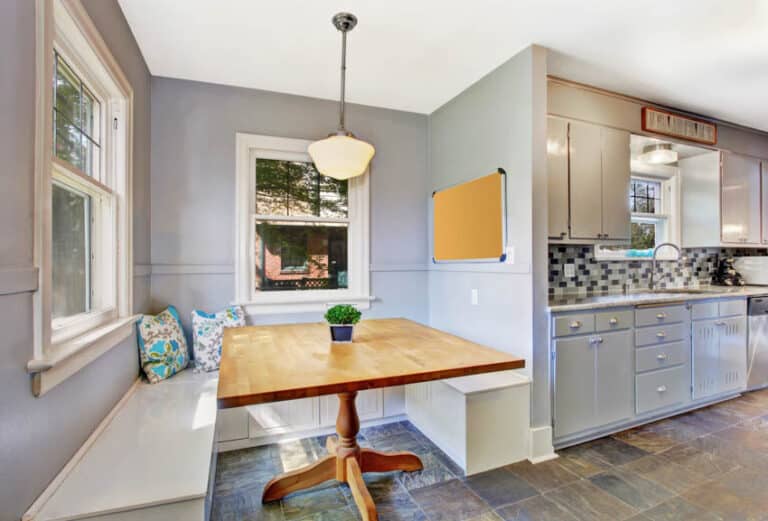
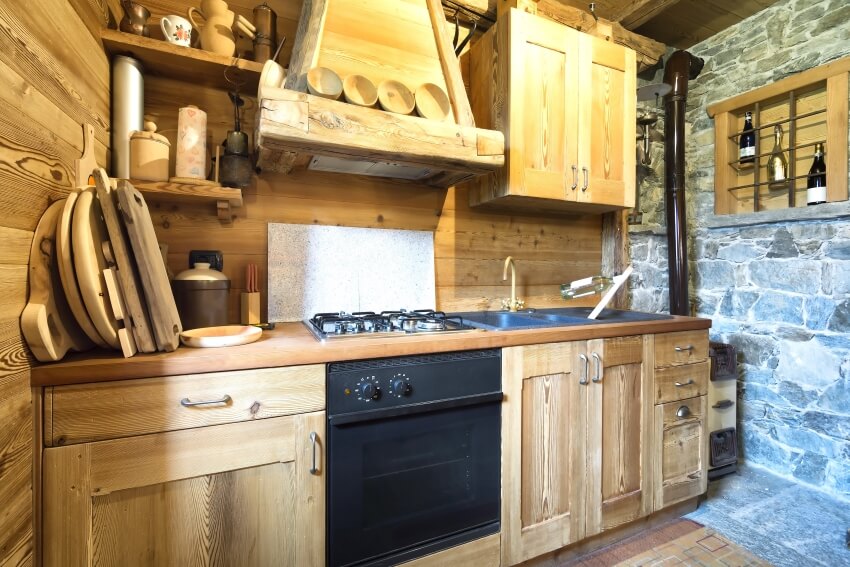
Rustic Style Backsplash
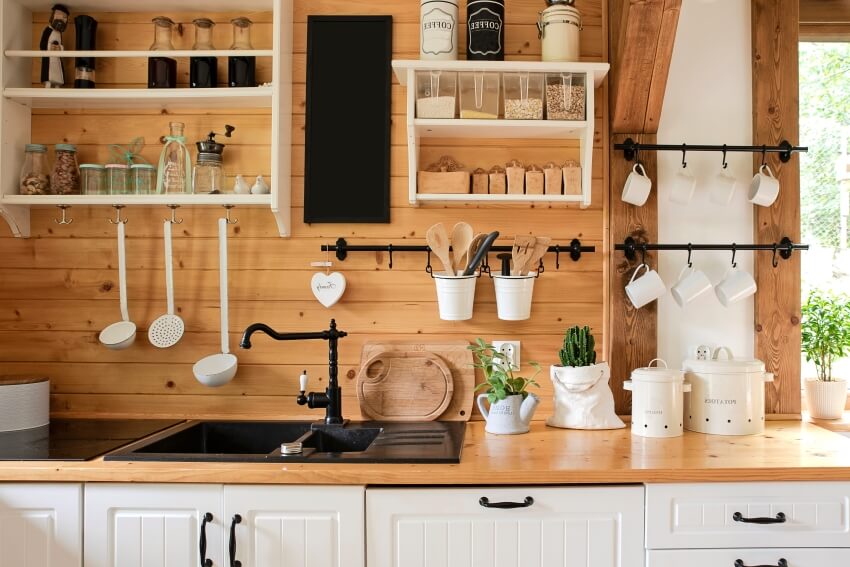
Organic and natural materials are at the heart of rustic interiors, and timber is just the perfect element to convey the casual and pastoral style.
Pallet-type paneling is a popular option for farmhouse kitchens with its varying graining and hues that contrast with the typical white or wood-layered interior. Galvanized iron and distressed materials common in rustic kitchens look amazing with rustic paneling made of wooden planks.
Peel and Stick Wood Style Backsplash
A peel-and-stick timber backdrop is a perfect option for renters or those planning a temporary residence. As the term implies, a peel-and-stick backdrop is installed by simply having a thin vinyl sticker where the backing is peeled to reveal the adhesive side, which is then laid to the wall with the desired orientation.
This type of peel-and-stick backsplash simulates the look and sometimes even the texture of natural timber, creating a 3D effect. Aside from the easy installation, the peel-and-stick wall panels are cheaper than your natural timber boards.
Herringbone Wood Pattern Backsplash

The herringbone wall paneling design lends dimensionality and is suitable for kitchen areas with a busy backdrop. The patterned design works for both your traditional and contemporary themes, where the hues and graining of wood will affect the overall appearance of your interior design. A herringbone is a pattern where it resembles fishbones.
The herringbone pattern is usually interchanged with the Chevron pattern due to its similar appearance. The best way to distinguish the two patterns is that Chevron has the inverted V layout while herringbone looks like a broken zig-zag pattern. Herringbone is a traditional pattern used on exterior and interior applications.
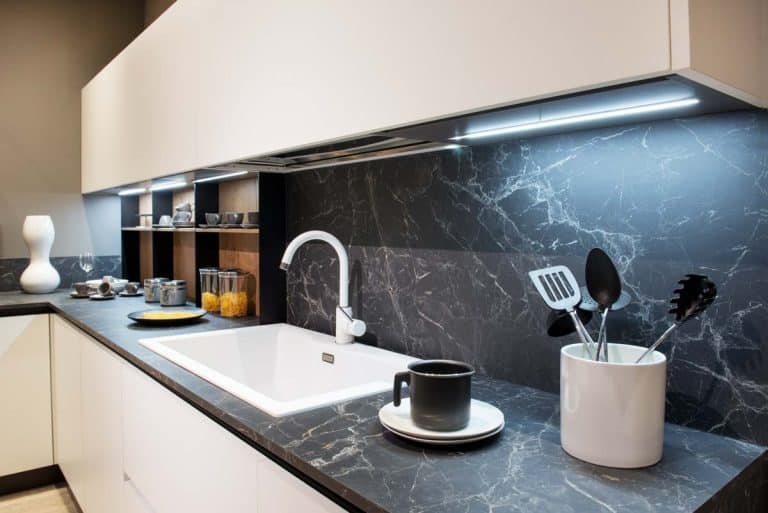
Butcher Block Countertop with Backsplash
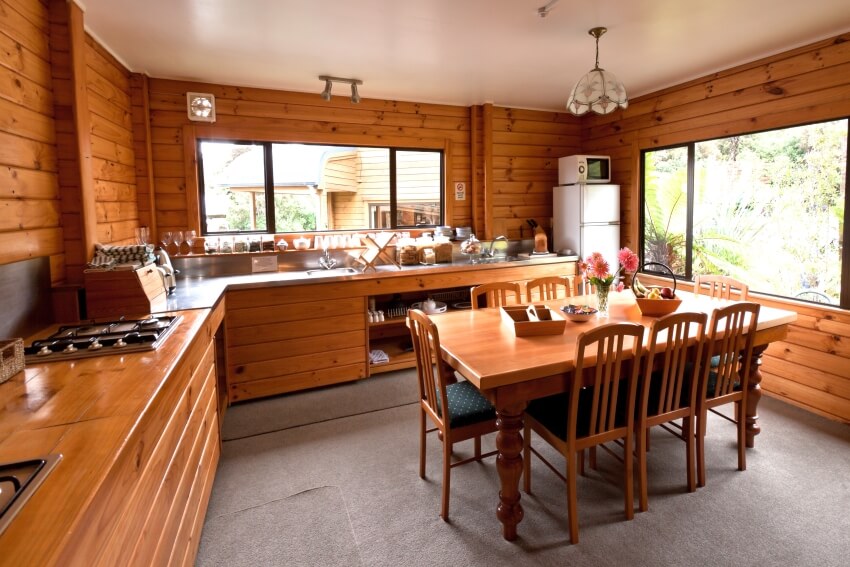
Wood on wood can be a striking feature in your kitchen, and a butcher block countertop offers that natural color and grain with its thick veneer wood.
Unlike solid countertops, the butcher block backsplash material is manufactured to be stable and is more resistant to humidity, making it suitable for damp areas such as the kitchen. Match the block with a backdrop to create a focal point in the interior.
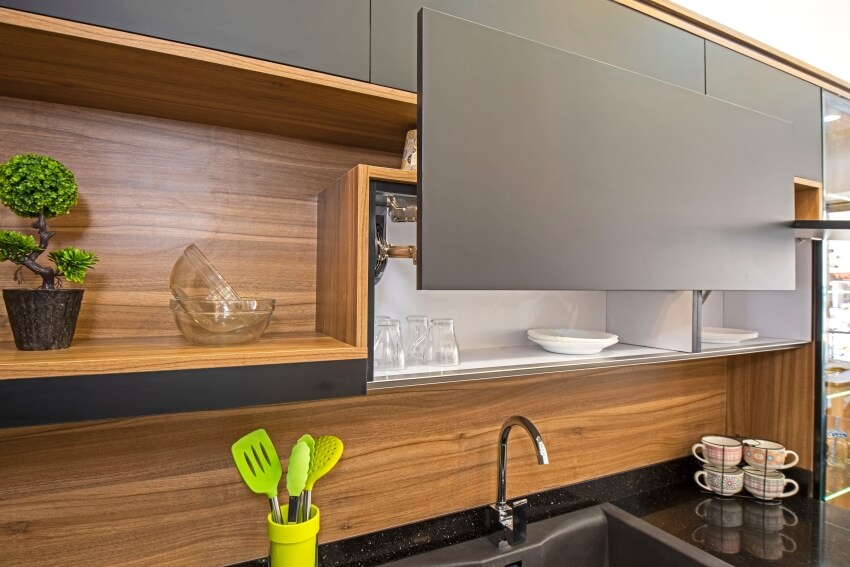
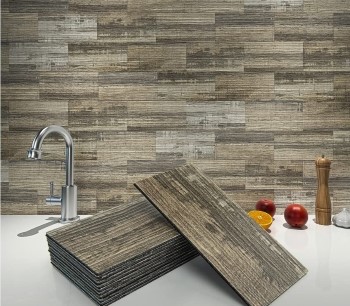
Faux Wood Panel Backsplash
Materials that simulate the look of wood, such as faux wood panels, are a practical option if you’re looking for an affordable way to create a beautiful backdrop in your kitchen. Moreover, there’s a wide range of design options to choose from available from almost any home and improvement shop.
The faux timber panels usually come in a continuous standard size of 18 inches wide x 9 feet roll. The panel comes with an adhesive backing that is stuck against the wall.
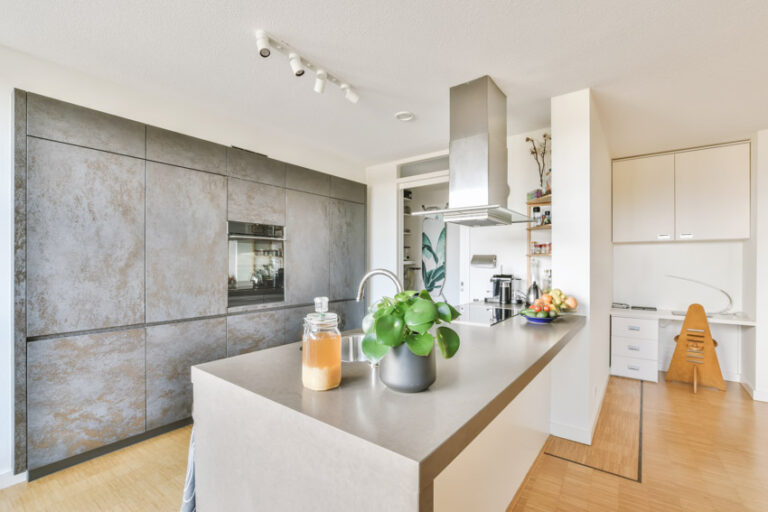
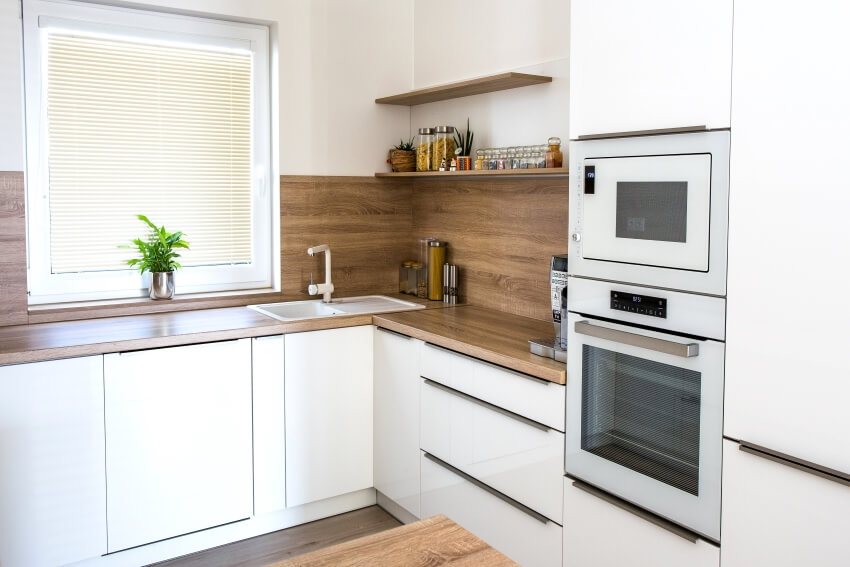
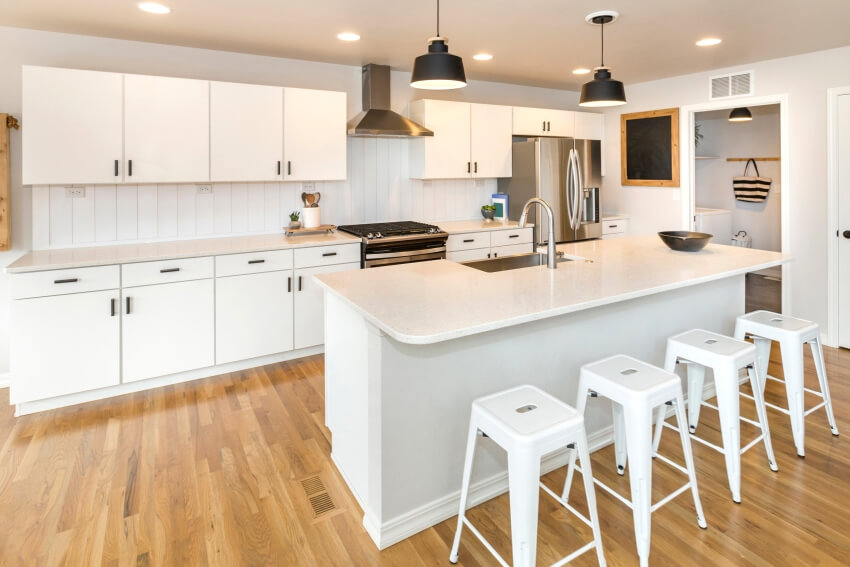
Matching Surfaces
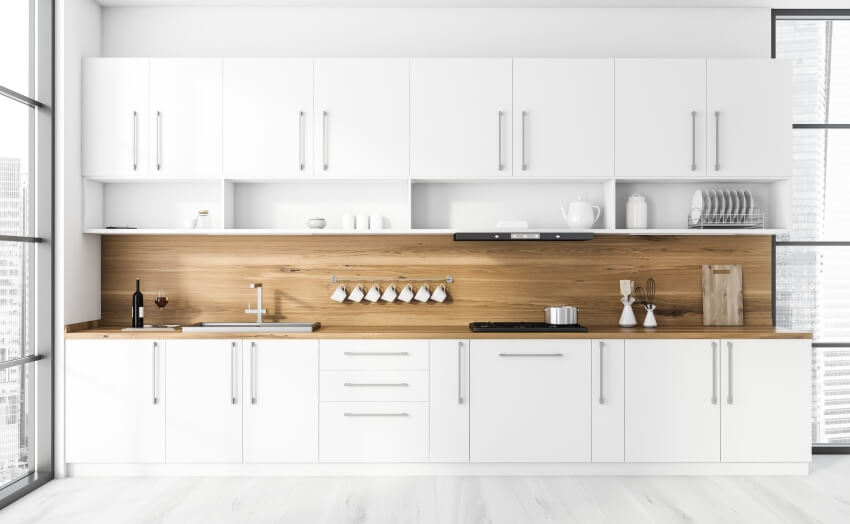
Matching countertops with the wall materials offers a cohesive design that can look stylish. This works well when the same color materials are used for both areas. To create even more visual interest using contrasting wood tones combined with different color cabinets. Light toned wall and counter surfaces paired with light or dark cabinetry creates a stunning kitchen design.
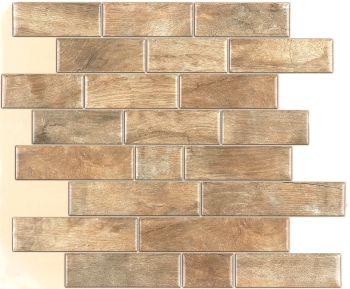
DIY Wood Tile Backsplash
The cheapest and easiest way to achieve paneling in any kitchen design is by using peel-and-stick tiles. The self-adhesive material comes with various patterns that simulate real graining.
The standard sizes also make it easier to cut using ordinary cutters and are easier to lay out due to the fixed size. Most faux wooden panels have a protective layer infused on their surface to provide gloss and make them easier to maintain.
Installing panels, palettes, or tiles is relatively easy when you desire authentic wooden material for your DIY wall covering. Use basic tools such as a jigsaw or regular saw to cut your panels into desired sizes; make sure to have a layout in mind to minimize material wastage before starting to cut your panels. The location of electrical switches and outlets should be removed before finishing your timber wall.
To attach your wooden material to your wall, use construction adhesive. The easiest method of attaching your panels is using a caulking gun to apply liquid nails, which come in tubes. Applying mastic on the wall or your panels using a notched trowel is another way to adhere your material to your wall.
How to Protect Wooden Backsplash
Protecting your wood surfaces is essential in maintaining the structural integrity and look of your design. Use a coat of sealer on both sides of the panel. Clear varnishes or lacquer can preserve the color and graining of your timber. Mineral oil is another great way to seal -off your timber wall accent.
When you plan to paint your feature wall, use a stain-blocking primer before applying paint on its surface. Before applying the surface, the coat is sure to remove debris by cleaning the surface thoroughly. Dents should also be removed by lightly scratching the surface, as imperfections can lead to holes or bubbles after the surface treatment.
Surface cleaning is important in maintaining the look of your timber accent wall. Regular oiling or waxing can be an added protection while keeping it looking its best.
For more related content visit our brick backsplash kitchen ideas here.
To showcase highly specific designs, some images on this website use advanced AI-generation software to illustrate ideas and room inspiration. See our editorial policy to learn more.