70 Gorgeous Tray Ceiling Design Ideas For Your Home

Welcome to our guide to tray ceiling design ideas for the living room, bedroom, dining room, bathroom, and kitchen. Almost every aspect of your home can be modified to meet your exact design and structural preferences – your ceiling included. There are many different designs that you can use, and each one has its own styles, costs, and benefits. Here, we will look specifically at tray ceilings in depth to help you find the right option for your home. [toc]
What Is a Tray Feature Ceiling?
A tray ceiling is another name for an inverted or recessed overhead. For these designs, the center of the room’s ceiling is several inches to multiple feet higher than the rest of the room’s overhead perimeter. Tray designs can feature many different styles, such as rounded design, molding, different paint colors, lighting, wood shiplap, arched construction, and tiered levels, just to name a few.
This design has been used for hundreds of years and continues to be incorporated in modern homes. Historically, tray ceilings were used both for architectural design and for disguising duct work before the invention of central heating and air. Now, however, they most often serve as a design element and focal point.
Types of Tray Recessed Ceiling Designs
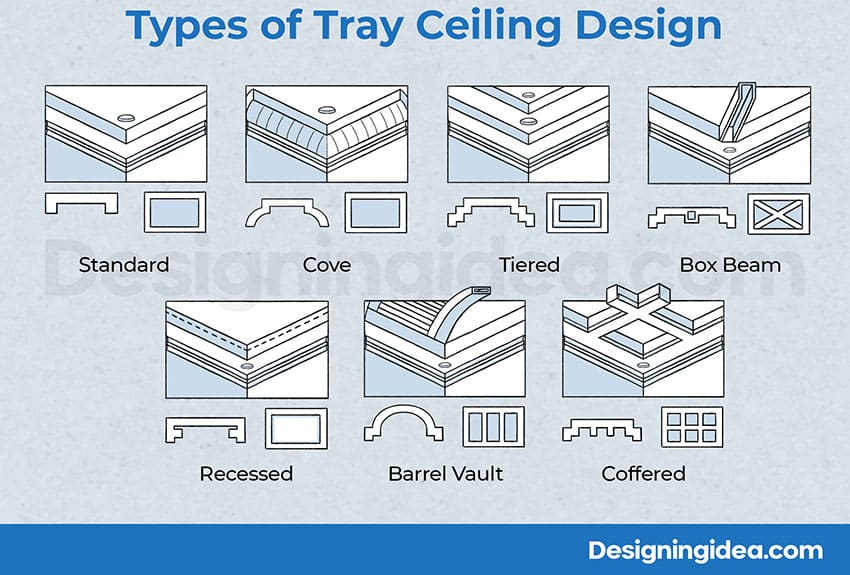
Here are a few of the most popular design styles you can find in residential homes.
| Standard Tray Ceiling | Basic form with a flat overhead and a raised central panel |
| Cove | Has a curved, concave shape that extends from the wall up |
| Tiered | Has multiple layers or tiers that create a stepped or tiered effect |
| Box Beam | Has exposed wooden beams laid out in a box-like structure |
| Recessed | Recessed overhead with a raised center panel |
| Barrel Vault | Features with a semi-circular or elliptical shape |
| Coffered | Featuring a grid of recessed panels |
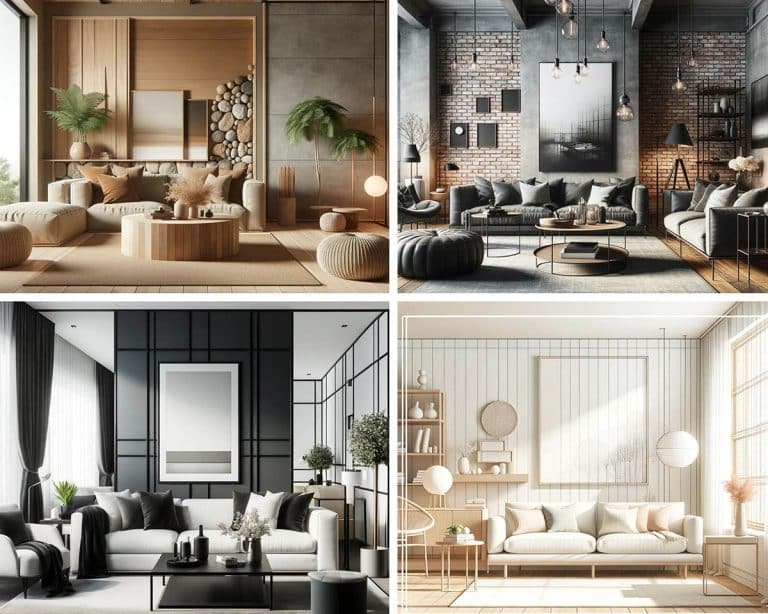
Living Rooms with Inverted Ceilings
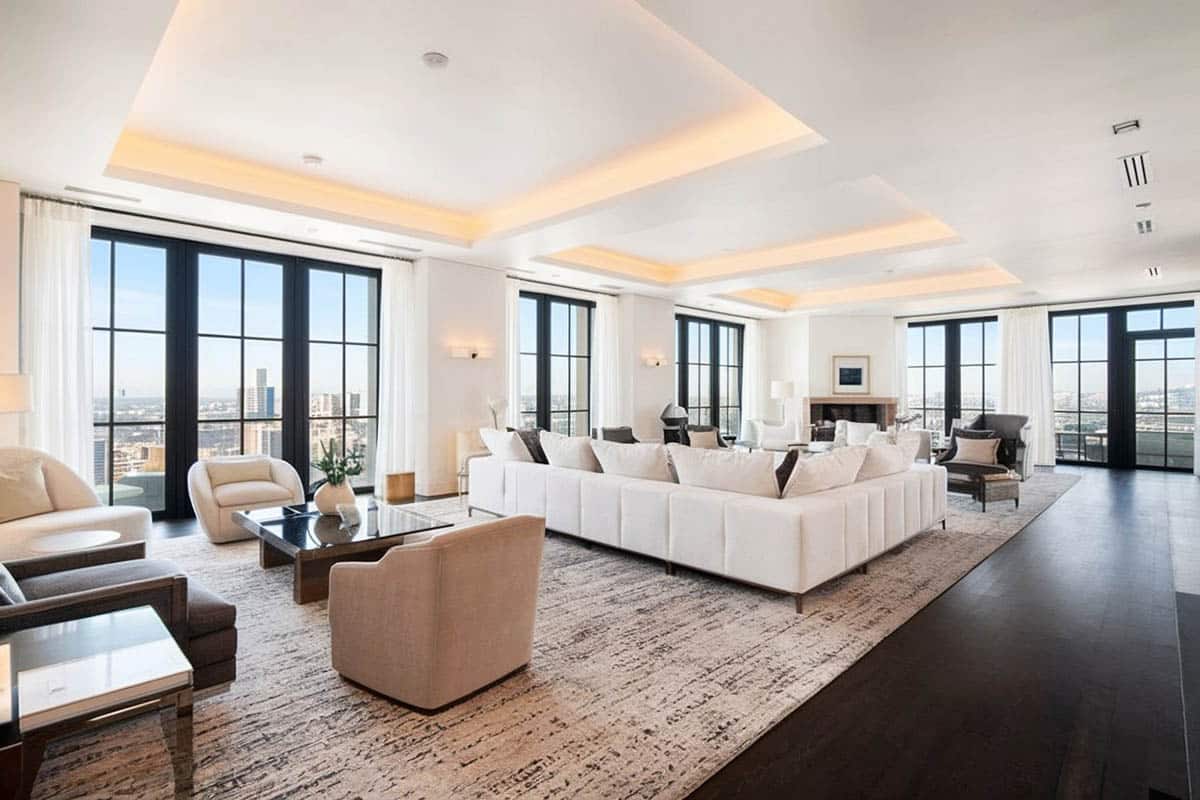
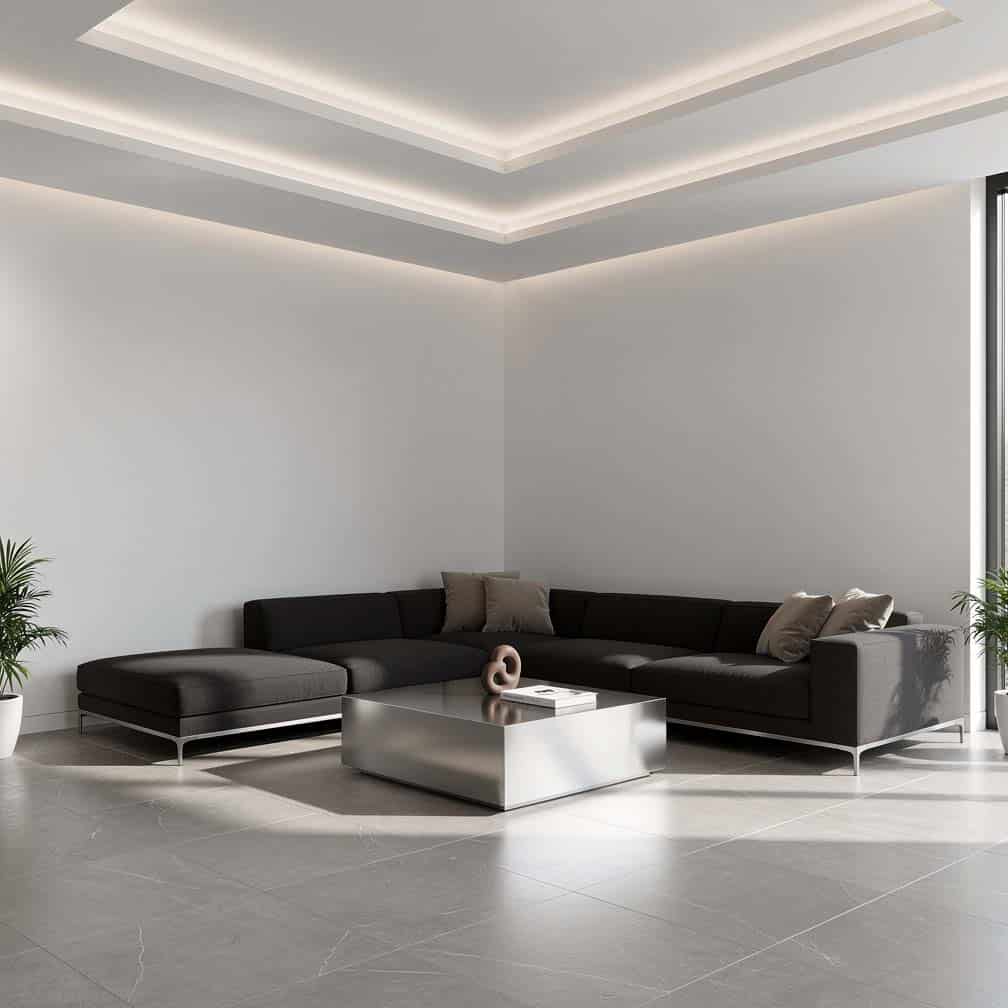
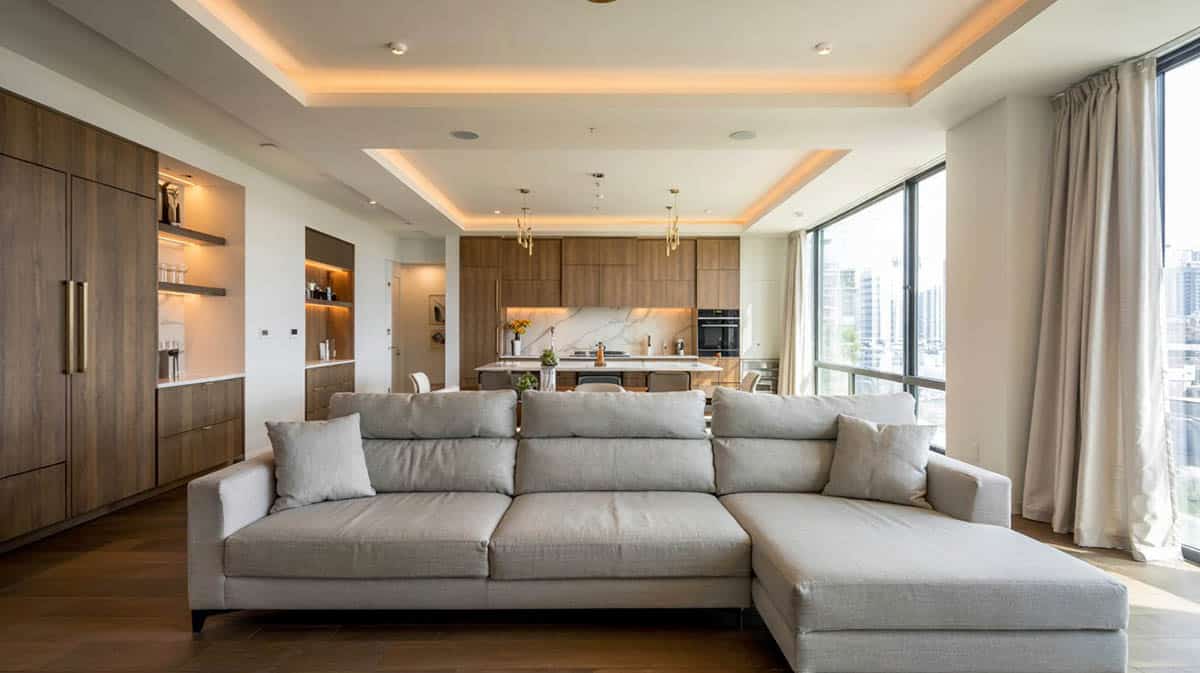
This large open concept living room design features three recessed areas with hidden lighting.
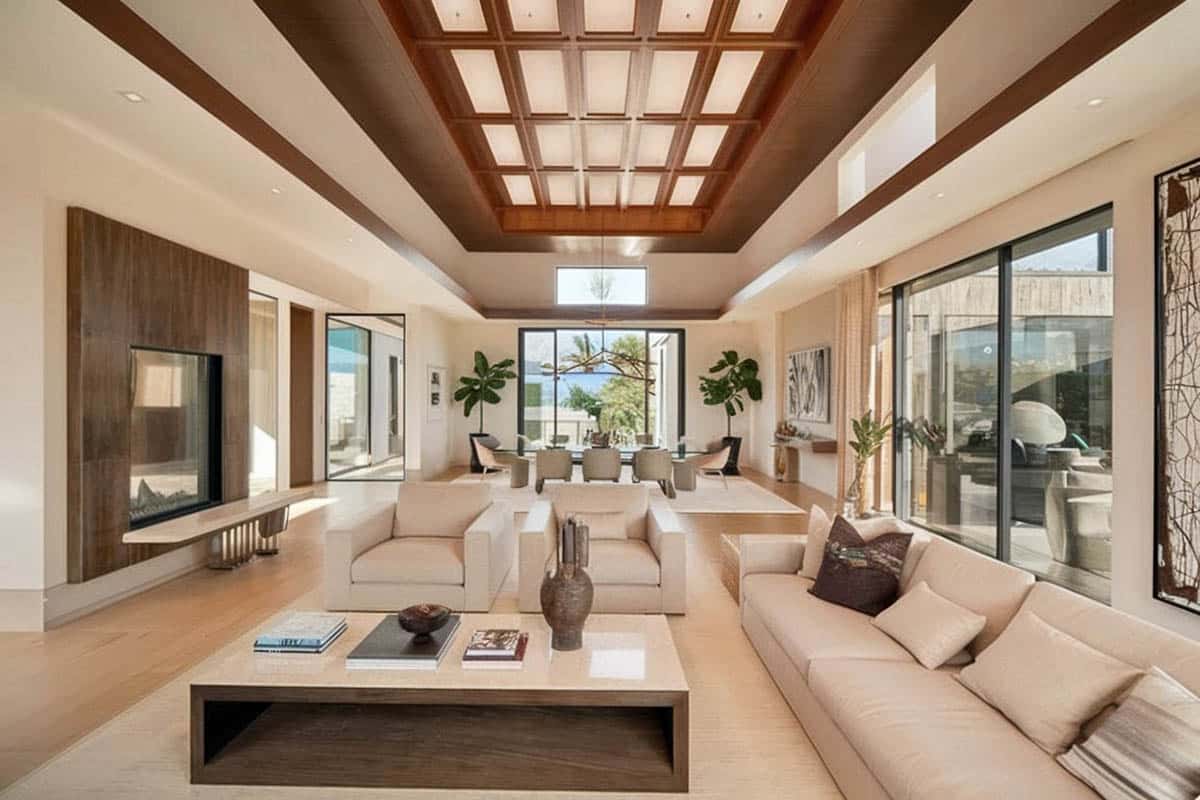
This living room offers a decorative wood style with an Asian-inspired influence.
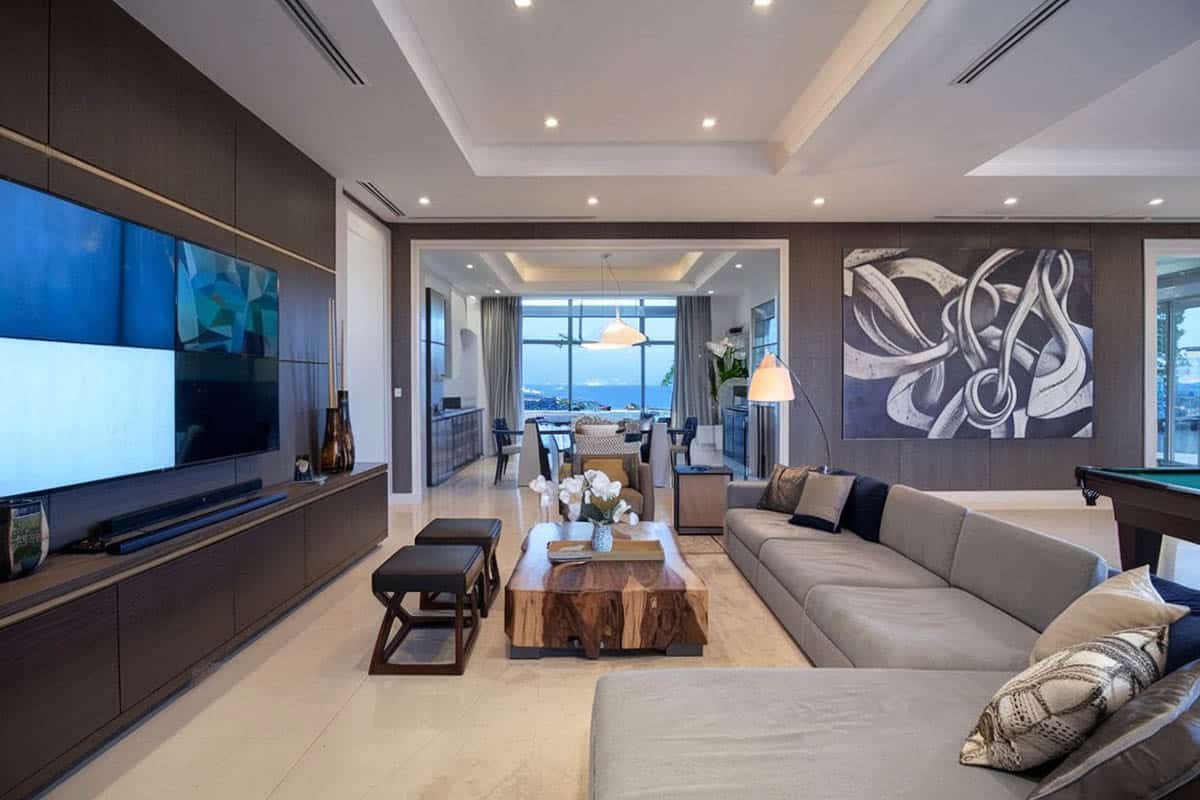
Modern living room design with multiple overhead features with recessed lighting.
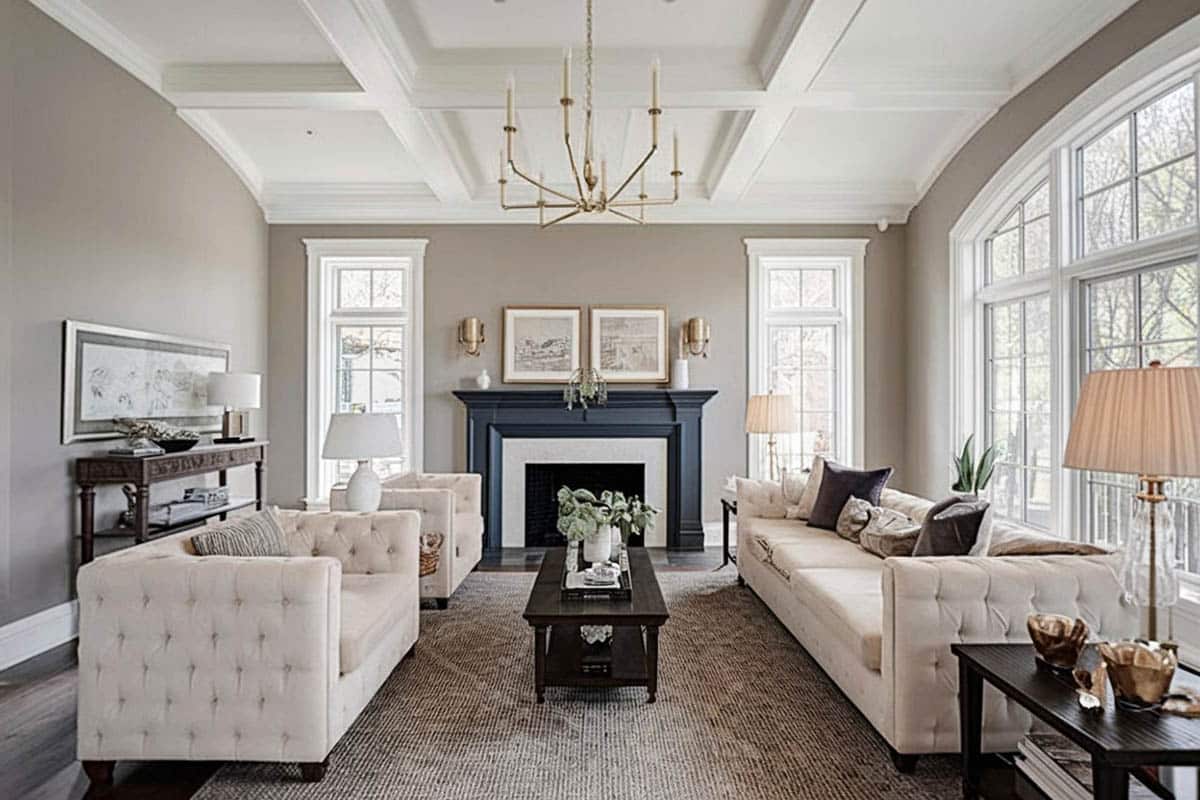
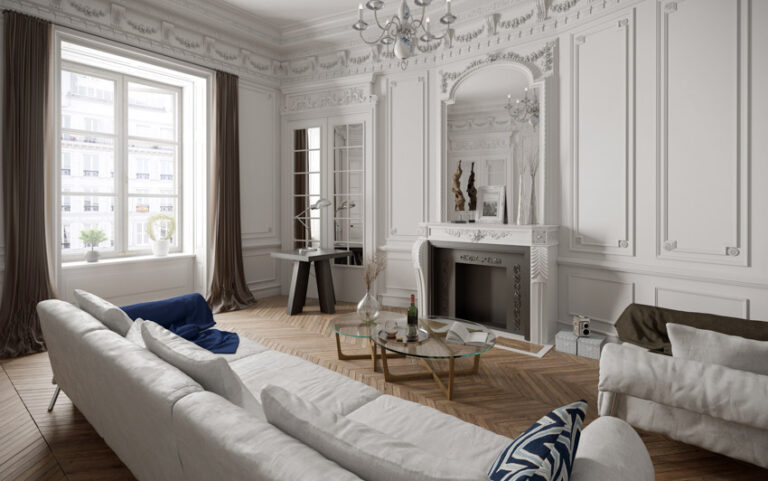
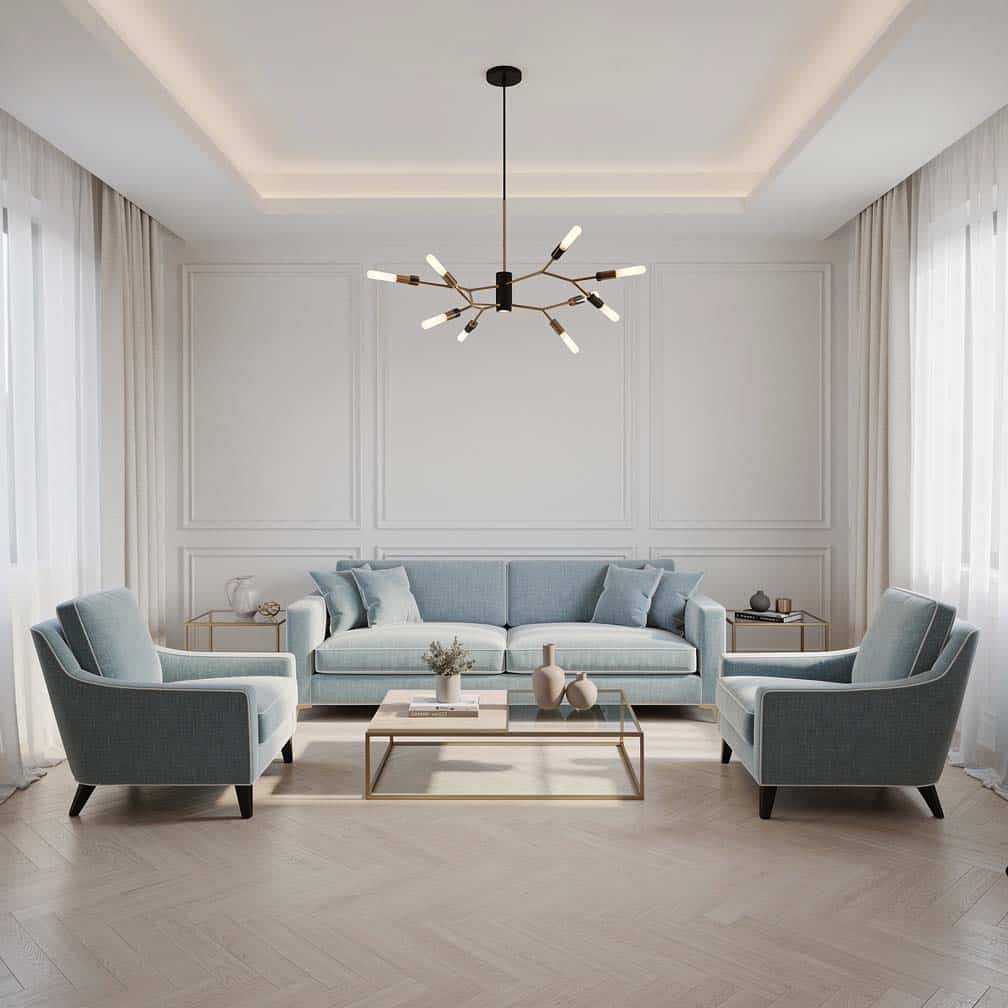
Unique custom design with living room chandelier.
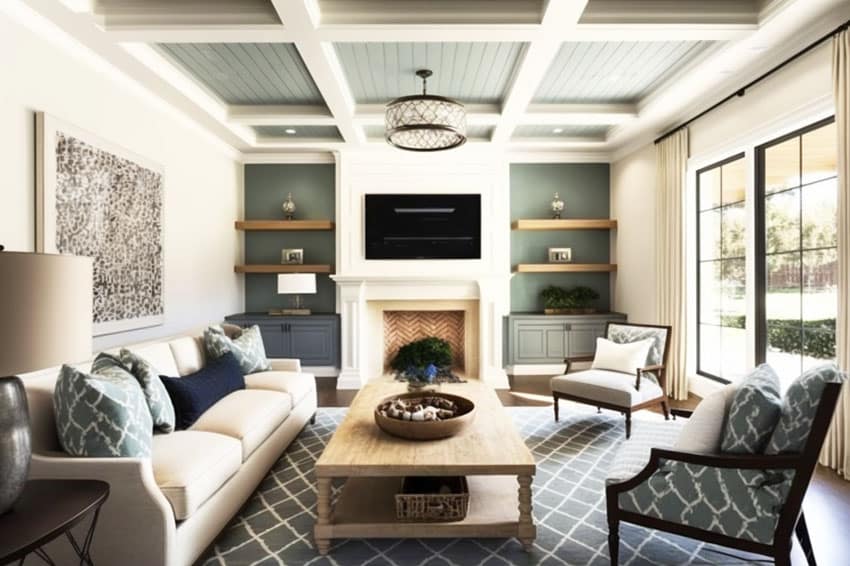
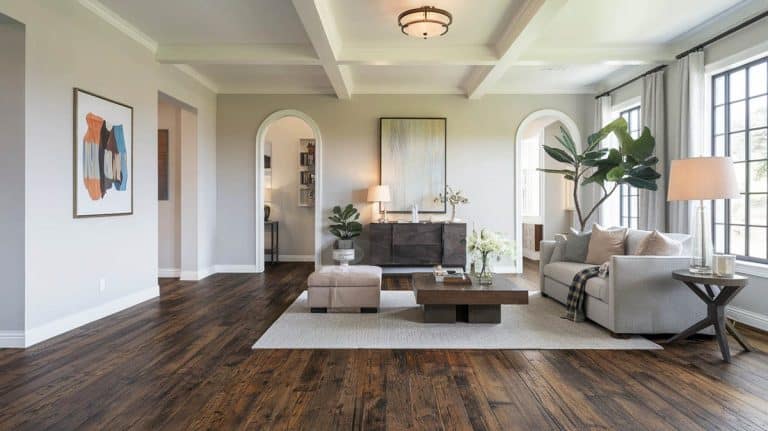
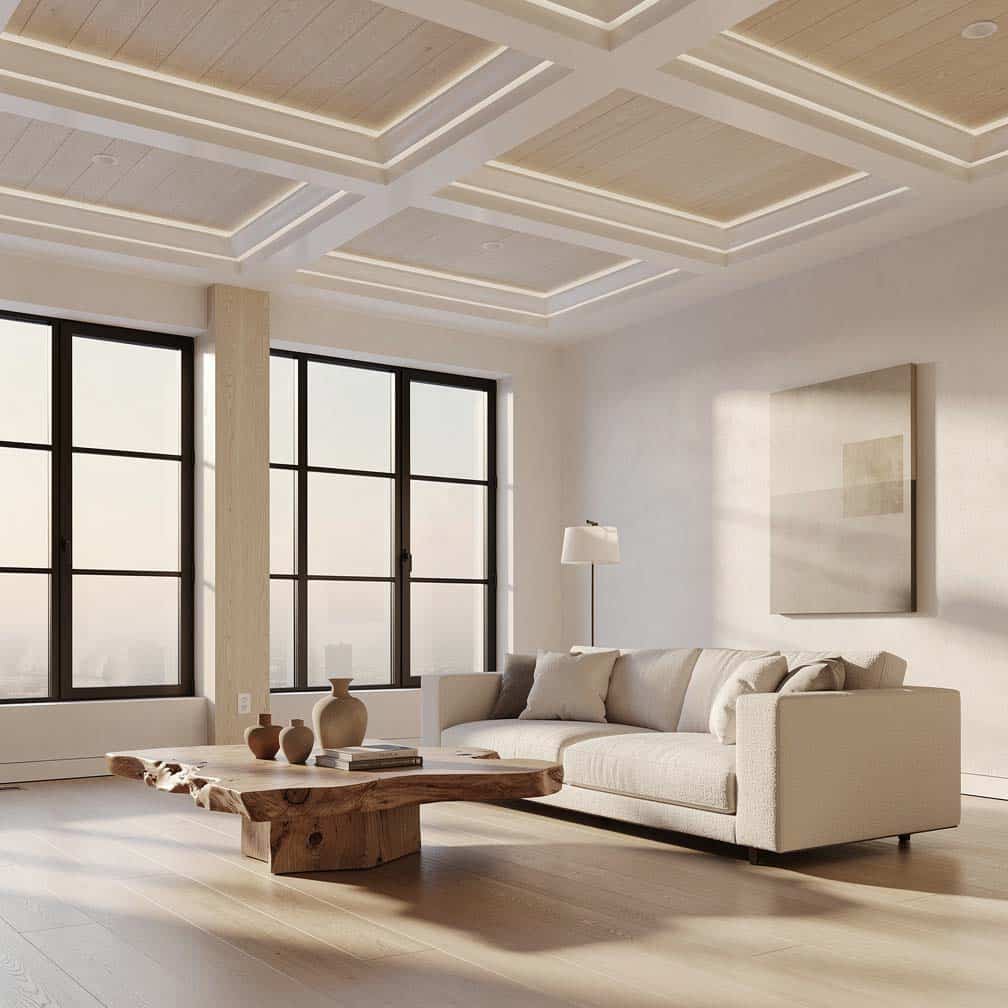
This transitional living room design features a white box beam ceiling with painted shiplap planks that match the built-in accent wall on either side of the fireplace with a herringbone brick pattern.
A large area rug frames the space and provides a way to create cohesion between the furniture fabrics while providing color and contrast.
Contemporary design with illuminated double tray ceiling and quartz accent wall fireplace.
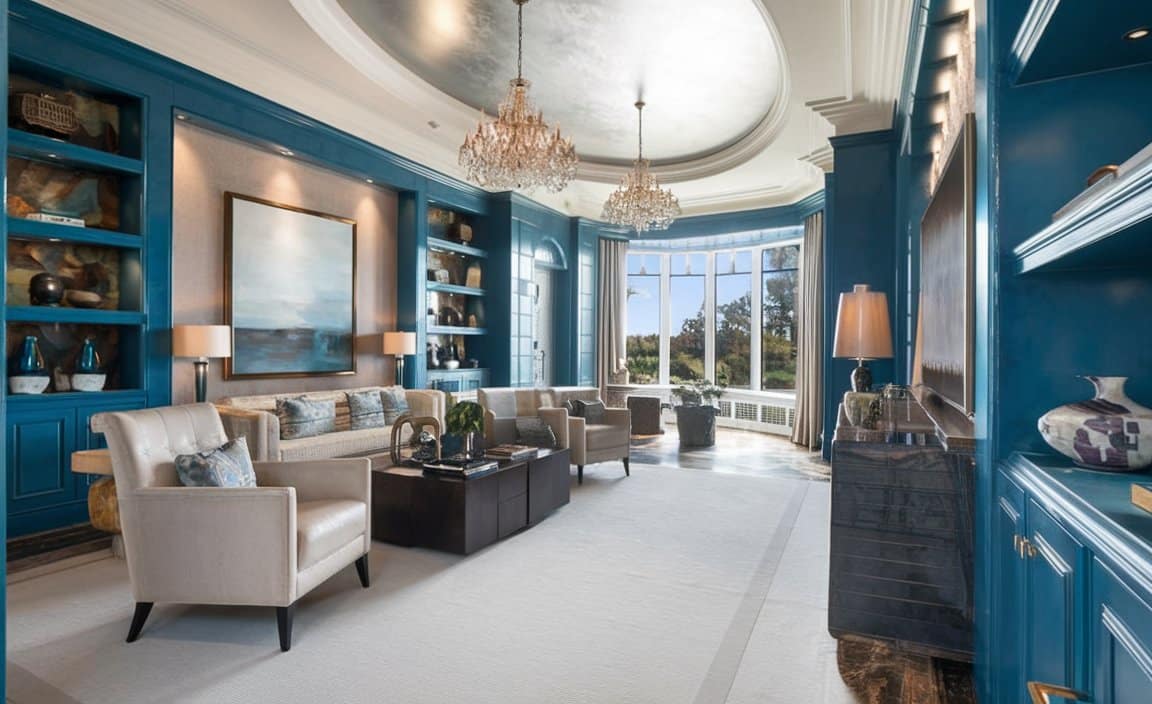
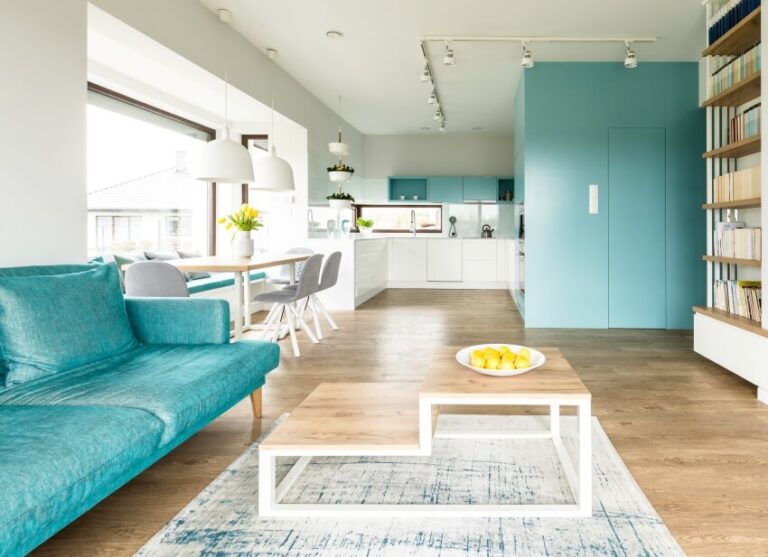
This oval design features an aqua green living room with built-in cabinetry.
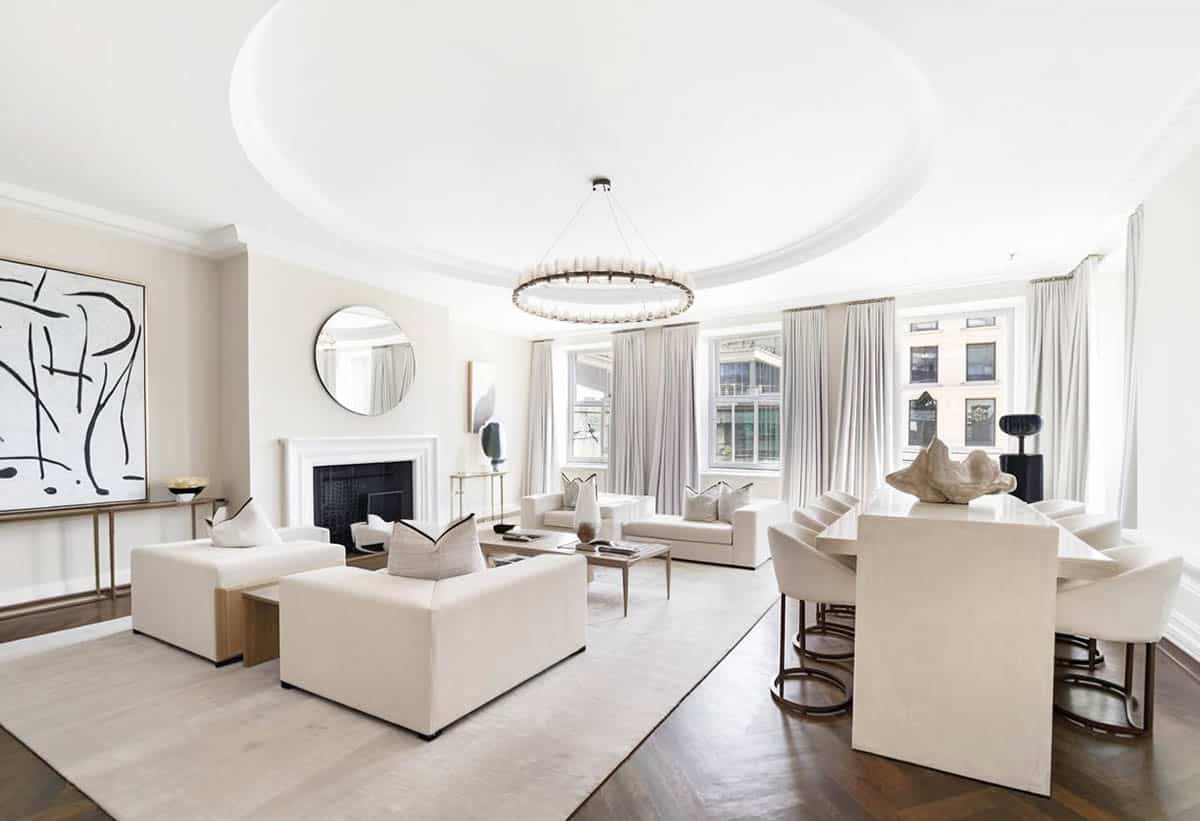
Contemporary living room with round feature with circular chandelier.
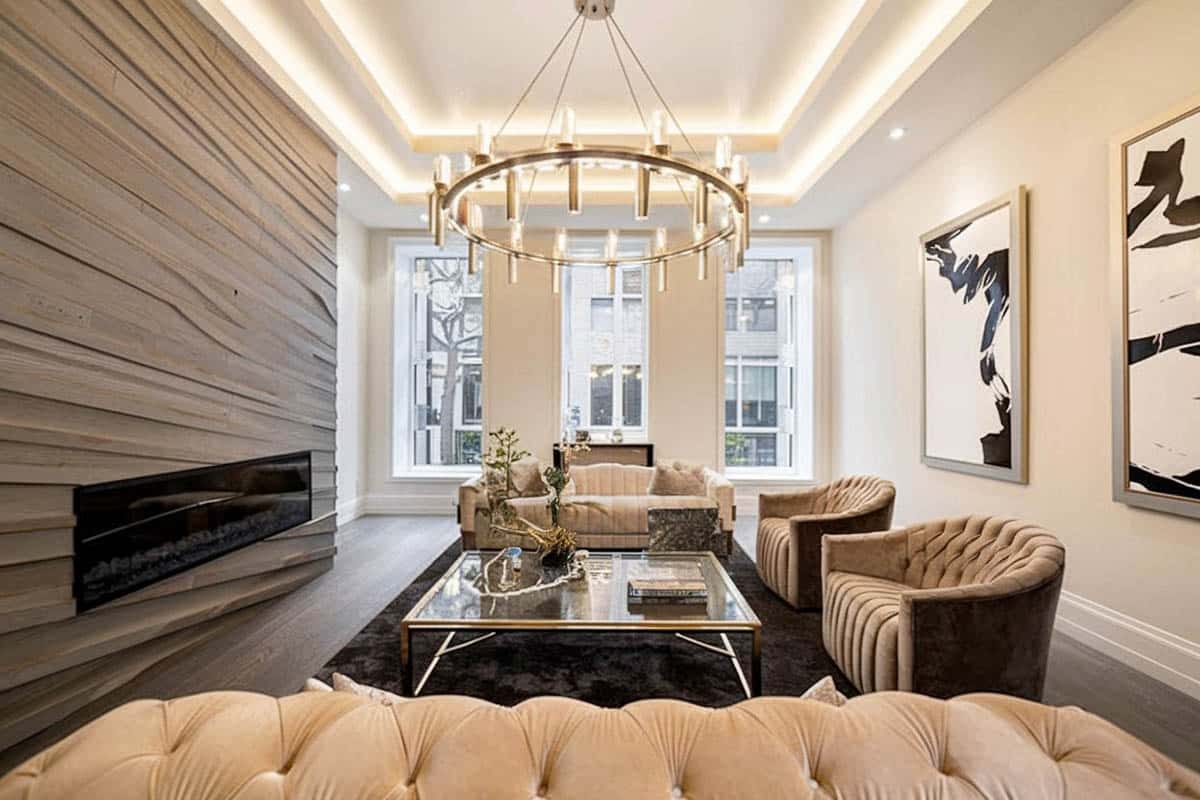
Unique circular design with rounded edges. These design ideas with unusually shaped overheads can pose challenges. This room features an extravagant tufted sectional sofa that provides the perfect vantage point for enjoying the raised overhead space.
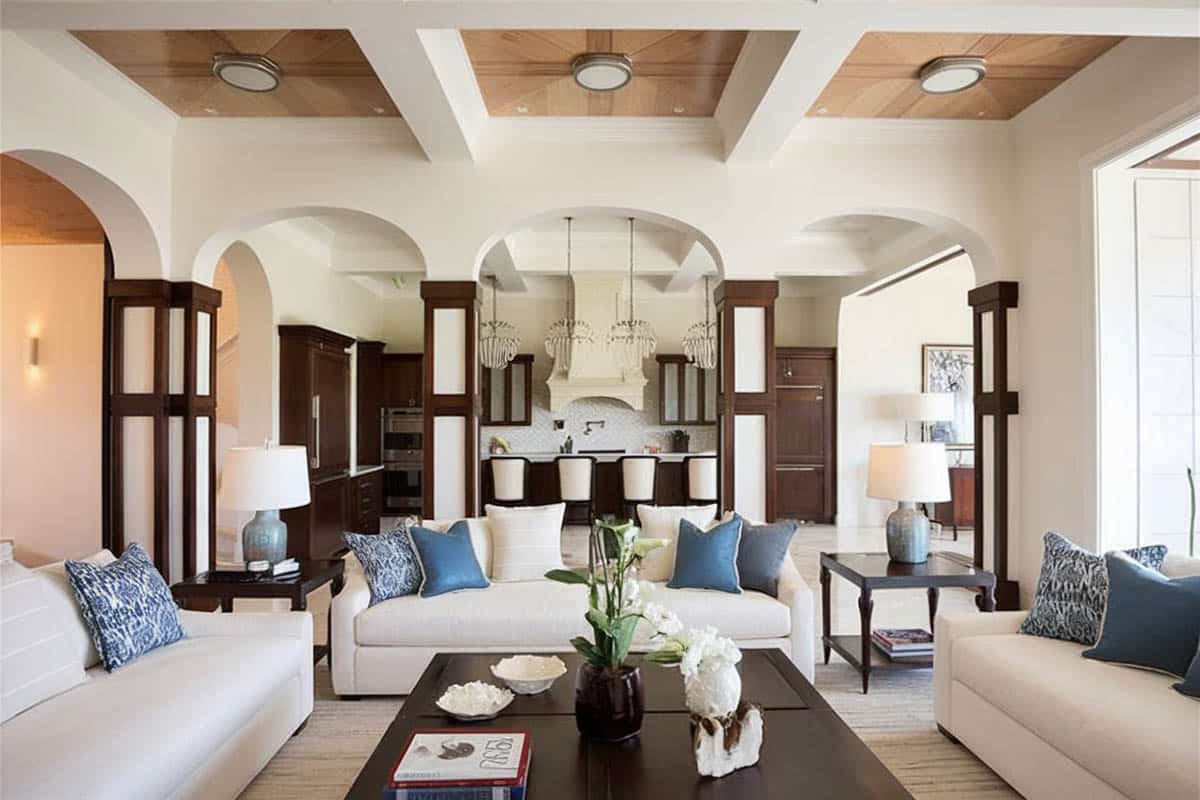
Formal living room with a deep recess with an unusual coffered style with wood planks and interesting wood pillar cladding and finishes.
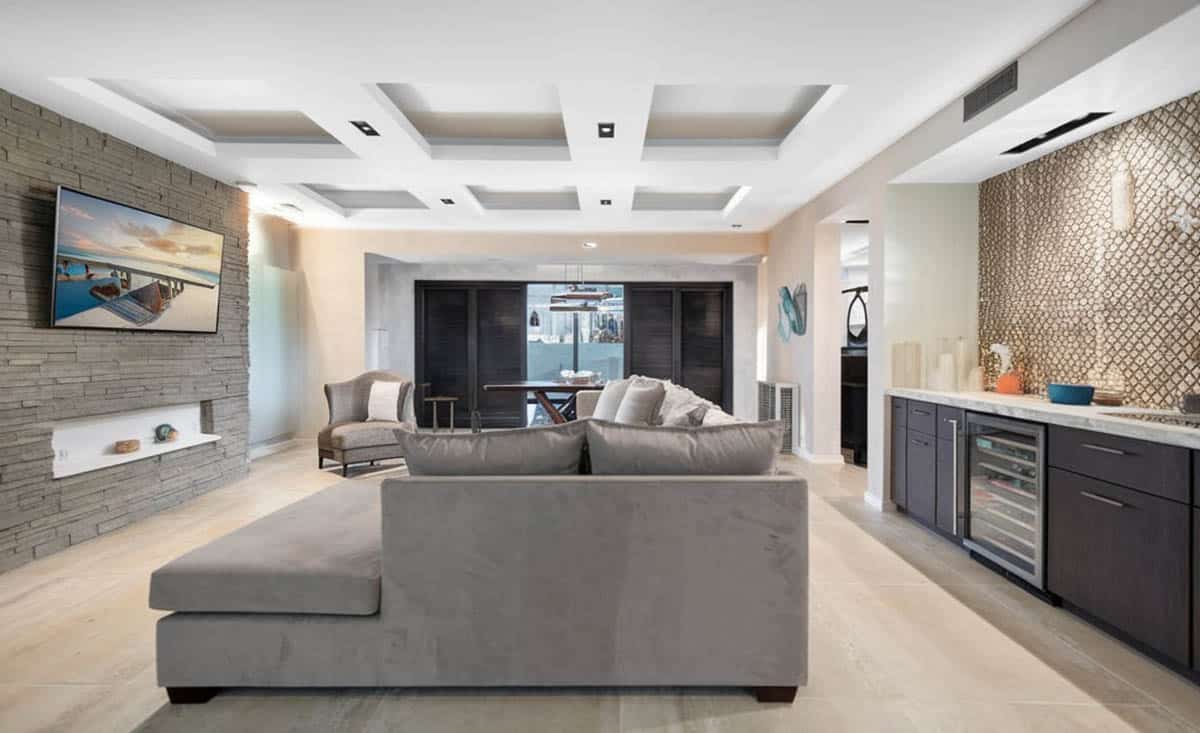
Modern living room with multiple overhead trays, stacked stone fireplace, and custom home bar design.
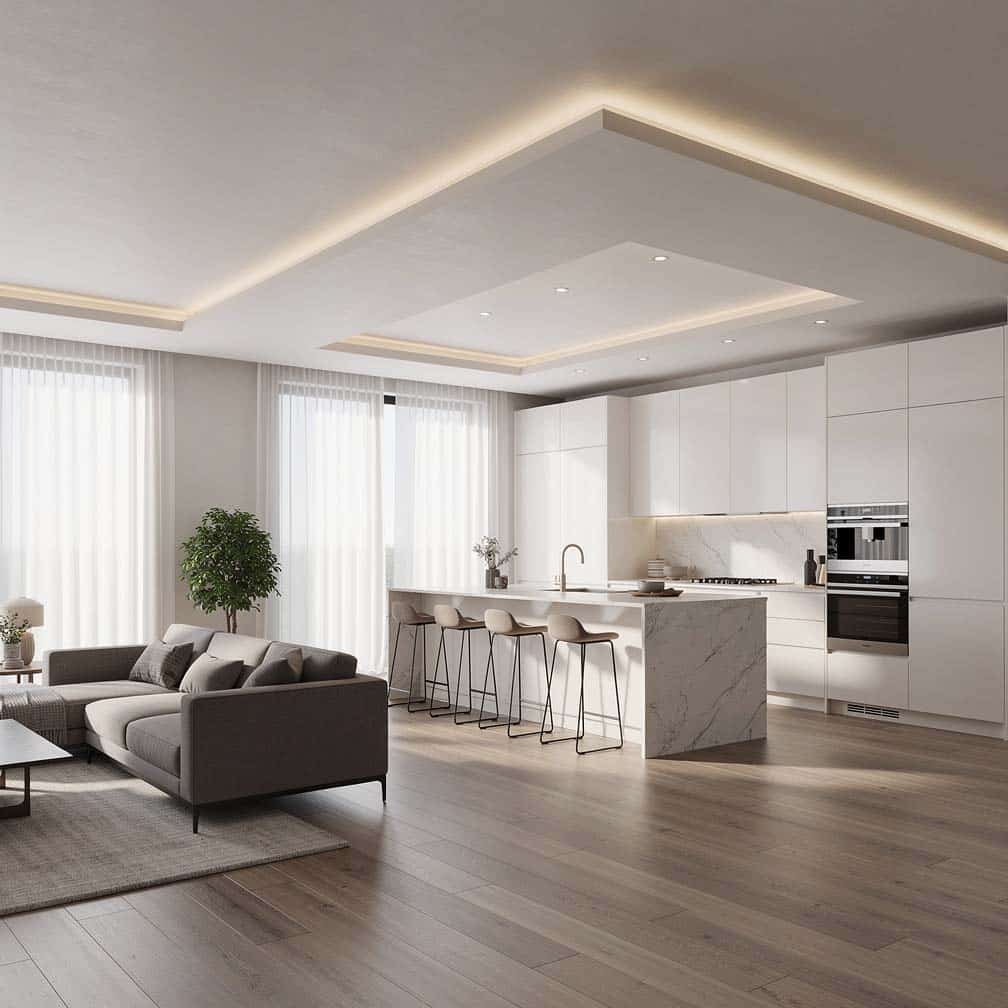
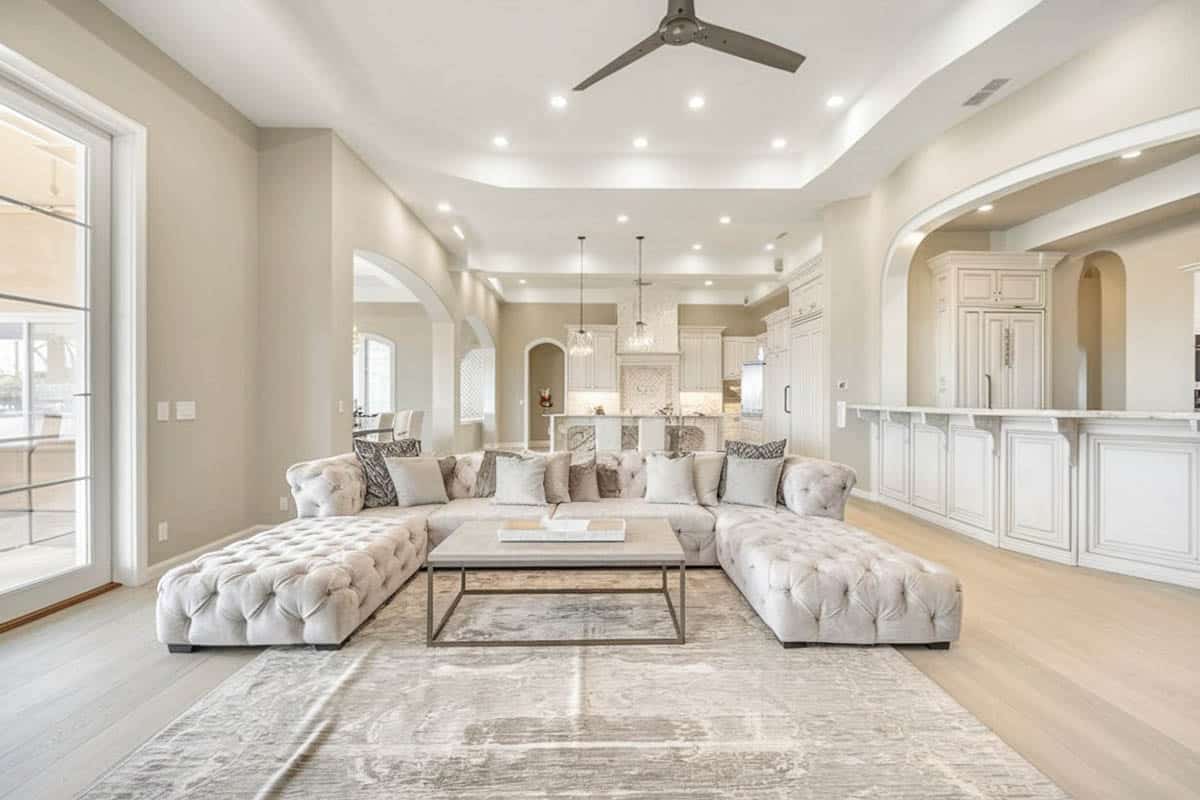
Two-tier style in an open-concept living room and kitchen.
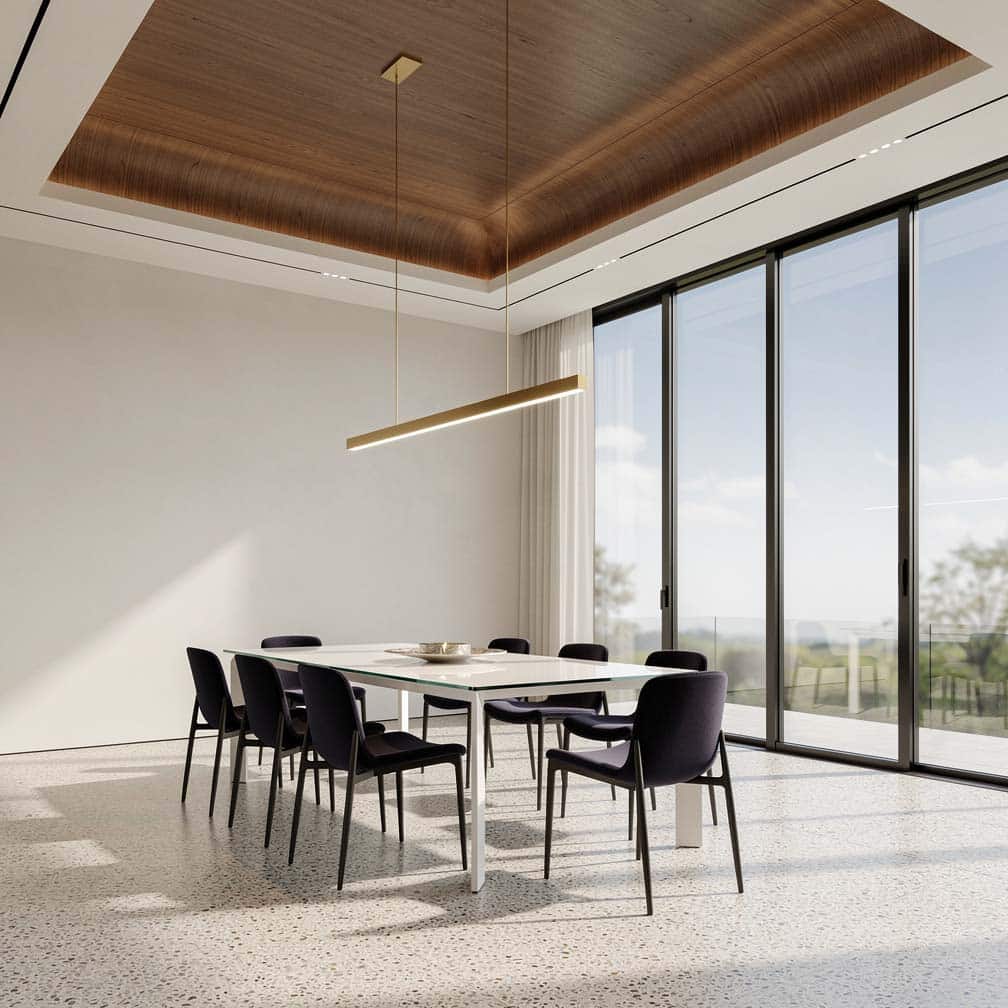
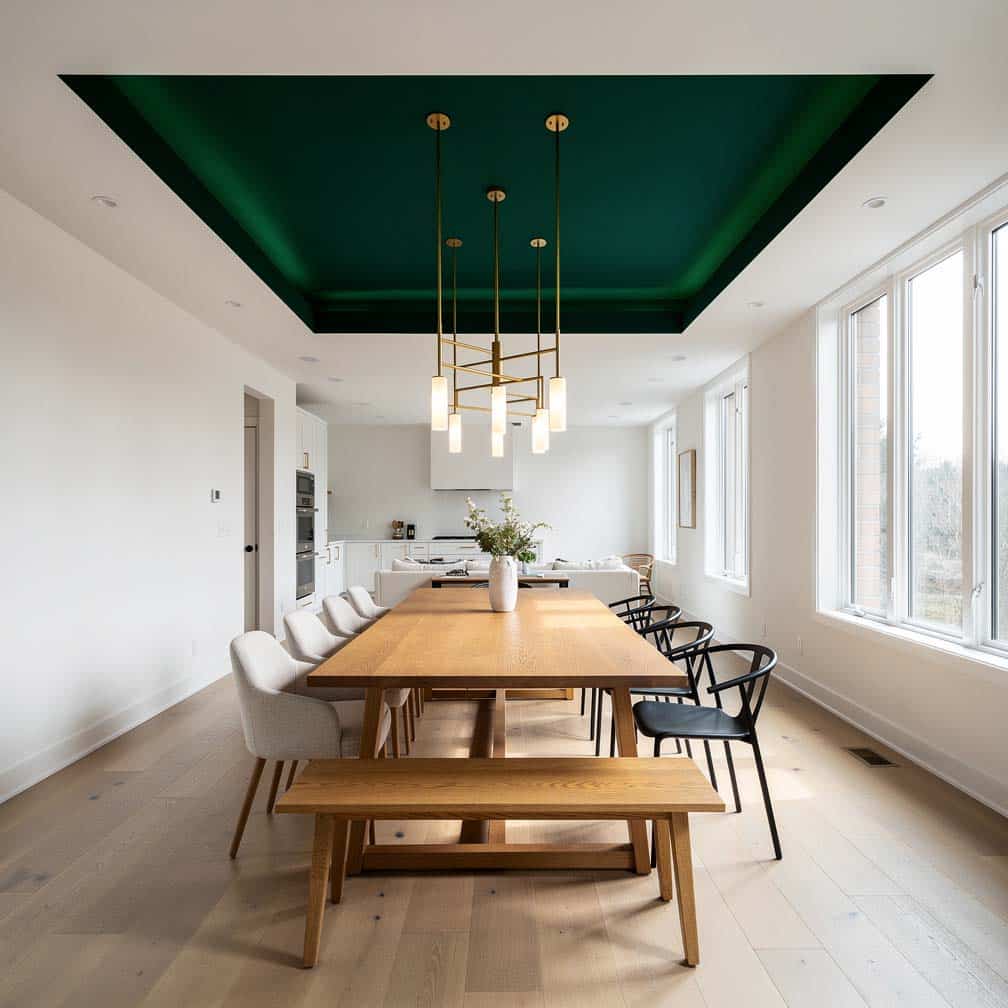
Modern dining room with wood veneer accent panels and linear pendant lighting above a white glass table.
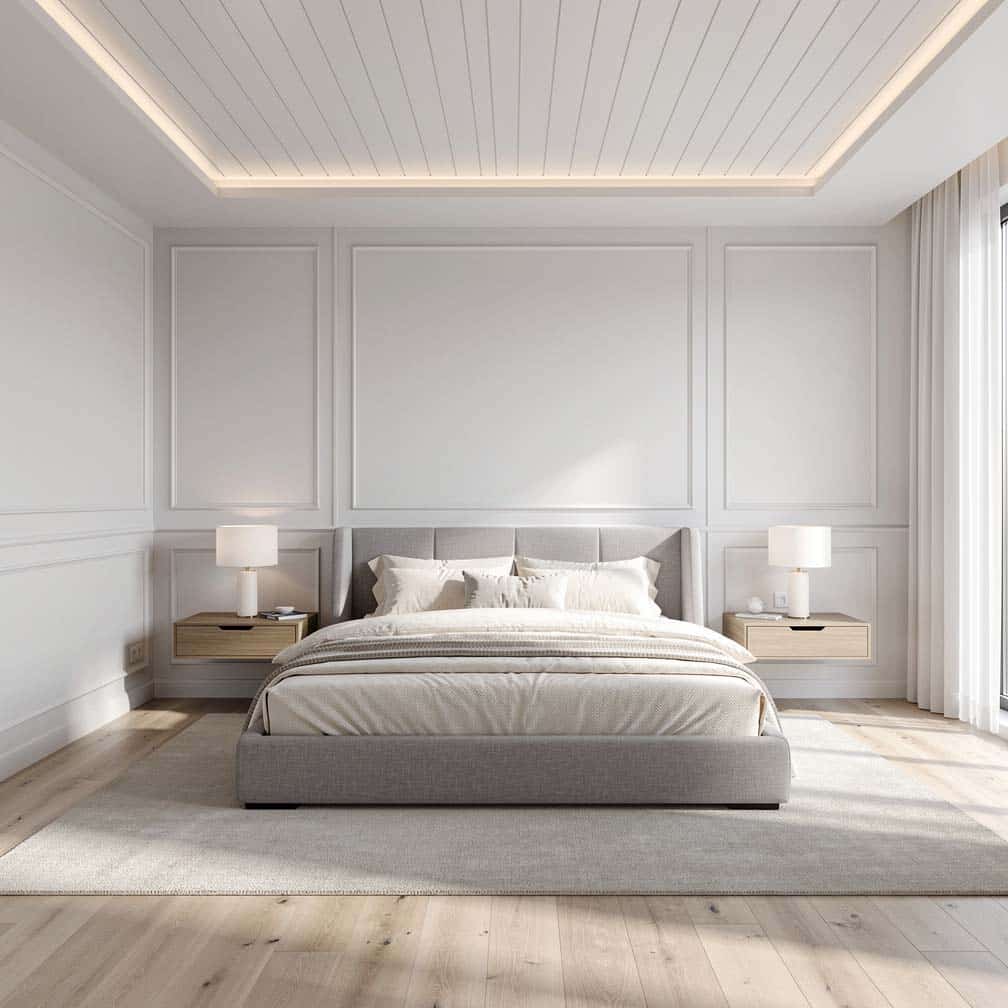
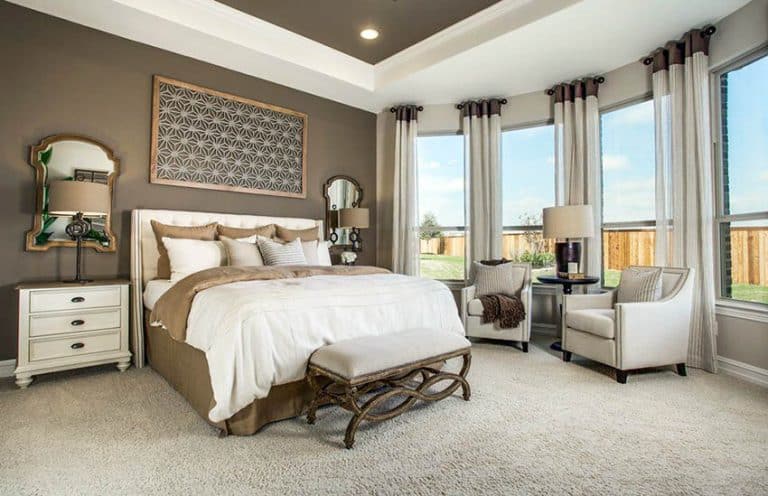
Master bedroom with painted white wood plank ceiling and geometric wainscoting.
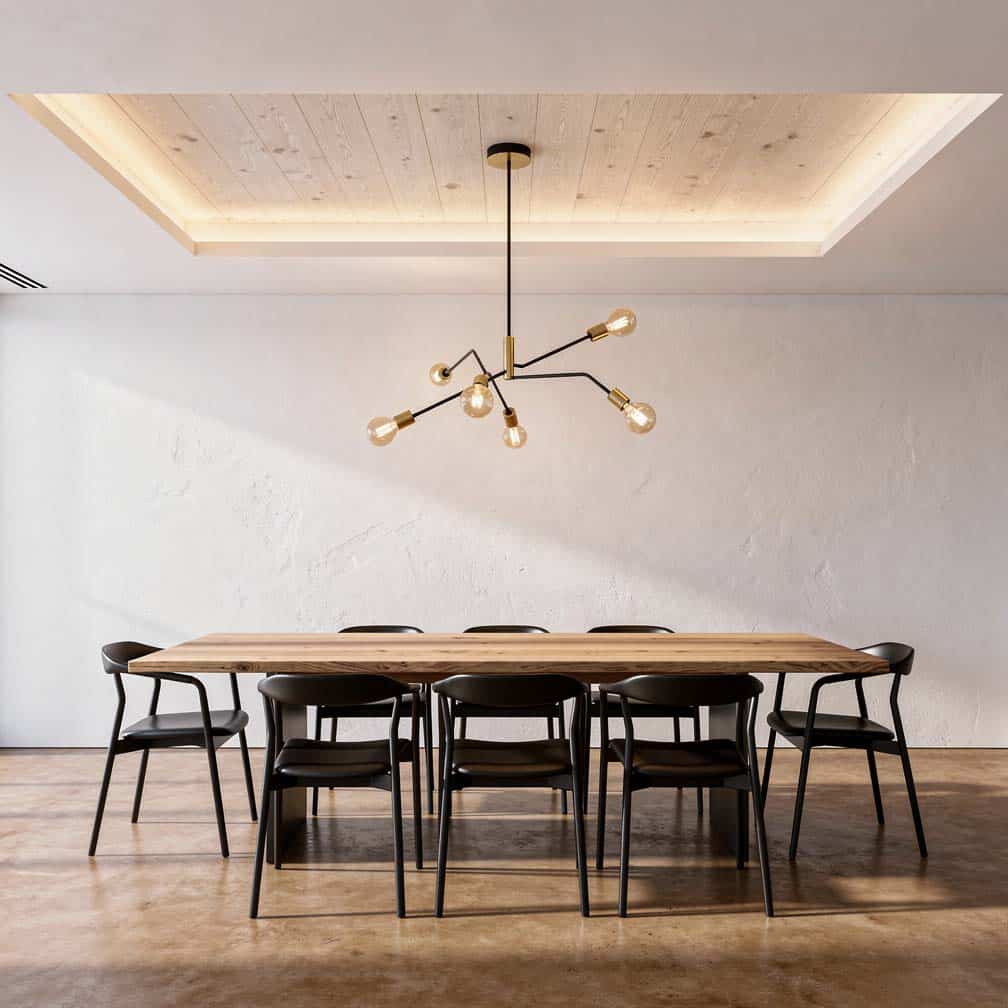
Dining room with wood planks above a dining table with a custom art fixture.
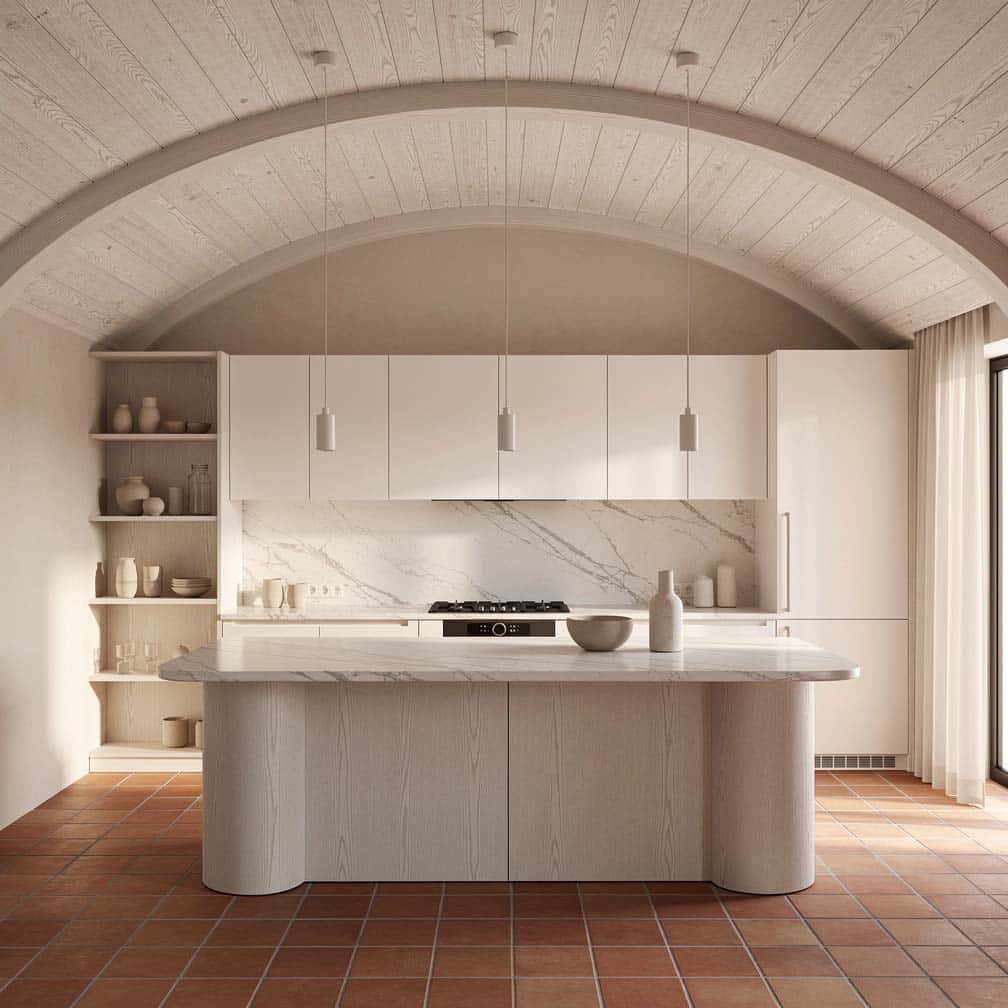
This kitchen uses its arched vault to frame the space above the island and hang its pendant lighting.
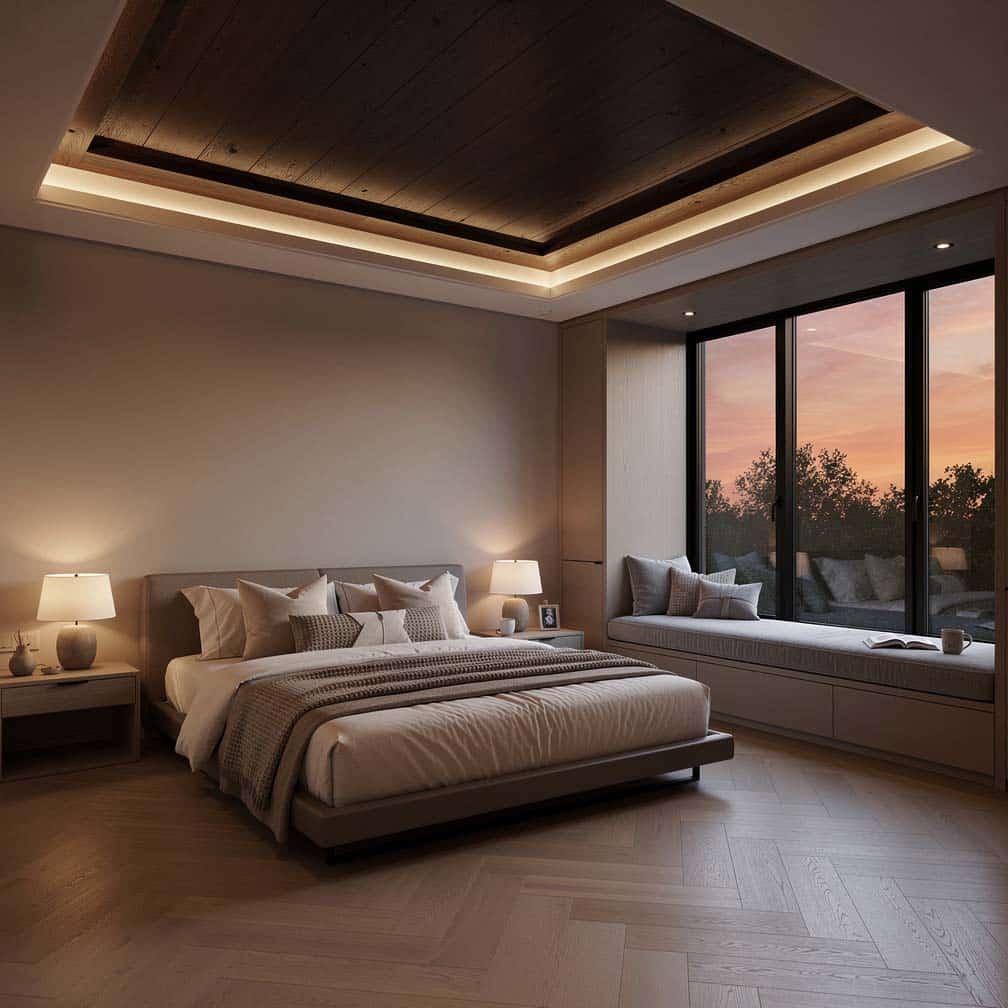
This amazing master bedroom showcases an eye-catching wood plank ceiling with backlights and a custom built-in bench. A separate sitting area nook creates a cozy place to relax or read your favorite book.
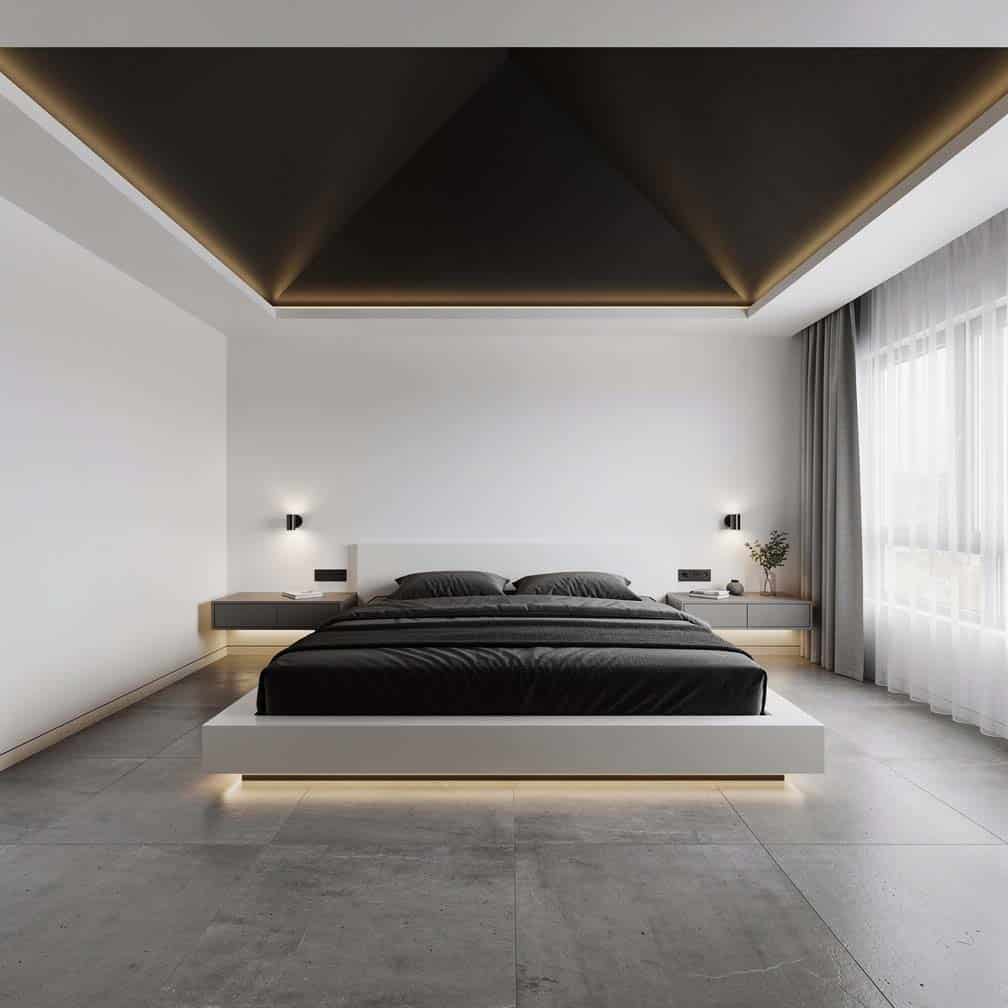
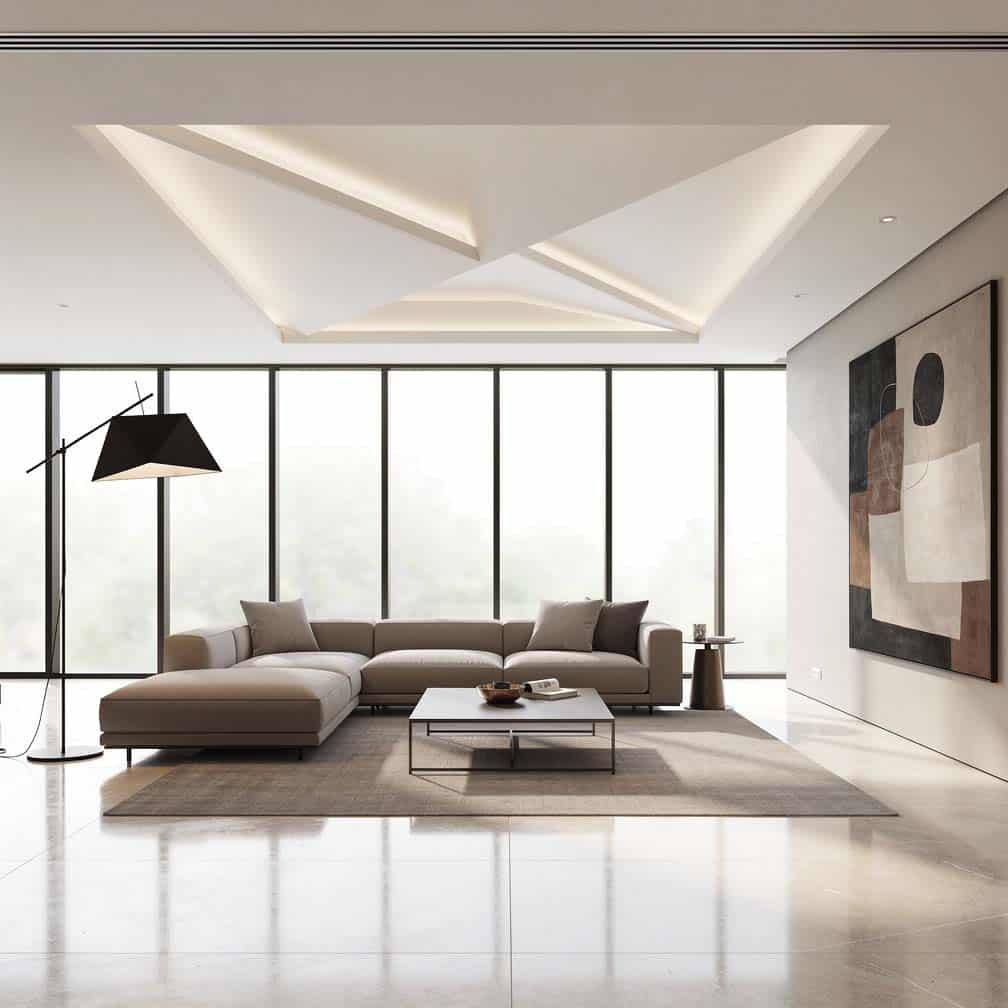
This room’s overhead is painted in black to create contrast and depth, with an angled slope to create visual interest.
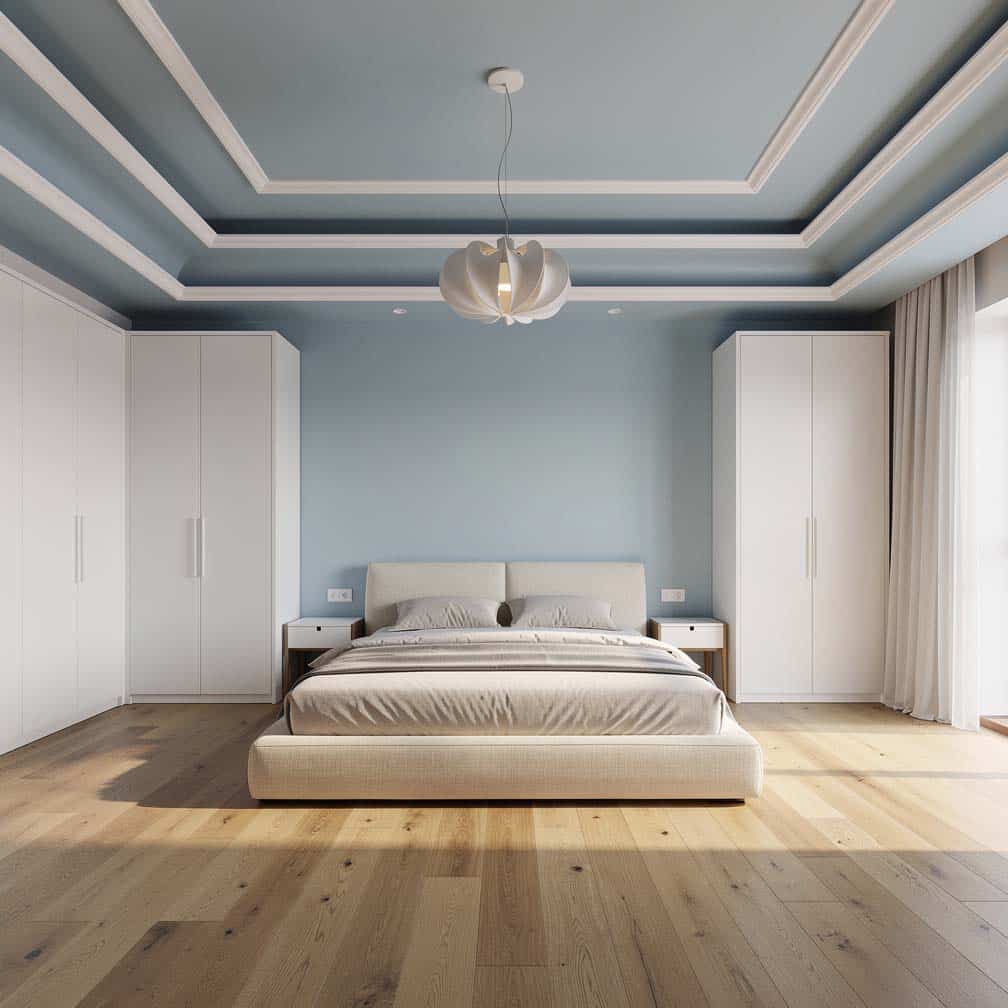
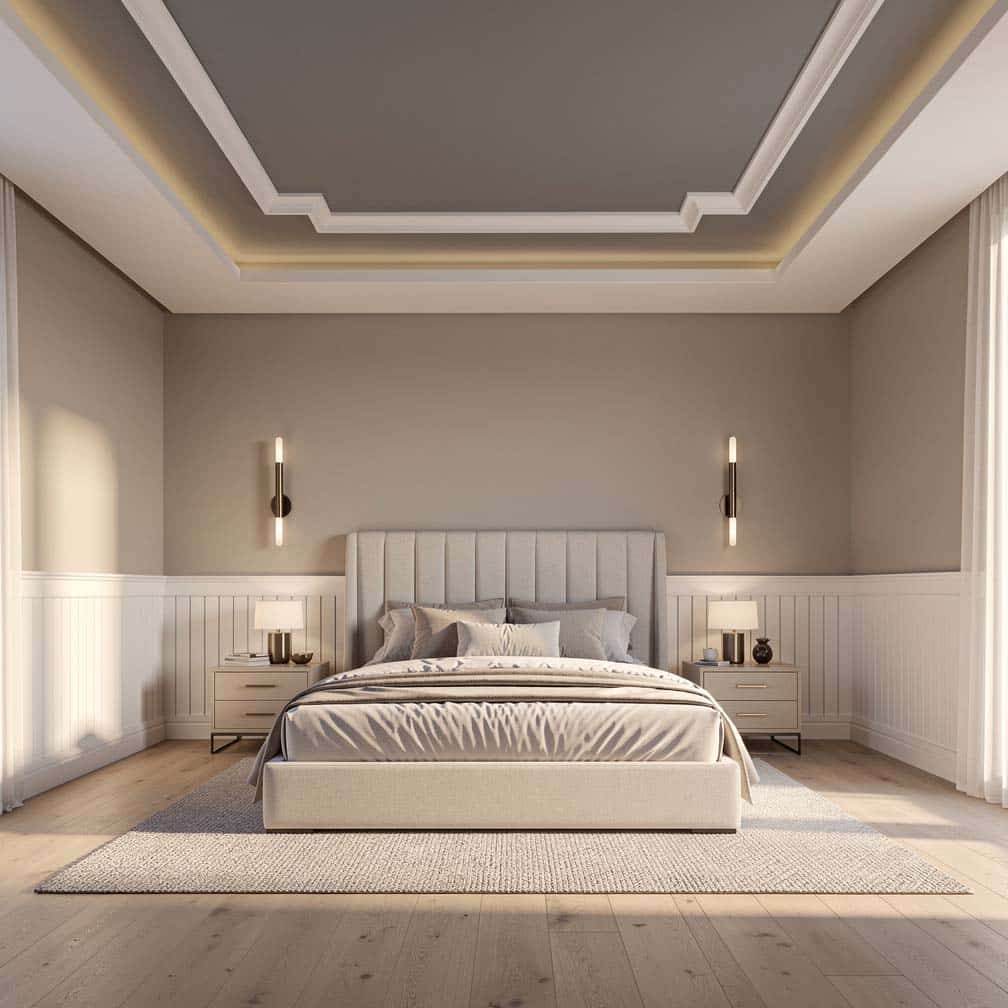
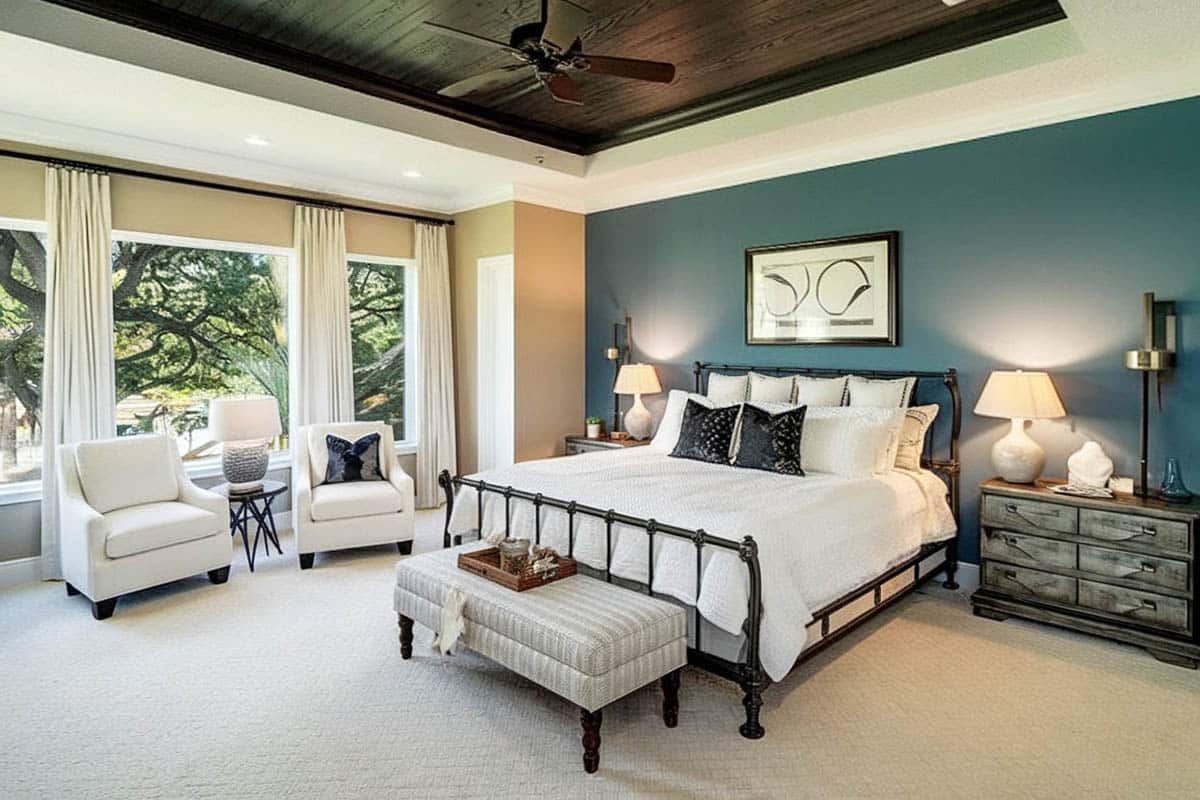
A blue with white trim tiered overhead that harmoniously blends to create an interesting backdrop.
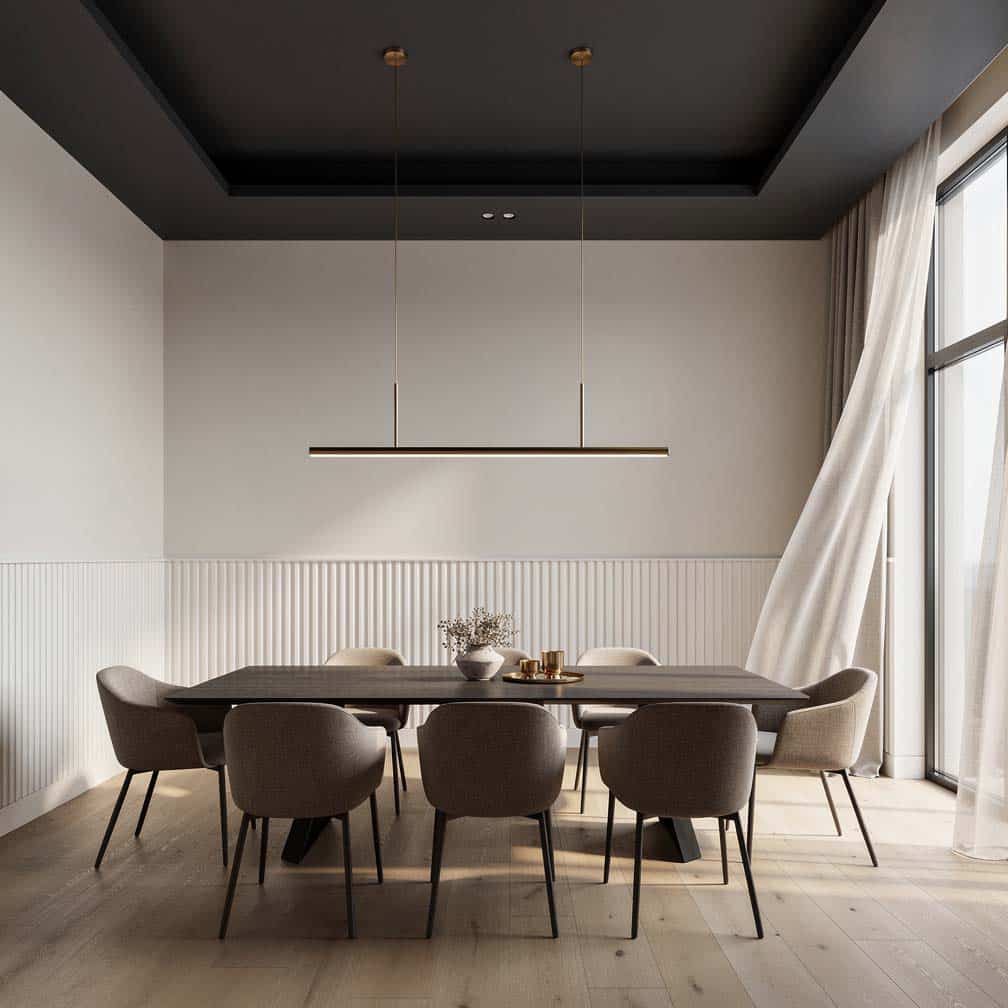
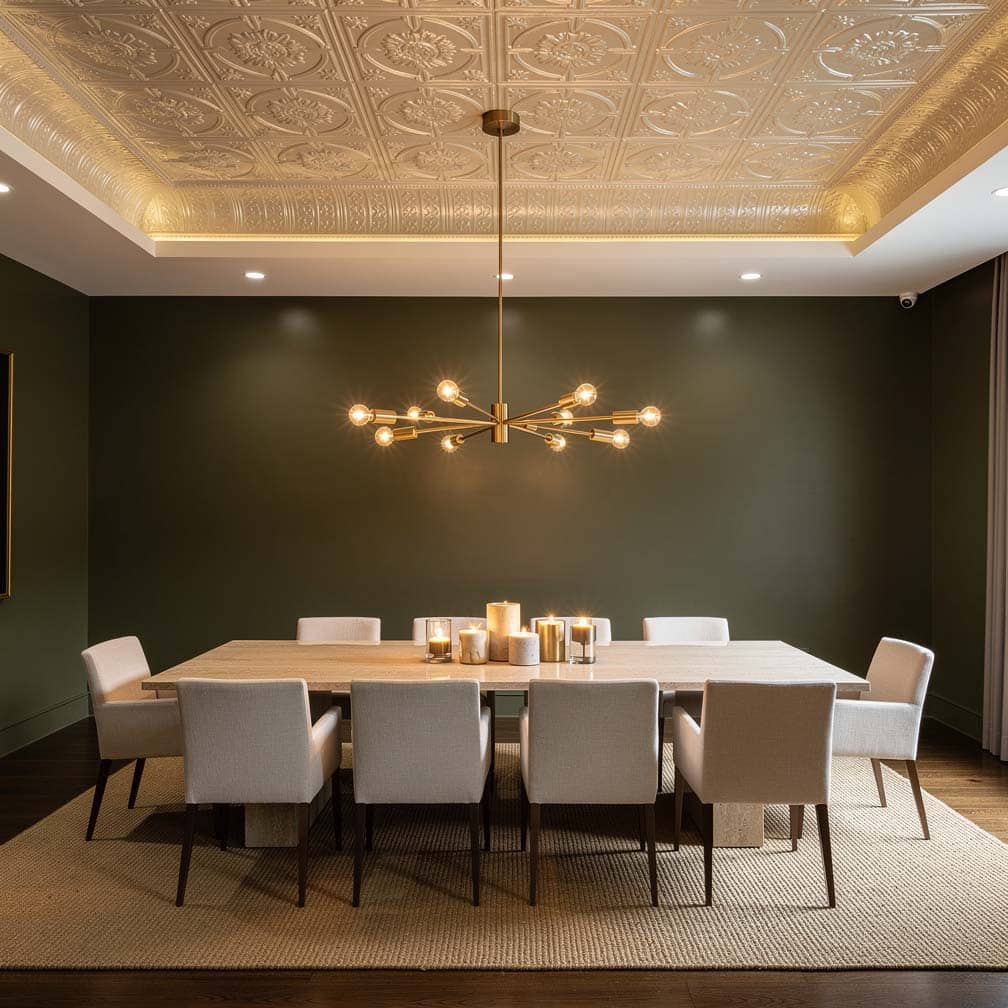
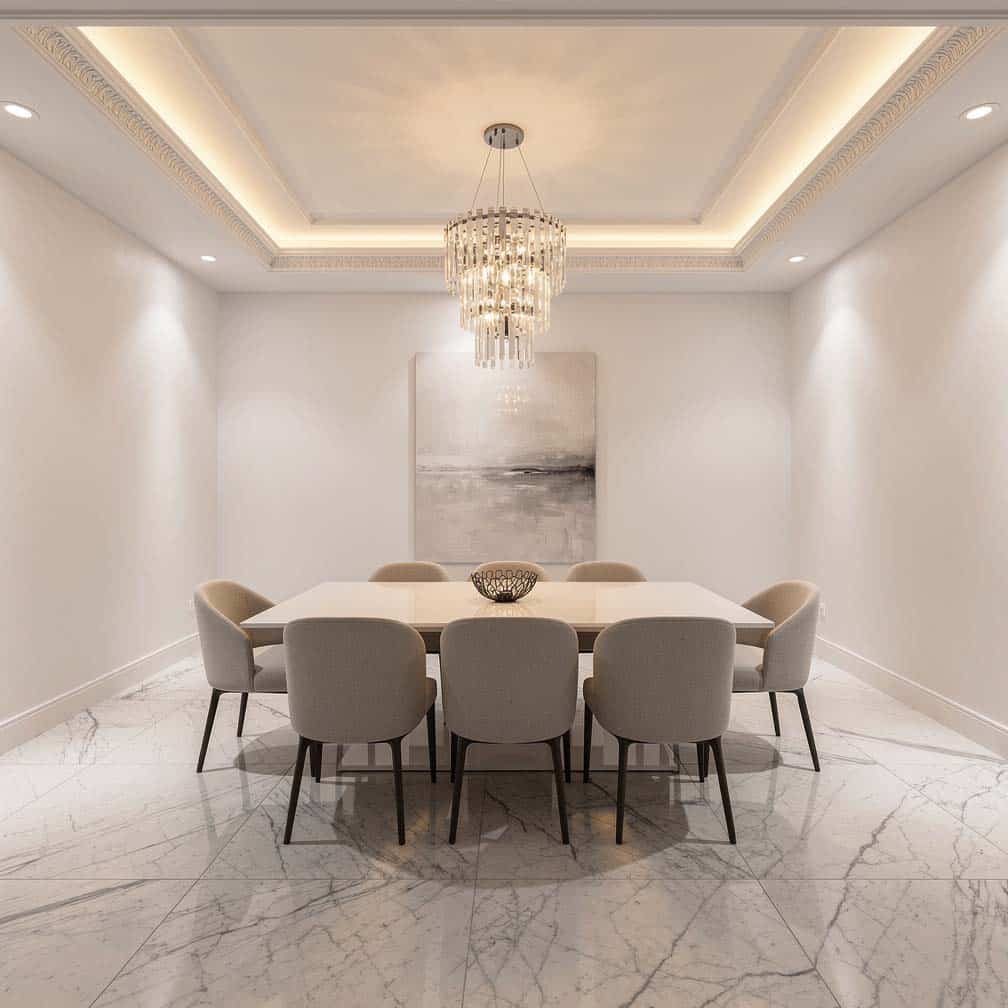
This elegant dining room utilizes darker gray paint for the ceiling than the lighter greige paint color used for the primary walls. Tall white wall paneling, large windows, multiple lamps, and a linear chandelier help to keep the space feeling light and bright.
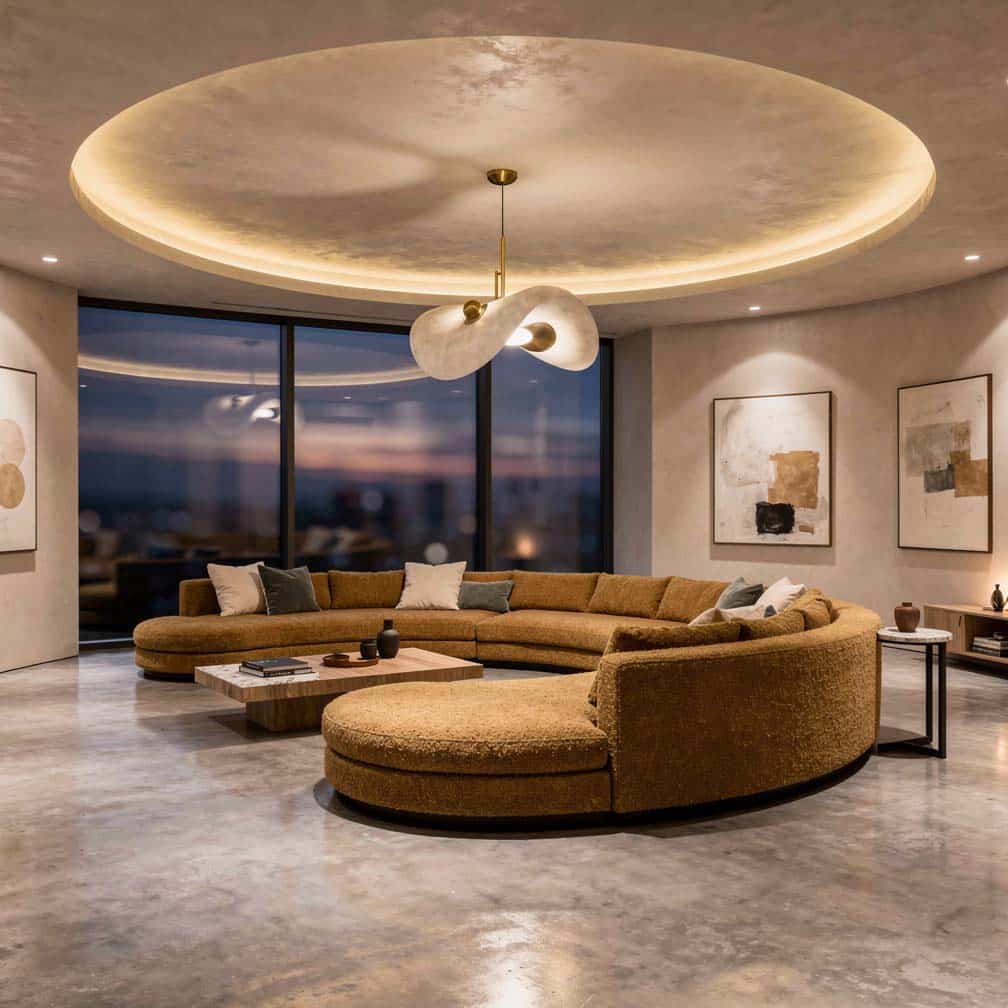
Unique circular design with rounded edges. These design ideas with unusually shaped overheads can pose challenges. This room features an extravagant tufted sectional sofa that provides the perfect vantage point for enjoying the raised overhead space.
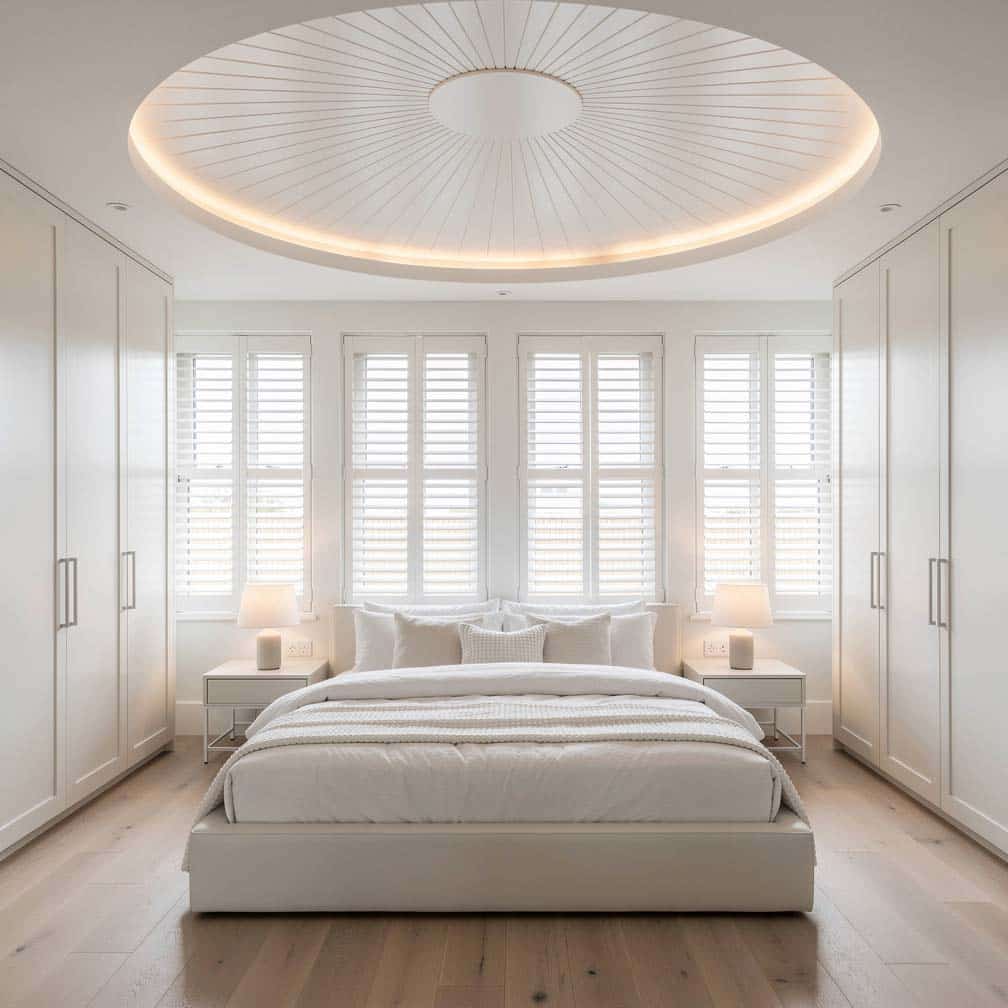
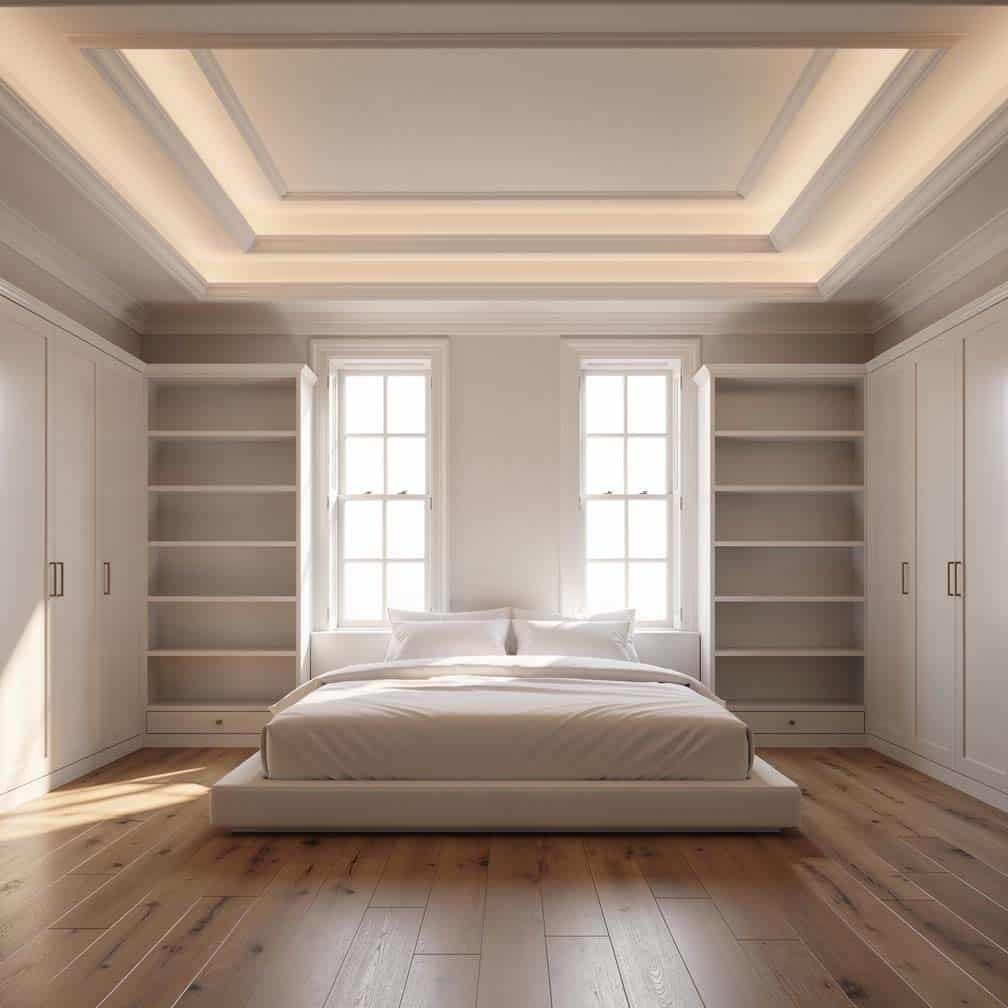
This bedroom features a circular design with a white-painted wood shiplap ceiling. This style helps create a bright and inviting space, especially when paired with white interior shutters and picture windows.
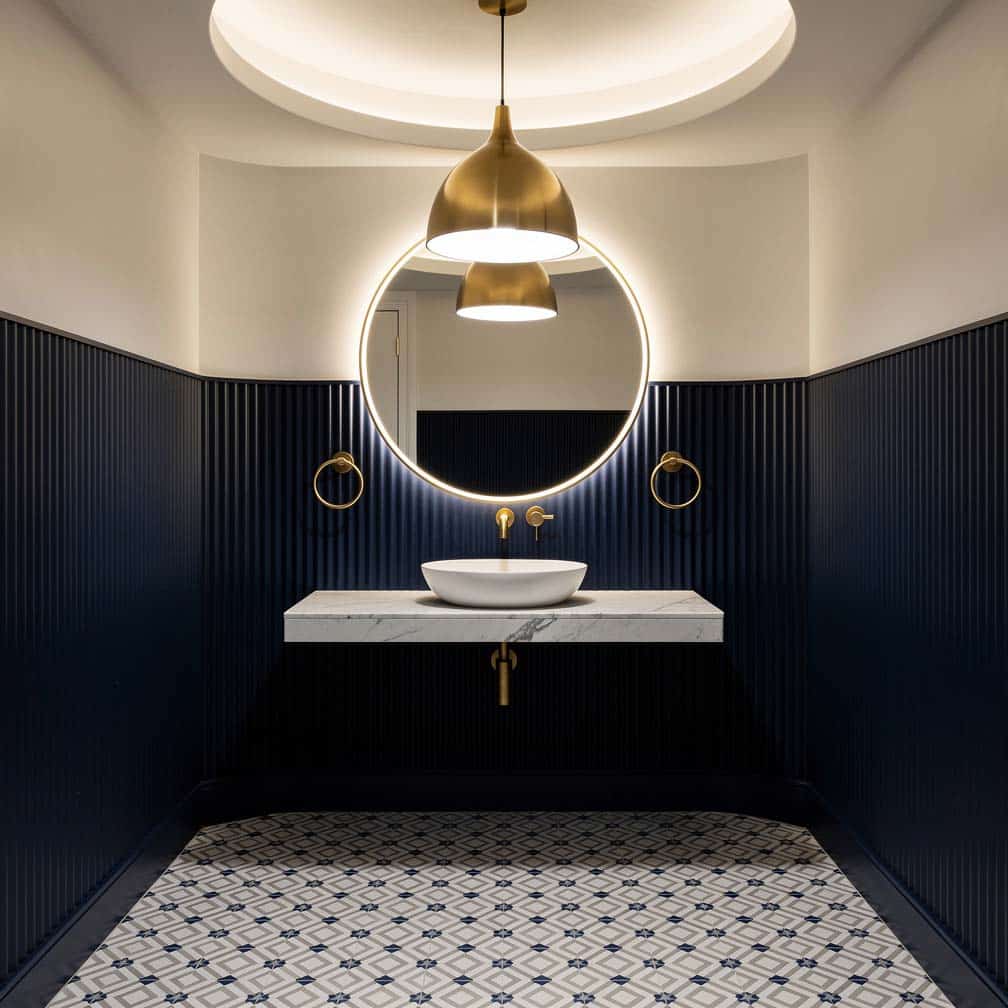
This bathroom powder room is perfectly accented with a circular feature with a large central chandelier.
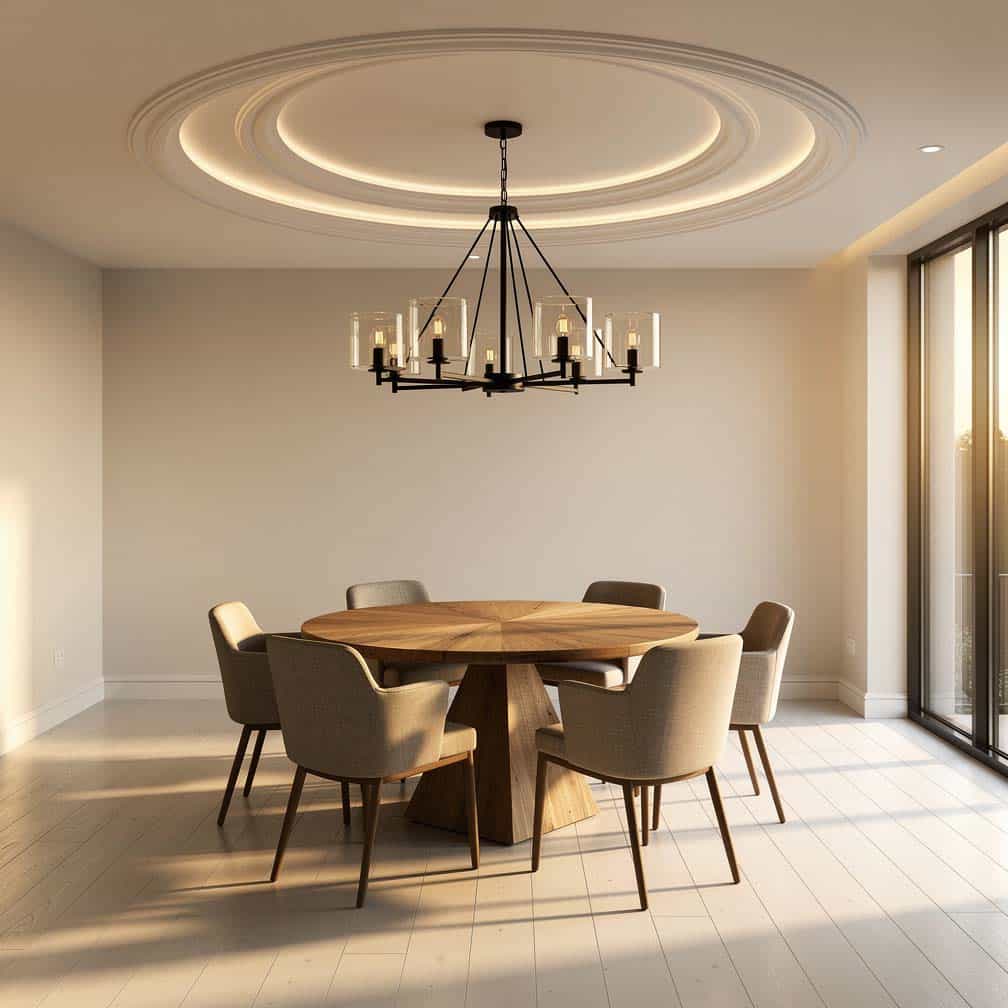
Round design with chandelier.
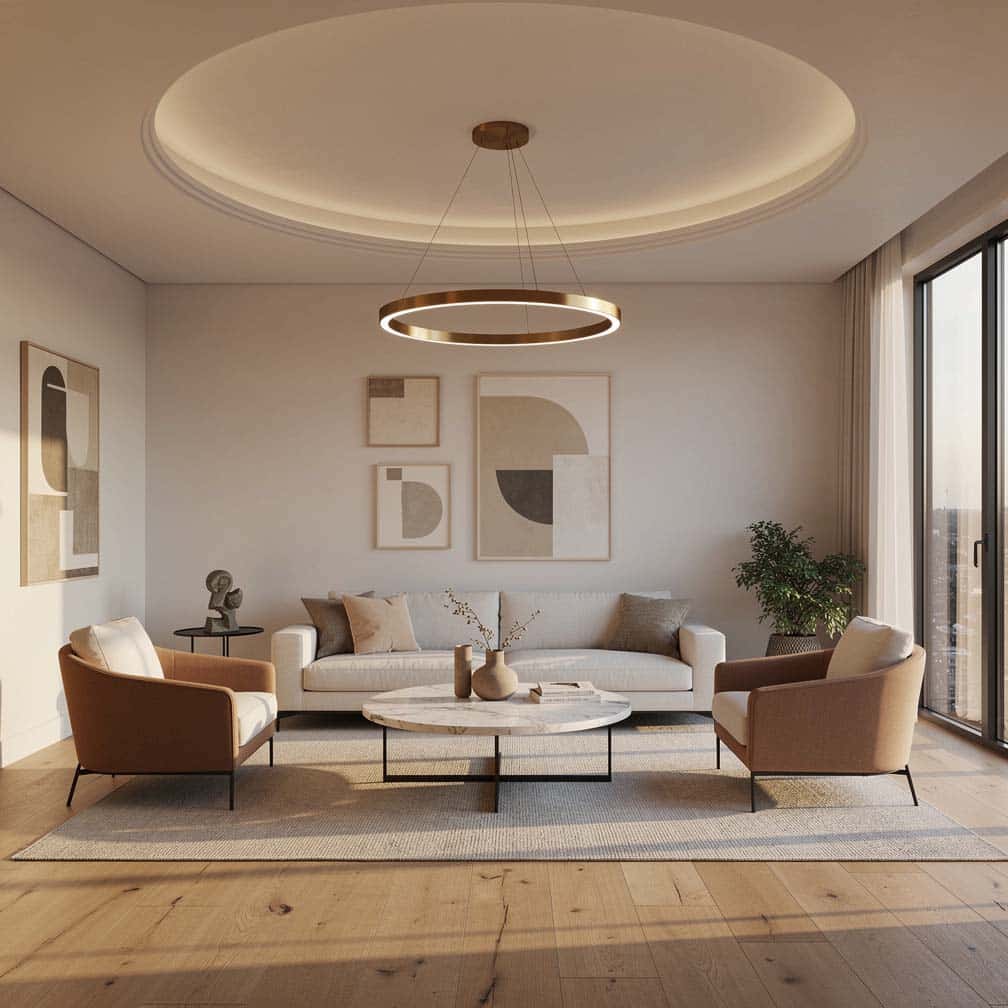
Contemporary living room with round feature with circular chandelier.
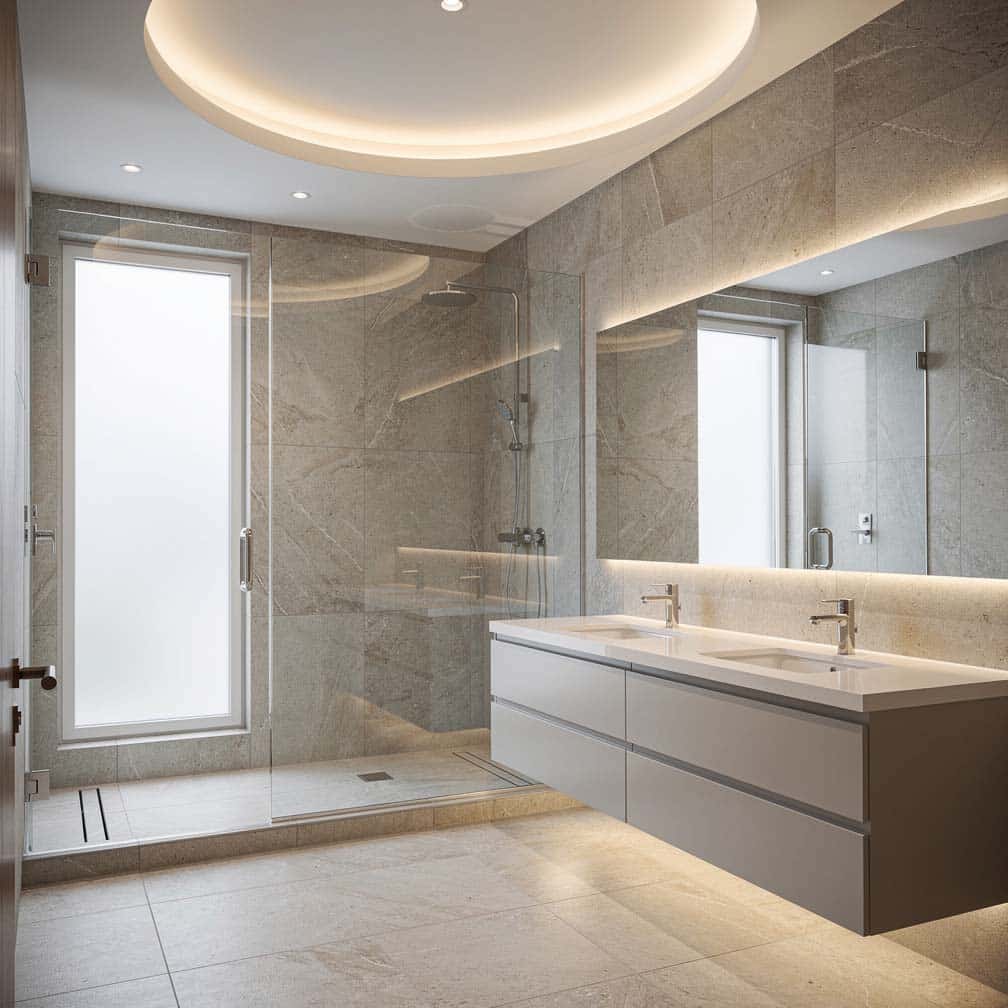
This custom bathroom design features a unique shower tray with a rounded design.
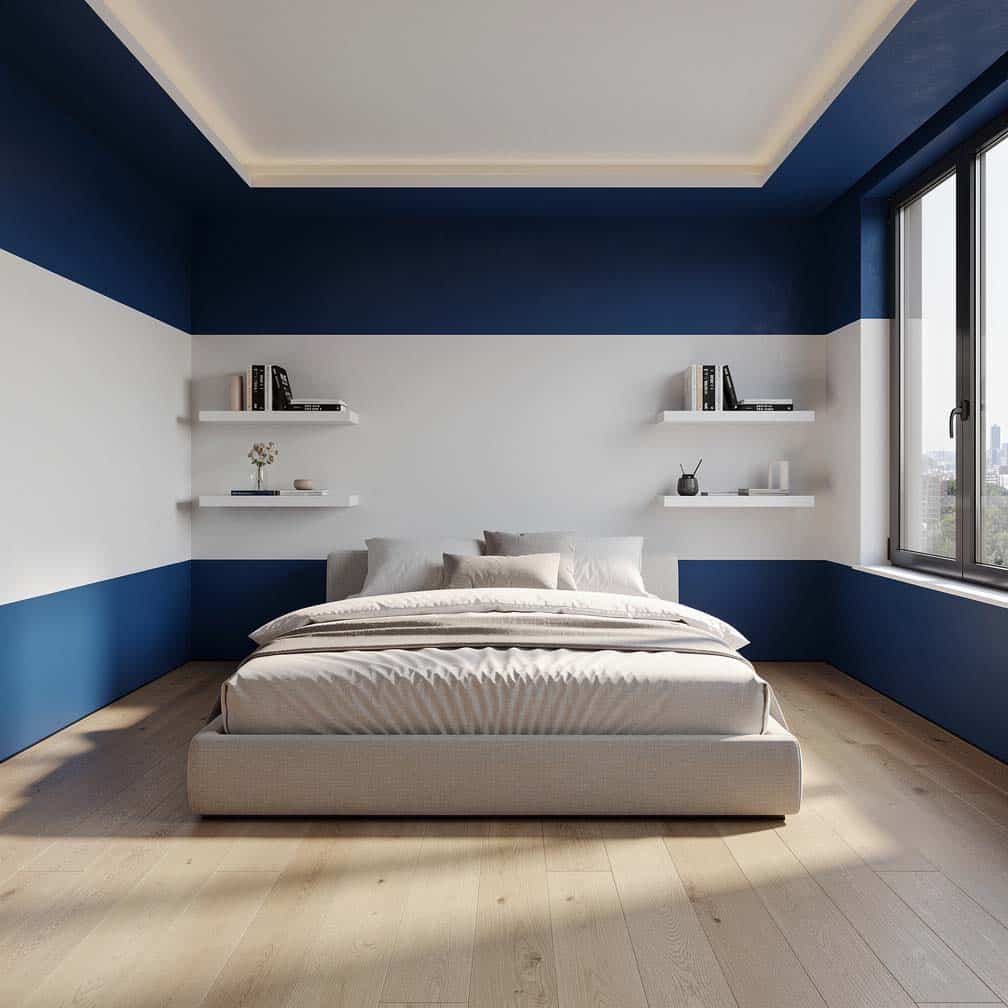
This bedroom uses blue paint to draw the eye up for added emphasis. The walls use a strip of the same color, blue for the upper and lower portions, with the remainder in white.
Coffered style with wood planks and interesting wood pillar cladding and finishes.
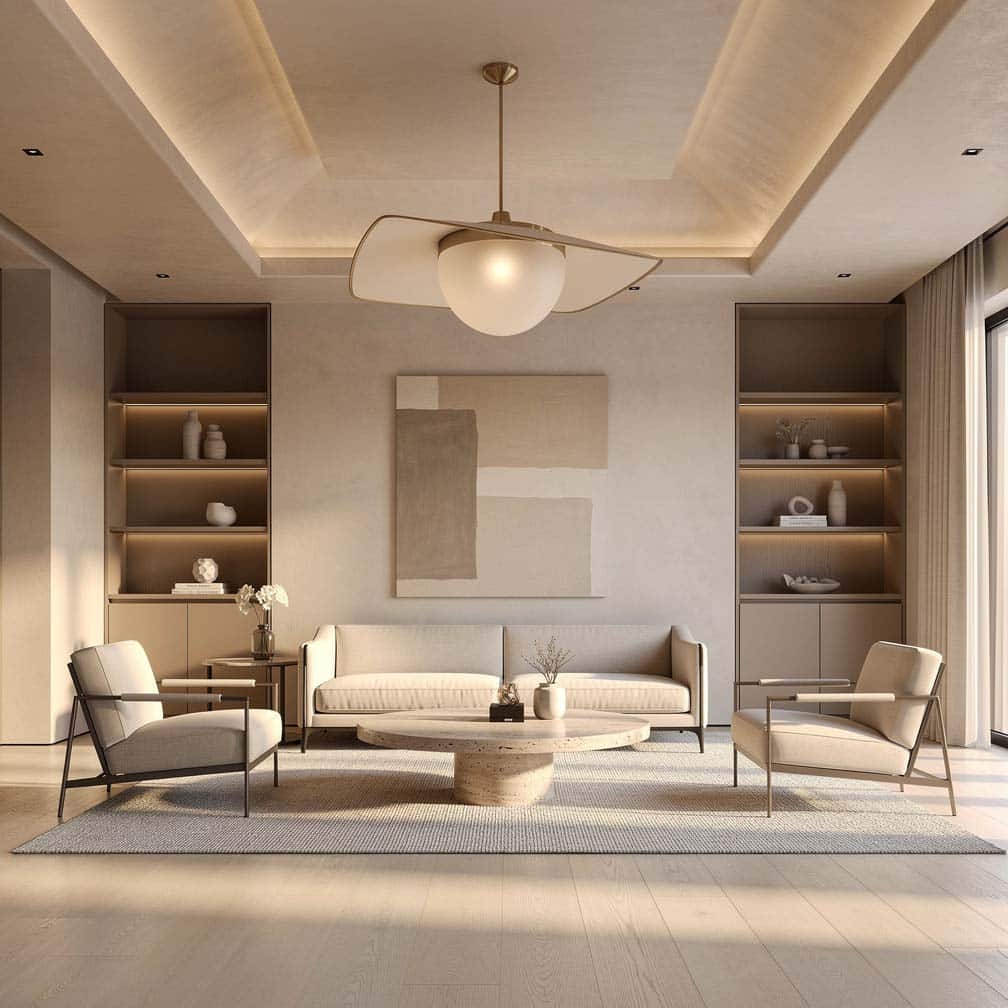
Unique custom design with living room chandelier.
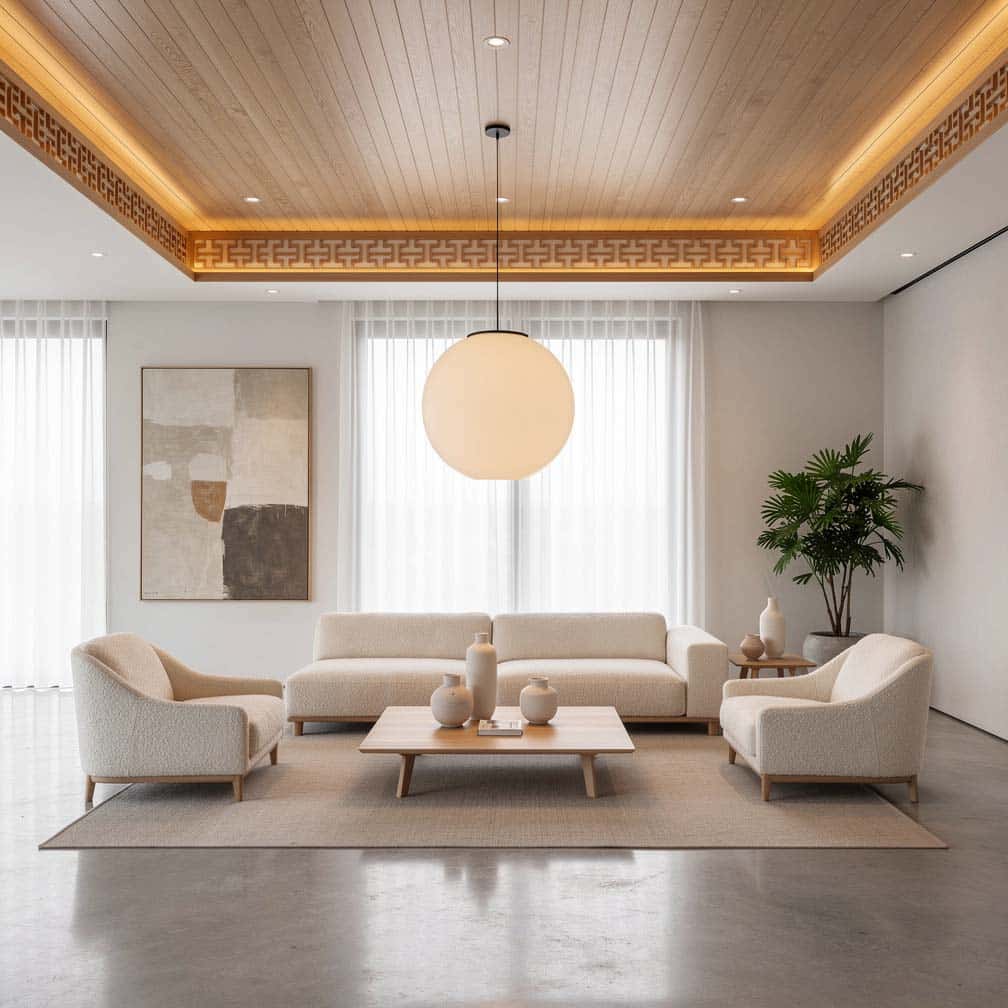
This living room offers a decorative wood style with an Asian-inspired influence.
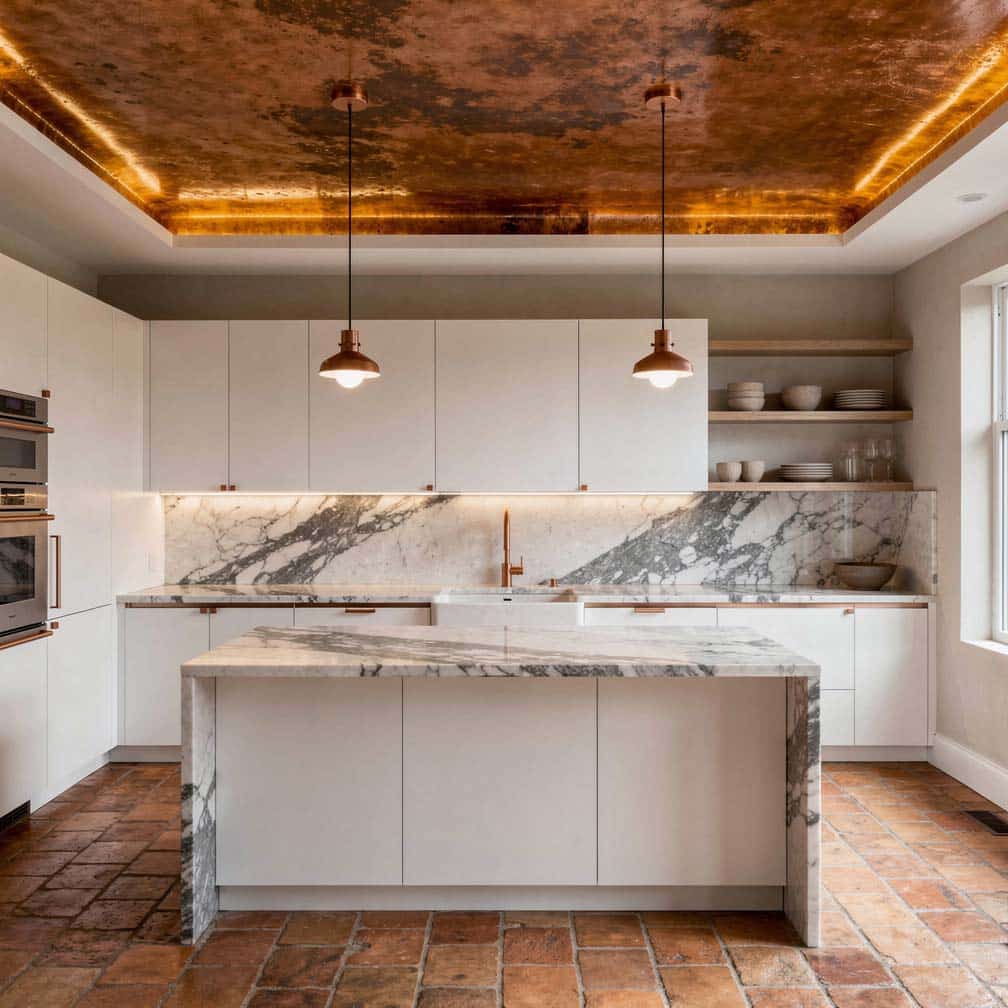
A kitchen with a beautiful copper ceiling can create an amazing focal point.
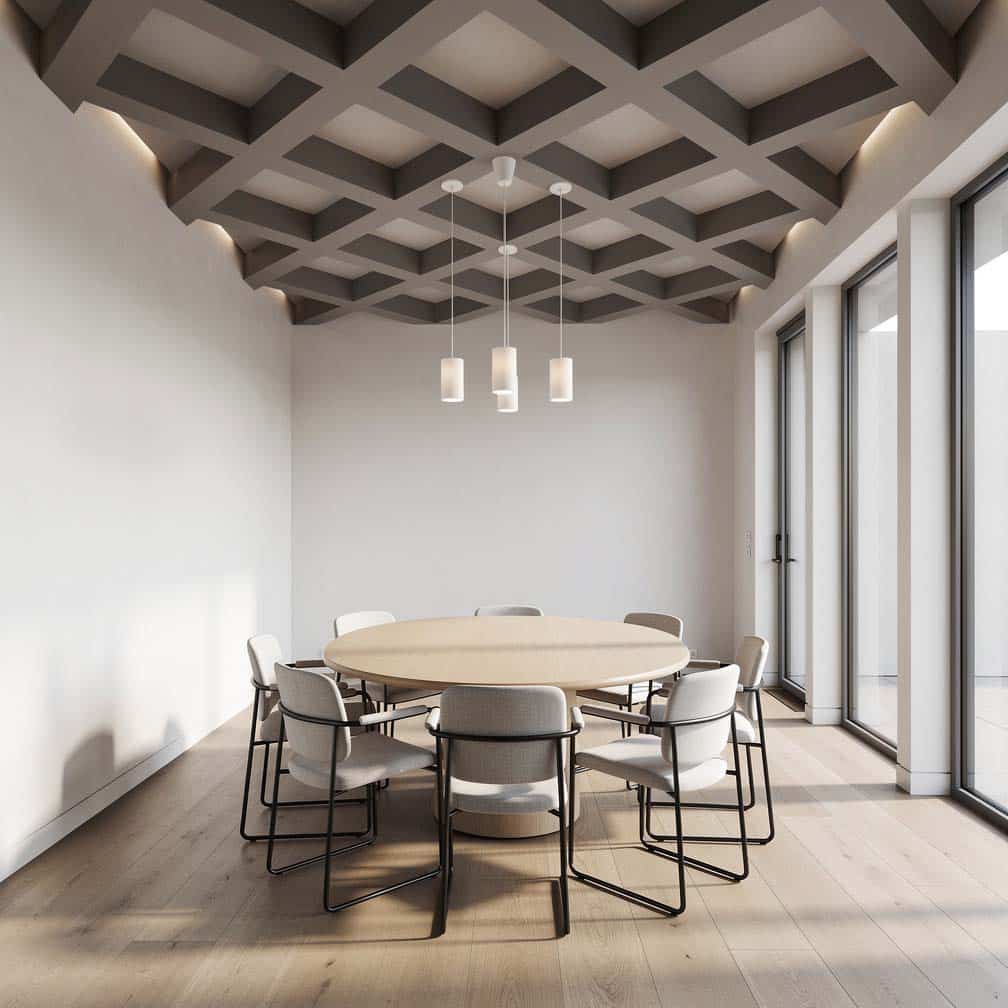
Criss-cross feature with gray paint.
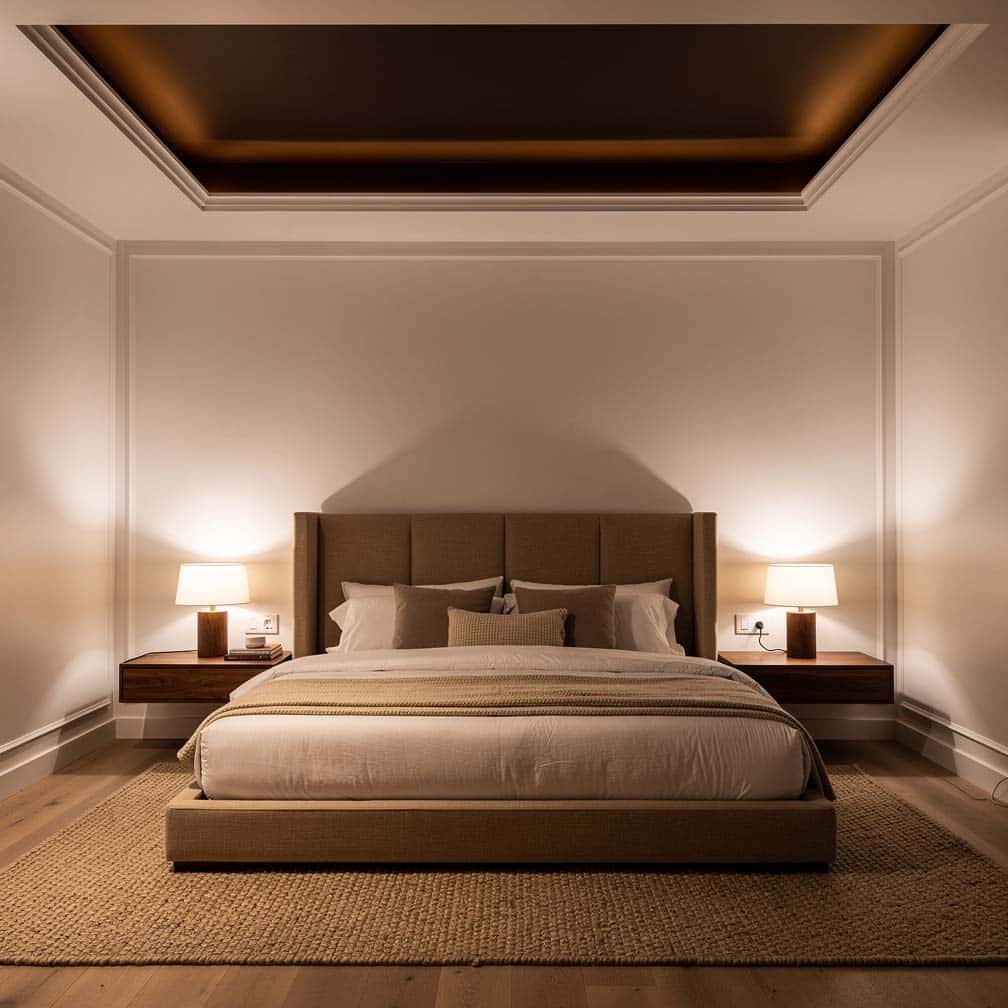
A bedroom with a dark brown painted accent above the bed.
Formal living room with a deep recess with an unusual design for the chandelier.
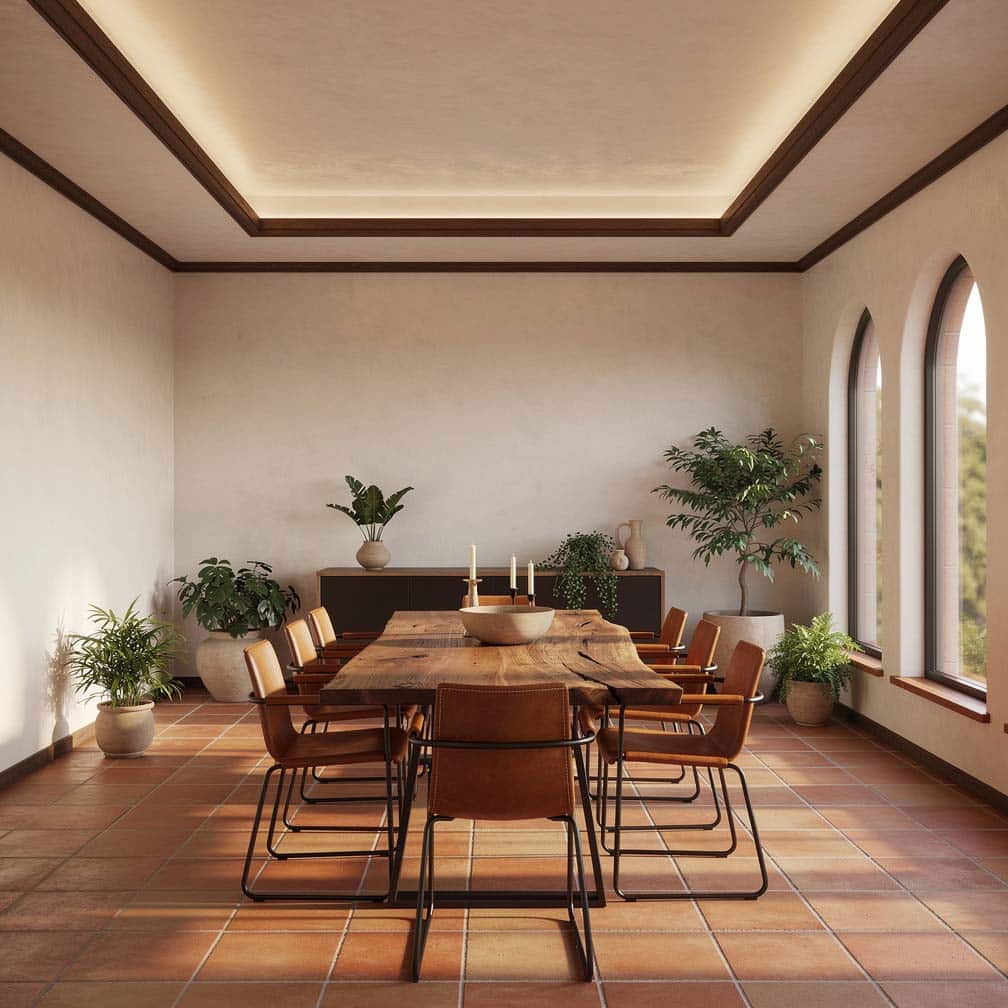
Rustic Mediterranean style dining room with deep ceiling feature with wood molding.
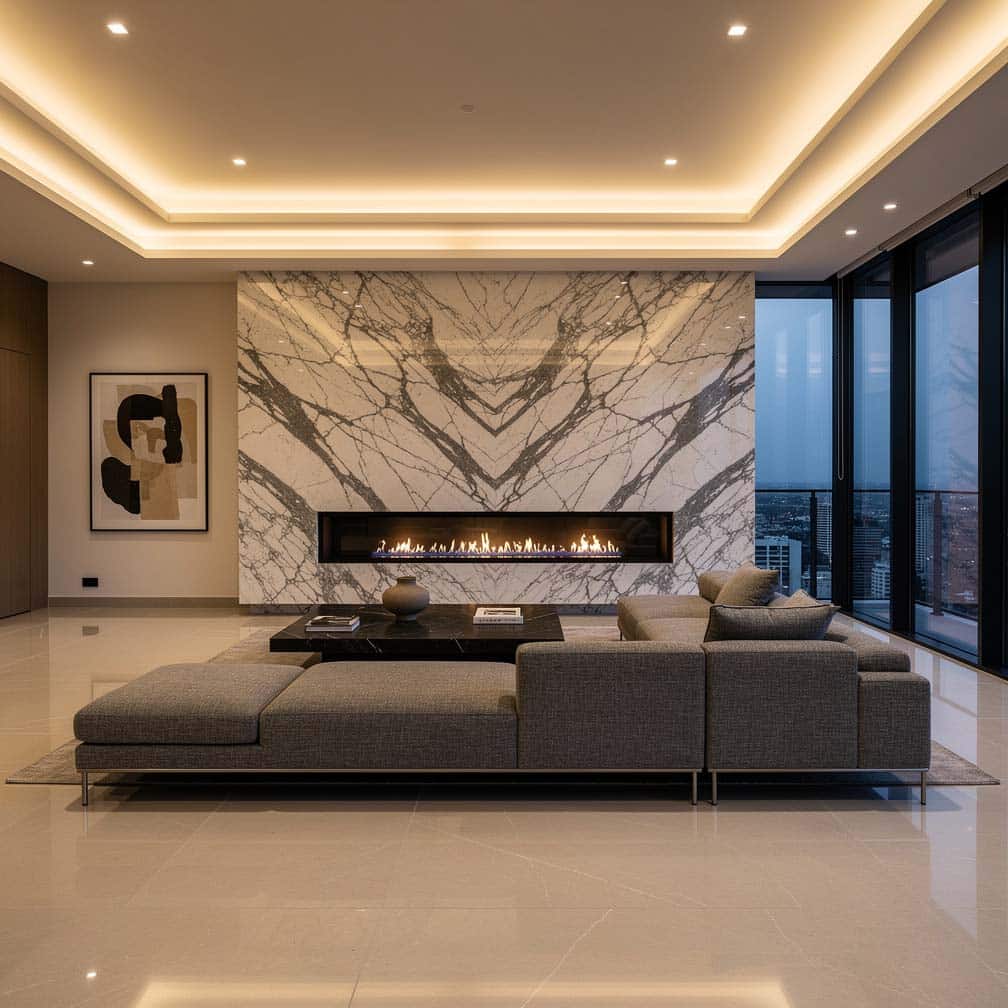
Contemporary design with illuminated double tray ceiling and quartz accent wall fireplace.
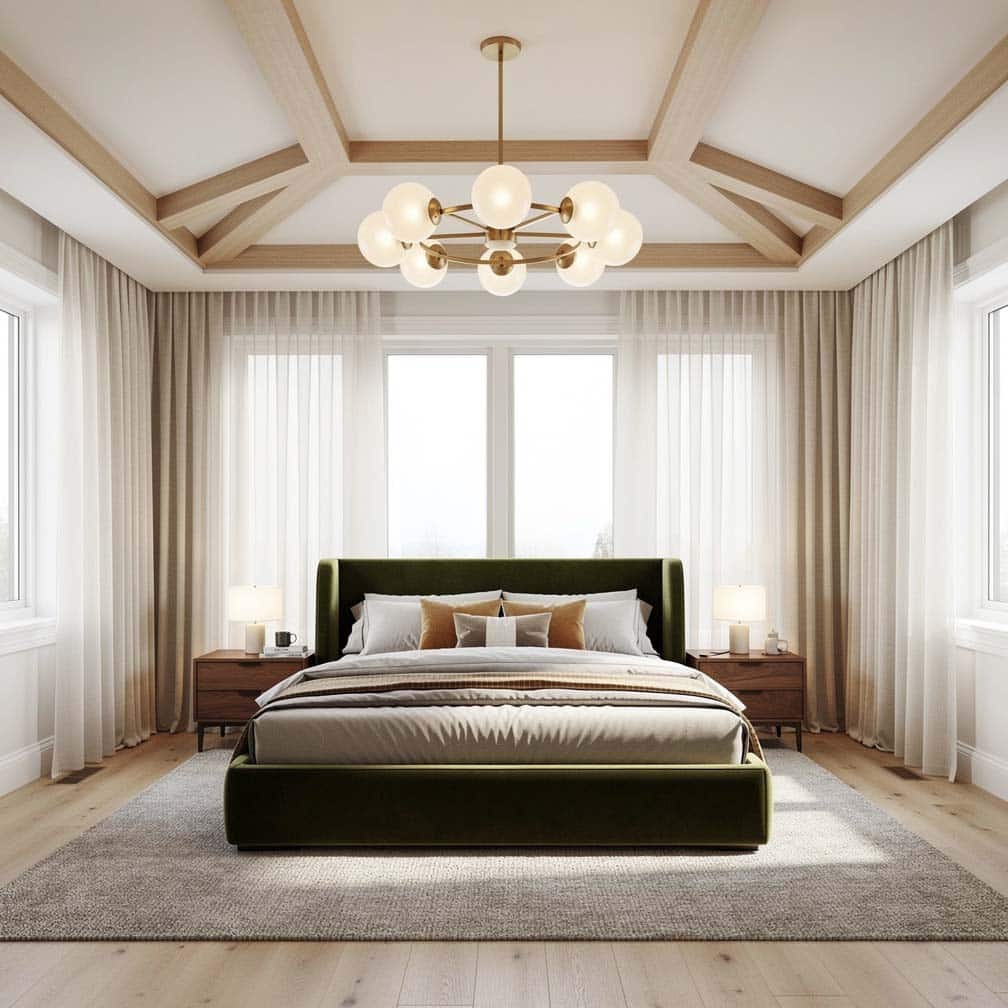
A bedroom with faux wood beams in an inverted raised area and a chandelier.
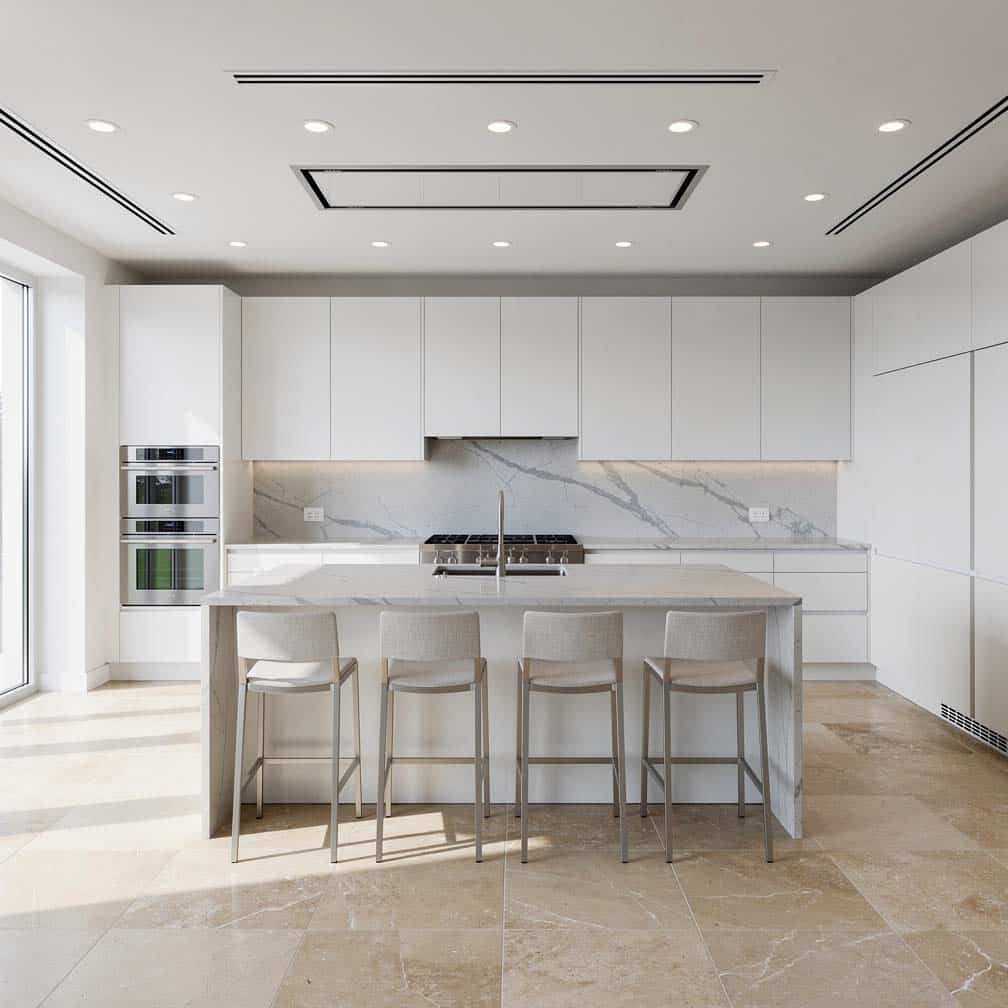
A kitchen with a tray ceiling can be used to install recessed lighting, ventilation, and an oven hood.
Geometric design in the modern living room.
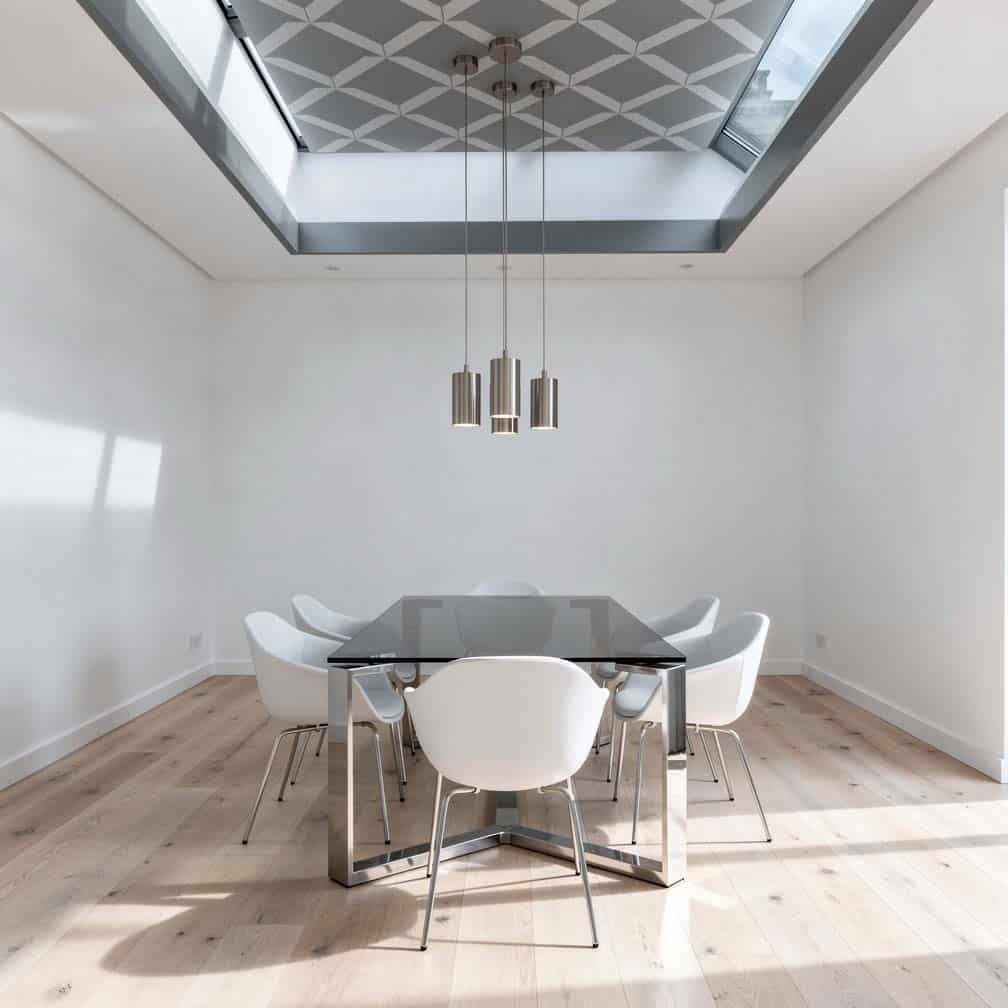
Gray and white geometric ceiling design feature.
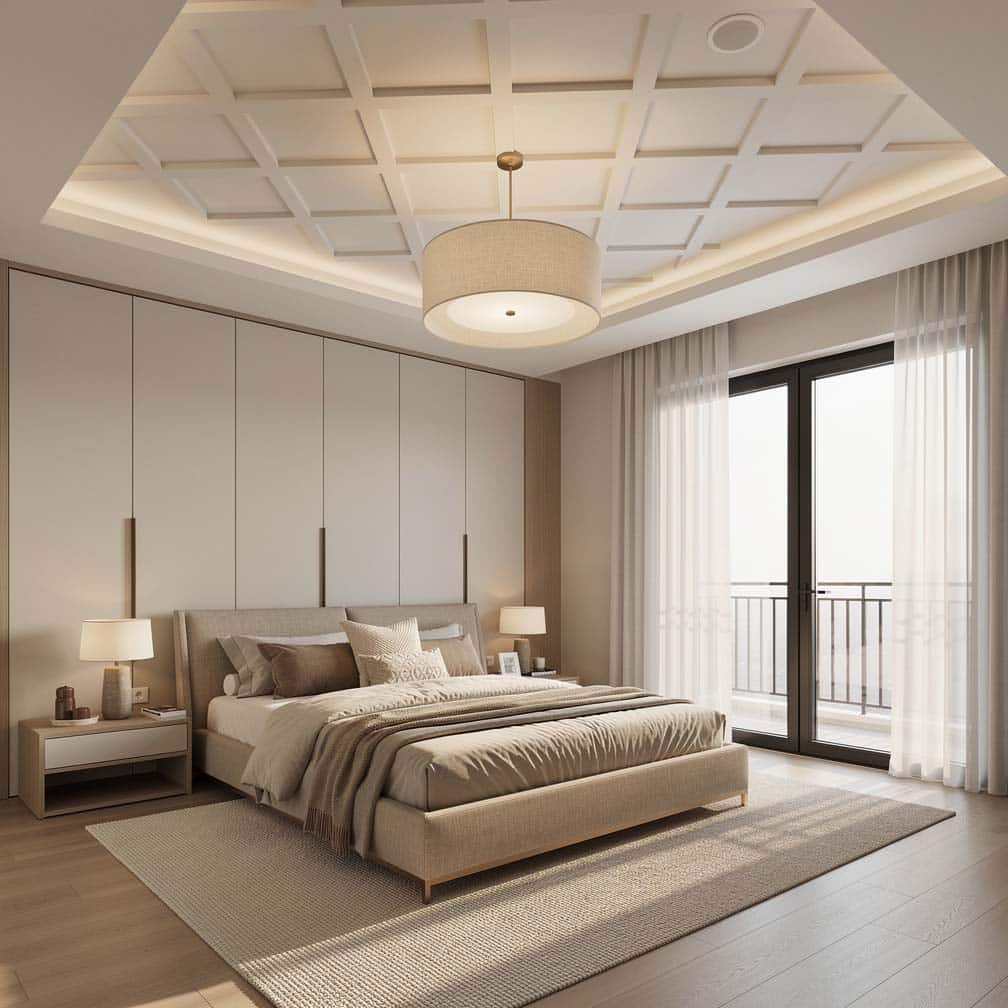
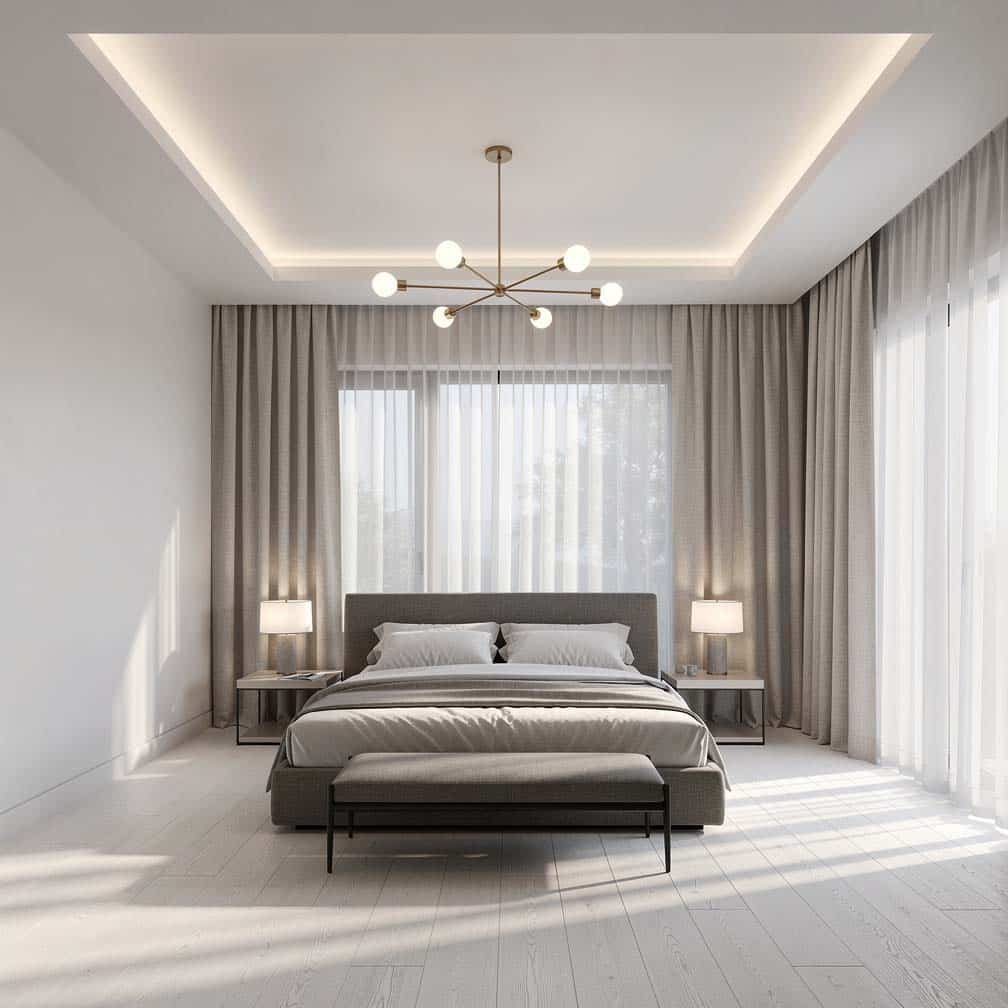
Bedroom with geometric ceiling design, drum chandelier, and French windows.
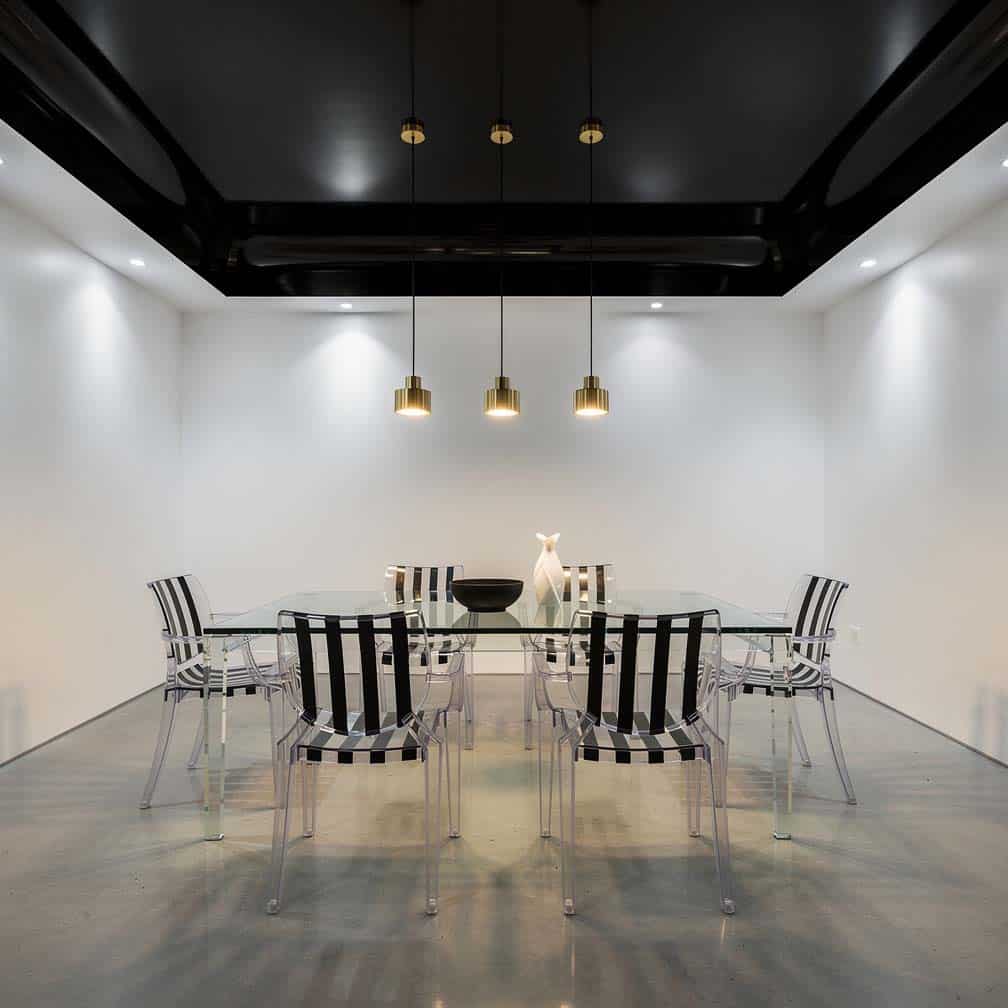
Modern dining room with a glossy black paneled feature above a glass table with striped acrylic chairs.
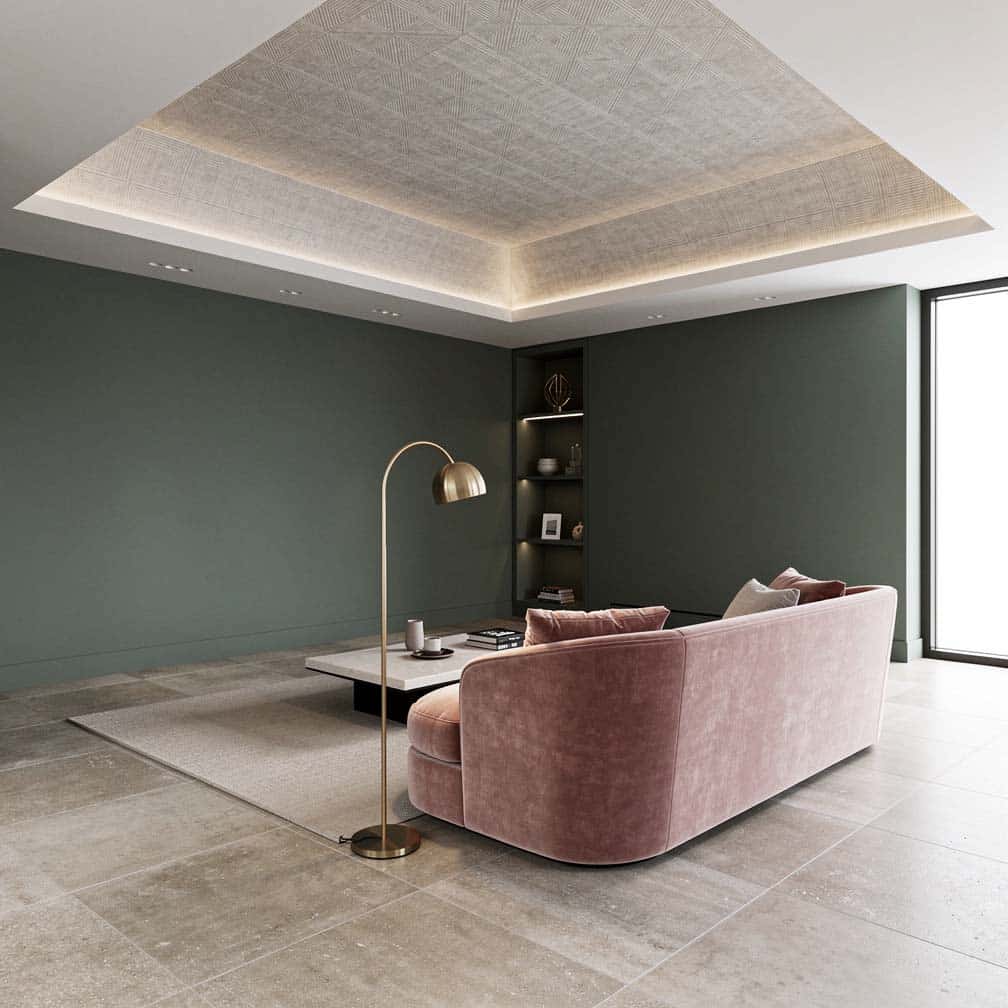
High living room walls with accent patterned overhead. These design ideas with wallpaper or texture allow one to match home decor pieces or finishes to create a cohesive look or create visual interest.
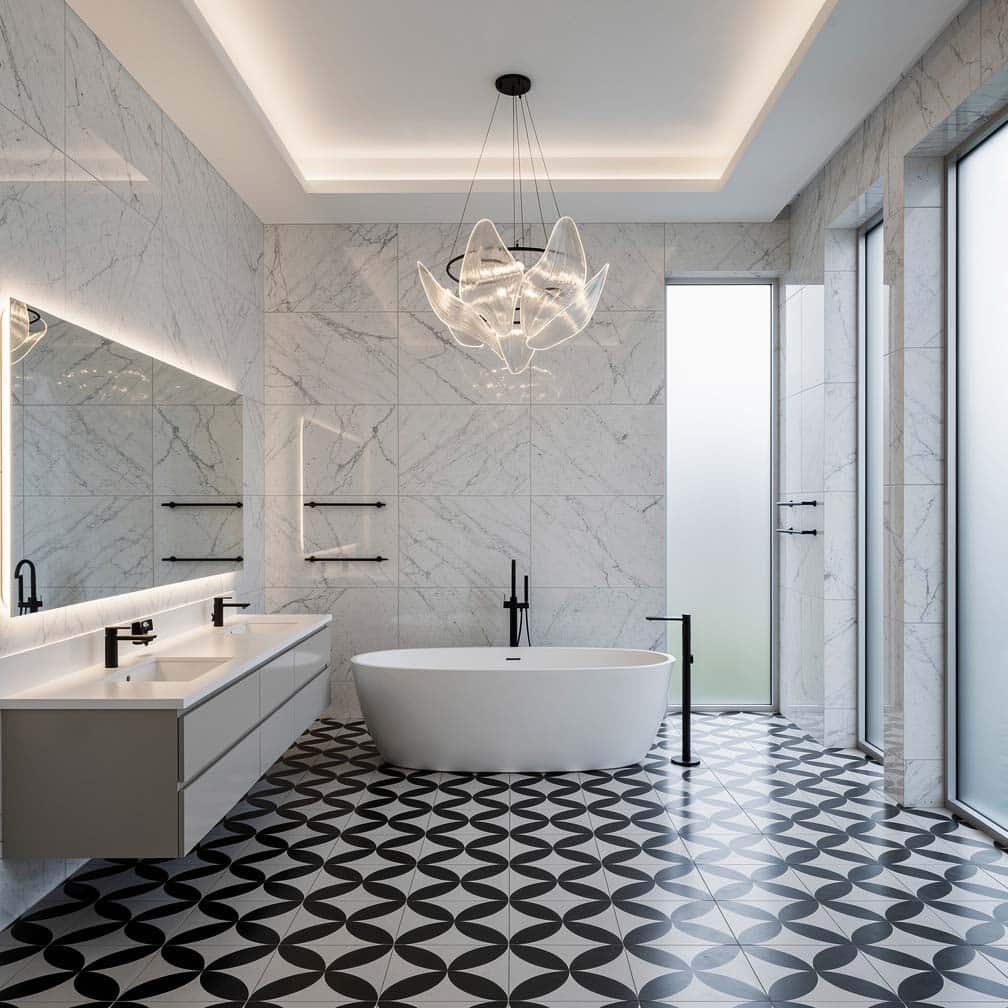
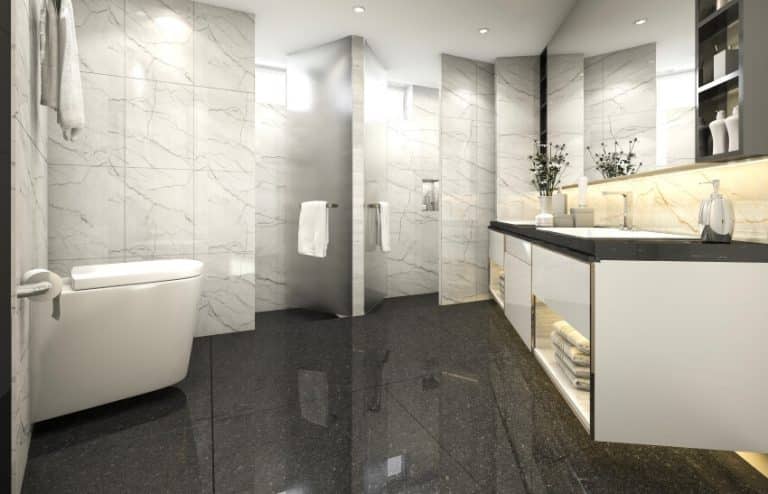
High ceiling design ideas, when used in the bathroom can make a grand impression and make the perfect center-point for a chandelier.
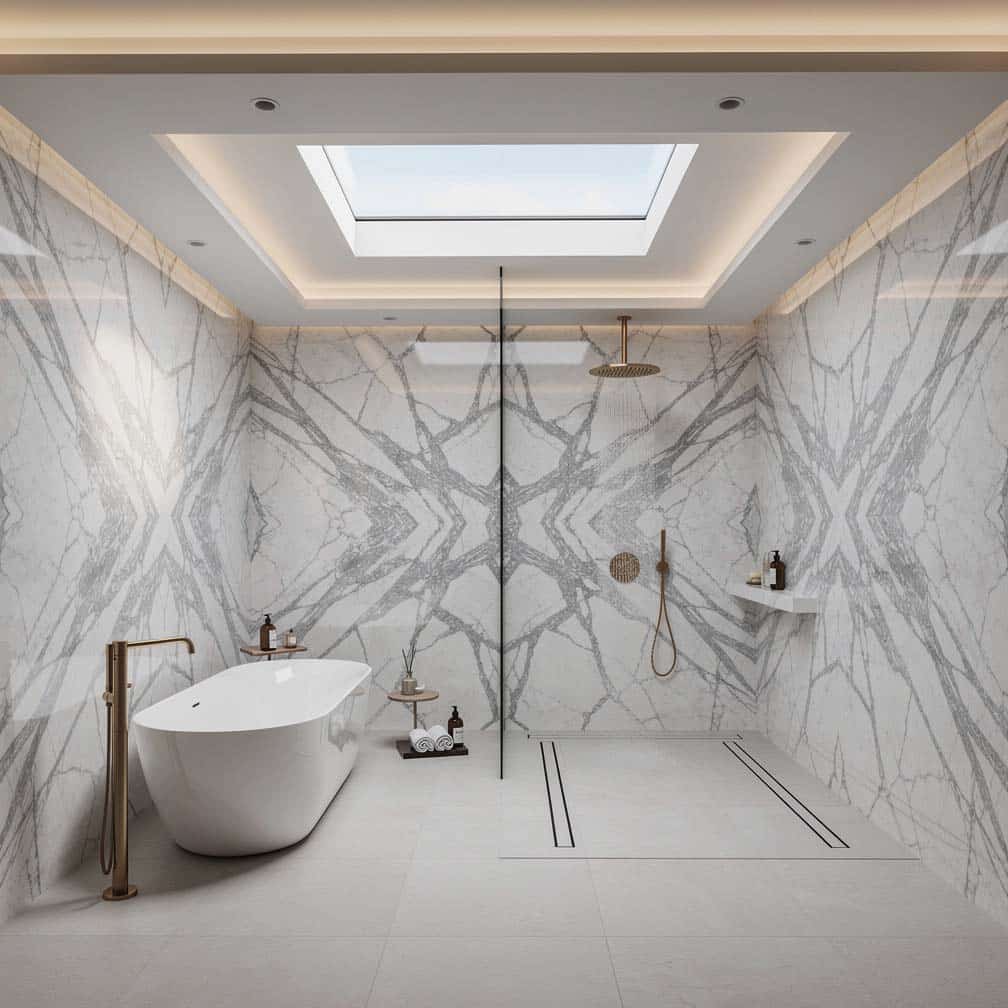
This custom bathroom uses its large border overhead to provide the backdrop for its open rainfall shower. The amazing central open shower has an overhead gold-mounted rainfall showerhead for the ultimate luxury experience.
Large painted ceiling feature in an open concept dining room.
A bedroom with long stepped recess and small chandelier.
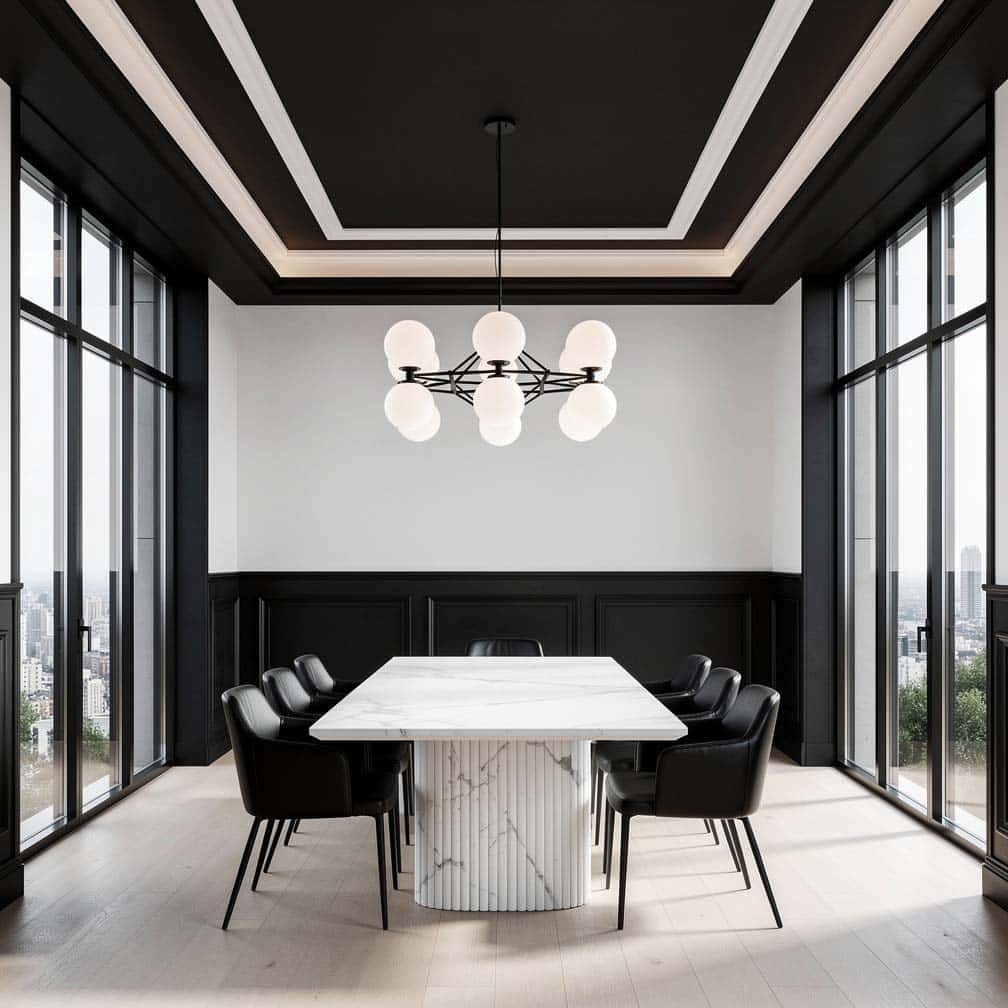
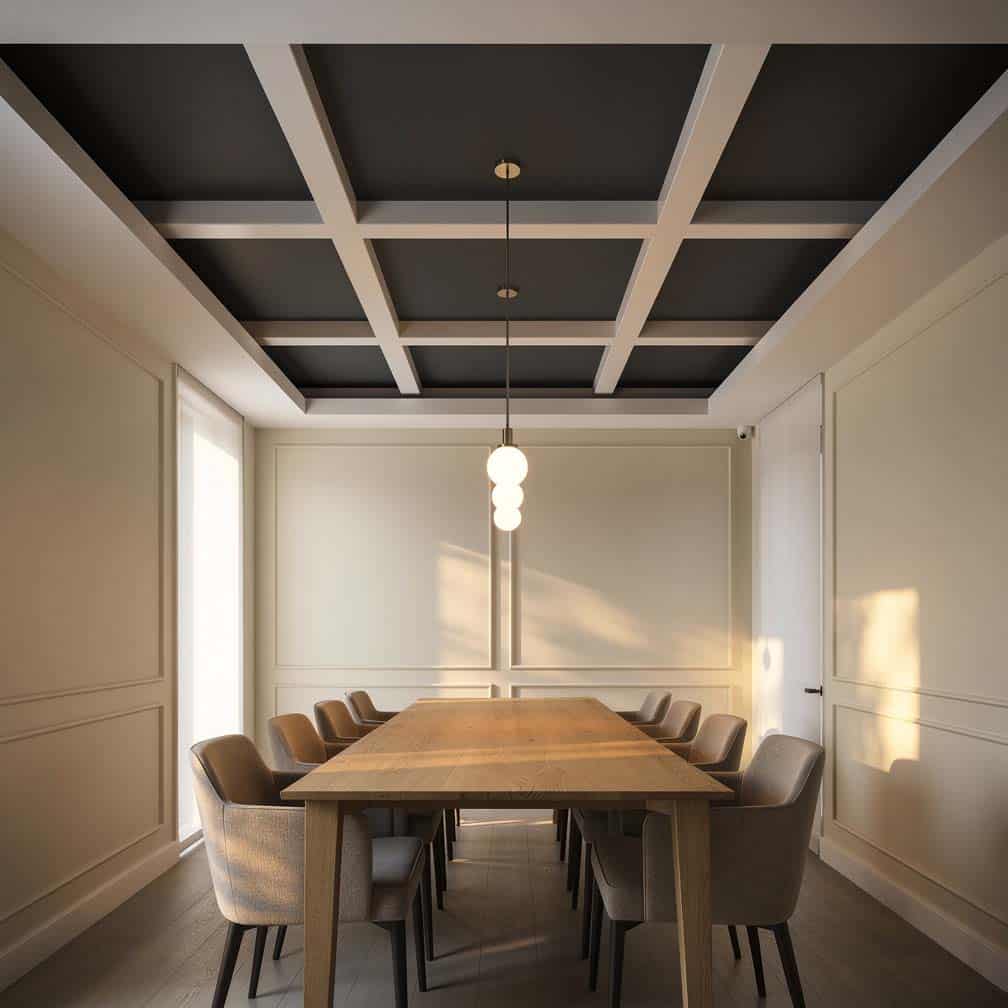
Painted black ceiling to match the lower half wall of this dining room wall with white contrasting molding.
Modern living room design with multiple overhead features with recessed lighting.
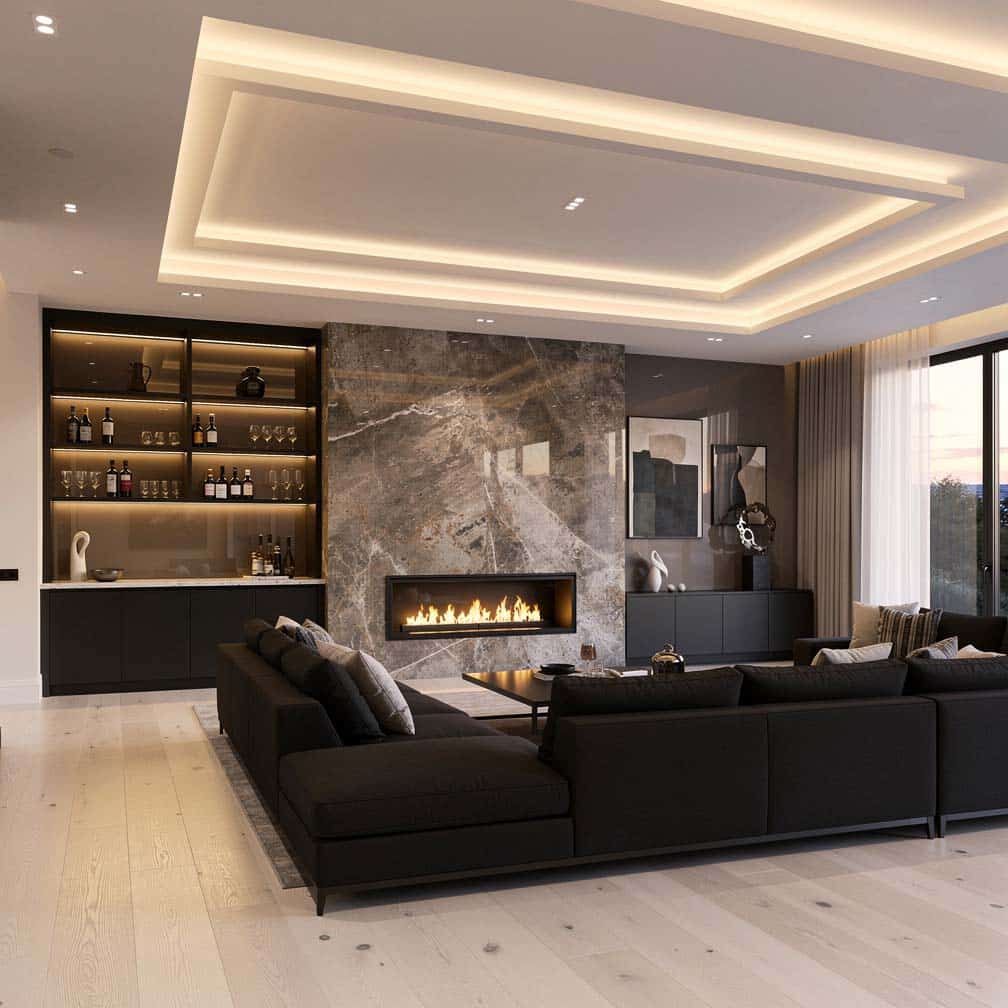
Modern living room with multiple overhead trays, stacked stone fireplace, and custom home bar design.

Dining room with painted edge design and white half-wall paneling.
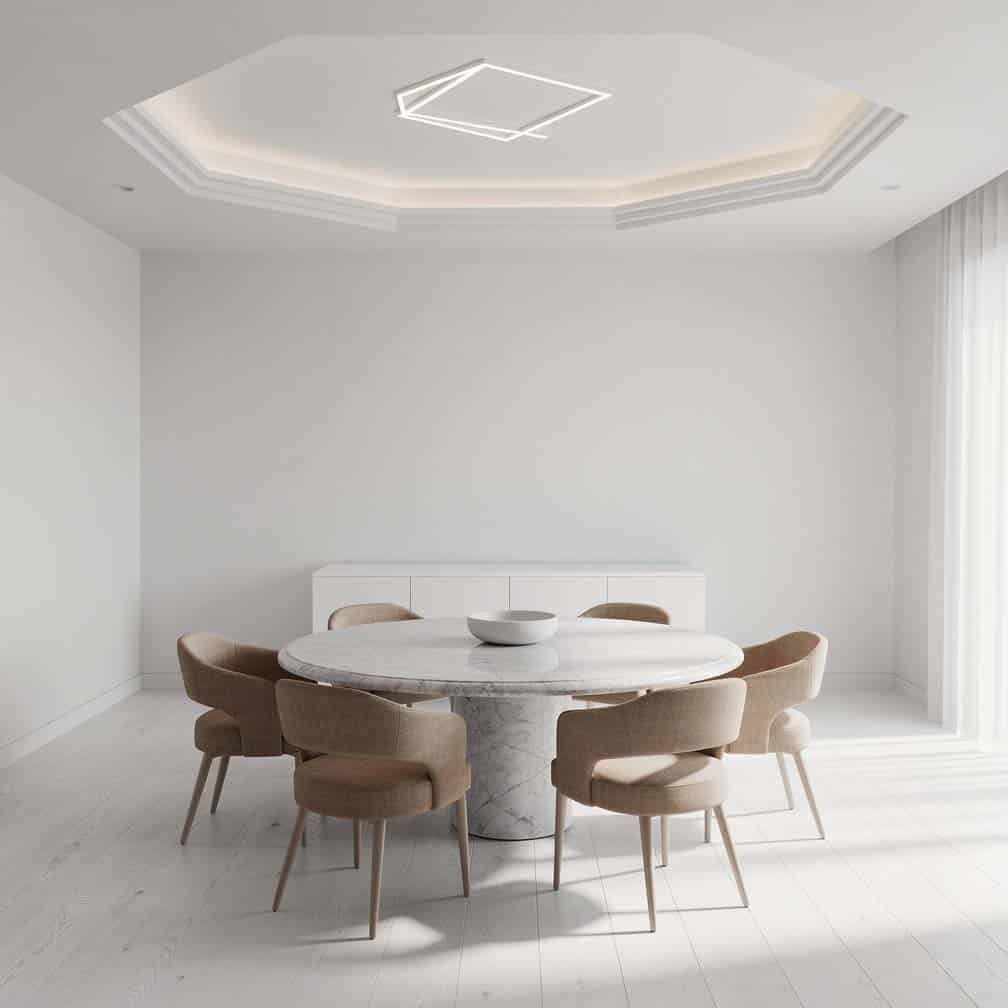
Octagonal-sided feature overhead with raised coffered style edges and light fixture.

This large open concept living room design features three recessed areas with hidden lighting.
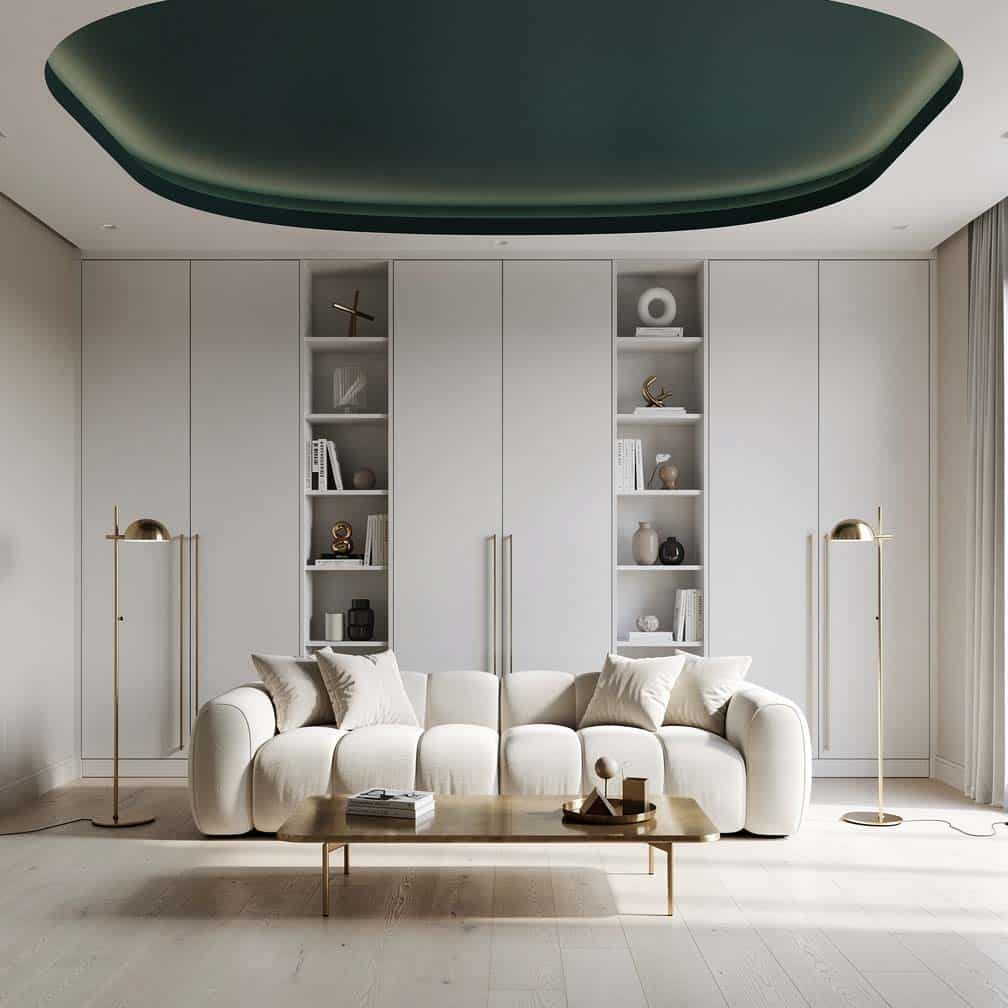
Oval design feature with aqua green living room with built-in cabinetry.
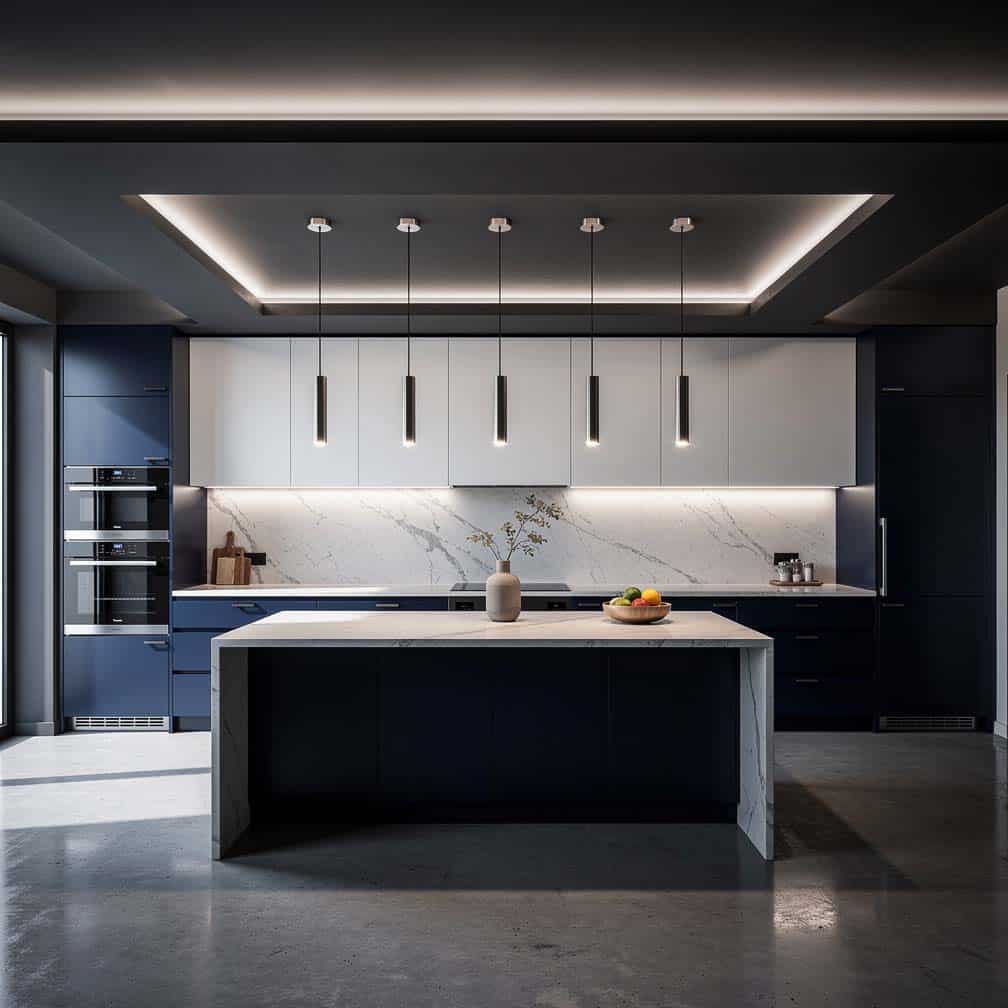
The painted rectangular overhead feature in this kitchen makes a big statement by using hidden neon lighting to provide drama to the space. The gray paint helps the area pop and gives it a unique style.
Tin ceiling and large chandelier.
Reverse ceiling with coffered style.
Dining room with reverse ceiling and recessed lighting.
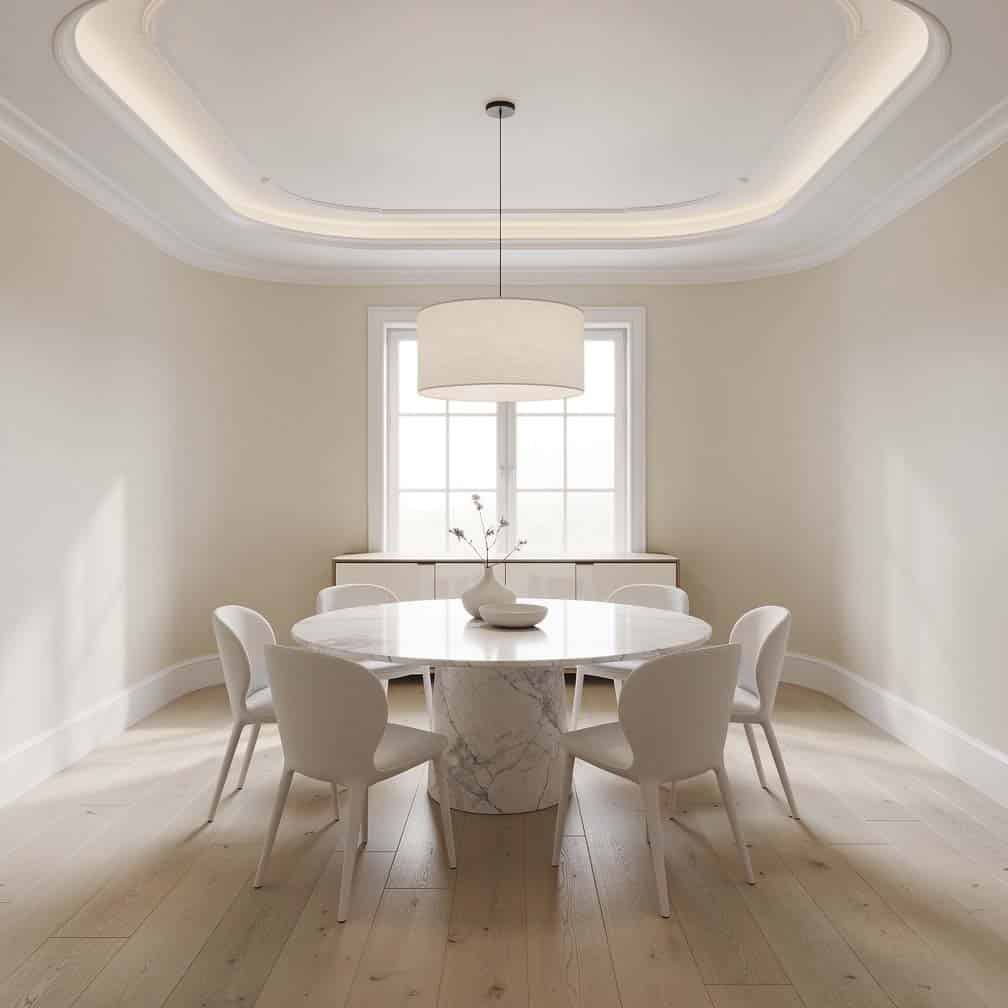
Rounded corner overhead design with white molding.
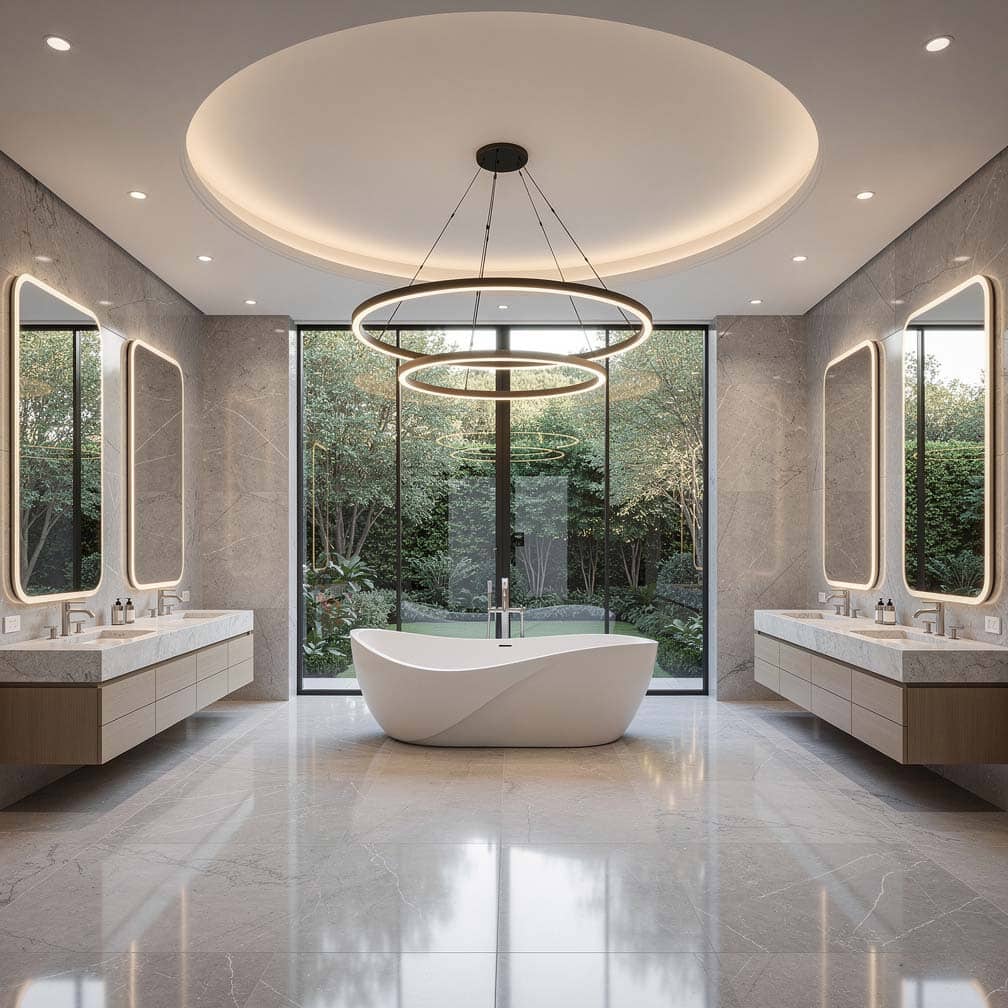
This roomy luxurious master bathroom offers a round tray ceiling with hidden lighting. Round overhead areas can use fixtures such as regular or drum chandeliers, tiered candle-style, and circular fixtures with great results.
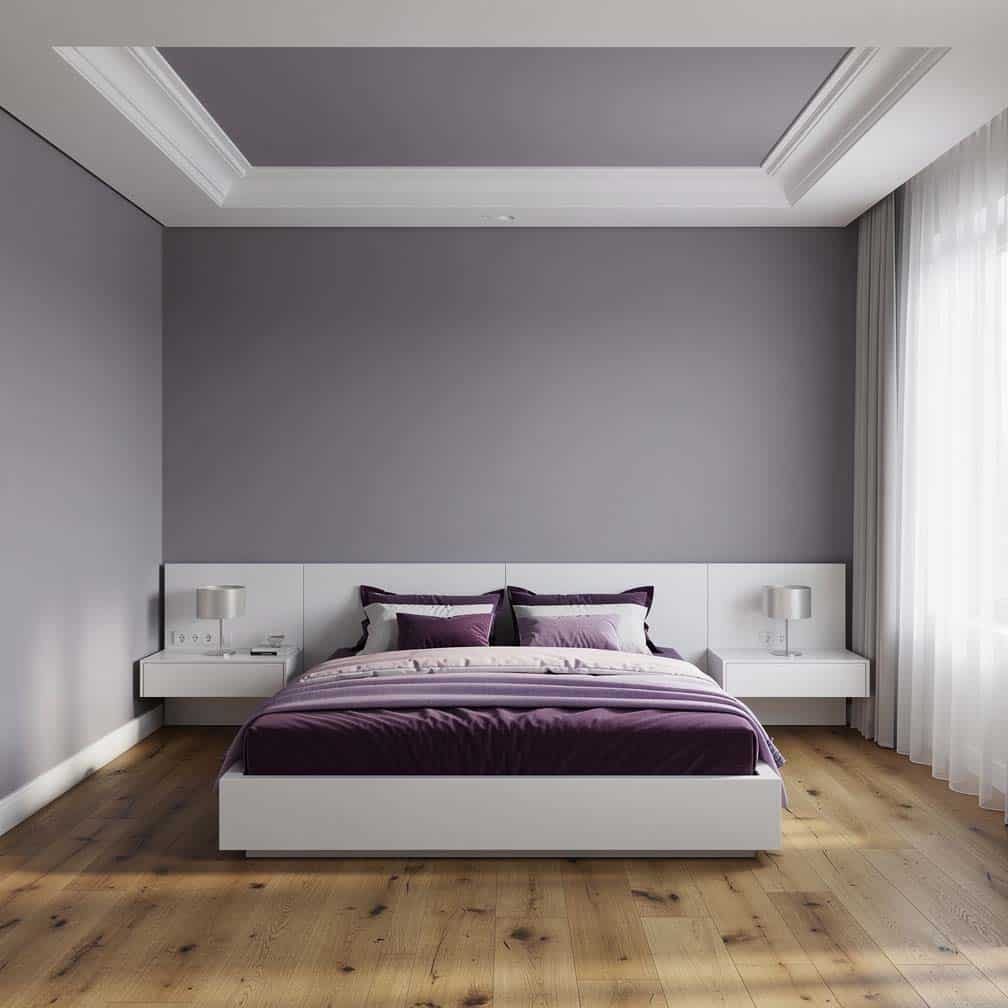
A bedroom with a shallow tray ceiling and purple-painted walls with white molding and furniture.
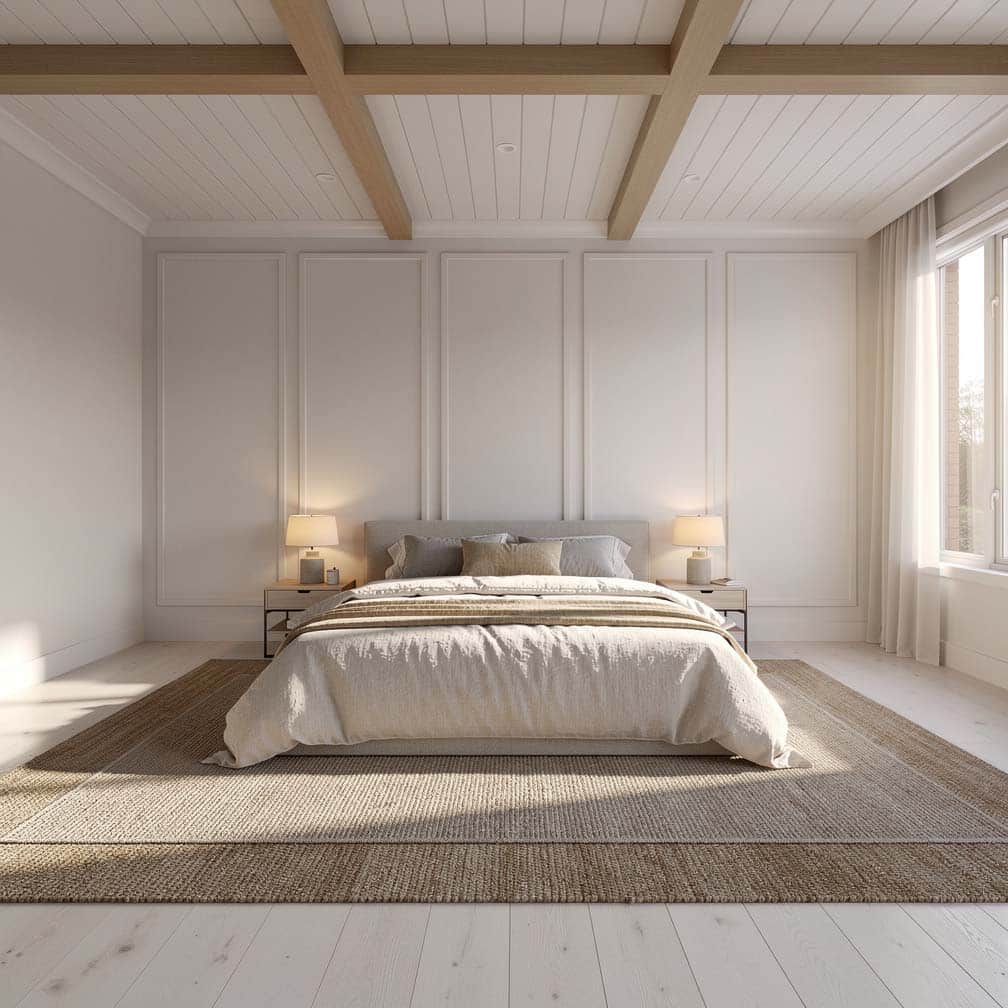
Bedroom with shiplap with wood beams overhead, raised wall paneling, and hand scraped hardwood flooring.

Small round ceiling feature with pendant lights.
Beautiful master bedroom with painted stepped geometric overhead features and white wainscoting design.
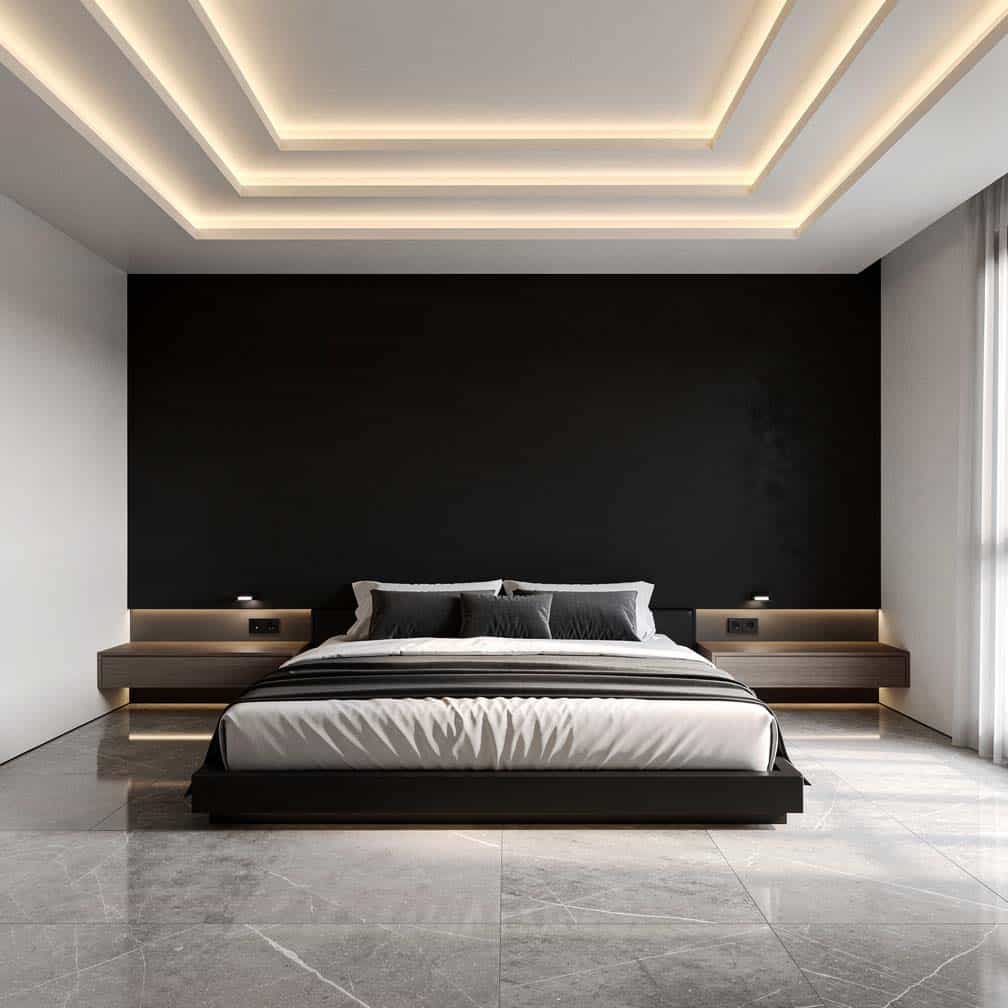
Bedroom with black accent wall and tiered ceiling.
This bedroom uses plenty of large crown molding to decorate its tiered plafond painted in white.
Tray ceiling with decorative tin trim and molding and crystal chandelier.
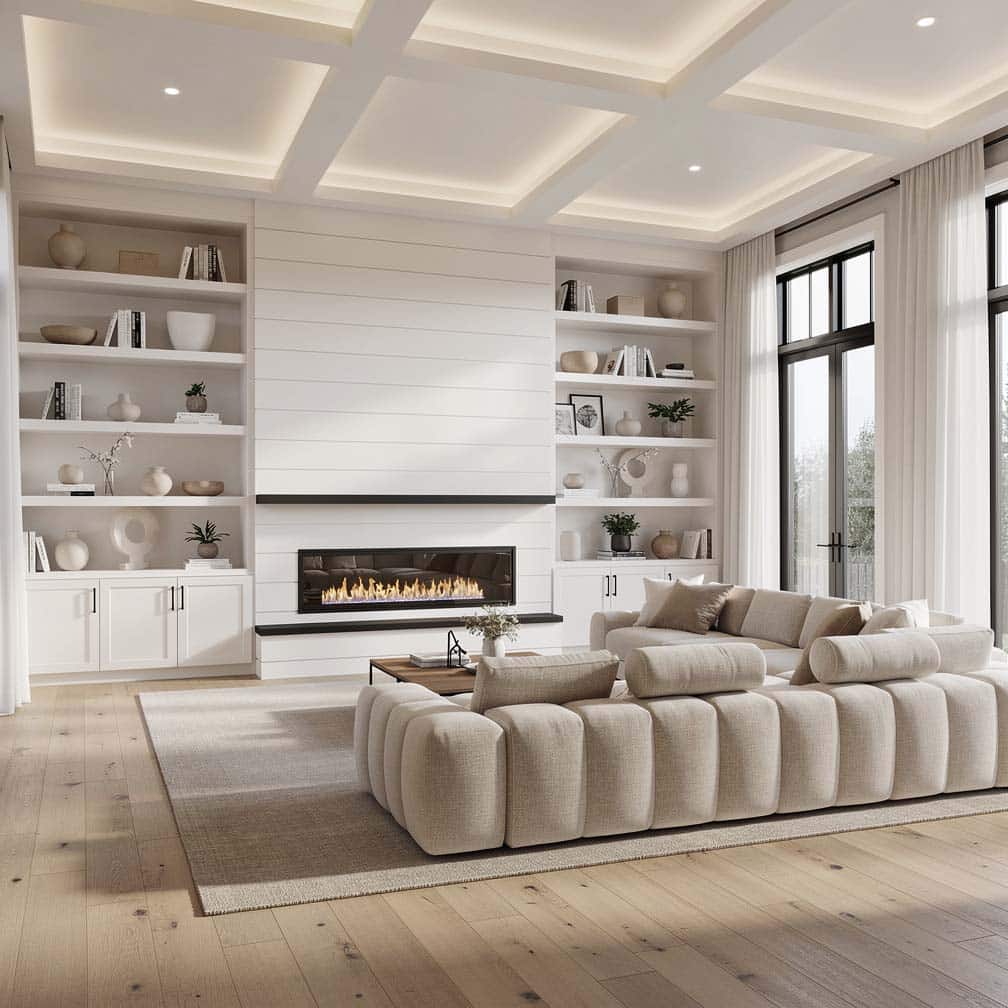
This transitional living room design features a white box beam ceiling with painted shiplap planks that match the built-in accent wall on either side of the fireplace with a herringbone brick pattern. A large area rug frames the space and provides a way to create cohesion between the furniture fabrics while providing color and contrast.
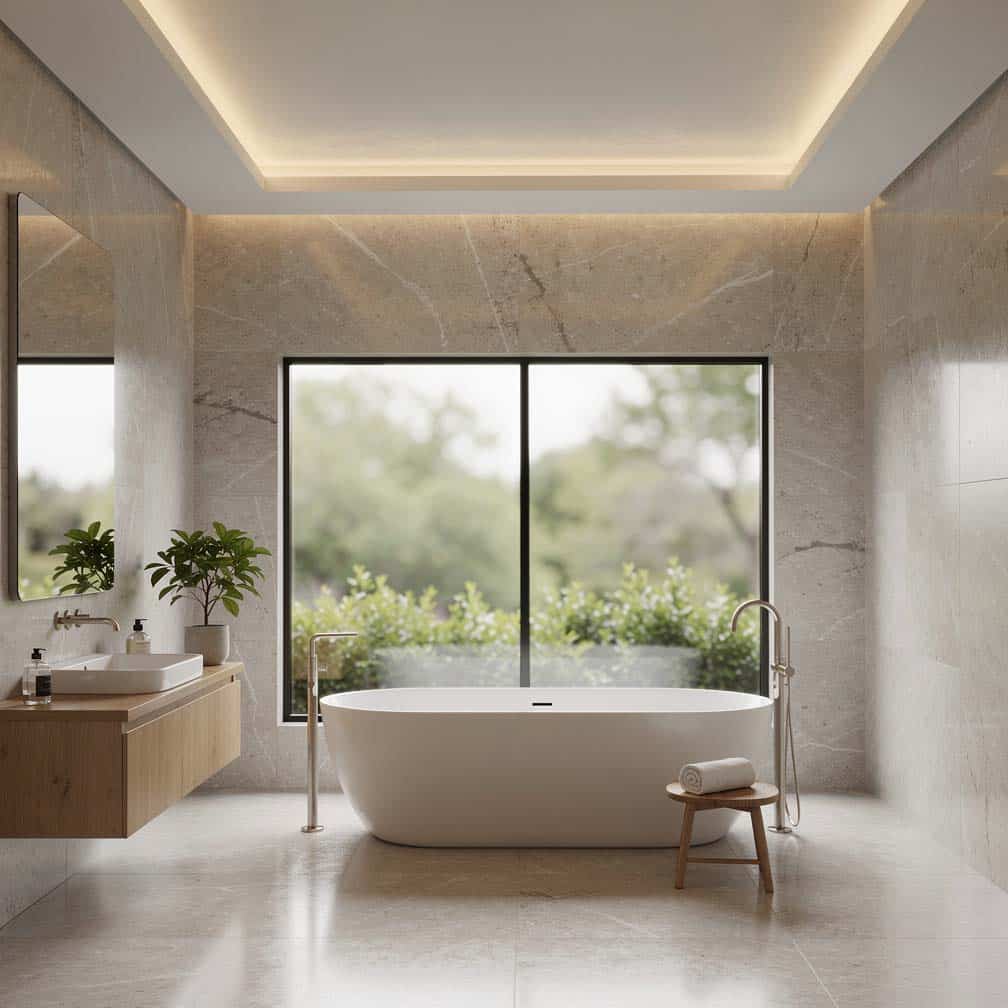
A great feature of tray ceiling in the bathroom is hidden lighting for creating the right mood for relaxing in the bathtub.
How Much Does a Tray-Design Ceiling Cost?
As with many other structural home improvement projects, a tray ceiling is most easily installed while the home is being constructed. Prices vary according to home size, location, and other factors, but the price will usually be between five hundred and two thousand dollars. For homes that are significantly past the construction stage, the price is going to be higher. The price of installation in constructed homes will usually range between $3,000 to $5,000
Another aspect to consider is the location of the room where the tray will be installed. Trays are most easily installed in rooms on the upper level of the home. It may be possible to install a tray on a lower level floor, but this is unlikely due to construction constraints. For rooms on the upper level, the ceiling will be raised using the space in the attic. If the attic framework has to be altered, though, this can potentially add thousands of dollars to the project’s price due to the structural aspect.
What’s the Difference Between a Tray and a Coffered Ceiling?
A coffered or box beam ceiling has beams or molding that create a grid across the overhead. The grid creates squares using the beams that hang lower than the rest of the panels. While a tray is a variation of the coffered style, there are a few differences between these two types. These differences lie mostly in the design itself, as well as the materials used in each project.
This decorative ceiling is made in the shape of an inverted tray. Even small rooms look enormous. – My Home My Style, Lt. Col. J M Sharma (Retd.), Vinaya More Bhalerao
A coffered design is recessed like a tray, but has additional design elements. Coffered overheads have recesses that are designed in such a way as to create box-like indentations. Trays, on the other hand, have only one recess that runs almost the whole overhead area.
Trays are typically created using materials such as plaster and drywall. Coffered are generally constructed from different types of wood or faux wood beams.
Coffered and tray ceilings do have several traits in common. Both designs offer recessed areas and affect design elements such as warmth and light. Another similarity is that both designs are limited to a degree by the size of the room. While a tray is limited by physical size, a coffered construction is limited in the accent capabilities that can be added in a small room.
How Do You Accent a Tray on the Ceiling?
A variety of accents can be used on a tray ceiling design. Paint can be used to create different visual effects. The raised part of the overhead may be painted a darker color, giving that area the appearance that is much higher than it actually is. Conversely, metallic paint will give the room a feeling of warmth, which can be helpful in large rooms that otherwise feel a bit empty.
You may also consider painting a mural in the recessed area. Using a stencil to create an art design would be perfect for a nursery or another room where a mural would be an appropriate accent. Using wood planks, wood beams, or shiplap is another great way to add emphasis and character to the room. Those with extra hardwood floor materials can repurpose the leftovers into a creative DIY ceiling.
You may also choose to get creative with the trim or molding to bring in the accent color of the room design. This would increase the amount of texture and create visual interest. You could also add wood inlay along the trim to add a bit of detail to the look. The style of the room will determine the type of wood inlay. If it’s a room in a beach house, for example, a bead board can be used to fit the style.
You may also highlight the recessed portion of the ceiling by adding cove lighting, a chandelier or other fixture that draws the eye up. The fixture will cast shadows onto the recessed portion, making the room seem taller.
What is a Reverse Tray Detail?
A reverse tray type is similar to a traditional design in that there is a disparity in the height of the center, in contrast with its perimeter. Rather than the center being taller, however, the center is lower than the perimeter. This dropped feature creates a very different look than a tray and is a bit more difficult to design. A reverse tray must be installed in a room with a tall enough overhead to incorporate the drop, at least ten to twelve feet in height.
A reverse tray is perfect for large rooms that would benefit from increased warmth. Rooms with high ceilings often suffer from a lack of intimacy and warmth that makes the room feel empty. A reverse tray brings a portion down, making the overall room feel smaller. It may be prudent to accent this reverse design by affixing a light fixture to the part that is dropped.
A tray ceiling is an excellent addition to any room of the appropriate size. If you’re looking for a change, these features can transform the look of your home, and with proper installation, they can add character and personality.
How To Determine The Tray Depth?
The general depth of a tray ceiling is 8 inches to have that perceptible effect, but it can range as little as 1 inch to 12 inches depending on many factors. The following are determining factors to get the best depth.
Determining Factors
1. Room Size. Smaller rooms, around 70 to 130 square feet, will look good with a shallower tray type lower than the average 8 inches deep. Larger rooms require a deeper tray ceiling, around 9 to 12 inches deep, for an impactful statement.
2. Assess Decorative Elements. A deeper tray is recommended when planning to place lighting fixtures and other decorative hanging elements.
3. Desired Effect. A deeper tray ceiling increases the vertical height, which in turn provides an airier feel, a practical effect for small rooms.
4. HVAC System. While a recessed overhead can conceal pipes and electrical wires, existing homes with preexisting HVAC systems can limit how high it can go. Consult a professional if unsure if there are existing pipes or wires in your overhead spaces.
5. Added Treatments. Adding Decorative inserts will need added depth and structural support.
Tips For Construction
1. Hide Joints with sealing compound. The edges and seams of the drywall where the boards meet can be sealed to create a seamless joint by using a joint compound.
2. Consider using lightweight materials. Light materials such as gypsum and foam are easier to handle and will have less weight load on the structure. Also, consider metal furring, such as aluminum braces, if needed, as it is lighter and won’t expand or contract like wood.
3. Use premade components for faster construction. There are pre-built tray ceiling kits and prefabricated moldings that come with a variety of designs. These components will cut time on the assembly of an overhead design.
4. Always plan the lighting before construction. A lighting plan beforehand ensures that electrical work is laid out correctly and lighting fixtures will look seamlessly integrated with the tray design.
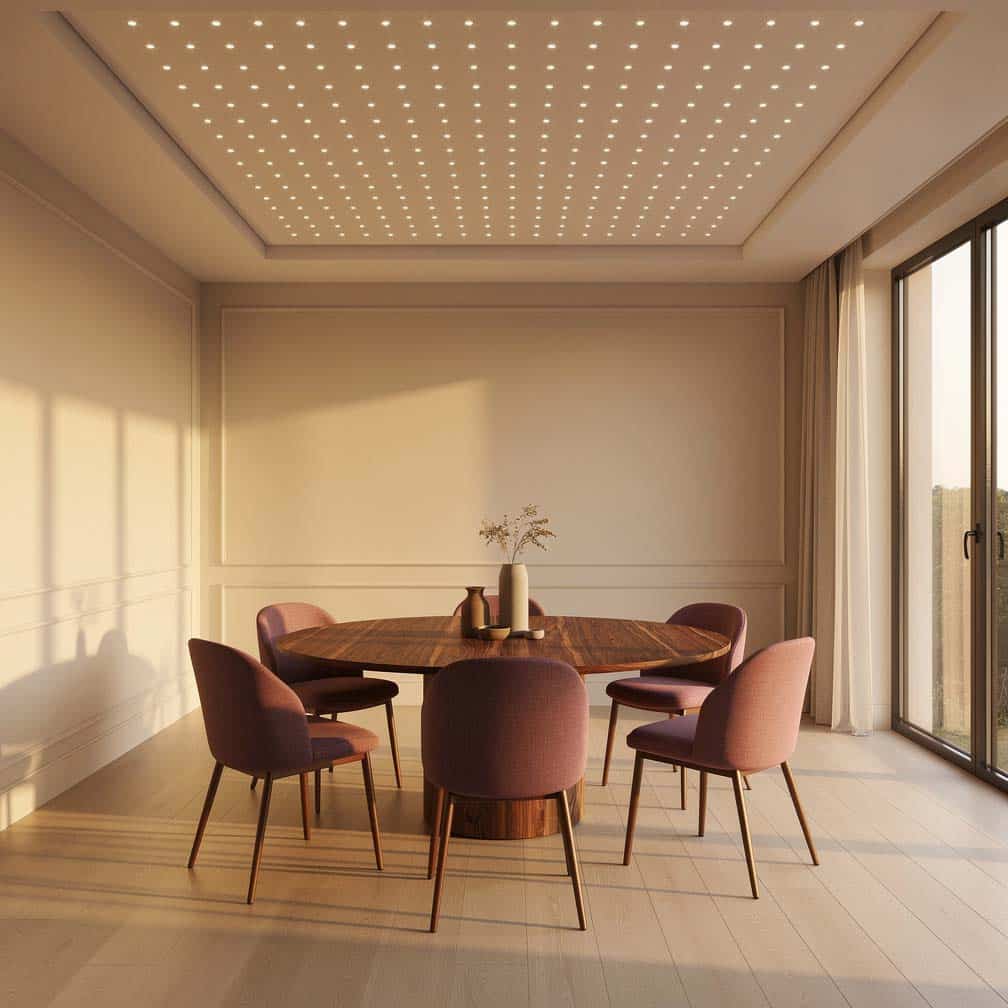
5. Use rope lighting for a dramatic look. The long tube of lights is installed along the perimeter of the tray ceiling, emphasizing the recessed area while giving it a dramatic glow, which is great for social spaces and the bedroom. Homeowners interested in this design should consult a contractor to get an estimate and make plans.
Tips for Painting a Tray Stepped Ceiling
Before starting any painting project, thoroughly dust and clean from the highest point down to remove all debris.
1. Start with the edges and corners before applying to flat surfaces to provide a cleaner and more precise paint finish.
2. Paint in small sections to prevent lap marks. Evenly paint the previous section with the next segment to blend in color.
3. Apply in multiple thin coats, which achieves a clean and smooth appearance.
4. A lighter tone than the rest of the room’s overall color scheme can make a small room more spacious and open. A bold tone, meanwhile, is great for large, expansive social spaces that can provide an opulent appeal. An exposed wood texture can also add depth and richness to the space.
5. Understand the difference between the matte and glossy paint effect on your tray ceiling. Glossy paint can reflect light better and can look more opulent than a matte finish. The downside is that imperfections can be easily seen with the reflective finish.
A matte finish is commonly used as it can hide imperfections and is easily repainted when needed without showing differences between the newly painted section and the old paint.
To showcase highly specific designs, some images on this website use advanced AI-generation software to illustrate ideas and room inspiration. See our editorial policy to learn more.

Upload a photo and get instant before-and-after room designs.
No design experience needed — join 2.39 million+ happy users.
👉 Try the AI design tool now