What To Know Before Installing A Shiplap Ceiling: Design Ideas

Shiplap is a type of wooden board used for both exterior and interior siding and ceilings. Historically, shiplap was used on the exterior of barns, sheds, and ships to keep the elements out of the structure. The way shiplap fits together makes it perfect for this purpose, as the construction forms a waterproof seal on the structure.
However, the historical use of shiplap was not limited to those types of structures. It was also used in homes to protect the structure from the elements. Before sheetrock and drywall were common, shiplap was used as a base layer in the wall. Not meant to be exposed, shiplap would then be covered with a layer of cheesecloth or a similar material, then covered with wallpaper.
As drywall and sheetrock became more common, shiplap was rarely used in home construction. Shiplap was almost forgotten for decades since drywall and sheetrock formed a better seal. While no longer used in a functional sense, shiplap has recently come into style for its aesthetic qualities. When used as a design element, shiplap can transform a living space. The exposed wood brings warmth and coziness to the room, like a log cabin. The texture gives a finish that eliminates the need for art or other items that would tie the room together.
This article will discuss shiplap cladding and how to incorporate this design element into the home. From cost to the steps of installation, this article is going to detail anything a homeowner would need to know about shiplap cladding.
Shiplap Ceiling Designs
Picking a material is where most shiplap ceiling projects are decided. The look matters, sure, but so does the room it’s in. For example, a bathroom ceiling has different needs than a cozy living room, and the wrong material overhead is a pain and also costly to redo. Here’s how the common options stack up.
| Material | Best For | Moisture Resistance | Takes Stain? | Relative Cost | Worth Knowing |
|---|---|---|---|---|---|
| MDF | Smooth, seamless painted ceilings | Low. Use MR-MDF in baths | No, paint only | $$ (~5% less than standard wood) | Won’t crack or show knots, but it’s heavy and hates moisture. |
| Plywood | Real wood grain on a budget | Medium | Yes | $ (budget-friendly) | Light and strong, though edges can splinter when you cut them. |
| Natural Wood | Warm, authentic character | Depends on species and treatment | Yes, beautifully | $ to $$$ ($0.80–$7.00/sq ft) | Widest range of color and texture. Also the heaviest to hold overhead. |
| Reclaimed Wood | Rustic, vintage, eco-minded spaces | Varies with age and finish | Yes, or leave it raw | $$ (varies, can save money) | Salvaged from old barns and factories. Inspect for rot before you commit. |
| PVC | Bathrooms and humid rooms | Excellent, basically waterproof | No, comes pre-finished | $$$ (priciest of the group) | Lightweight plastic in matte, semi-gloss, or gloss. Fast to install. |
| Metal | Modern, high-end statement ceilings | High | Paint, not stain | $$$ | Aluminum, steel, or copper. Leave it raw or paint it for a custom look. |
| Composite Lumber | Uniform look and quieter rooms | Good | No, pre-colored | $$ | The acoustic version muffles noise between floors. |
Quick rule of thumb: Want a paint-grade ceiling, go MDF. Have a damp room, go PVC. Want real warmth and don’t mind the weight? Natural wood works perfectly.
As with any home renovation, a shiplap ceiling can be done in innumerable ways. While the project should be done in a way that does not compromise structural integrity or safety, this does not mean that there’s only one specific way to design your very own shiplapped ceiling. This project should be as unique as your home and fit the inhabitants’ style.
One major aspect of shiplap is that it can be stained or painted to suit any number of room schemes. Opting for stained or even bare boards would be a good choice for those looking for a more rustic look. This will coordinate with furniture and other elements to create a warm, welcoming space.
Painting the panel ceiling, however, will give the room a much different feel. Painted planks in white can give the room a modern feel, while pastel colors go well with farmhouse decor. Bright shiplap can also lend itself well to kids’ rooms.
This is a good joint to choose when you need to make a wide panel from small boards, Compared to a regular butt joint, a plank has more gluing area and the shoulders of the joint help significantly with alignment durint assembly. – Classic Joints with Power Tools, Yeung Chan
There is also the consideration of patterns. Just like hardwood flooring, the look of shiplapping can differ depending on the direction the wood goes. For instance, a flat ceiling can look good with shiplapping in a uniform direction. On the other hand, a vaulted ceiling can lend itself to an upward pattern on either side of it meeting at the highest point.
Some shiplapping also uses decor touches such as beams over the plank. This is popular with vaulted ceilings, once again. The beams in these cases are rather uniform, as they are a set distance apart. This creates an aesthetically pleasing symmetry. They may lie flat against the panel or connect from one side of a slanted ceiling to another, like rafters. If you decide to paint your panel, bare exposed beams are another way to add a rustic touch.
An architectural element known as an exposed ceiling joist allows the structural beams that support a room’s ceiling to remain visible without being covered by drywall or other finishing materials. This design decision is sometimes made for aesthetic reasons. It can give a place a rustic or industrial vibe that adds character and visual interest.
A design element known as an exposed ceiling joist with panel combines the structural benefits of exposed joists with the homey, rustic appearance of panel planks. In this design, the panel boards covering the ceiling are painted or stained to match the exposed joists supporting it. As a result, a room gains a dynamic, visually appealing design element.
Shiplap Materials
These are the types of paneling that are most often used for ceilings:
MDF (Medium-density fiber boards) – When aiming for a smooth and consistent finish for a panel ceiling, MDF is a great option. Made from wood fibers and bonded with synthetic resin, the engineered wood won’t have cracks or knots that can affect the structural consistency throughout the board. The leveled material is easier to install and can be cut and painted just like ordinary wood. Though, MDF does not receive stain well, as the absence of graining and knots makes it difficult for the solution to seep through the material.
Choose a Moisture-Resistant (MR) MDF material for the bathroom and other rooms exposed to humidity and moisture. The MR MDF is bonded by a moisture-repellent resin, protecting the material from absorbing water. An MDF or medium-density fiber trim will cost around 5% less than a standard wood panel.
Plywood – The wood veneer is an excellent alternative to natural wood and MDF when aiming for some natural graining and knots. It is lighter to handle compared to MDF or solid wood and can hold better when screwed or nailed due to its multi-layer structure. While solid wood is a hardy material, plywood has a higher strength weight to ratio but is lighter than MDF, making it easier to hold it against the ceiling. The challenge of plywood panel ceiling material is that it has the potential to splinter when cutting.
Natural Wood – An advantage of wood over synthetic panel ceiling materials is that it comes in a wide range of textures and colors. Moreover, it receives paint and stains easily, making it a versatile option when achieving a particular look for a panel ceiling. Natural wood can be used in any setting with a properly treated species. A disadvantage of natural wood is that it is usually heavier than PVC, vinyl, and MDF, making it challenging to hold it against gravity when installing.
Natural wood can either come as hardwood or softwood.
- Hardwood used as a panel is poplar, acacia, or golden teak.
- Softwood used as planks is cedar, pine, and redwood.
Reclaimed Wood Shiplap – Reclaimed wood panel is a popular choice for those who want to add a rustic or vintage feel to their space. It is often salvaged from old barns, factories, or other structures and can be left natural or refinished to match any design style.
PVC – Best for bathrooms and other areas exposed to constant Moisture and humidity, PVC is a plastic material that does not absorb water. PVC panels are available in a wide selection of finishes, including matte, semi-gloss, or glossy appearances. The lightweight plank material also means it is easier to install, especially for longer and more expansive panel ceiling projects. However, PVC is more expensive than other shiplap ceiling materials.
Metal Shiplap – Metal panels can lend a room an opulent and modern touch. It can be made from aluminum, steel, or copper and left unfinished or painted for a custom look.
Composite Lumber – Planks made from composite lumber, is typically made from a blend of polyethylene, polypropylene plastic, wood fibers, or sawdust that is ground into a fine powder.
Though composite lumber is not made to look like natural wood, it has a more uniform look and can come in a range of colors. Acoustic composite lumber is great for adding a sound barrier between the lower and upper floors.
Other Materials Needed for Shiplap Installation:
Nails – Preferably brad nails with a 15 or 1 gauge and 18 gauge. Brad’s nails are usually used for baseboards, and the principle of installing them applies to a shiplap installation.
Make sure the length and gauge of the nails or screws are appropriate for the thickness of the boards and the type of wall you are installing on.
Underlayment – When installing directly on a level surface, such as drywall, there’s no need to use an underlayment material, but for uneven surfaces, the following are underlayment material options:
• Plywood Sheets – 4 x 8 feet with preferred thickness.
• Moisture-resistant barrier – For panel ceilings installed outdoors, a moisture-resistant barrier such as building wrap should be installed before the shiplap material.
• Foam-board installation – Provides added insulation and a level surface.
• Shiplap furring strips – These are thin, long trim strips of wood or metal attached to a wall or ceiling to create a level surface for installing panel boards. The plank boards are then installed on top of the furring strips.
Wood Filler – It fills gaps or holes on newly installed panel boards to maintain a smooth and airtight surface before painting.
Shiplap Cost
Those looking to perform this renovation may wonder how much it costs to shiplap a ceiling. While a precise answer will have to come from the individual contractor performing the job, this guide can supply a helpful range of prices. The cost of a shiplap ceiling renovation is determined by various factors, including the type of wood used, the price of other materials needed for the project, and the price of labor to install shiplap.
The type and amount of wood used are probably the project elements that will most affect the price. Hardwood, cedar, and pine are three of the most common woods used for shiplap ceilings. “Hardwood” refers to wood taken from any broad-leafed tree, meaning that the type of wood in a bundle can vary. This can include options such as maple and oak.
Because hardwood can vary, prices depend on your area and the local species available. Homeowners can expect to pay anywhere from $0.80 to $4.00 per square foot, depending on the manufacturer and type of hardwood. For homeowners looking for a uniform wood, pine may be exactly what they’re looking for. An average quality pine will run anywhere between $2.50 to $4.00 per square foot.
For homeowners looking at higher-end options, cedar is an excellent choice. High-quality cedar costs between $4.00 and $7.00 per square foot, but the expense is worth the investment. Another factor contributing to the cost of a shiplap ceiling is the cost of materials. Necessary materials include underlayment, brad nails, spackle, painting materials, filler, and finish. These prices are much less expensive than the wood itself or labor. You can typically get all the nails you need for $2 to $6, while primer runs around $25 per gallon.
The final part of the cost is labor. Each contracting company may differ in labor prices, as their per-hour rates will vary. Most contracting companies consider the difficulty and size of the product in their cost. Any company worth its salt should give you an estimate before getting started.
For homeowners with a do-it-yourself spirit, this cost may be eliminated entirely, by choosing to take it on as a DIY project. However, it is important to mention that this can be a long project. So, if you’re looking for a quicker timeline, it might be best to go with a professional. We’ll explore how you can pull this DIY off in a minute.
Like any other home renovation project, shopping around at different hardware stores and contractors is a good idea to get the best price estimate for the job and its supplies.
Shiplap DIY
Taking on a shiplap ceiling as a DIY project has a few benefits. First and foremost, hiring a contractor can help save on the costs incurred. In addition to that, it can be a great way to add a personal touch to your home. Not to mention, DIYs are popular because they can be fun! The exact steps for installing shiplap ceilings can vary a bit depending on your design. For now, we’ll take a look at some basic DIY instructions.
To start, you’ll need to gather all your materials. Wood glue, nails, a nail gun, a hammer, and a stud finder are important. You’ll also want your wood planks and a jigsaw to cut them down if necessary. Remember to grab safety tools, such as safety glasses and a pair of sturdy step stools or ladders.
Now, you need to find out how much wood you’ll need. Measure the room lengthwise and width-wise. Then, choose the width of each plank. With these measurements, you should be able to calculate how many boards you need to create your pattern and keep it consistent over the whole ceiling.
Before securing anything into place, mark where it’s supposed to go. Changing a chalk mark is much easier than removing and moving secured wood. It’s also going to save you a lot of material. When marking these out, a stud finder can help you find the right spot. It can also be useful to try a test nail before trying to nail boards into place.
If the boards aren’t pre-cut, you’ll want to go ahead and measure and cut them. If you want to stain the wood, it’s also a good idea to do it now. This will allow you to get a smooth, clean stain. It’ll also help keep the stain on the wood, not your ceiling.
However, you’ll want to wait until the stain sets and dries before applying it to your ceiling. This will take around 18 to 24 hours. Most projects will call for more than one layer of stain, but that doesn’t necessarily mean that it will take days and days to stain a single piece of wood.
Let’s take a moment to discuss how to stain wood. The two main options are water-based and oil-based stains. We’re going to take a look at liquid oil-based stains here because, while they have a longer drying time, they also have a more durable and even finish. Liquid is also easier for projects of this size than gel-based options.
You’ll want to lightly sand the wood down and apply a pre-stain. Let this sit for at least 30 minutes but apply the stain before 2 hours. Stir the stain well and apply a coat. Allow it to absorb for about 5 to 15 minutes before wiping the excess away. After that, you can apply another coat if it’s wanted or needed. Now, let the wood sit for 18 to 24 hours. Don’t attempt placement with wet stain.
Now that that’s done, you can start placing them. The same rule applies to shiplapping as to wood floors – placing the first board is probably the most important part. The chalk marks you made earlier are your best guide to ensure everything lines up the way you want.
Some shiplap ceilings include beams under them rather than starting on an already smooth ceiling, so depending on the style you’re going for, you’ll want to work around or cover those. It’s also important to keep space for any installments in the ceiling, such as around ceiling fans or recessed lights.
When you’re ready to place the boards, add a few lines of glue to the side that will lie against the ceiling. Then, you’re ready to start driving nails into them. A nail gun is an efficient way to secure them to the ceiling.
The nail holes in the planks aren’t invisible, of course. So, after the ceiling is installed, you will want to use something to fill them in. There are plenty of options, and some of the most popular include caulk, wood filler, and painter’s putty. Many homeowners choose to paint their shiplapping once it’s installed.
Faux Shiplap
While most of us try our best to invest in the real thing, there are times when using faux shiplap would be more prudent. In situations where the renovation is cost-prohibitive, faux shiplap would be a good investment as it is significantly less costly than genuine wood. Faux shiplap would also be a good choice for those who live in particularly humid climates, as real wood is prone to expanding and constricting with heat.
For those looking for a quick renovation at a fraction of the cost of real shiplap, shiplap wallpaper is worth considering. It has the look of shiplap, and can easily be installed in just a few hours. While it does not have the texture of actual wood, this is easier to mask as the wallpaper will be used on the ceiling.
If faux shiplap is a good choice, but wallpaper doesn’t suit the homeowner’s interests, there is another way to achieve a faux shiplap ceiling. By using plywood instead of traditional wood planks, the shiplap cladding design can be achieved without the price of the real thing. See reclaimed wood faux shiplap ceiling planks at Amazon [sponsored link]
Restoring Shiplap Panels on the Ceiling
For those looking to install a shiplap ceiling, it is important to understand the restoration process for when that time comes. Alternatively, you might have installed panels, but they’ve seen better days. Because shiplap cladding results in exposed wood, it will need to be renovated every so often as the stain fades. This will be especially important for homes in particularly wet climates, as the panels will be more prone to water damage.
Another situation that will require the restoration of shiplap cladding is when homeowners in a historical home wish to repurpose their existing panels for a new project. In this situation, the homeowners will have discovered panel cladding in their walls, likely during a separate renovation. Once found, the homeowners may choose to repurpose this cladding to use decoratively on the walls or ceiling. In this case, the panel would have to be completely renovated before it could be used, to ensure that the boards are fit for use.
For homeowners looking to repurpose old panels, the boards and nails need to be removed from the ceiling. Once the boards have been removed and inspected for rot and mold, they can be restained or painted to suit the homeowner’s taste. Once stained, the panels can be installed in the new location as if they were new. If problems like rot greatly degrade the wood, it might not work for repurposing. The idea is to take advantage of still viable wood and give it a contemporary look and a second life.
Repurposing and restoring older wood is a great way to be more environmentally friendly in your shipping project, in addition to saving money. Utilizing restored panels benefits the homeowner by eliminating the cost of wood from the project’s budget. Additionally, this benefits the environment by not creating an increased demand for fresh timber.
Shiplap or Tongue and Groove Ceiling
Another way to obtain this look is to use tongue and groove boards to clad a vaulted ceiling. A vaulted panel ceiling design features an angled ceiling with horizontally installed boards. panel and tongue and groove cladding look remarkably similar when installed, but the two styles have a few differences.
The main difference between panel and tongue and groove cladding is that the panel has a longer lip edge to connect the boards. This gives panel cladding a superior ability to protect the structure from rain and other elements. This is why shiplap is better suited for walls that will directly encounter the weather.
Another small but important difference between panel and tongue-and-groove cladding is cost. Because shiplap panels have a longer lip, extra wood must be used to cut them. Tongue-and-groove panels have a much shorter lip, so less wood must be used for each panel. To put this into simpler terms, traditional panel boards overlap when installed side-by-side, whereas tongue-and-groove ceiling panels lock into one another.
The cost of additional materials may be significant for projects that use expensive wood such as cedar. It is worth considering whether tongue-and-groove cladding may be cost-effective for the project, as it would provide a similar look for a lower cost.
Shiplap with Beams
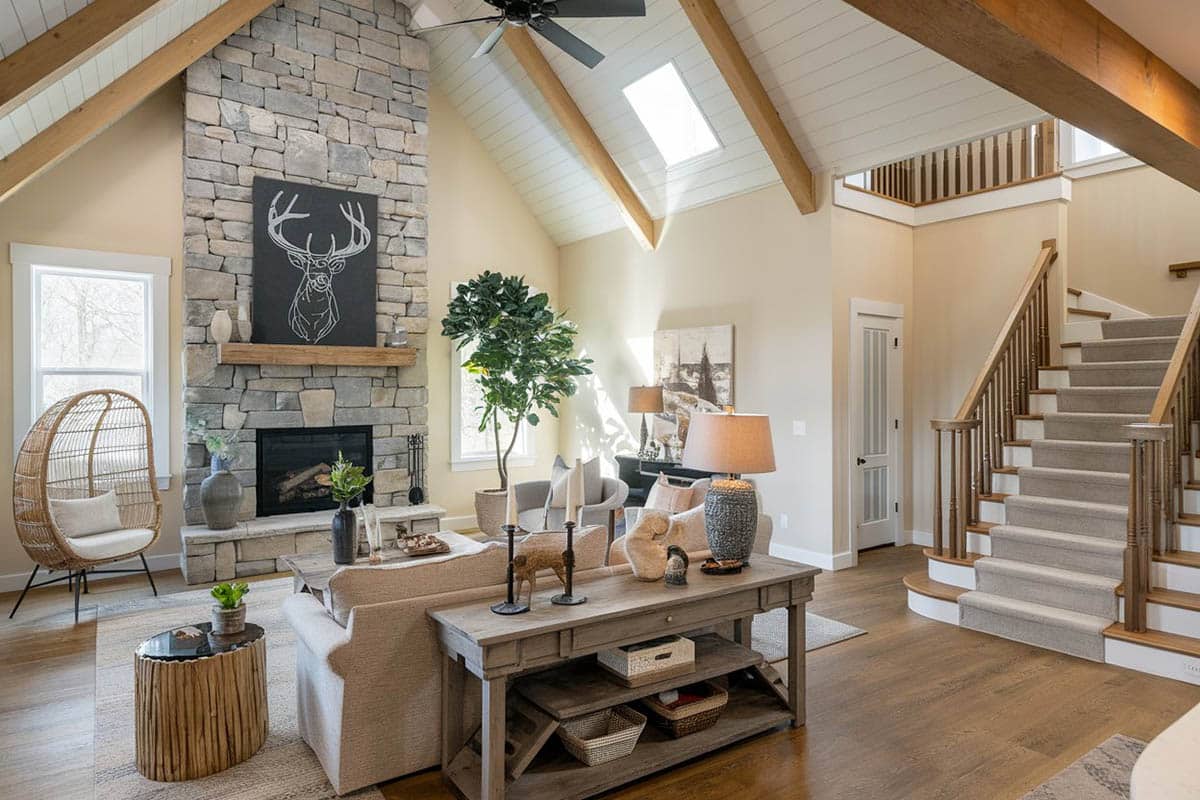
Panel boards combined with a wood beam ceiling provide an attractive ambiance that will make an impression. The contrasting colors of wood beams on panel ceilings creates an eye catching feature that looks luxurious. A panel and beam combination can be used for many different styles, including rustic, farmhouse, modern farmhouse and coastal.
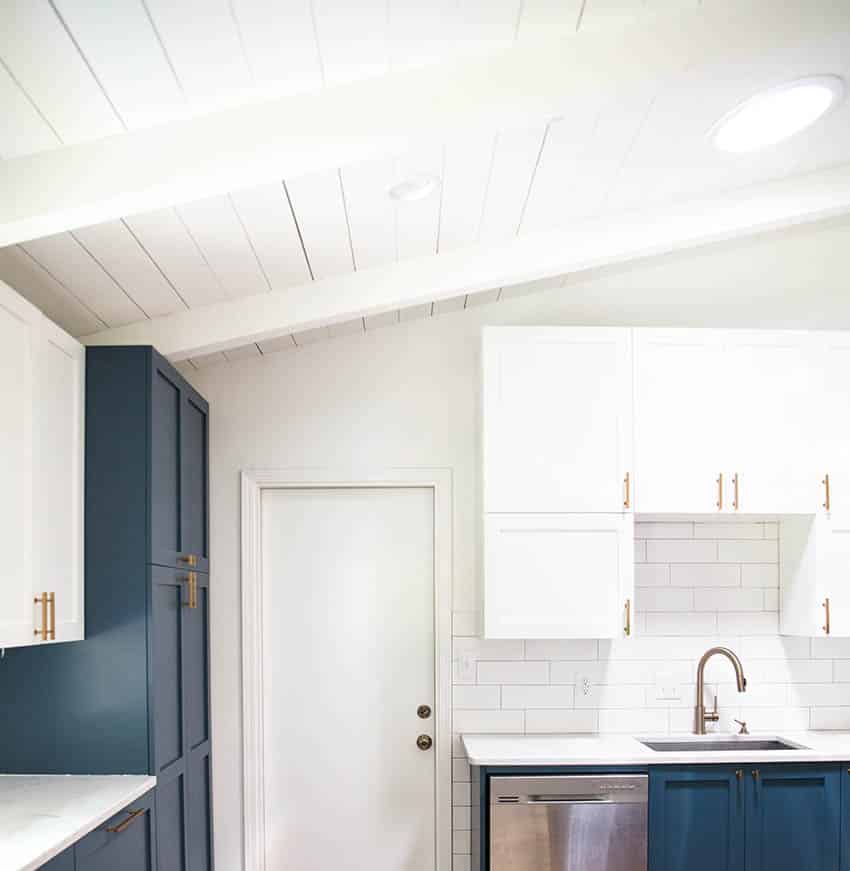
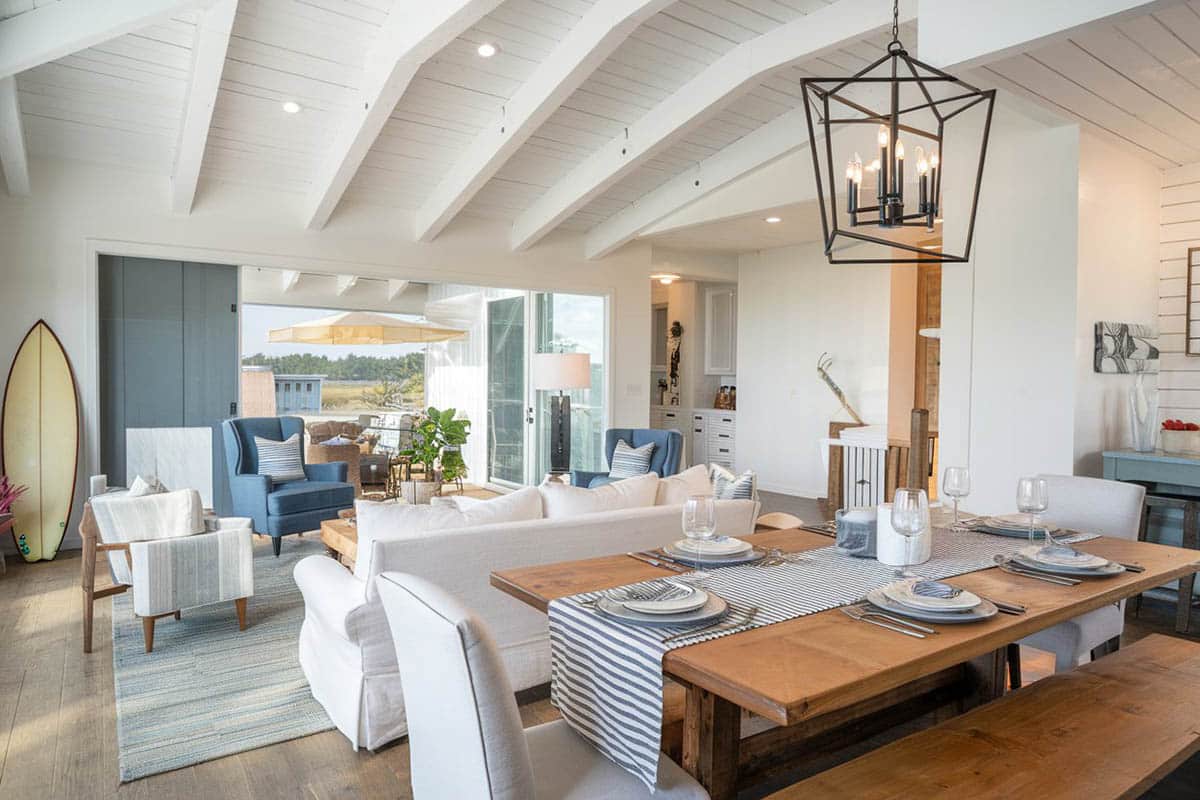
Shiplap Vaulted Ceiling
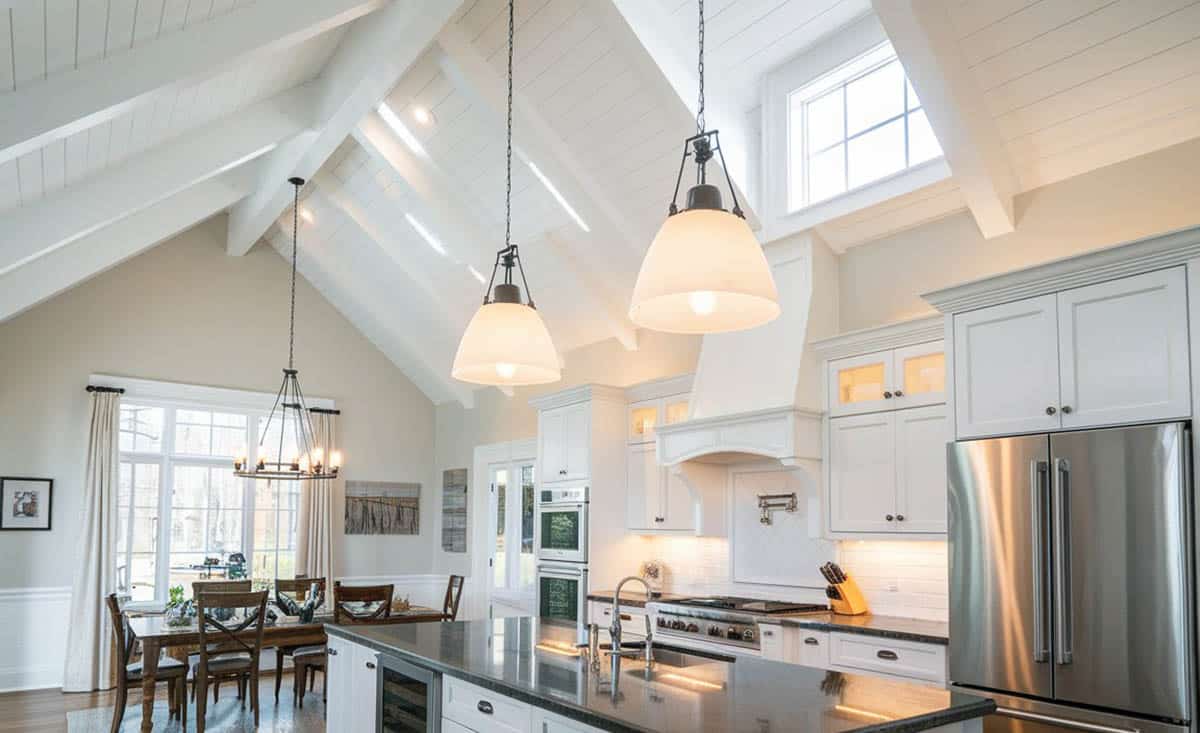
The vaulted panel ceiling in this kitchen makes a grand impression. Painting the ceiling board white maximizes light reflection and helps keep the space looking bright and inviting. See more pictures of wood kitchen ceiling designs here.
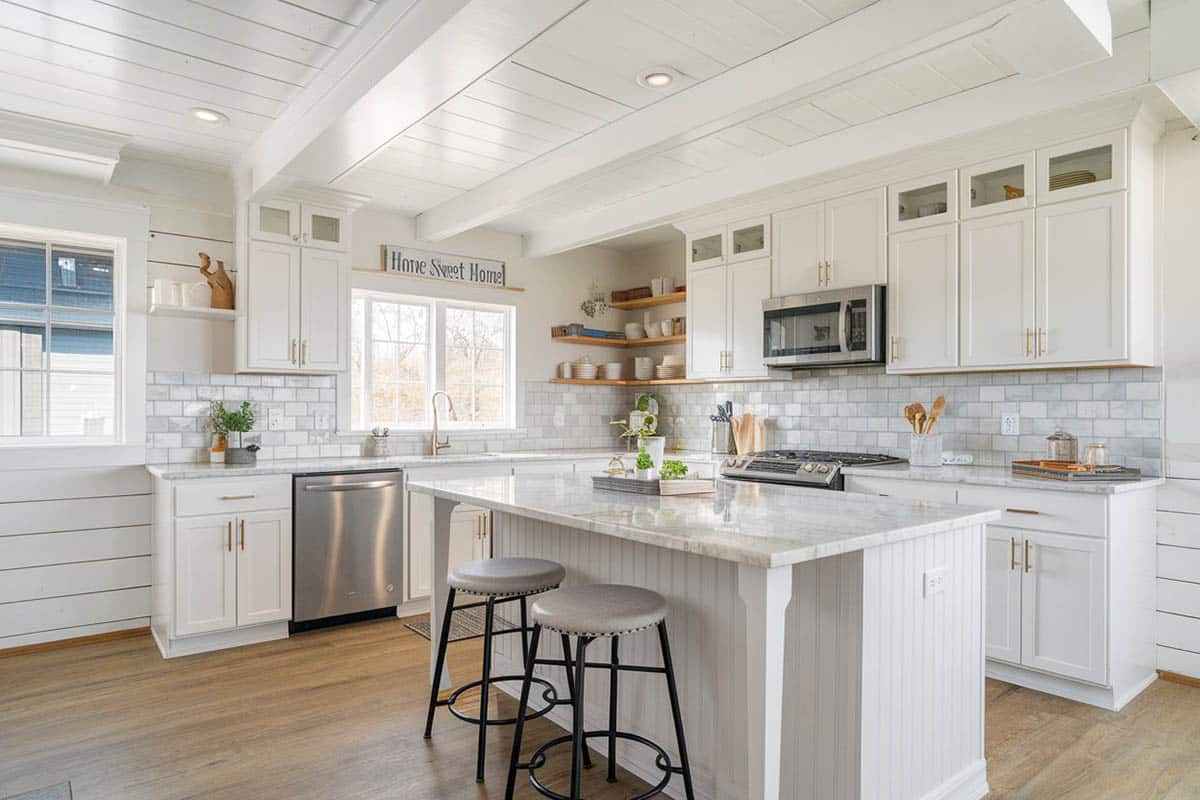
Shiplap for Kitchen Ceilings
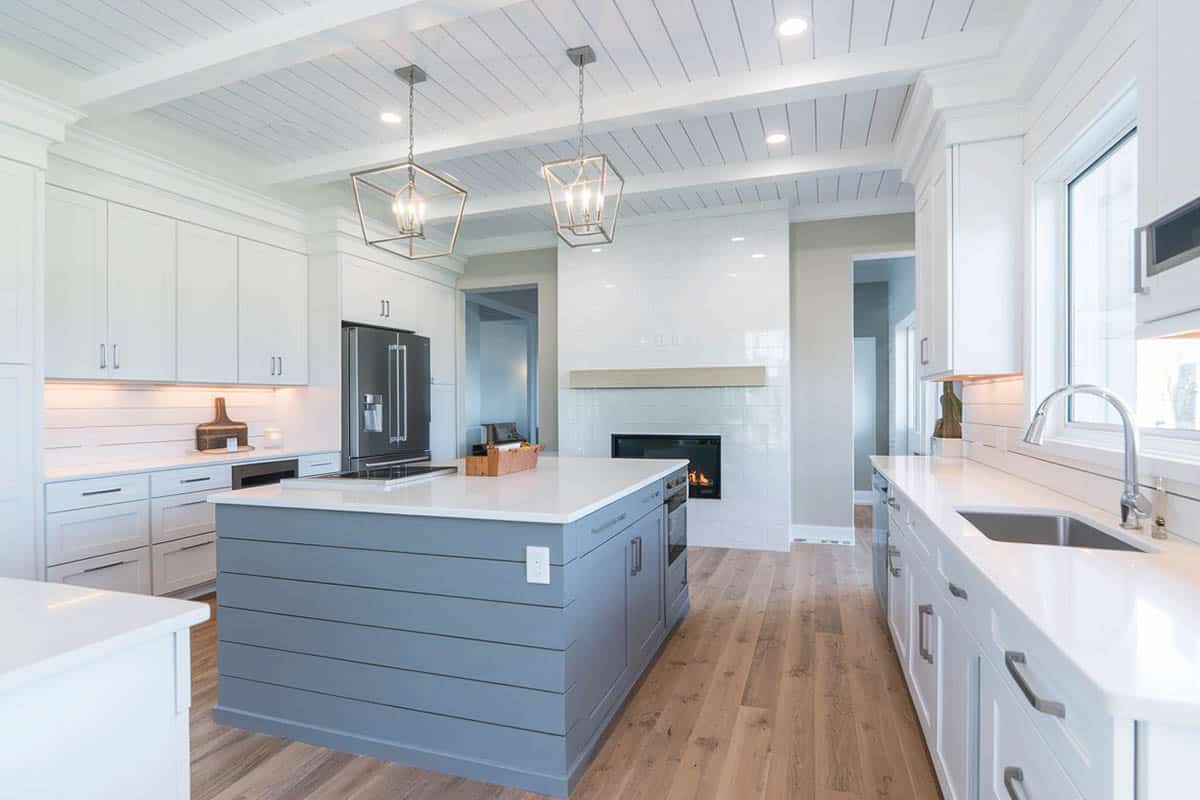
This beautiful white-cabinet kitchen has a painted white-panel ceiling that flows into the open living room. It also has a gray shiplap kitchen island with a quartz countertop, which further ties in the kitchen design to the ceiling. The island also has a white granite countertop.
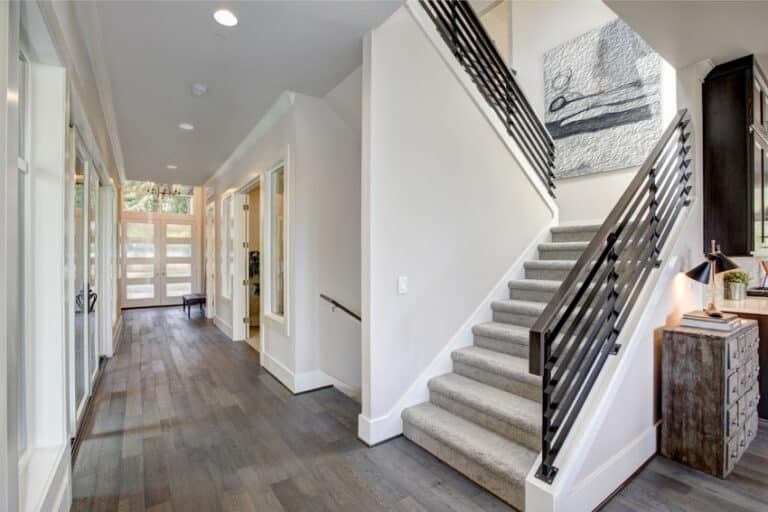
Shiplap Walls and Ceiling
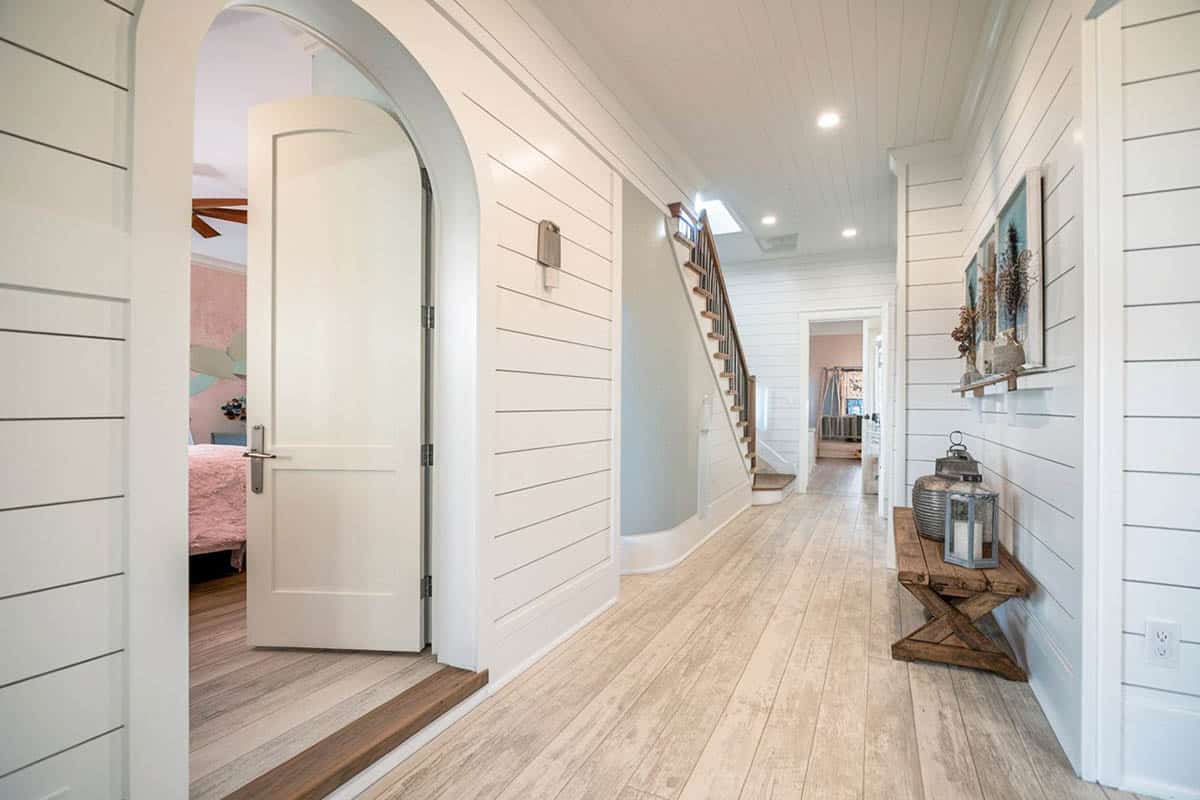
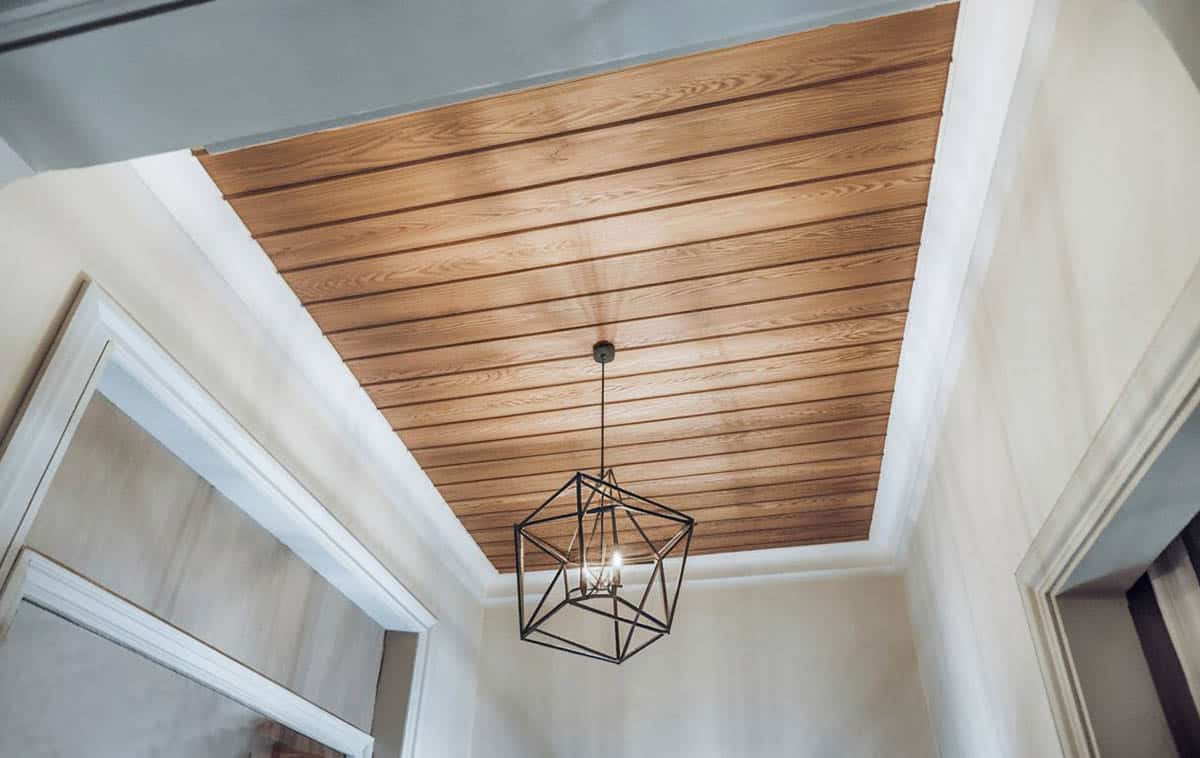
This home’s hallway features custom paneled walls and ceilings to create a farmhouse style feel.
White Shiplap Wood Paneling
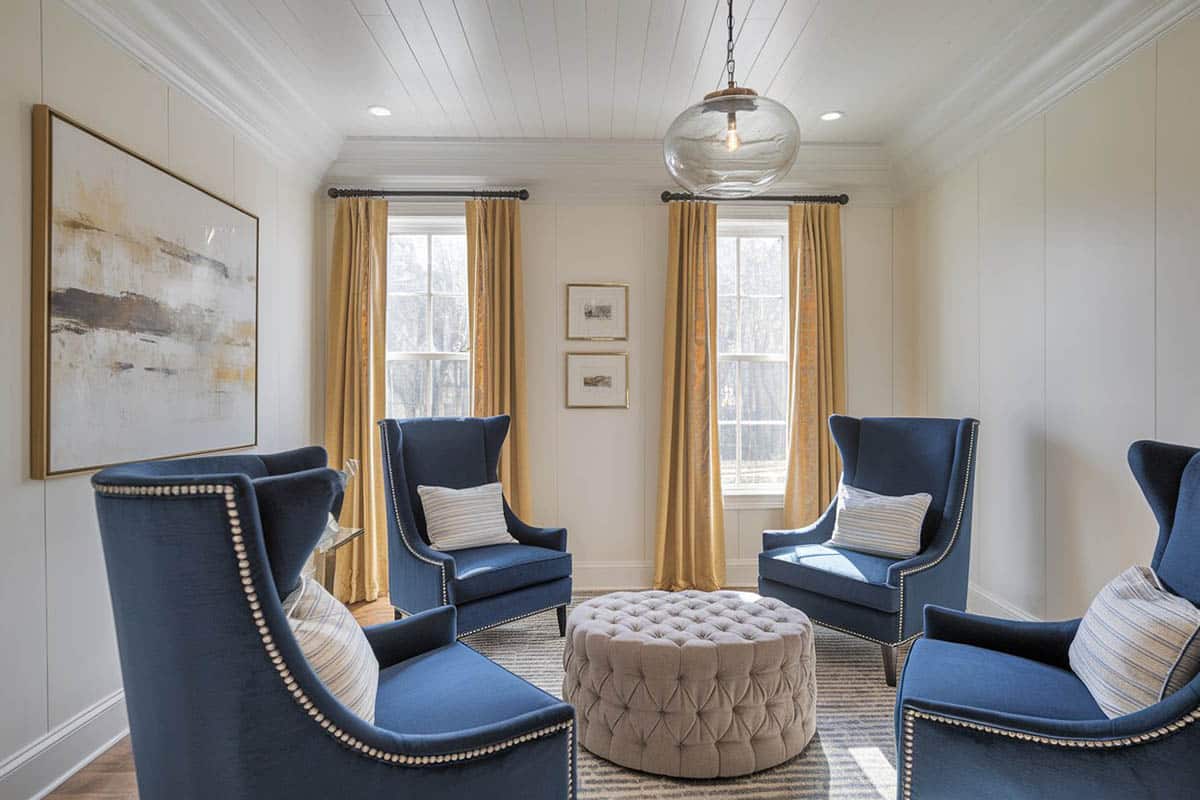
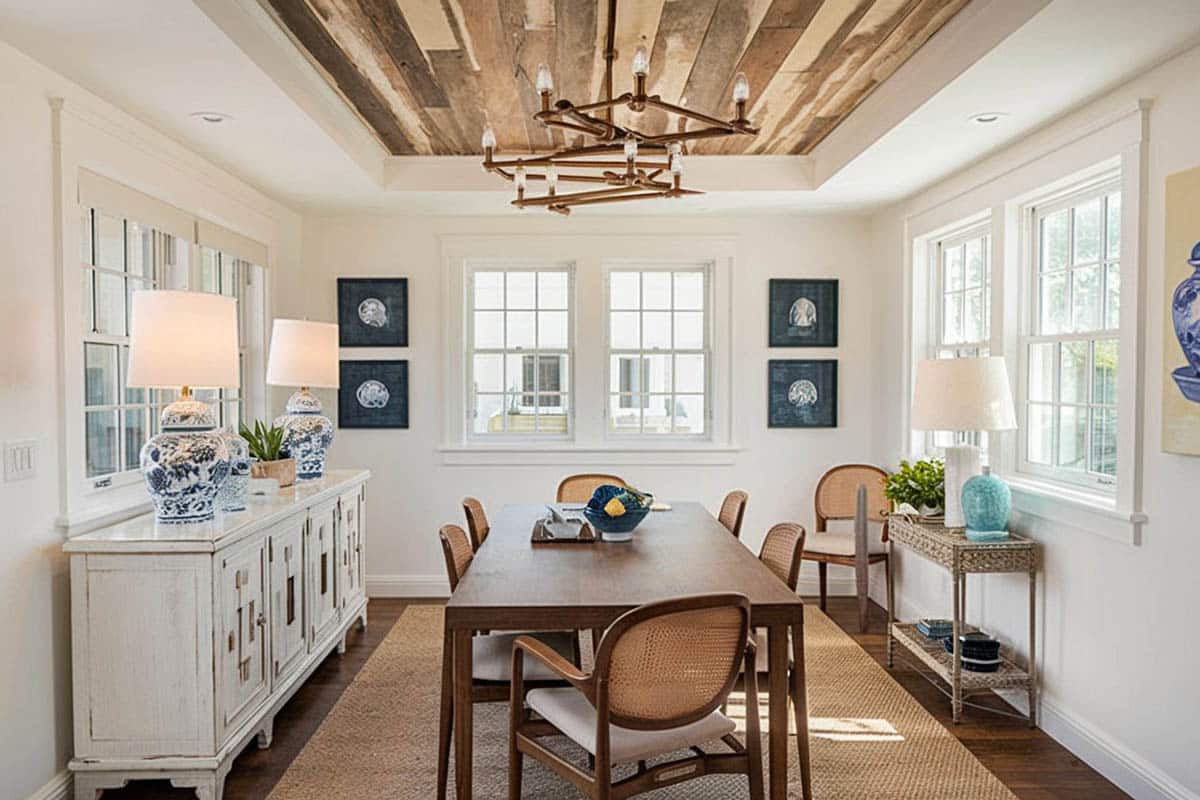
This formal dining room with shiplap uses white planks with nickel gap edging for the ceiling, combined with gray-painted walls and colorful decor, with great results.
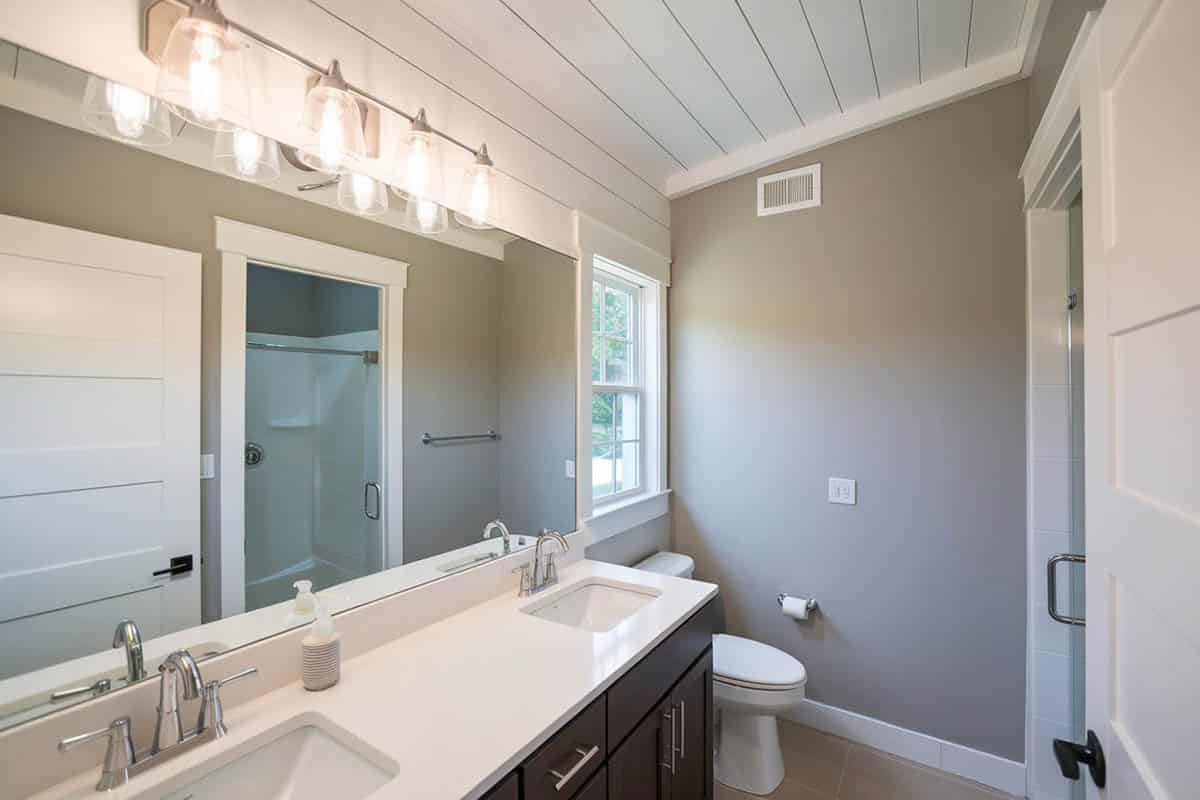
A small bathroom with shiplap painted white can help brighten the space and provide a country or farmhouse-style atmosphere. Painting panel ceilings adds visual depth and interest, and by painting the boards white, you benefit from added light reflection and the appearance of a larger space.
Gray Shiplap Paneling
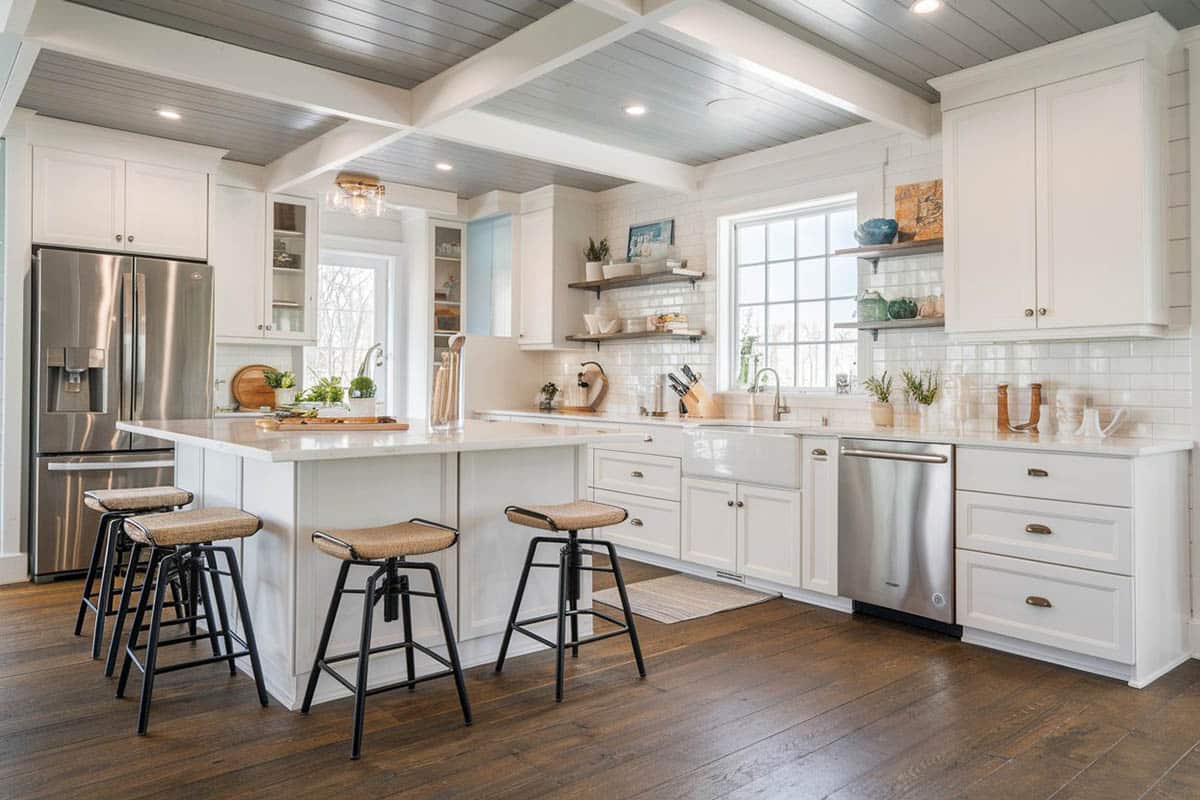
This cozy cottage-style kitchen features a gray panel ceiling that contrasts against the all-white cabinets, subway tile backsplash, and quartz countertops. Gray paint and hardwood floors also add visual interest to the room.
What do you think about panel ceilings in interior design? Let us know your feelings in the comments below. See more gray and white kitchen designs on this gallery page.
To showcase highly specific designs, some images on this website use advanced AI-generation software to illustrate ideas and room inspiration. See our editorial policy to learn more.