Nickel Gap Shiplap (Materials & Designs)
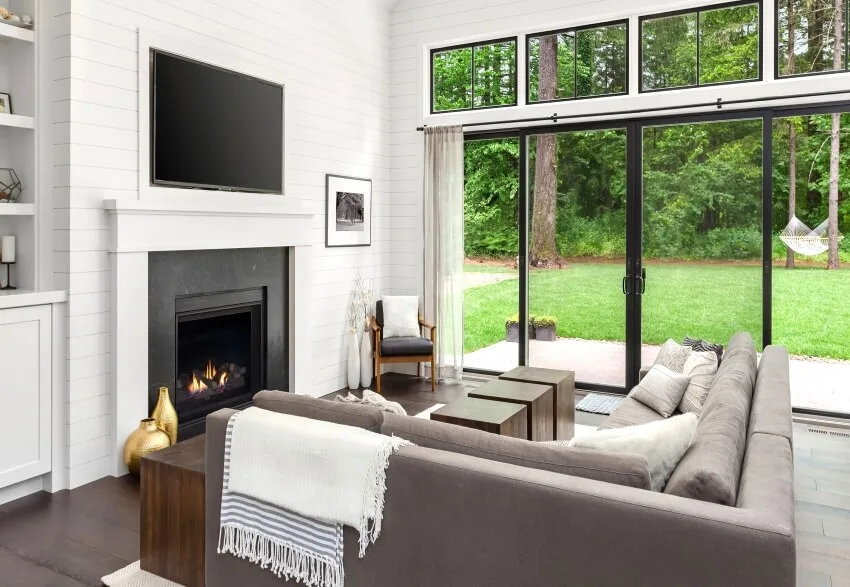
Nickel gap shiplap is often the first thing that comes to mind when you hear the words ‘fixer-upper’ or ‘Joanna Gaines.’ It’s a rustic housing style that has taken the country by storm. Utilized as cladding and interior paneling for many years, it makes a bold statement and a popular design trend for giving houses a “farmhouse” appearance.
It adds personality, and you can readily customize it with the correct paint color. Depending on your preferred design, nickel gap shiplap might be a simple way to add charm to your space. [toc]
What Is Nickel Gap Shiplap?
The nickel gap, the distance between shiplap planks, got its name from the design that nickel could fit into each slot. In contrast to traditional shiplap, which has no gaps between the planks, nickel gap shiplap has built-in spacers between each board.
You can get a clean, consistent appearance with a nickel gap design with your shiplap installation without going through the time-consuming procedure of installing a conventional layout.
Nickel gap shiplap, so named because of the groove size, intends to overlap so that the nails hide from each piece. Nickel gap is a simple approach to provide uniformity between the planks as opposed to the traditional style, which has gaps butted up against one another.
Nickel gap shiplap comes in a range of sizes and designs. It is simple to install and great for various uses, including interior and exterior walls and ceilings. It is frequently seen on modern farmhouse designs due to its clean and inviting look.
Nickel-Gap Vs. Shiplap

There is a difference between standard shiplap and nickel-gap boards. Shiplap consists of wooden planks that overlap to form a channel between them. This style has a more rustic appearance. A rough surface for the boards adds to the rustic feel, although it is also available in a clean finish. Depending on your application, the amount of spacing between boards might vary.
A nickel gap is a common element in interior design that looks similar to a shiplap. The critical distinction is that nickel gap siding contains tongue and groove boards that conceal nails, giving it a smoother overall appearance.
It also has a constant width in the space between boards (approximately the size of a nickel). Nickel gap siding is available in several pre-finished hues but is also unpainted or untreated.
Shiplap Materials
When installing a nickel gap shiplap at home, you will need the wood, the panels, a saw, a power sander, nails, a nail gun, a level, a chalk line, spacers, a spackle, and paint. The installation will occur when you have prepared yourself with the necessary equipment and supplies.
When installing a nickel gap shiplap it is essential to stock up on extra coins. The boards are spaced evenly and will all line up thanks to the coins inserted between them.
When planning a DIY shiplap project, the following are the primary types of wall paneling products you will encounter:
Shiplap Panel
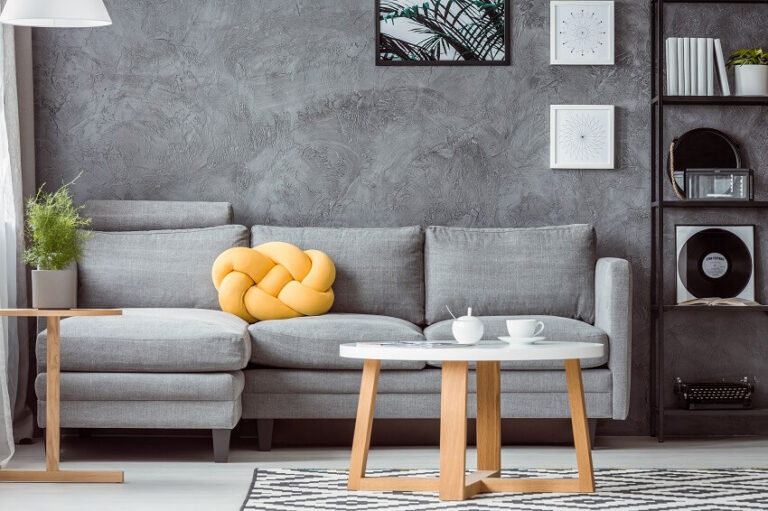
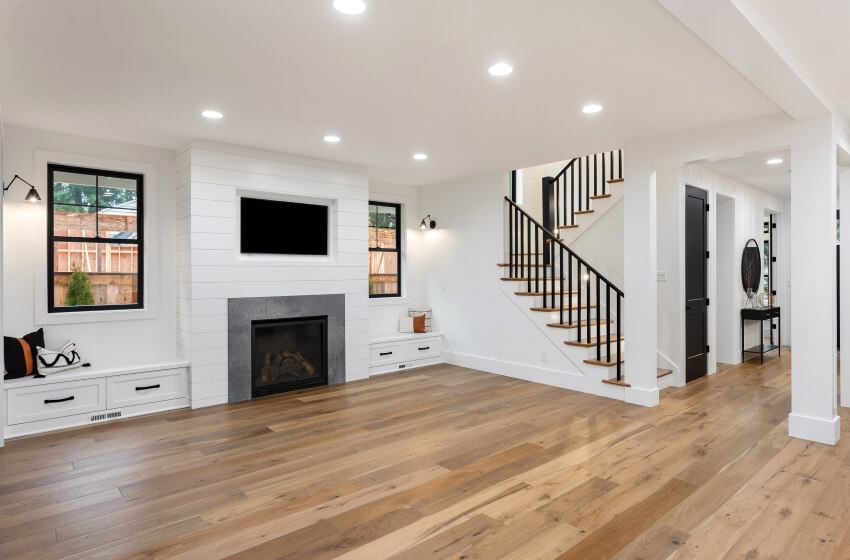
Due to its delicate texture and rustic beauty, nickel gap shiplap panels are a popular option for interior installation. The nickel gap lap panels‘ design contributes significantly to the farmhouse aesthetic. You can install the panel format quickly and effectively with either a horizontal board layout or a vertical format.
Using plywood is the most popular and cost-effective method for recreating the lap panel appearance from scratch. Avoid the cheapest plywood and go for 34-inch AC plywood, which is pre-sanded on one side. A 48 sheet costs around $30, or less than one cent per square foot on a wall.
Primed Shiplap
Primed nickel gap shiplap is made particularly for a flawless paint finish. A primer is used as an undercoat of paint to seal the surface. It allows the painter to choose from various finishes, including flat, eggshell, semi-gloss, and high gloss.
The painter may avoid surface preparation by using a primed shiplap. It has a precise 1/8″ nickel gap, with a custom-milled tongue and groove design. Each board is spaced apart by 1/8″ and has a full 1/4″ of recessed space.
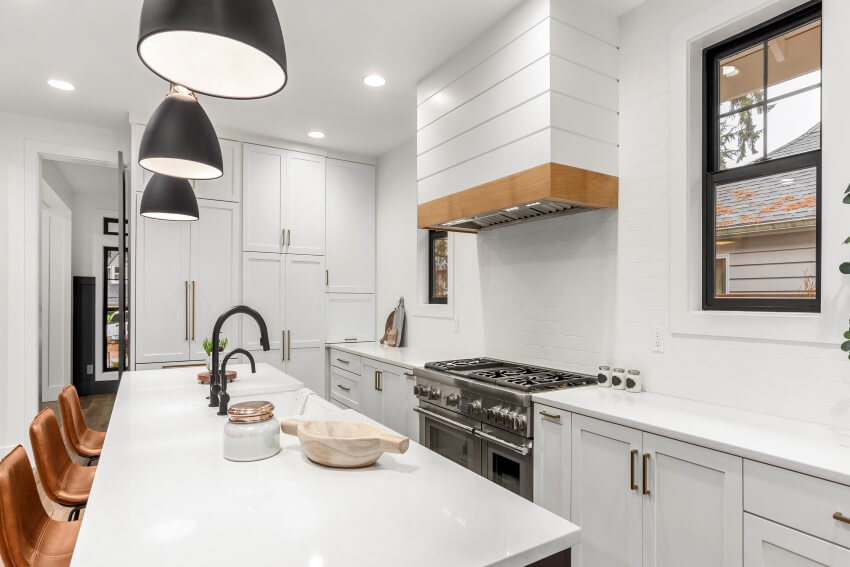
The primed surface has exceptional paint adherence and a flawless finish, and the wood is transparent and devoid of any knots or voids.This level of finish is great for interior applications such as shiplap kitchens, living rooms, entryways, or bedrooms.
One of its remarkable features is that this product is lightweight yet incredibly sturdy compared to other wood species and 50% lighter than MDF or composites.
Pine Shiplap
If you’re in search of shiplap material without the hassle, pine exhibits exceptional quality. Pine boards are very simple to install and are manufactured from the same Eastern white pine as the tongue and groove paneling.
The most common pine utilized for this type is the Ponderosa pine. It is a western white wood often used for board and batten stock. It is top quality with tight, homogeneous grain and knots, with a smooth surface designed to absorb paint and stains very well.
The material is from larger, slower-growing pine trees for more excellent dimensional stability. Pine is generally resistant to variations in humidity, making it useful for projects requiring tight-fitting connections.
In contrast to other softwood species, unfinished pine shrinks relatively little and has a homogeneous cell structure. With minor splitting, cupping, or warping, it ages nicely.
Using a primer with a shellac base for a premium finish is advisable since it will hide the knots and stop them from seeping. Pine is relatively light and straightforward, particularly for a ceiling application. It is perfect for intricate crafts like paneling, cabinets, and shelves where accuracy is needed.
MDF Shiplap
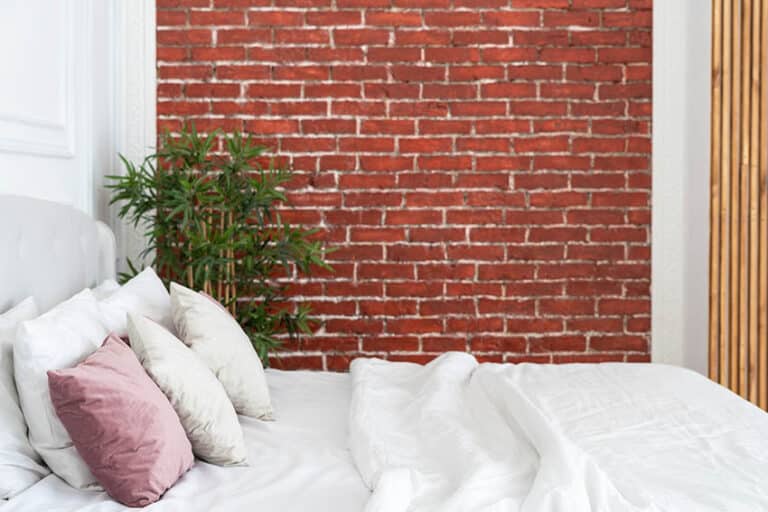
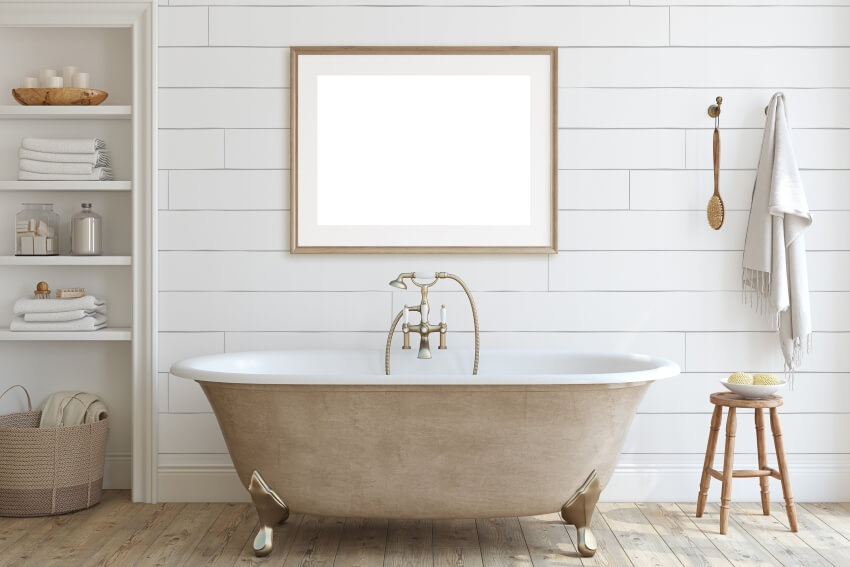
Moisture-resistant MDF nickel gap shiplap has several benefits, especially in the bathroom. With MDF, there is no need to be concerned about hot showers warping your boards and causing uneven gaps.
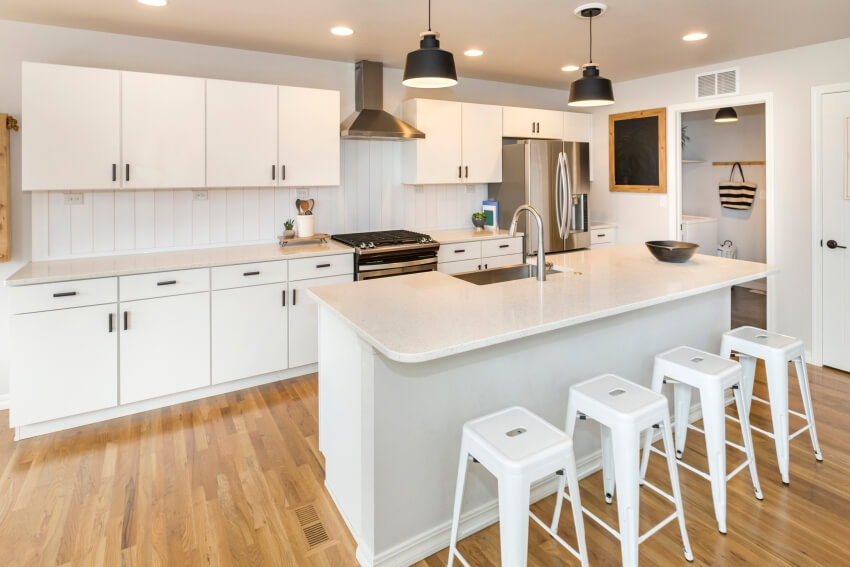
If you like texture and pattern, this material also looks fantastic when matched with graphic wallpaper. See pictures of shiplap bathroom ideas here.
MDF nickel gap shiplap works well on both ceilings and walls. It contains carpenter-friendly, supple wood that is simple to cut, miter, and nail. Since MDF doesn’t have grain and won’t expand and compress as much, it provides more stability than solid wood.
MDF is easy to paint since it will take any paint, and you can paint it in any color. MDF might be a great alternative to shiplap wood. The finish you obtain from this material will be far smoother than you would from wood, and it typically costs around 5% less.
PVC Shiplap
PVC shiplap, especially in white, is stylish and sturdy and offers a contemporary, clean appearance or a farmhouse, rustic style with the nickel gap.
Made from durable PVC (polyvinyl chloride), this type of PVC board is pre-painted and ready to be fitted, allowing for a speedy installation. This PVC molding is water-resistant and suitable for places with high humidity, such as restrooms.
PVC materials are simple to maintain and perfect for exteriors or any other area where moisture is an issue. It is a premium, long-lasting wall or ceiling material since it won’t warp or decay.
It is also an excellent choice for interior wall paneling, ceilings, and exterior siding since it is an economical, beautiful alternative. For installing PVC nickel gap shiplap, we advise adhering to the manufacturer’s recommended spacing specifications.
Shiplap Designs
You may get shiplap paneling products in a few different varieties for your home design. Here are some of the areas of the home that may benefit from the installation of nickel gap lap wall or ceiling paneling.
Tongue And Groove Shiplap
In a classic nickel gap shiplap, one board laps over the other, creating a tiny fissure between the two boards that allows the boards to shrink and swell separately throughout the seasonal movement.
A carpenter would typically nail one nail through the top and one towards the bottom of the board’s face. The only drawback to this procedure is that you must patch the holes before staining or painting the final coat.
On the other hand, a tongue and groove nickel gap shiplap inserts via the tongue, eliminating the need to nail the piece on the face. Tongue and groove nickel gaps may be placed vertically, horizontally, or at an angle.
Instead of overlapping, tongue and groove panels connect via notches and indents that fit together like jigsaw pieces. As a result, the panels fit together neatly and have a more streamlined appearance.
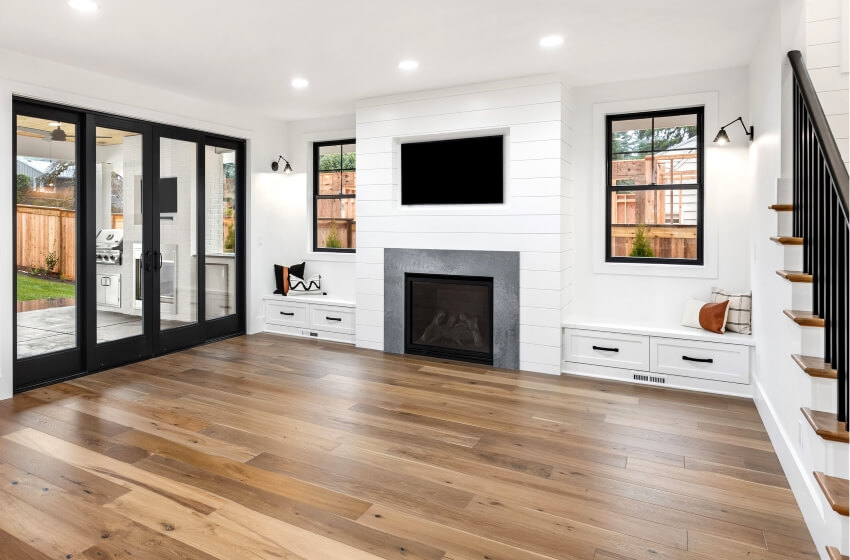
Shiplap Ceiling
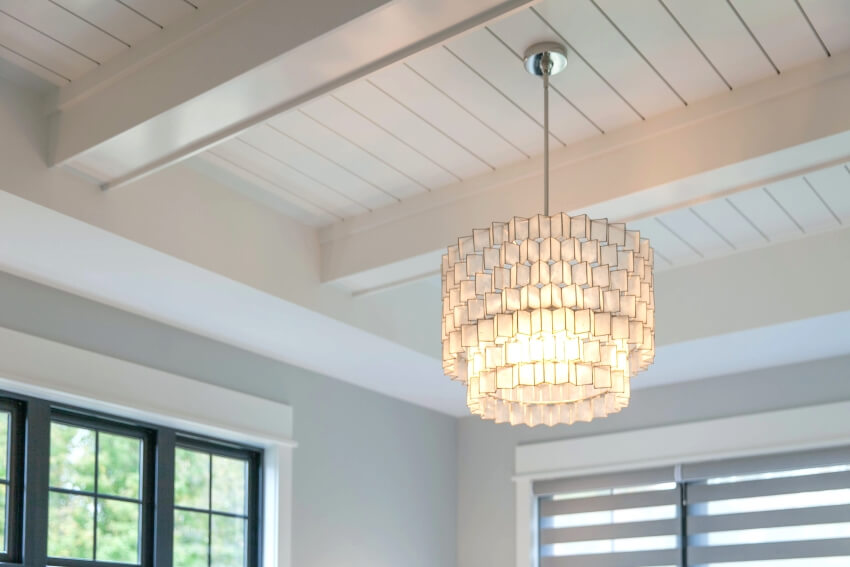
You may use nickel gap shiplap on surfaces other than your house’s walls. Any room in your home might benefit from adding these panels, but it is particularly significant for the ceiling.
Though it may seem difficult to install, the top will look particularly unique with the pattern shiplap makes because of its strong lines and striking design. The long, room-wide wood planks imparts a calm, ordered, and serene atmosphere.
The shiplap may be attached directly to the drywall in the ceiling or over a furring strip layer. Usually, the state of the ceiling and individual preferences will influence this choice. If the ceiling is flat and level, you may apply it on the drywall.
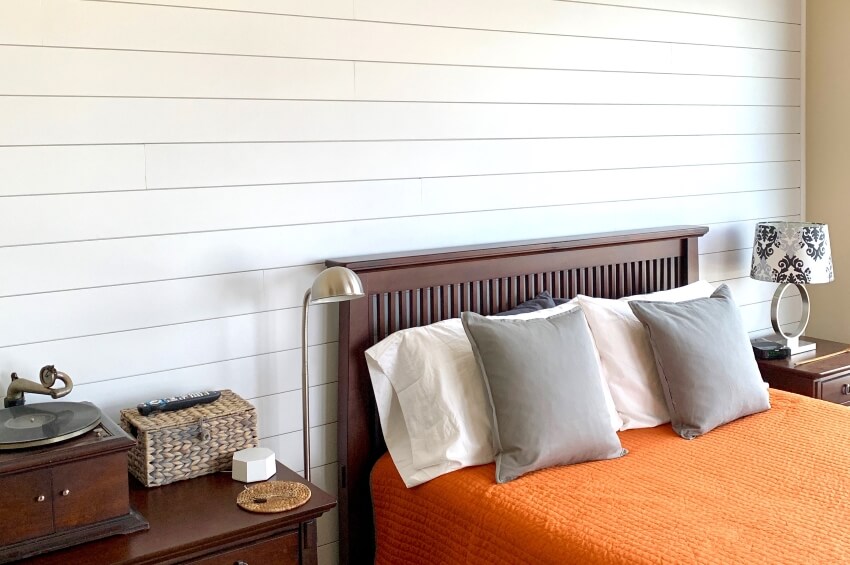
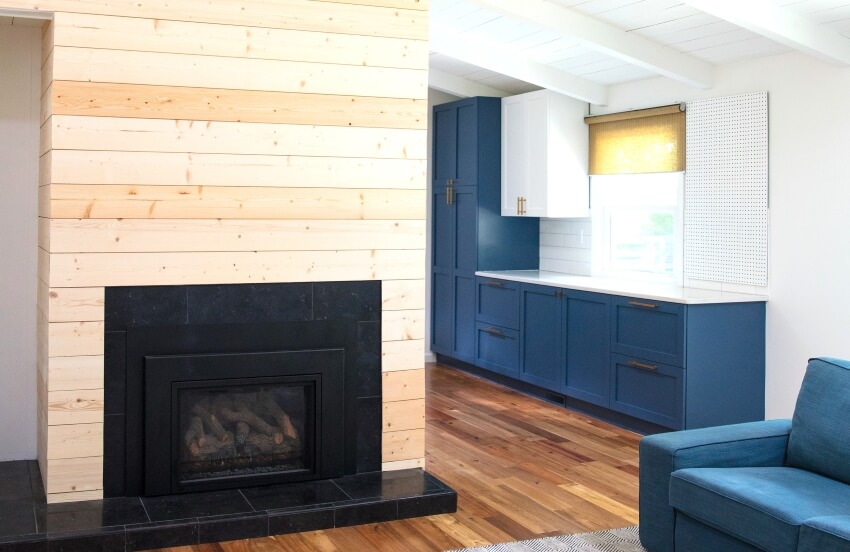
Using unfinished boards will provide a more rustic style, while using painted boards can give a more modern farmhouse, country or contemporary ambiance. The lighter the paint or stain color the more reflective it will be, which can be useful for darker spaces or rooms with not a lot of natural light.
Use the furring strip technique if you want the nickel gap shiplap to be perpendicular to the ceiling joists for aesthetic or other reasons. Cutting the boards is challenging in large spaces or ceilings with odd angles and curves. You may get assistance with placing shiplap on the ceiling from a carpenter or general contractor who will have the tools and expertise for the job.
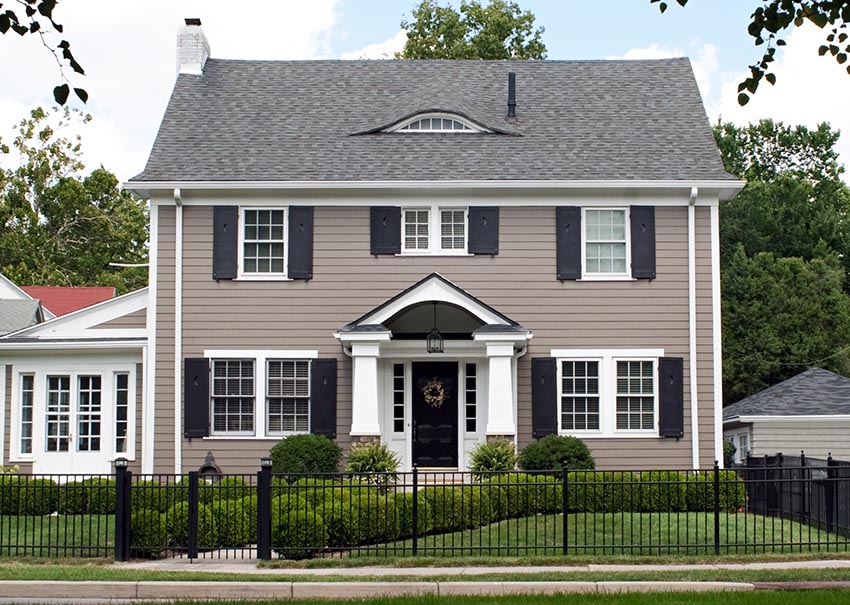
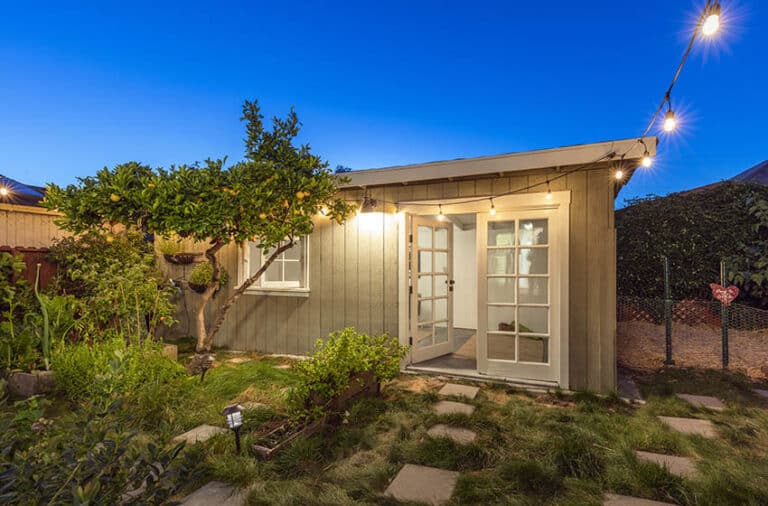
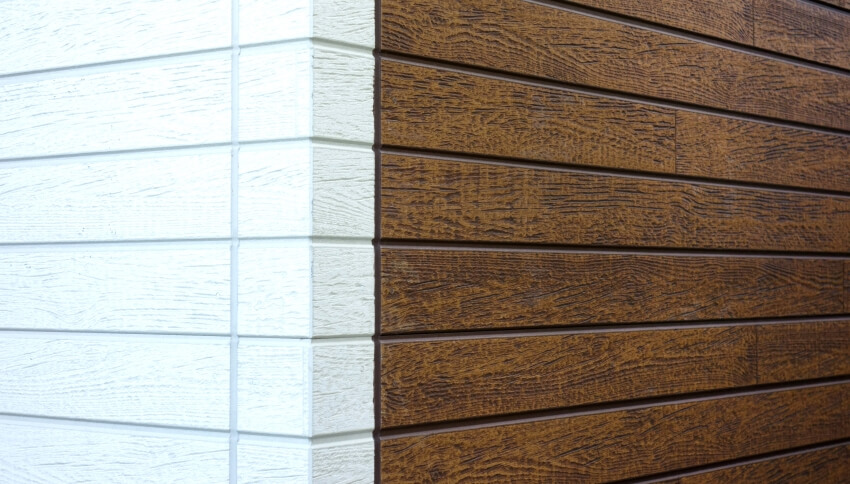
Shiplap Exterior Siding
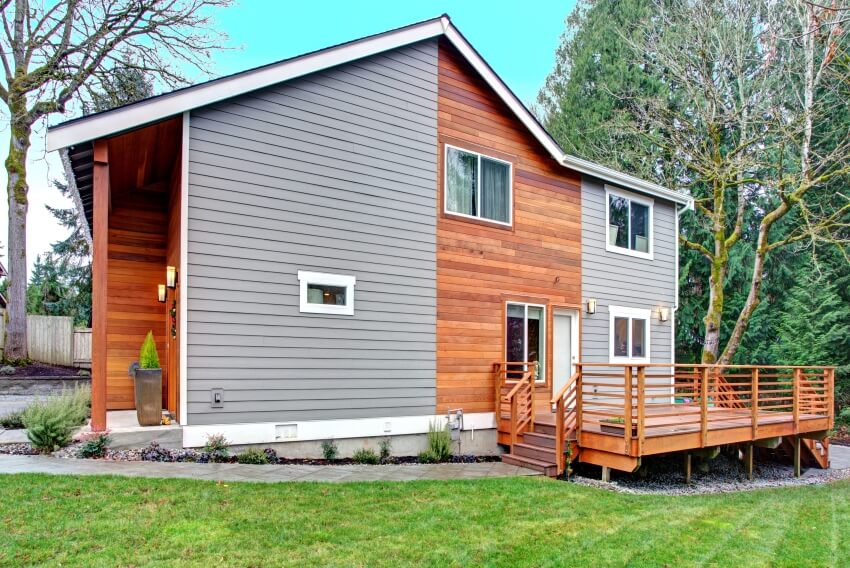
The exterior nickel gap shiplap is the perfect option for individuals wishing to extend the aesthetic outside. Made from recycled components that are exceptionally dimensionally stable and resistant to rot and decay, this material considers exterior siding in mind.
Use the nickel gap exterior siding for outdoor living spaces, restrooms that are often steamy and damp, external siding, and any other location where weather or moisture may be a factor.
Exterior shiplap siding is incredibly carpenter-friendly and easy to install. Three easy stages comprise installation: cutting, fastening, and painting. There are no particular installation methods or limitations regarding gapping, butt joints, priming edges, or field cuts.
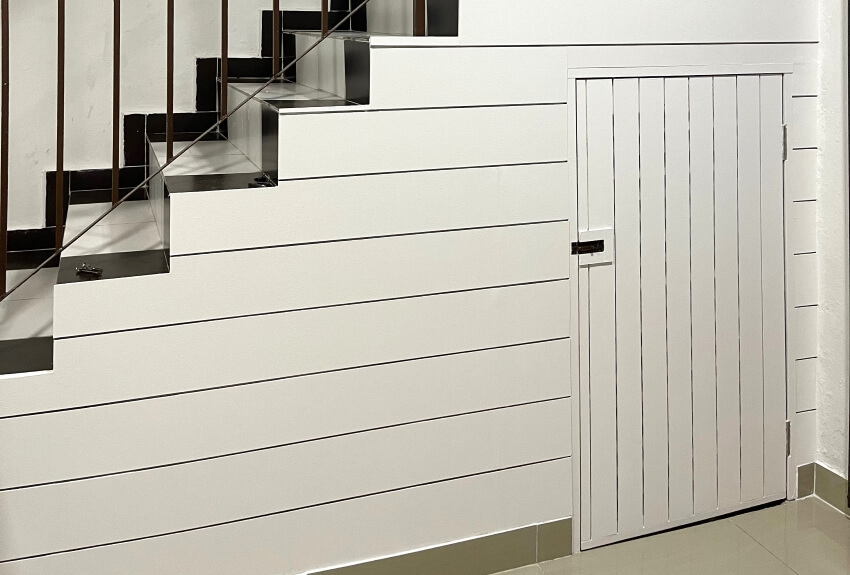
DIY Shiplap with Nickel Spacing

DIY nickel gap shiplap is the way to go since it is far less expensive to create the illusion of lap siding using plywood strips rather than actual lap planks.
In addition, because “genuine” shiplap boards are only about 34″ deep, you must remove all of your molding (baseboards, crown molding, and door trim) to install it, and then you must replace the molding on top of it.
For a DIY nickel gap lap, preparation is crucial. As a starting point, you should paint the room’s walls the same shade as the panels. You certainly don’t want a different color showing through the tiny space between the boards where you can see the wall.
You can DIY many other types of shiplap, but nickel gap tongue and groove planks are advisable for a novice. These boards give you a traditional shiplap appearance and are simple to snap together for proper spacing (nickel gap spacing, to be exact).
Here is how to use the tongue and groove shiplap in your house:
1. Mark your studs: Utilize a stud finder to determine the location of your wall studs, and then use a level to draw straight lines up the wall. The boards will hide them, and it is far simpler to locate studs through your walls than it is to do so while also searching through the boards.
2. Make a level base: Start hanging your panels after you’ve marked your studs. Choose whether to begin at the top or bottom of the wall. Starting at the bottom makes it simpler to check if a board is at the level when you are on the ground.
It is crucial to make sure your first row is level. Using a brad nailer, fasten your first board into studs along the lip of the board. Keep hanging the panels close to one another until you finish the first row.
3. Coat the inner lip between boards: Paint the exposed board lip between rows if you’re painting. Even though this step isn’t strictly essential, it is far simpler to paint the gap while it is visible than to fill it in at the end with a little paintbrush—just a little time-saving measure.
4. Stagger and nail: You may continue to the next row after the paint has dried. Make sure the tongue and groove are completely clicked and pressed together.
You will repeat this procedure along the wall. Although the boards don’t have to be staggered, avoid having two vertical lines where two panels intersect directly on top of one another.
The components at the end of each row should then fit using a miter saw and measuring tape. Level and nail repeatedly, and although they are not always a required addition, trim pieces around the wall’s perimeter for a charming touch.
5. Use spackle to cover gaps and holes: Hanging shiplap is simple, but the other procedures are as crucial. Use a spackle to cover any gaps and nail holes in your wood boards once hung. Sand the spackle down once it has dried to hide the seams, smoothen the sand, and then go over it again.
After sanding all seams and spackle, wipe down the wall to ensure that it is clean and free of dust or dirt. You may now proceed with painting the boards with a standard wall roller, but pay attention to the gaps since paint can occasionally collect.
Nickel-Gap Shiplap Dimensions
There are several options for plank dimensions, depending on your design needs. The shiplap boards may be trimmed to any size and come in conventional lengths of 4′, 6′, 8′, and 10′. You may cut any board to size.
When the two boards are put side by side, there is a 1/8″ gap—roughly the size of a nickel—hence the name nickel gap. You can mount the shiplap in any direction, including vertically and at an angle.
How Thick Are Shiplap Boards
Shiplap boards are available in 6,” and 8″ widths and are 3/4″ thick. With a precise 1/8″ spacing between each board in a bespoke design, you get the appearance of shiplap with the desirable “nickel gap” effect.
Using spacers, provide consistent spacing (usually 1/8 inch) between each board. You may use whatever spacer you desire, such as tile spacers or the edge of a carpenter’s square. To make the boards seem uniformly spaced, be careful to place each panel using the same spacer.
How To Paint This Type of Shiplap
Before you paint a nickel gap shiplap, you must choose a paint color and sheen. You can get to work when the wall is ready for painting. Choosing a paneling color can be intimidating, like any other paint color.
For example, suppose you want to make your shiplap accent wall a showpiece. Why not use darker paint color to make the wall a focal point if this is the case? Do you want to go all out with a darker shade? Then white is the color to go with.
Paint and primer in one is the best type of paint to use. Nickel gap shiplap is best with a matte or flat finish. However, the sole disadvantage of a flat finish is that it is difficult to clean. A semi-gloss finish would be easier to clean but would look gleaming.
Before you begin installing on the wall, make sure that all of your boards are ready for painting. To prepare the wall, paint it the same color as the lap panels to make it simpler to paint between the cracks later. Painting the cracks takes time, so having the wall already painted will offer you an advantage.
You will need to sand your boards to prepare them. To begin, get some 80-grit sandpaper. A sheet or palm sander will suffice.
After filing the panels smoothly and dust-free, you may start putting them on your wall. The most challenging aspect of painting shiplap wood is getting in between the planks.
Begin by painting in between the boards using a smaller paintbrush. Apply plenty of paint to your brush and work your way into the cracks. After you’ve painted between the boards, grab your paint roller and roll the wall like any other.
Next, look for paint that has accumulated or pooled between the boards. If this happens, run a tiny spackle knife into the gaps to remove the extra paint. Allow the first layer of pigment to dry before deciding if you need a second coat. Repeat the technique if you want a second coat.
How To Nail Shiplap Planks
Set the board in the desired location and drive nails through the flange and face of the panel to attach the shiplap. Then, to achieve a smooth look, you must cover the nail holes on the front of each board with wood filler.
Just as you would fill in nail holes with wood filler when attaching, you’ll want to ensure that any gaps and edges are filled with caulk to produce a seamless appearance. The edges will have neat lines and a polished appearance after caulking.
The simplest and most effective equipment when installing a lap or tongue and groove is a finish nailer or brad nailer. They are lightweight, inexpensive to buy or rent from your neighborhood hardware shop, and easy enough that even a 12-year-old can use them.
Put a nickel or quarter as a spacer between the boards to ensure they are all spaced equally. Some people like the way shiplap looks with exposed nail heads. Nail the boards via the rabbet or tongue to prevent obvious nail holes.
Where To Buy Shiplap
This paneling can instantly add character, texture, and rusticity to any space. It is inexpensive and straightforward to install, requiring just a few essential pieces of equipment.
You can buy wood paneling online and in a few hardware shops nationwide. We advise going to a nearby lumber yard since it is often less expensive than purchasing from a large hardware shop. Purchasing the boards and other components and installing them yourself is the most affordable method to achieve the design.
However, if you haven’t installed a nickel gap shiplap or are new to DIY tasks, consider hiring a trim carpenter or general contractor. It can be preferable to hire a professional if you’re dealing with a challenging area, such as walls with windows and doors.
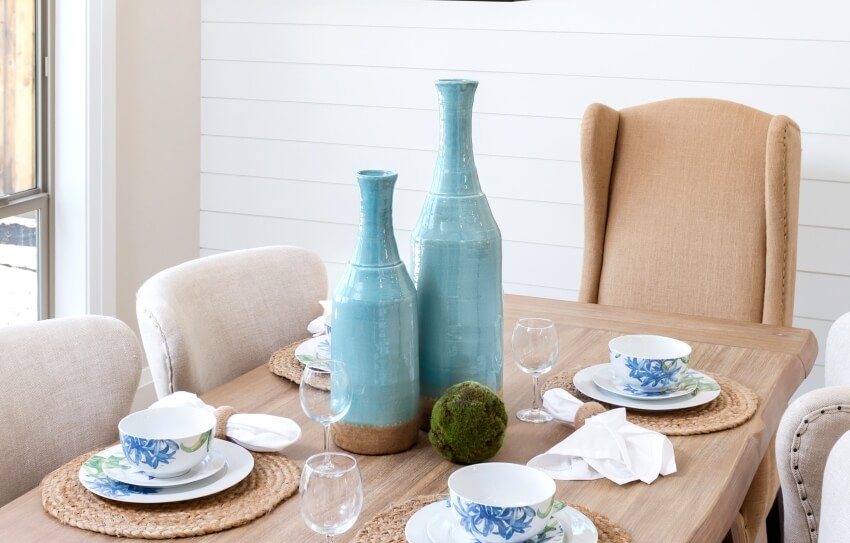
For more related content take a look at our shiplap dining room ideas gallery.
To showcase highly specific designs, some images on this website use advanced AI-generation software to illustrate ideas and room inspiration. See our editorial policy to learn more.