Mirror Wall Panels (Types & Design Gallery)
This mirror wall panels guide includes what they are, types of reflective panel designs, where to use them, benefits, and the installation process.

One beautiful and decorative element you can add to your spaces at home is mirror home panels. They’re great because they can easily transform any space into something airier and brighter almost instantaneously.
Wall mirrors are glamorous and trendy and something that can add value to the overall aesthetic of the space. These reflective products can also come with a lot of variety. They come in many different designs, from modern-looking starbursts to fun-looking geometric patterns to metal flowers and so on.
There is bound to be a mirror wall panel for literally any type of budget and any style or décor theme. If you want to make a considerable amount of visual impact with little cost and effort, then mirror wall panels are the way to go. [toc]
Quicklook: Different Mirror Wall Panel Types
• Multi Panel
• End-To-End
• Decorative
• Mosaic
• Beveled
• Smoked
• LED
• Custom
What Are Mirrored Panels for Walls?
Mirror wall panels comprise large pieces of high-end glass (or at least high quality). It’s a piece of architecture made of glass that comes in endless dimensions and varieties in terms of color, size, shape, and even finishes.
They’re a great way to add a bold statement piece to your space without making things look and feel overwhelming. Mirror wall panels also don’t take up any amount of floor space as they’re tacked onto the walls so that they won’t affect your floor layout.
Where to Use Mirror Wall Panels
Mirror wall panels are used to reflect light, create an effect of having more light and space, and overall draw attention to them. Your mirrors can easily be the focal point of any room if you want.
Here are the different places and functions where your mirror wall panels can be of use to you:
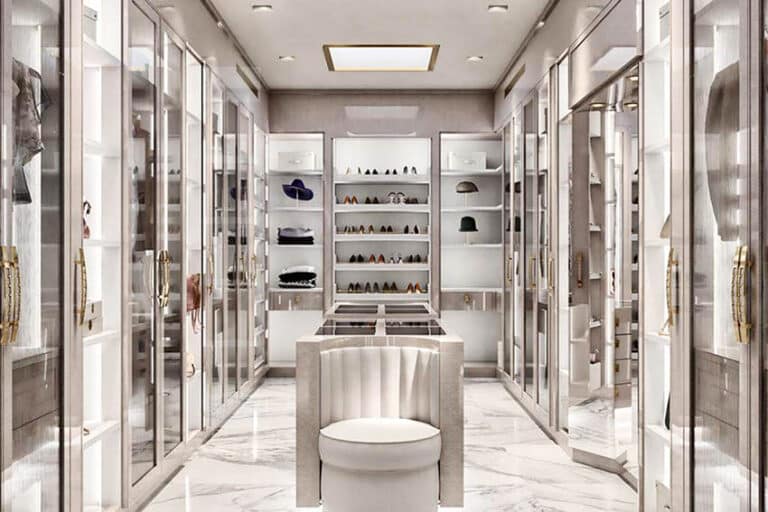
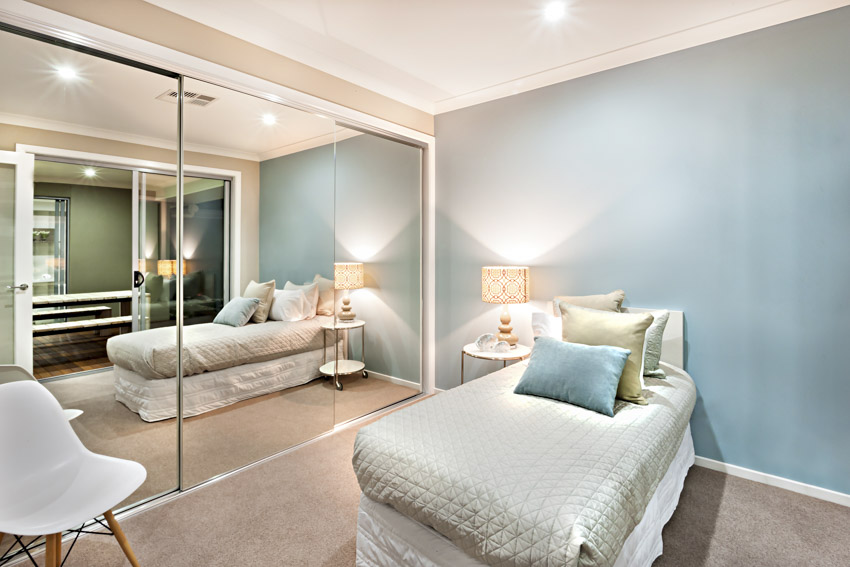
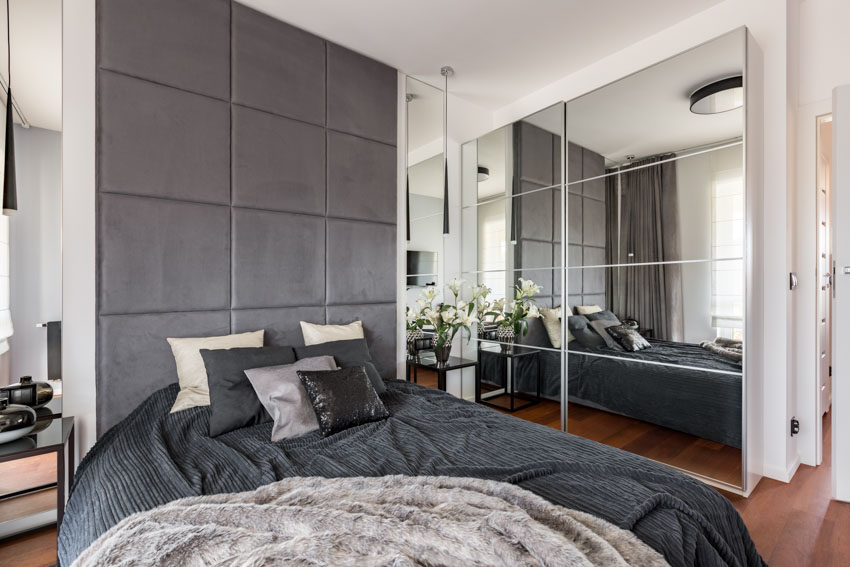
Closet doors: If you want to open up the look and feel of enclosed closet doors, mirror panels can help. There’s also the added benefit of having a functional reflective surface that you can use to check your reflection when you’re dressing up and getting ready.
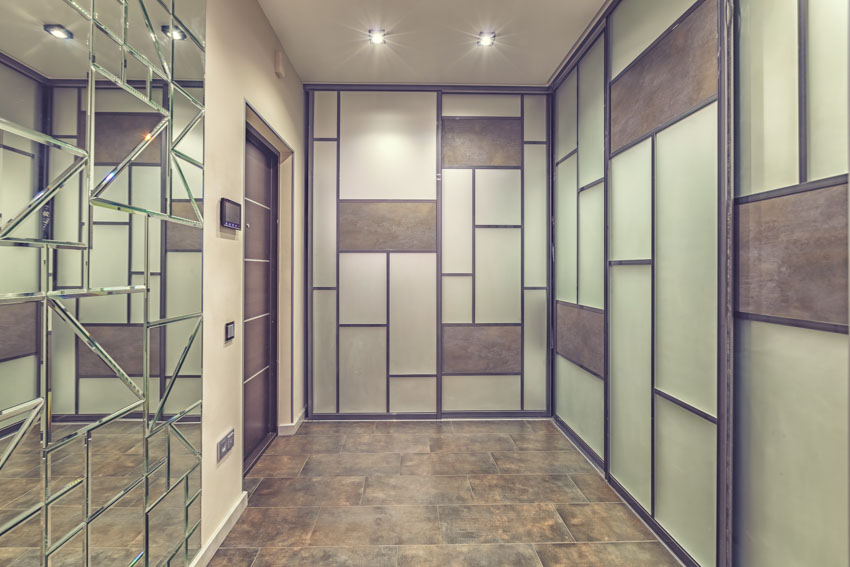
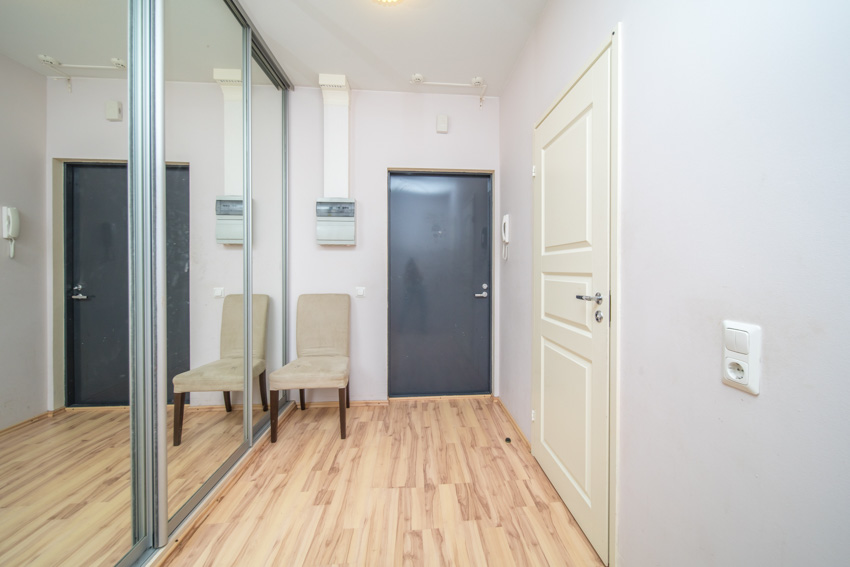
Hallways: This can transform narrow hallway dimensions and make them look and feel so much wider. The space will feel like you have so much more area to move around in.
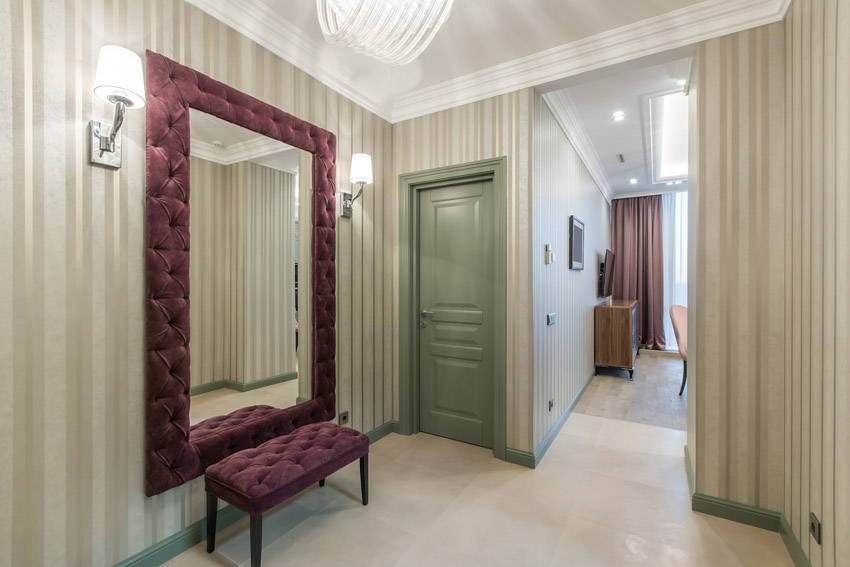
Entranceways: When mirrors are installed along your entranceways, they can create a vibe of intrigue and drama. At the same time, you will also be able to effectively reflect artificial or natural light, effectively opening up the space and making it look friendlier to the eyes.
The use of glass as mirror is well established in interior design and, conventionally, it is used to give an accurate reflection of the room that contains it. – Furniture for Interior Design, Drew Plunkett, Sam Booth
Alcove walls: Adding mirror panels can transform your alcove walls into statement pieces. This can turn them into an attractive architectural element that adds a lot of value to the space that you’re redecorating.
Stairways: Stairways can, at times, look and feel cramped. This is something that you will be able to easily remedy by installing reflective surfaces to create the illusion of having more light and more surface area in the space. See more staircase wall decorating ideas here.
Indoor pools: Indoor pools provide naturally reflective surfaces because of the water. Adding in reflectivity could highlight this element even more.
Home athletic studios: Working out while being able to check your reflection is a great way to make sure that you have your form and posture right.
More than that, even when dealing with a small amount of space, as with most home gyms and yoga studios, you can even open the space up and make it look so much bigger and more spacious than it is.
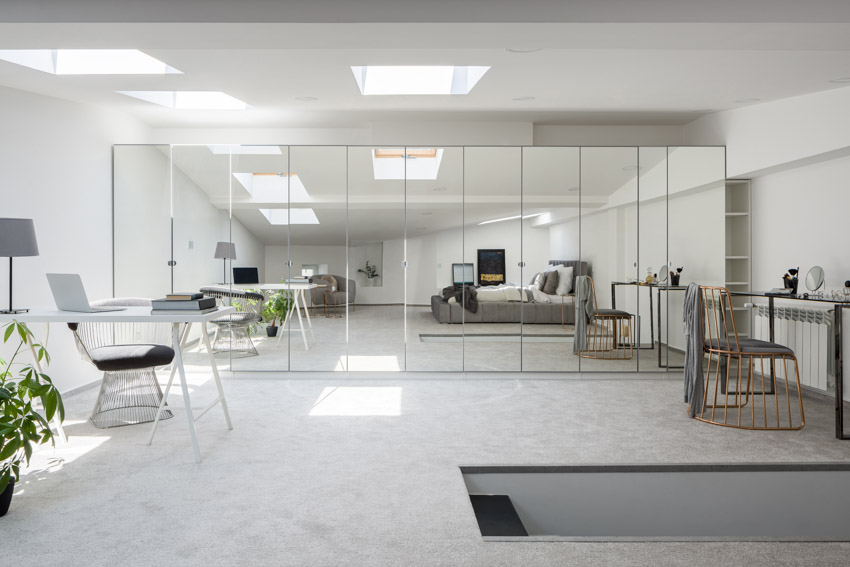
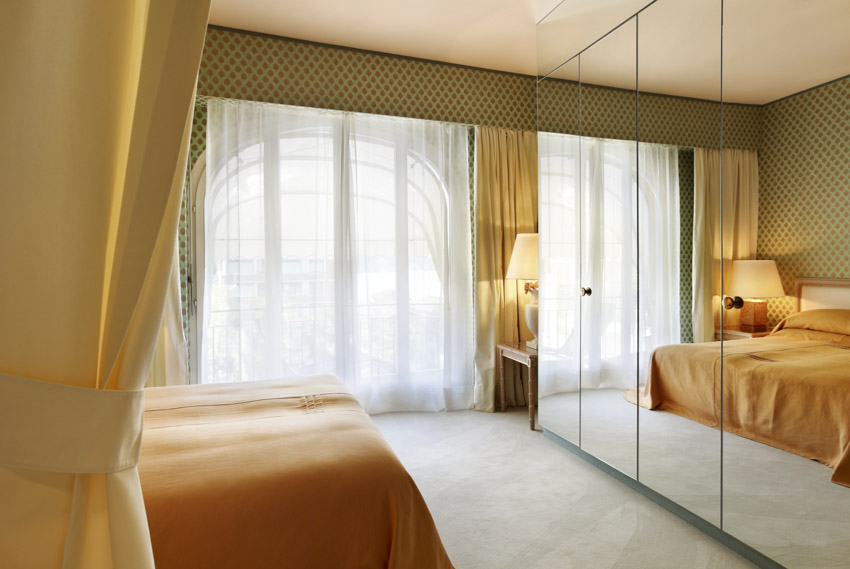
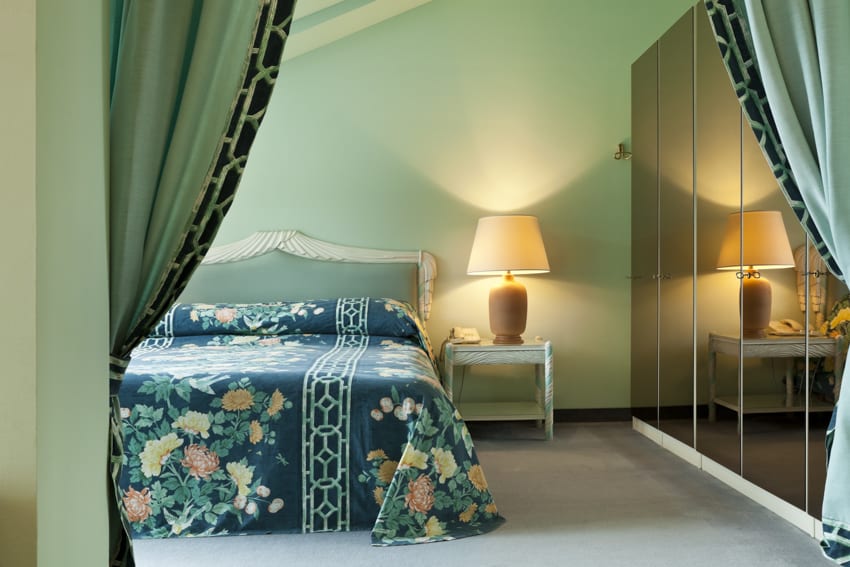
Behind large furniture pieces: One downside to having large pieces of furniture in the home is that they can close the space up, especially when backed up against the wall.
Types of furniture can include things such as a big bed, an office desk, or even a fireplace. After all, room layouts are all about the element of illusion, and these surfaces are great at achieving that.
Literally anywhere: When you think of it, you can tack mirror wall panels onto anything anywhere. If there’s any space or room in the home that you would like to upgrade with minimal effort, then reflective sheets should be your first go-to approach in changing it up.
Mirror Paneling Benefits
Timeless: Mirror wall panels are attractive, and they can be quite timeless. Unlike other decorative materials, they don’t go out of vogue. Regardless of your design preferences and styles and no matter how the trends evolve, you can rest assured that your reflective walls will be able to keep up with them.
Has no issues with moisture: Unlike most types of drywall timber or other materials that have issues with moisture, mirror wall panels have none. They don’t take on moisture, so you won’t have to worry about mold growth over time. It won’t get damaged by it, and you even get to enjoy the benefits of enjoying it for longer.
Easy to maintain: Wall mirror panels are made out of glass. Glass is a material that is pretty easy to clean. All it takes is nothing more than a simple or basic glass cleaner, and you should be able to update your wall panels and make them look like they’re brand new.
High-quality glass, in particular, may lose its luster as the years go by, but this doesn’t mean that you’ll end up spending a lot of money to maintain it.
Durable: Although glass might seem like a fairly delicate material, this isn’t exactly the case with architectural glass. This type of glass can turn out to be incredibly strong. It means that the material is bound to last. It will not scratch or break easily.
Wall mirror panels go through a lot of impact from daily wear and tear, but you can rest assured that your panels could stand up to that.
Types of Mirror Wall Panels
Here, we share the different types of mirrors used for wall panels
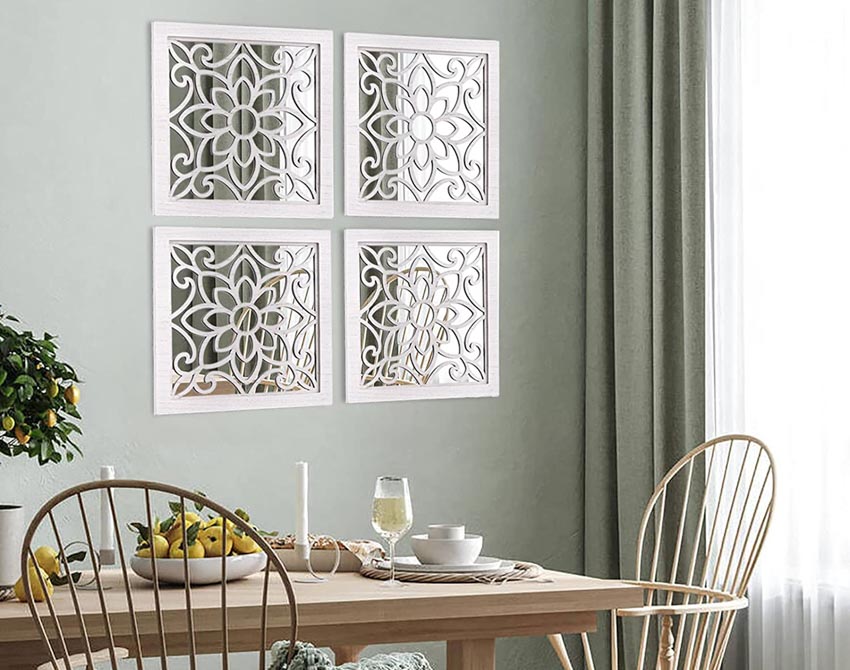
Multi-Panel Mirror
Multi-panel wall mirrors comprise multiple small panels that make up a whole unit. They can add a clean-looking focal point to the room that you’re decorating it with.
They look graphic and can command attention. If you want something that makes a statement, multi-panel reflective panes are the way to go.
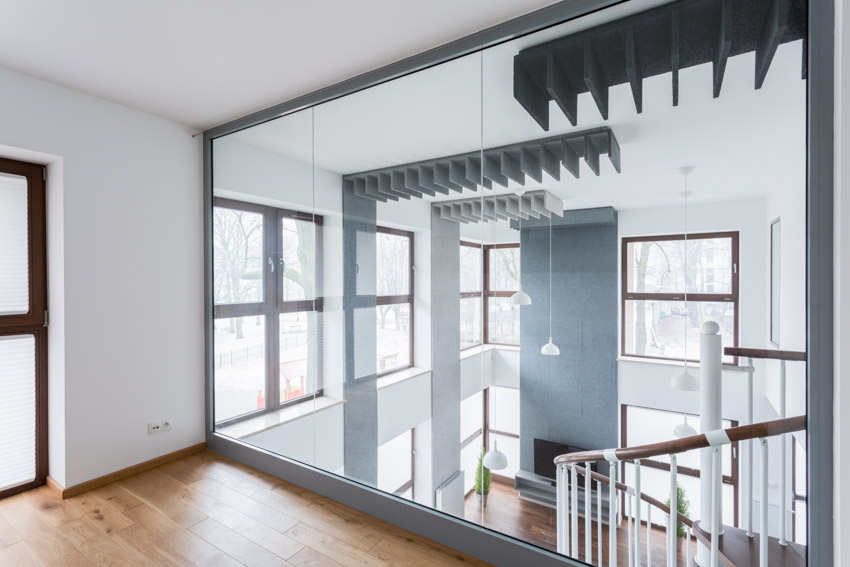
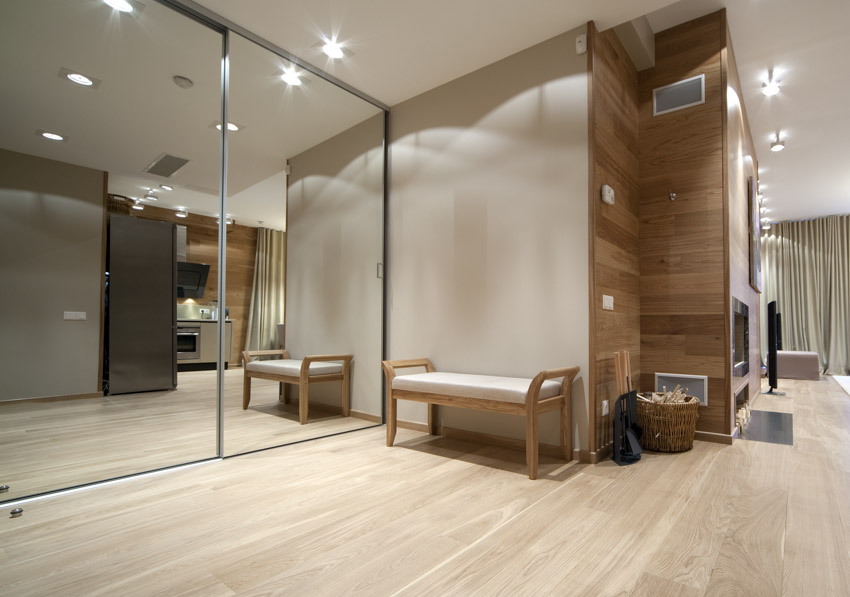
End-To-End Paneled Mirror
These are panels with mirror sizes that span a wall from one end to the other, from floor to ceiling. This can make any small area stand out and appear so much more prominent than it will initially look if it isn’t installed with the wall panels.
If you’re dealing with a cramped bathroom space, end-to-end mirror wall panels can instantly increase the room’s appearance, adding space and depth to it.
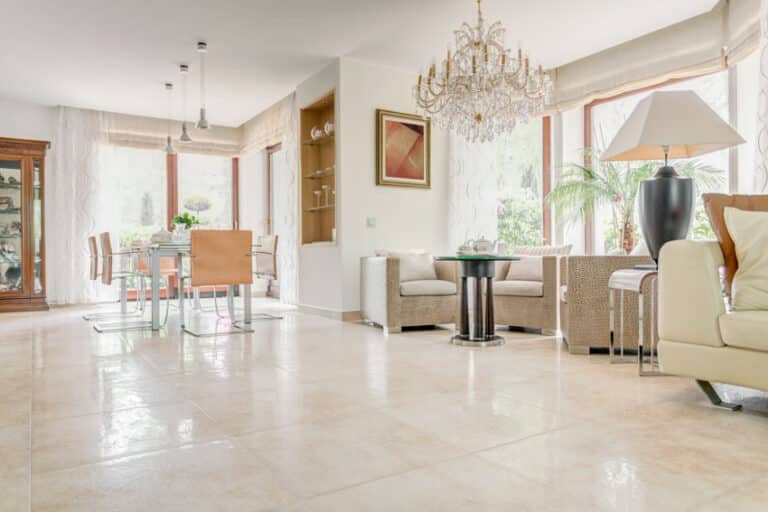
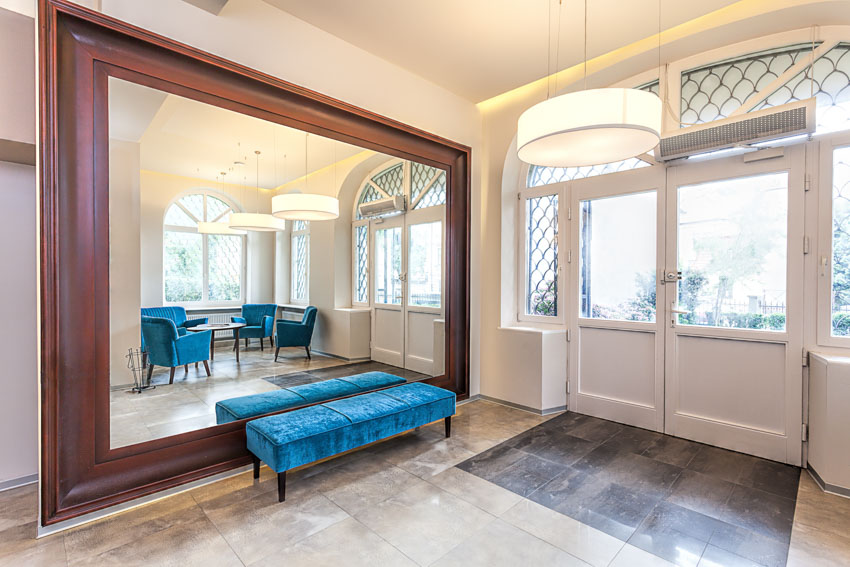
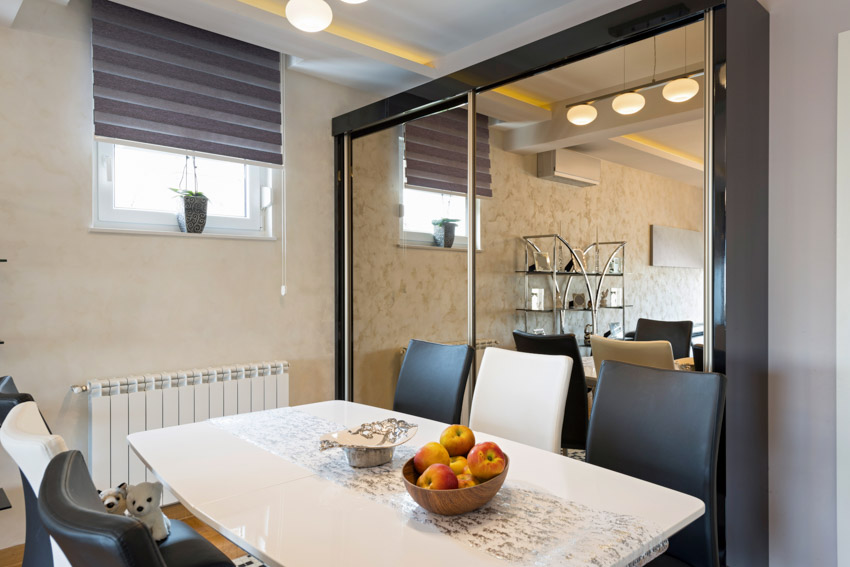
Decorative Wall Mirror
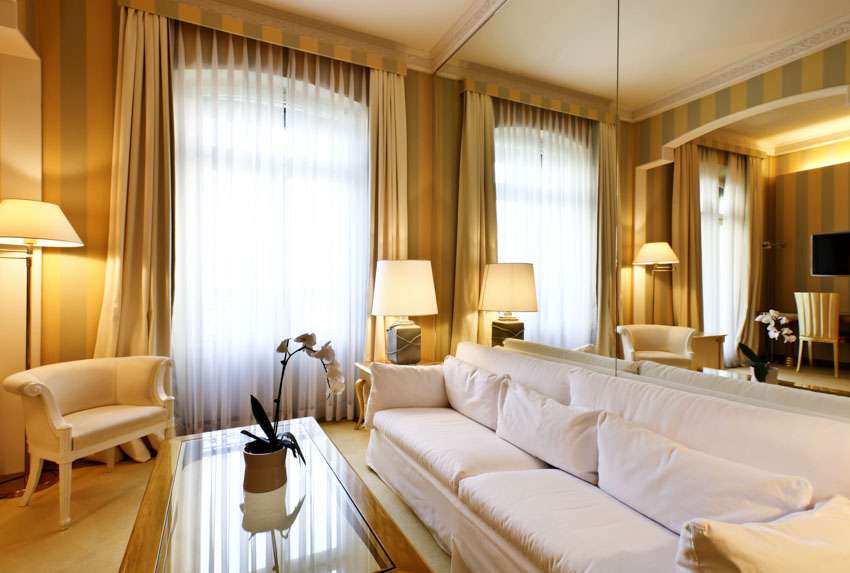
This can be perfect for your receiving areas, such as your living room and your dining room. Decorative wall mirror panels can set the backdrop for something elegant and beautiful.
If you want to make a space look enticing while, at the same time, providing an illusion of space, decorative reflective wall surfaces are for you.
They can be in every shape and design that you could want. If you want to make it even more decorative, you have the option to pair it with fine light fixtures to really bring out its beauty and further provide illumination to the space that you’re redecorating in the home.
The options you have are limitless. With some thought, you can easily develop something that will elevate your space.
Mirror Mosaic Panels
This is usually a marriage between mirror wall panels and decorative mosaic glass tiles. The results look antique and colorful, reminiscent of how stained glass windows in church cathedrals usually look.
If you’re decorating an area in the home that doesn’t get a lot of natural light throughout the day, you might want to consider getting mosaic mirrored tiles.
You get additional illumination and the illusion of created space from the reflective surfaces, but on top of all that, you get the added benefits of the light bouncing off of the colored mosaic glass tiles.
It makes for a very impressive-looking element in the room and can also easily be the main point of interest in the space you’re redecorating.
Beveled Wall Mirrors
Beveled mirrors have a slanted edge, which creates a framed look around the edge. They add a touch of elegance to any space and can be used to create a focal point on a wall.
Beveled mirror wall panels have a special place in the hearts of interior decorators everywhere. A beveled panel will usually have its edges cut and polished. A specific size and angle are usually observed.
This produces a look that’s elegant and extremely polished since the panels look like they have been individually framed. The bevels are acting as borders.
Bring them side by side, and you have a looker to give you a good run for your money. They cost more than flat mirror panels because you’re paying for extra processing and manufacturing.
The result can be quite astounding, though, and well worth the extra money you’re paying. The middle part of the individual panes is usually thicker as the edges taper out, bringing in the element of varied textures. This can be quite a treat if you want to introduce that to the space you’re designing.
Smoked Panel Mirrors
These are typical mirror wall panels with a bit of color added to them. Smoked reflective panels are at times nicknamed grey mirrors as well. This is based on how the extra color can make the surface look.
The colors can vary greatly from black to gray tints to dark bronzes. It all depends on what your preferences are. To get the smoky appearance created for the reflective surfaces, a mixture of metal oxides is usually poured onto the glass and added while still in their hot and molten state.
The effect is very elegant and sophisticated, and if you’re going for something that looks minimalist and a bit somber, smoked glass surfaces are a great way to go.
Mirror Panel with LED
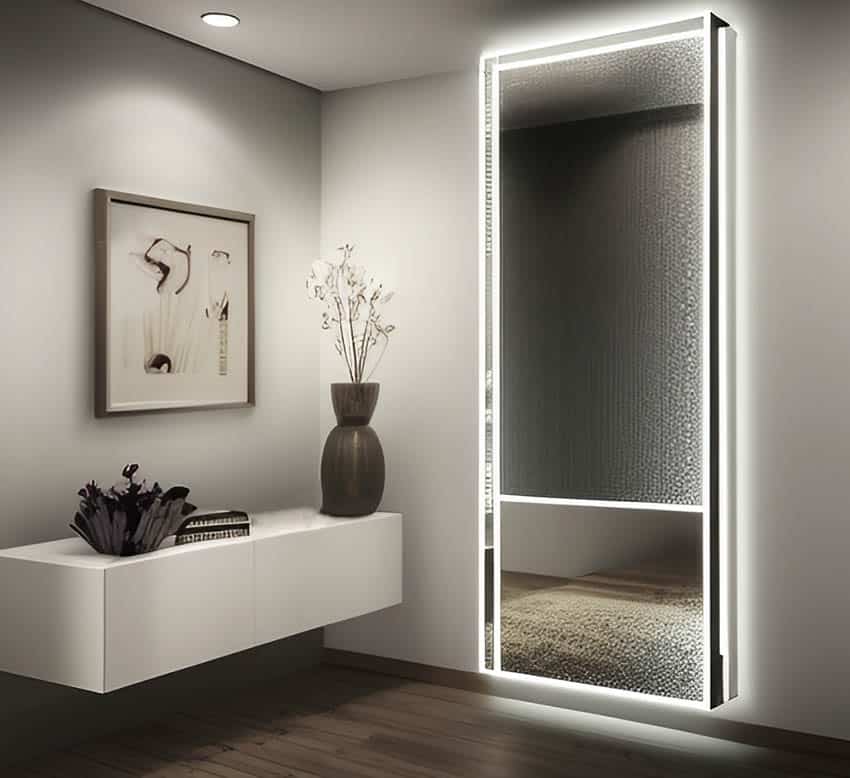
LED mirrors have built-in lights, creating a soft glow and making a space warm and inviting. They are often used in bathrooms and bedrooms and can be a great option for those who want a modern and functional design.
Some interesting features of LED reflective panels include built-in touch controls to change the brightness levels, a magnifying mirror for bathroom grooming, defogging functionality, and even Bluetooth speakers.
Custom Mirror Panels
There are so many things you can do with your mirror wall panels. You can easily customize them based on your heart’s desires. You can frame them with moldings ranging from the cost-effective to the high-end ones, add in splashes of color before you get them installed, get stencils on them, cut them in different sizes, styles, and shapes, and so much more.
The only limit to all of this is your imagination. If you can think it, you can do it. And if you can’t, you can rest easy because there are bounds to be a professional out there who can deliver exactly what you’re looking for at the end of the day.
The best way to get your reflective glass customized would be for you to go directly to the source. Have a detailed sit-down conversation with your local glass supplier and see if you can bump heads and create something that’s specifically made and designed for you and for the space that you’re adorning with a mirrored surface.
Just keep in mind that suggestions are great and all that, but at the end of the day, it all depends on what you want and how far you would like to take the design element of it.
Other Reflective Panel Types
Acrylic Mirror. Made from reflective metalized PET or plexiglass, acrylic sheets are made from acrylic, a type of plastic material known for being lightweight, durable, and shatter-resistant. Acrylic panels have a reflective surface similar to traditional glass mirrors, but they are much lighter and less prone to breakage.
Polystyrene. A poly mirror is made from polystyrene, which is a thermoplastic polymer. Polystyrene material is lightweight, heat-resistant, shatter-resistant, and flexible. This style is frequently used in closets and bathrooms and comes in different color options, such as silver, gold, black, and bronze.
3D Panel Mirror. The machine-made etched glass surface can create intricate designs. Patterned and custom 3D panels are popular in interior design and can make a room luxurious with a panel of these products. They can also be equipped with LED lighting to create interesting accent pieces that look like art.
Tinted Mirror. A tinted reflective panel is treated with a special film or coating to give it a colored appearance. Tinted mirrors come in various colors, including bronze, gray, pink, and blue.
The tinting process reduces the light that passes through the mirror, resulting in a darker reflection. This can help reduce glare or create a more intimate atmosphere in certain settings. The added color can be explored for a more sophisticated installation.
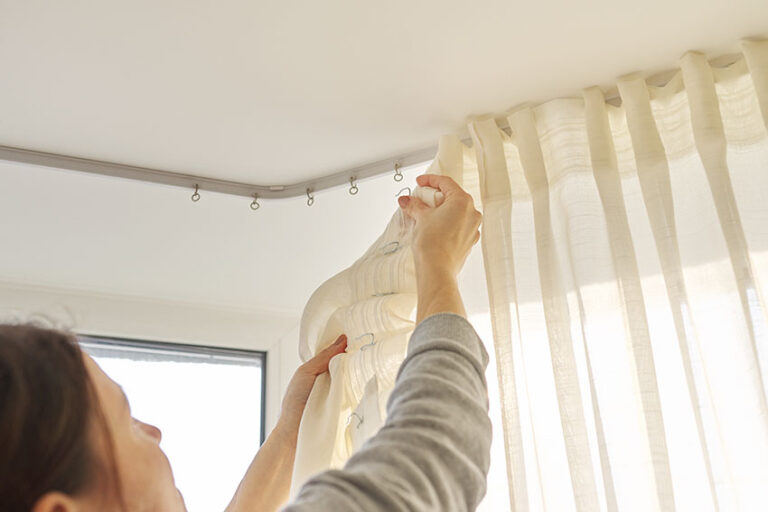
Mirrored Panel Installation
Installing mirror wall panels is somewhat similar to getting wall tiles installed. The only difference is that you don’t have to go through the hassle of applying grout in between them because they do not need for any.
This means that it isn’t as time-consuming, nor does it cost as much as tile installations do. But just like your tiles, your reflective panels can be installed in patterns, in a straight line, or in literally any design or way that you might have in mind.
Mirror wall panels are something that you can do yourself. You don’t always need to hire it out as a professional job. Here are the basic steps on how to get your reflective panels installed.
Clean the wall: You only need some water and a mild soap solution. This will eliminate dust, stains, or dirt particles on the surface. Any foreign particles may interfere with how the sheets properly adhere to the walls.
Make sure that it’s properly cleaned and wiped dry. Take some time with this and go about it slowly if you have to. This isn’t a process that you would want to rush.
Measure the wall area: Make sure you take horizontal and vertical measurements.
Mark it out: Usually, the best way for you to mark your wall out would be with the use of chalk. Start your measurement from the top using a vertical line, then start from side to side with a horizontal line.
Now, you can start by lining up your wall mirror panels: Start at the bottom edge, working towards the center. Then, work your way outwards towards the other side of the wall.
Shift the pieces around if you want to make sure that your reflective sheets will fit from one end to the other. Now that you’ve had a tentative outline of what your arranged wall sheets will look like once installed, it’s time for you to spread on some adhesive.
You are going to need some mirror mastic adhesive for this. Spread it over in 3 square foot areas. Take it one small area at a time. Rake over the applied adhesive with the use of a notched-edged trowel. This will give your adhesive area some traction and ensure that your mirror panel pieces tack on nicely and snugly.
Now it’s time to set your pieces individually, just as you planned before the mastic adhesive was on. Make sure that you press the pieces on tightly and do it one by one until the adhesive sets gently.
Make sure that you don’t end up butting the mirror panels too tightly side by side: They aren’t pressed together too hard, or you might end up damaging your reflective sheets. Keep this up until you’ve completed the first row.
Then, please proceed with the second row of panels and keep the vertical chalk line in mind to ensure they are arranged uniformly.
Once you’re done arranging all of your wall panels, follow through on the instructions of your mastic adhesives manufacturer for the curing process and the timeline.
Take extra care in ensuring that the application surface will not interact with you throughout the time while you’re waiting for the mastic to cure.
Once fully cured, wipe the mirror panels down with a clean rag with some glass cleaner sprayed. This will remove any fingerprints and residual dirt that might make your reflective panels appear dirty or blurry. Ensure you don’t spray the glass cleaner directly on the sheeting surfaces.
Installing Tips for Mirror Surface Panels
1. Combine Mirror Wall Panels with Other Elements. Integrating different materials such as wood as frame or surround.
2. Create a Panel Template. Creating a panel template can help ensure the panels are evenly spaced and aligned when working with multiple reflective sheets. Create a template using cardboard or paper, which will serve as a guide when installing the panels.
3. Use Mirror Clips. These clips can be a great way to secure larger reflective sheets. These usually come in pairs where the two clips are assigned on top and the other pair to the bottom.
Attach the clips to the wall and slide the panel into place. Be sure to use enough clips to support the weight of the mirror panel. These clips are one of the best ways to hang sheets on drywall, concrete, brick, and stone. (Attach to studs for drywall)
4. Use Proper Tools and Construction-grade Adhesives. Ensure you have the right tools and adhesives when installing the mirrored panels.
Depending on the size and weight of the reflective panels, a heavy-duty adhesive may be needed, such as construction adhesive or mirror mastic. Also, use a notched trowel to apply the adhesive, and follow the manufacturer’s instructions carefully.
5. Safety is a Priority. When handling these panels, wear gloves and safety goggles to protect yourself from broken glass during an accident or when cutting the glass.
Also, ensure the panels are properly secured to the wall to prevent them from falling and causing injury. Use OSHA-approved safety equipment and accessories such as EN388/2003 gloves.
6. Take Expert Advice. If you need help installing reflective wall panels or working with large or heavy panels, it may be best to seek professional advice. A professional installer can ensure the panels are properly installed and secure to prevent accidents.
Removing Old Mirrored Panels
You have two ways where you can go about this. You can either take them down carefully and preserve the pieces as much as you can, or you can go with the faster route to break them and get them removed more quickly.
The older mirror panels are usually tacked on with high-bond adhesives, while the newer ones are installed with adhesive pads or mastic.
However, they were installed, and you need to remove them from the wall before you can do any amount of redecorating. There will be some instances wherein the wall might need some repairs.
Also, if the mirror panels are butted tightly together, there might be no other choice but for you to break them for you to clear up the wall effectively.
Place drop cloths all over the areas directly under the sheets. This is so that you can catch glass pieces that have gone astray and ensure safety at all times.
Get a second person to help you out with this: This isn’t something that you can do solo. A second set of hands is usually needed to gently push the panel against the wall while removing it, ensuring that it doesn’t fall directly on the floor and break up into pieces.
Put on your safety gear: You will need some gloves and goggles for this. Make sure that the person helping you out is doing the same thing.
Even if you’re cutting through the adhesive and not breaking the glass up, there’s still the danger of some glass pieces going astray. Make sure that you’re protected throughout the time.
Slip a wire saw over the back edge of your wall panels: Then try to separate your panel from the wall. A wire saw is usually made up of a piece of abrasive wire that has two handles (end to end).
You can start from the top to the bottom of a panel piece or from the bottom to the top, whichever is more accessible. Ensure you have a firm grasp of both handles for your wire saw. Pull it back and forth. Repeat it as you go, piece by piece. Remove the panels carefully as you go along.
Are Panel Mirrors Still In Style?
We don’t think there will ever be a time when mirrors will not be in style as they have always been and still will be, an interior design favorite. And this is for a pretty good reason.
They reflect light and add illumination to any space – which is always a good thing. Mirrors can expand any room in your home visually. And, of course, they make for very stylish and decorative finishing accents.
They can come in expensive pieces or cheaper and more affordable ones. It all depends on what your budget is. You’re bound to find something out there that will fit in well with your needs.
On the downside, these panels can overwhelm some, and not everyone loves them. If you are installing them on a wall to sell a home, there may be some who find them to be an outdated style.
Alternatively, real estate has been more and more challenged regarding square footage. Having mirrors installed can make a big difference in the perceived size of a room.
If you’re dealing with a cramped space, you may want to consider leveraging the use of reflective surfaces, as they can make the rooms in the home appear bigger with little to no effort at all.
See more related content in our article about how to cover a mirror wall on this page.
To showcase highly specific designs, some images on this website use advanced AI-generation software to illustrate ideas and room inspiration. See our editorial policy to learn more.