Subway Tile Kitchen Backsplash Ideas That Never Go Out Of Style

Welcome to our ultimate guide to subway tile kitchen backsplash design ideas, including popular styles, patterns, and types. A backsplash may seem small, and its only purpose is to protect the wall, but it can actually be a major focal point in many kitchen designs. Here are some tips, tricks, how-tos, and inspirations on how to bring your kitchen backsplash from just useful to both being functional and beautiful. [toc]
What Is a Subway Tile?
The term ‘subway tile’ gets its name from New York’s standards in subways beginning in the early 20th century. These were (And still are) well known for a glossy finished tile with thin grout lines used on the walls. The iconic look of a subway tile is a 3 inch by 6 inch white glossy glazed rectangle with the aforementioned thin grout lines. Tiles were not something typically placed on walls, but in extremely high traffic areas such as a New York subway station, tiles helped with the wear and tear.
Subway tiles are traditional-shaped tiles that lookjust as good in contemporary kitchens as in rustic ones. – Step-by-Step Home Design and Decorating, DK
The public caught on to the design idea and now ‘subway tiles’ are used in a number of commercial and residential applications. Since these tiles are placed on a wall instead of floors, they are able to have a glossier glaze since it will not be a slipping hazard.
Rectangular Wall Tile Colors
Generally, if keeping true to the original subway tile design, they will be a glossy white, but that is not a requirement. Tiles can be any color imaginable based on the materials selected and the aesthetic being created. From natural stone looks, glossy neutrals, to bright accents, the world is at your command here. Pairing with grout colors is easy, too, with color matching. And what’s to say you only need one or two colors? There are options for mosaics and hundreds of patterns used with different colored tiles.
Subway Style Tile Patterns
While there is the traditional way that subway tiles were laid, it has evolved into so many unique designs. Here are the most popular backsplash tile patterns to bring excitement and inspiration to any style kitchen.
Straight Set Tiles
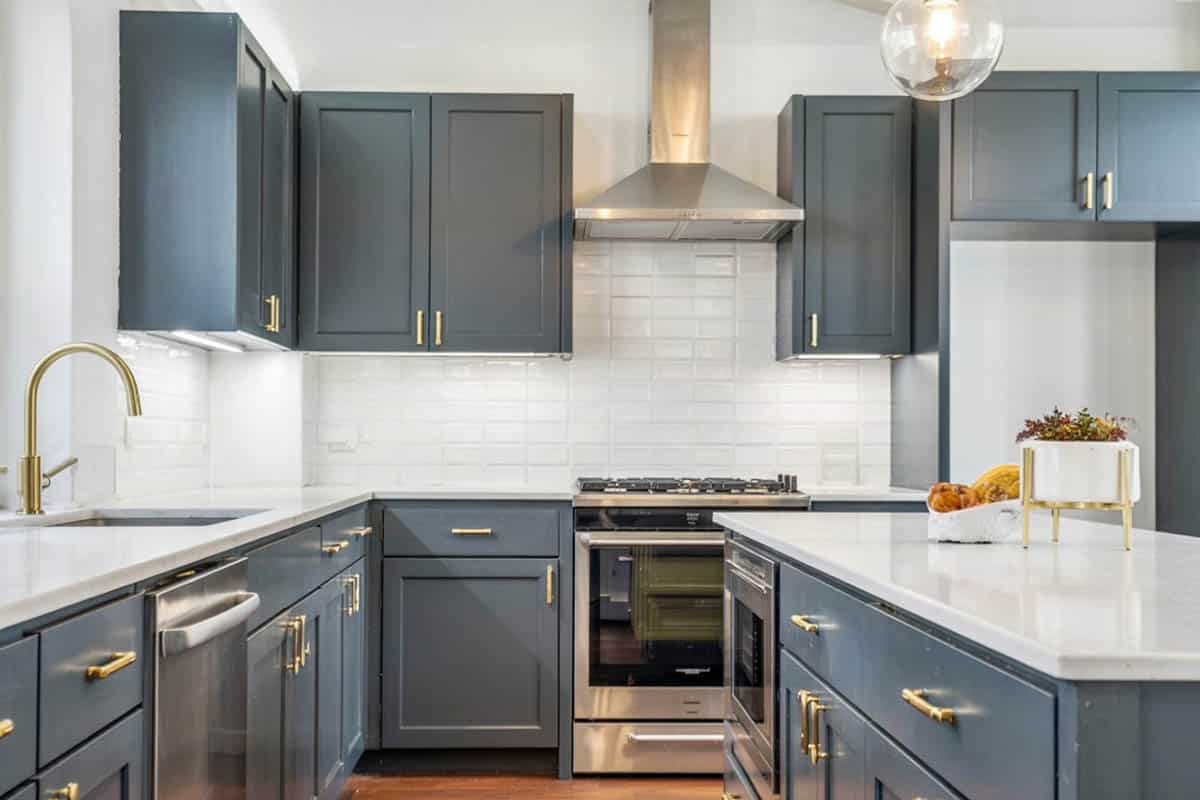
Straight-set installation is also known as straight lay, and it can be done in a variety of ways. This method is also referred to as stack bond due to the one on top of the other nature of the pattern. The overall idea of straight-set subway tiles is that it is square with the wall and are placed in parallel rows. The straight-set tile pattern is one of the simplest and easiest ways to lay tile, but to keep it interesting, there are many variations. It is most commonly horizontal, and as in all straight-laid patterns, all the joints will line up.
Vertical Straight Set Tiles
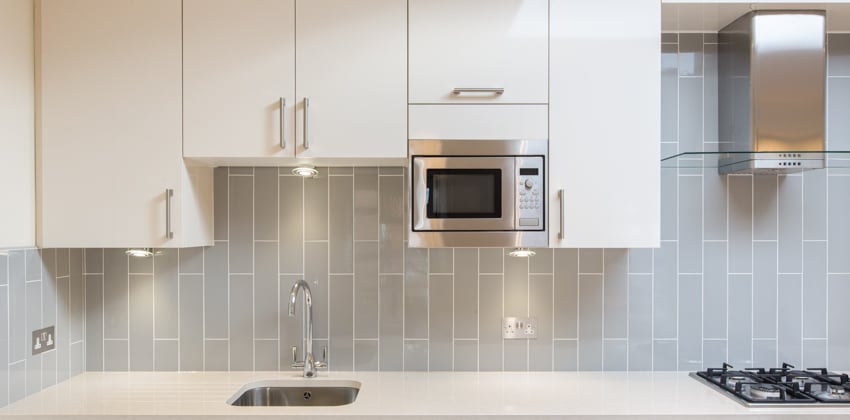
As a variation of the above-mentioned straight-set subway tiles, which are typically a horizontal lay, there is also an option to lay the tiling vertically. This is used in smaller spaces or rooms with lower ceilings to create the illusion that the space is larger. This pattern also holds the characteristics of the straight-lay tiles by being square with the wall and then being placed in parallel rows. The grout lines all line up. Another variation of this style is called the vertical offset pattern. We cover the offset style in more detail directly below.
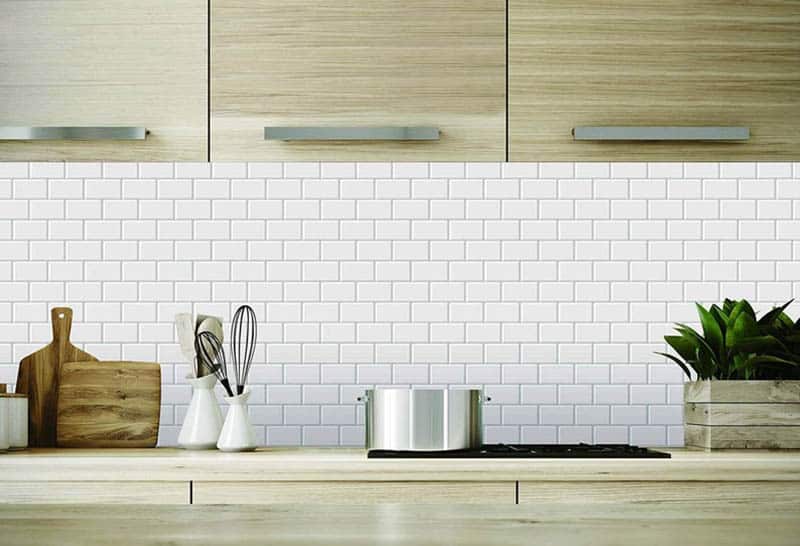
Offset Tiles
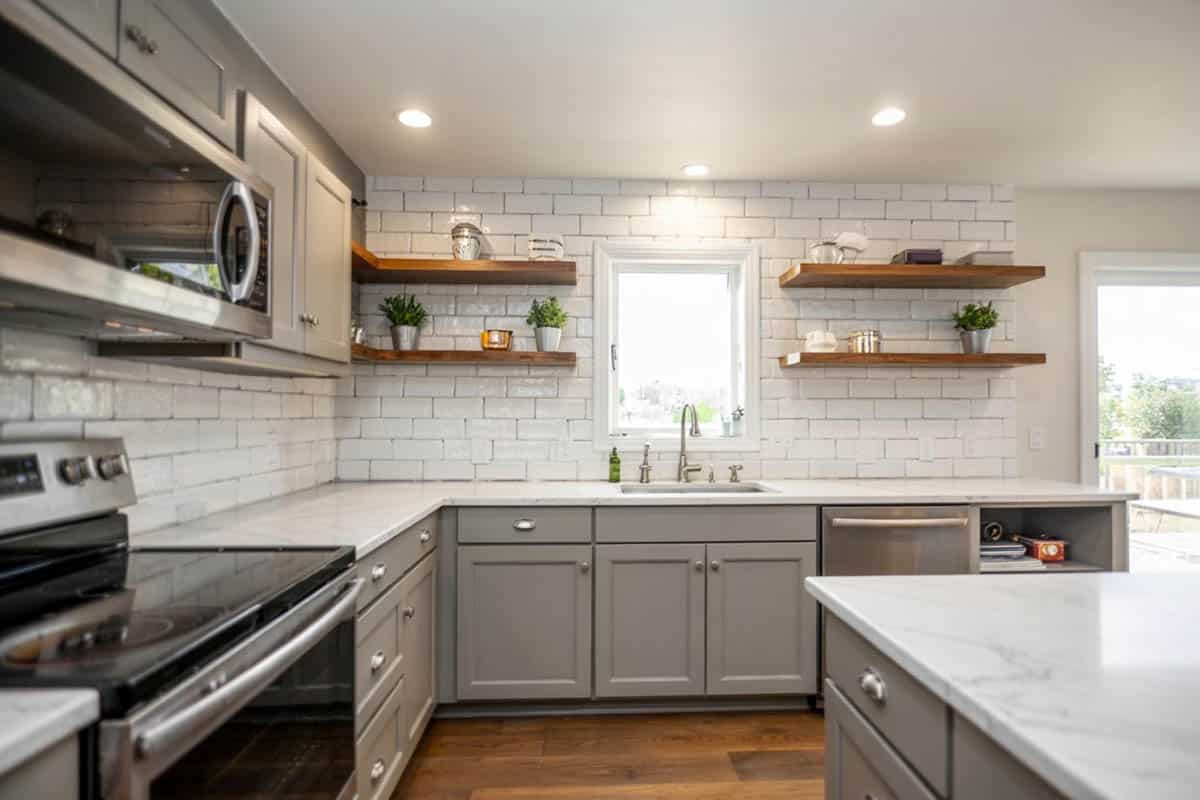
The offset pattern is pretty similar to the previous installation methods, but there is one key difference. This difference is where the style gets its nicknames of ‘brick pattern’ and ‘running bond.’ For an offset pattern, the tile is offset one-half the width of a tile in the rows above and below it. This was originally used by masons to create stronger buildings, but in non-construction uses, it adds an exciting pattern. There can also be color or size variations in the pattern to create even more visual interest.
There are variations to this pattern as well – changing up the offset distance. The third stagger offsets each of the tiles one-third instead of one-half. Random stagger is another option that will be similar to wood flooring patterns – where the planks (in this case, tiles) are not all the same size and will be randomly placed. This adds a very unique look for subway tiling and is not very common.
Diagonal Offset Tile
Another variation of the previous offset tiles – but able to have many variations of its own – is the diagonal offset subway tile installation. Instead of being square to the wall, this installation method will have a 45-degree angle from the floor line (or wall line, depending on the application). This method can have any of the mentioned staggering – random, regular offset, third stagger, etc.
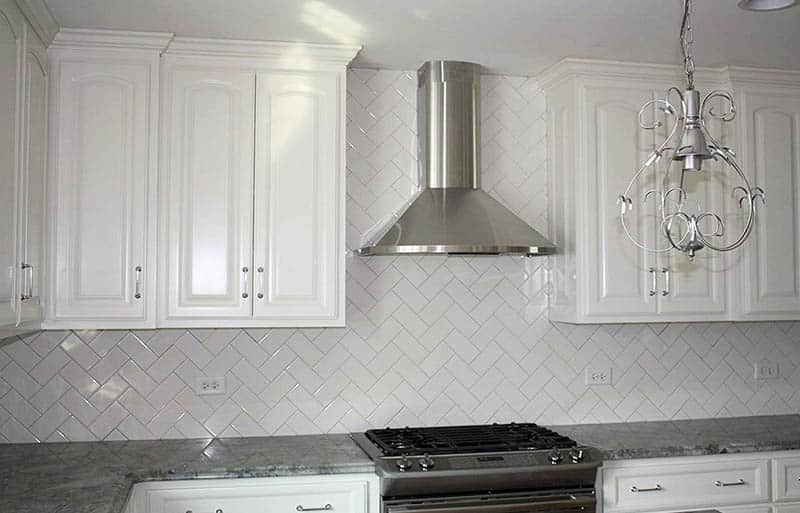
Herringbone Tile
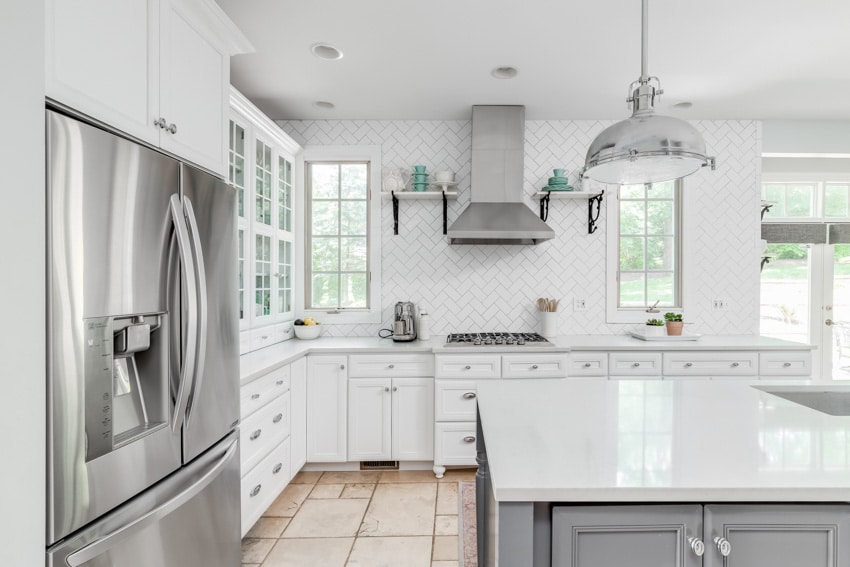
The Herringbone pattern uses rectangular tiles (so subway tiles are a perfect option) or parallelograms if you are feeling particularly unique. The size of the rectangles will usually be 2:1 or 3:1 ratios, making the 3-inch by 6-inch subway tile sets work very well with this pattern while still keeping its iconic style.
The pattern represents the bones of fish – specifically, the herring; hence the name. This pattern is best placed in taller or larger areas due to its horizontal and vertical qualities to create visual movement and bring the gaze upward.
Tile Sizes
Subway tiles come in a number of different sizes for a number of different uses. The ratio of rectangular subway tiles is usually 1:2, but it is not a requirement. Keeping the 1:2 size ratio is one of the things that makes this backsplash material so versatile and easy to arrange. Some patterns require certain ratios so they can be placed the right way.
Some of the most common subway tile dimensions are as follows:
• 2×4
• 2×8
• 3×6*
• 3×12
• 4×8
• 4×12
• 6×12
The 3-inch by 6-inch tiles are the standard – as these were used in the 50s subway stations and brought on the style. Certain styles will have different sizes (such as square or mini subway tiles), but these are the most common. Typically larger sizes will make a room seem larger as they have fewer grout lines and portray a more open look.
Tile Shapes
Again, there are the standard rectangular subway tiles that started the revolution and that made the style what it is, but now there are variations everywhere to fit all sorts of styles and needs. Some popular subway tile shapes are as follows.
Flat Tiling
If we take any context clues from the name, one would guess these tiles might be flat – well, that guess would be correct. The classic look of subway tiles has flat edges. This makes the entire piece the same height and shape. The basic shape allows for the focus to be on the color or pattern of the tiles.
Beveled Tiling
Beveled subway tiles add a bit more interest and texture to the backsplash design. The word bevel means to reduce to a sloping edge. That is exactly what the beveled edge does – it gives a slope to the edge to add a little bit of contrast and depth.
Bullnose Tiling
A bullnose tile is used as a trim piece. This is because of its rounded edge (or edges). The intent is to put it around the edge of the area of a tile to avoid any sharp or unfinished edges. These tiles are available in pretty much all the same styles and colors as the rest of the options, as it will be a finish piece. These are especially used in backsplashes, accent walls, and base trim for softer edges.
Mini Tiling
Mini subway tiles have most of the same qualities as regular subway designs, except the come in much smaller sizes. These tiles are about 1” – 2” and can come in rectangles or squares. Since the pieces are so small, they often come in sheets, making installation a breeze! These are most commonly used in backsplashes or other small decorative areas.
Large Tiling
With every sort of product, there will be an oversized version of it. This is where large subway tiles come in. They are just like your standard subway tiles but double, triple, or even quadruple the size. These come in handy when trying to avoid cramping a room up by adding too many patterns or grout lines.
Square Tiling
Square subway tiles are extremely similar to regular rectangular shapes, except (As the name suggests) they will be square. These can be placed in the same patterns and selected in pretty much the same colors (depending on stock). Mixing some square and some rectangular tiles can add a unique look.
Wavy Tiling
The wavy subway tile sounds like it could be a complex style, but it is more the surface-level finish that is wavy than the edges of the tile itself. This type of tile adds a unique texture to the tiles that make a space unique.
Backsplash Tile Cost
The cost of subway tiles, or subway tile projects in general, will depend on a variety of different circumstances. Subway tiles can cost anywhere from $1.20 to 15 dollars per square foot. The prices increase, though, when you get into finished costs which are between $6 and $13. This varies within states and by the company you buy products and services from.
Subway tile backsplashes range from $7 per square foot to $13 per square foot. This price is most heavily influenced by the types of tiles selected. Other items you need to complete a project, such as this is grout and sealant for the tiles. This is usually an average price of $1.50 per square foot. There are other tools you need (if this is a do-it-yourself project) if you do not already have them such as a grout float, level, tile cutter, etc. That can be a price addition to the project.
The labor costs (if this is not a do-it-yourself project) can be anywhere from $40 to $150 per hour based on the complexity of the tiling. This is because tiling is a labor-intensive project and requires a careful eye.
As mentioned, the tiles themselves have different prices based on size and type. A few examples are below. Prices based on the size of the tile (Estimated prices):
• 2×4: $7 per square foot
• 2×8: $7.50 per square foot
• 3×6*: $5 per square foot
• 3×12: $18 per square foot
• 4×8: $6.50 per square foot
• 4×12: $7 per square foot
Prices based on type of tile(estimated prices):
• Ceramic: $4 to $8 per square foot
• Glass: $29 to $38 per square foot
• Mosaic Glass: $31 to $38 per square foot
• Copper: $30 to $49 per square foot
• Steel: $33 to $41 per square foot
• Granite: $35 to $59 per square foot
• Marble: $39 to $46 per square foot
• Travertine: $20 to $30 per square foot
Subway Backsplash Tile Designs
The two main types of tiles are glass and ceramic.
Glass

Glass tiles are a bit more environmentally friendly than the other available options are a bit more expensive. In terms of looks, glass materials are quite transparent and reflect a good deal of light, making spaces seem larger. Glass is less porous than ceramic, which can help resist mold and mildew, but if it is not grouted carefully and properly, the glass can look dirty or smudge.
Ceramic
See this ceramic subway tile backsplash at Amazon
Ceramic subway tiles are the original material that subway designs were made from. Ceramics can handle a bit more wear and tear than glass, as it has greater stain resistance.
Porcelain
Porcelain subway tiles will follow suit with ceramic in most aspects, but they are a bit denser and less porous than ceramic. This makes porcelain a little bit more expensive and better for heavy-duty needs. Read more about porcelain vs ceramic tile here.
Carrara Marble
Carrara marble is a white marble stone that is extremely unique. No two pieces of this marble are the same, which makes the materials elegant as well as valuable. With value comes expense, and unfortunately, Carrara marble is pretty expensive. In addition, Carrara marble is a relatively soft material and requires special maintenance to keep the stone in good condition.
Mirrored

Mirrored subway tiles stay true to the name of the mirror. This type of subway tile is an extremely reflective surface that will act as a mirror. Mirrored subway tiles can take a smaller area and make it feel double in size with their reflective properties.
Stainless Steel
Stainless steel subway tiles are often used in more heavy-duty or commercial kitchen areas or in areas where you wish to give the look of a robust cooking station. The tiles will be made of stainless steel and give an industrial-style feel.
Travertine
Travertine is another strong material often found in Mediterranean interior designs and used as tiles. Travertine is a natural stone, so, unfortunately, is vulnerable to acidic substances and can easily scratch. This type of tile has a very neutral color palette and can have one of many finishes: polished, honed, brushed, or tumbled.
Mosaic
Mosaic subway tiles are available as smaller pieces in typically multiple colors with a pattern. These are often on a sheet for easier installation. Mosaic subway tiles can be in any of the abovementioned materials – glass, ceramic, porcelain, etc. This option offers a focal piece to backsplashes or other inlay areas.
Textured
Textured subway tiles can also come in a wide variety of mentioned materials, these just have a little more surface texture. In some materials, the finish layer will purposely warp, or the materials will be textured. This gives a visual and physical texture that will add interest to any tiled area.
Peel and Stick
See this peel and stick subway tile backsplash at Amazon
Peel and stick subway tiles are not the same as the rest of the mentioned materials, but it sure does look like it. Peel and stick tiles are made of plastic or vinyl and are extremely lightweight so they can be stuck to the wall like a sticker. There are some types of peel-and-stick ceramic and glass options, but they still require grouting after they are applied to the surface.
Tiles with Accent
Subway tiles can be laid in a variety of patterns, and not all of them need to be the same color; accents can help spice up a bland look. Whether the accent is a color or just a black tile mixed in with the white tiles, it can still add so much attention and pop to the tiled area.
How to Install Tile Backsplash
Installing subway tile will be done in a bunch of different steps, and there is a lot of waiting for things to dry. Below are a few tips and tricks on the steps to install subway tile backsplash. Before you buy them, you’ll want to calculate how much tile you’ll need and include a small extra amount of 10-15% for potential breakage and cutting.
How to Cut the Tiles
At some point in this project, cutting the tiles is necessary; it is best to be prepared for that. The suggested tool for cutting subway tiles is a tabletop wet saw. This is similar to a wood table saw, but the blade is carbon or diamond to be able to cut things like porcelain.
The ‘wet saw means that it will release a constant stream of water to reduce the dust and heat as much as possible – which is not an option when cutting wood. With that tool, follow the instructions for a quick, easy cut to all the materials needed for the project.
What size trowel should I use for subway tile? First off, the answer to this will depend on the area that will be tiled. Using a v-notched trowel is one of the best types to make grooves in the adhesive that will help the tiles stay on the wall even better. Small projects such as backsplashes require a smaller trowel than one may need in a shower of full wall setting.
How to Lay the Tiles
After cutting all the pieces to the correct sizes, there are a few more steps to take. Begin by preparing the wall on which the subway tiles are being installed. This includes covering the counters, cabinets, flooring, outlets, light switches, etc., and anything that is in the same area. If in an area that needs to be heavily water resistant, adding a layer of cement board is recommended. If not, the tiles can be applied to the existing drywall after a little sanding.
After sanding, it is recommended to plan out the lay of the tile pattern – incorporating something smaller (mosaic style) can come in sheets, making this step very simple. If there are sections that need bullnose tiles, make sure you have those where they need to be. The next step includes spreading the adherence on the walls, usually doing small portions at a time and then applying the tiles to avoid the substance chosen from drying.
There should be a little bit of wiggle room before everything dries so that you can make sure all the tiles are properly spaced and straight. There are spacers that you can get that will ensure an even space between all the tiles. These can come in hand and will be removed once the adhesive is dry.
How to Install Tile Backsplash Corners
In some cases, the tile will warp all the way around a corner, which adds a little bit of difficulty to the project. It is best to start in the middle and work your way out. Starting at the corner, you must line the tiles up how you want them. Instead of using grout at the corner joint, you should use caulk. This is because over time the walls will move over time, and grout will crack, unlike caulk which will move a little with the walls.
Tile Spacing
As mentioned previously, spacers are available for projects such as subway tiling. These pieces are small shapers (All the same size) that fit between the tiles to ensure that every tile is the same distance apart, giving an even look to the overall design of the tiled area. Some tiles take away the need for separate spacers; these have built-in spacers. Self-spacing subway tiles have grooves on the sides that will make for an automatic 1/16” space for the grout lines. This comes in handy because it eliminates the need for fumbling with small spacers.
How to Finish the Tile Edge
One of the most helpful pieces that is needed when finishing the edge of a subway tile will be the bullnose piece. This is used when the tiled section does not cover the entire wall in cases of backsplashes that only go between the counter and cabinets or on bathroom walls that only cover a certain area.
The bullnose tile piece will give a water-tight seal and avoid sharp edges. There is nothing different that you will need to do besides add this piece in the end to finish the ends. There are other styles, too, besides the bullnose. These finish pieces will be different shaped tiles that will remove the harsh edges, and bullnose is just the most common design.
How to Grout Tiles
After all the tiles are laid and spaced where you want them grouting them is the next and final step. While grout is a relatively easy step it can be easily messed up as well. Grout dries quickly so it is best to work in smaller 5 to 10 square feet sections to avoid grout lines where they are not supposed to be. Grout comes in many different types: powdered, premixes, sanded, non-sanded, etc. Check what the tiles suggest is best to pair with the product to pick the right kind. If it does not specify, a good identifier is how big the grout line will be. Sanded grout is typically used for grout lines over 1/8 inches thick, while non-sanded grout is recommended for lines under 1/8 inches thick.
When it comes to powdered over premixed, powdered needs to be mixed together and is usually used for bigger jobs, while premixed is quick and ready to go for smaller uses. To grout subway tile, there are a few supplies that you need. Some of these are the ones that you used in the steps of laying the tiles themselves, which means you can use them here. Needle nose pliers, tile sealer, grout (see above for what type is recommended), putty knife, rubber grout flute, one-gallon bucket, grout sponge, and cleaning materials.
Starting off the grouting process, make sure all tile spacers have been removed if applicable, and make sure the surfaces are complete and ready. If the tile is porous, it needs to be sealed before the grouting process begins. After that is complete, start by applying the grout to about 5 square feet of the tiled area with the rubber grout float. The intention is to get it to fill the joints between the tiles, but getting some on the tiles is ok. After filling the section joints with grout, get the grout sponge and clean the tiled area with some excess grout.
If it is important to you, shape the grout lines – you can run your finger over them, or you can use a special tool. This just removes excess grout and smooths the joints out. After these steps have been performed on the entirety of the tiled area, let it sit for about an hour, then complete the final clean. This will include using a cloth to remove any excess material from the surfaces. Following that is the buffing of the floor tiling using some sort of cheesecloth or magic eraser, depending on the shiny you desire.
What Color Grout Should I Pick?
Grout can come in a wide variety of colors and sometimes can be color matched to certain tiling which is the design intent. Often, people will pick a grout color that is the same color family as the tiles but just a few shades darker or lighter than the selected material. Sometimes, though, not all the materials are the same color, which can throw off which color you may choose.
With multicolored tiles, it can also be good to pick the most prominent color tile and coordinate with that tile in particular; typically, the others will coordinate as well. Sometimes with too many colors, a neutral is needed. A few neutral colors and their best uses are as follows.
Subway tile with white grout is not often selected due to the ease of it changing from pure white to an off-white. Just beware of that choice when making it. If you can keep it clean, it will be a beautiful addition to the color and give a clean-cut appearance.
Even if the pure white grout fades to an off-white, it can still be a beautiful addition. Subway tile with gray or off-white grout can make a dramatic look. With the different hues of gray and off-white, it can be paired with warm-tone and cool-tone tiling. These neutrals will become timeless as they will be easiest to pair with any changes in color, accent style changes, or even resident changes.
Another option can be subway tile with black grout. Going with a darker grout like black will give a high-contrast look for any color tile you choose. Black grout is extremely good at hiding dirt that may get stuck in the grout, which is a plus since grout is not the cleanest part of the tiled area. With its high-contrast appearance black is good to be used in geometric designs and patterns.
The best grout color for white subway tile will depend on the aesthetic that’s desired. For a light-balanced kitchen, white grout will coordinate perfectly with the white tiles. If looking for a more dramatic, eye-catching backsplash or wall, adding a bright-colored or black grout will highlight the white flooring.
For related backsplash ideas, check out our gallery of brick kitchen designs.
To showcase highly specific designs, some images on this website use advanced AI-generation software to illustrate ideas and room inspiration. See our editorial policy to learn more.

Upload a photo and get instant before-and-after room designs.
No design experience needed — join 2.39 million+ happy users.
👉 Try the AI design tool now