Microcement Shower Walls (Advantages & Installation Tips)
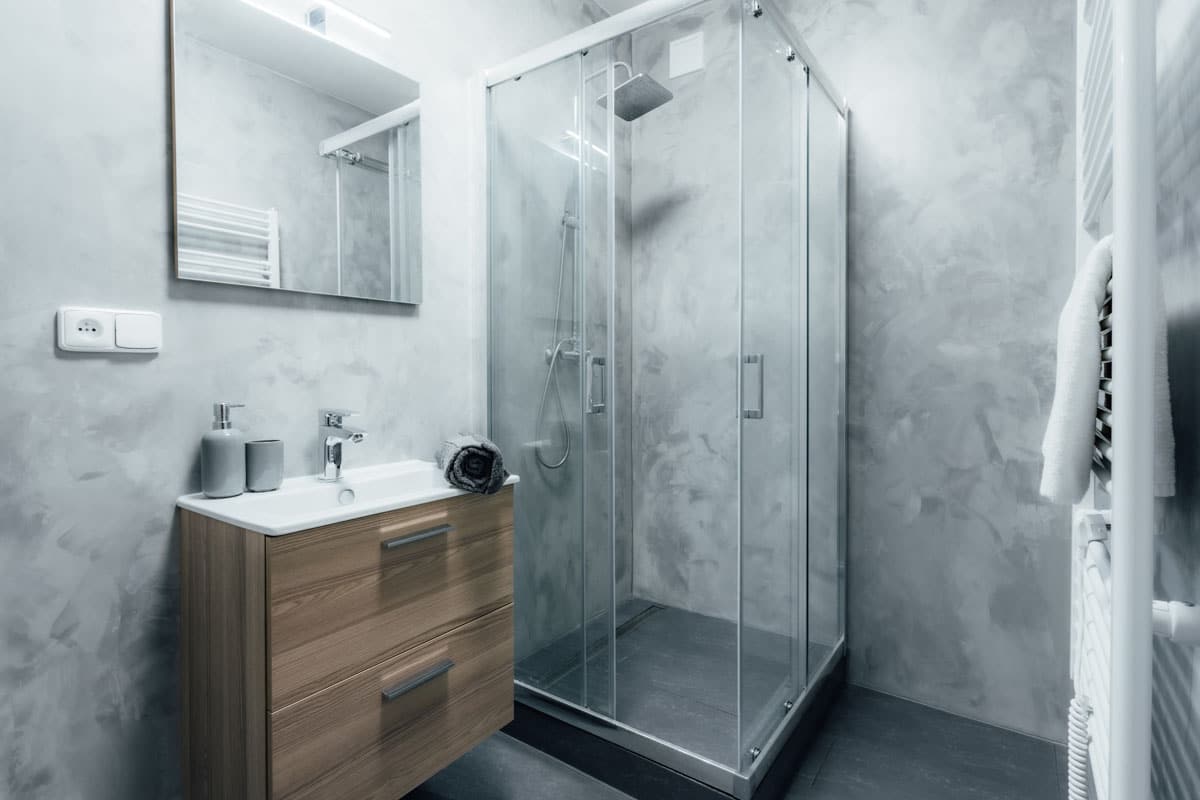
Microcement shower walls are the perfect option for homeowners looking for a shower wall finish that’s easier to install than tiles and as stunning as a high-end top coat. Developed in the 1950s mainly as an option for repairing industrial floors, the liquid polymer has now been developed to provide different textures and colors.
Improved compressive strength, water resistance, and low thermal diffusion are features of micro cement that make it an ideal shower wall surround. In France, a version of microcement called “beton cire” is a popular option often described as the “industrial chick” finish. [toc]
What is Microcement?
Mircocement is a decorative coat that uses a cementitious mixture applied to vertical or horizontal architectural members to create the desired finish. While it enhances the appearance of walls, it also provides an impervious surface, preventing damage from water and other elements.
The composition of microcment may vary from different brands, but the basic ingredient is composed of cement, water-based resins, and mineral pigments. Other brands opt for more eco-friendly components, such as recycled glass, that actually improve the compressive strength and abrasion of the wall coating.
Hybrid cement can also be added to improve stability and binding and prevent cracking. Other terms for microment are microconcrete, microtop, and beton cire.
The coating is applied as thin as 2mm to 3mm with cement binders that can be applied virtually to any type of surface. Microcement can be applied over tiles such as marble, porcelain, ceramic, and natural stones. Drywall, wood, plasterboard, ficem board, and even metal surfaces bond well with micro cement.
Like any other finish, microcement can come in a glossy, matte, smooth, or textured. The versatility of enforcement makes it great for many types of applications. Not only in residential bathrooms or kitchens but can also be used in industrial and commercial uses.
Microcement shower wall kits are available in the market for easier application, and it can be a DIY project for someone skilled in applying the microcement. It is advisable to seek a certified installer to ensure a smooth and properly installed microcement.
Features and Advantages of Microcement
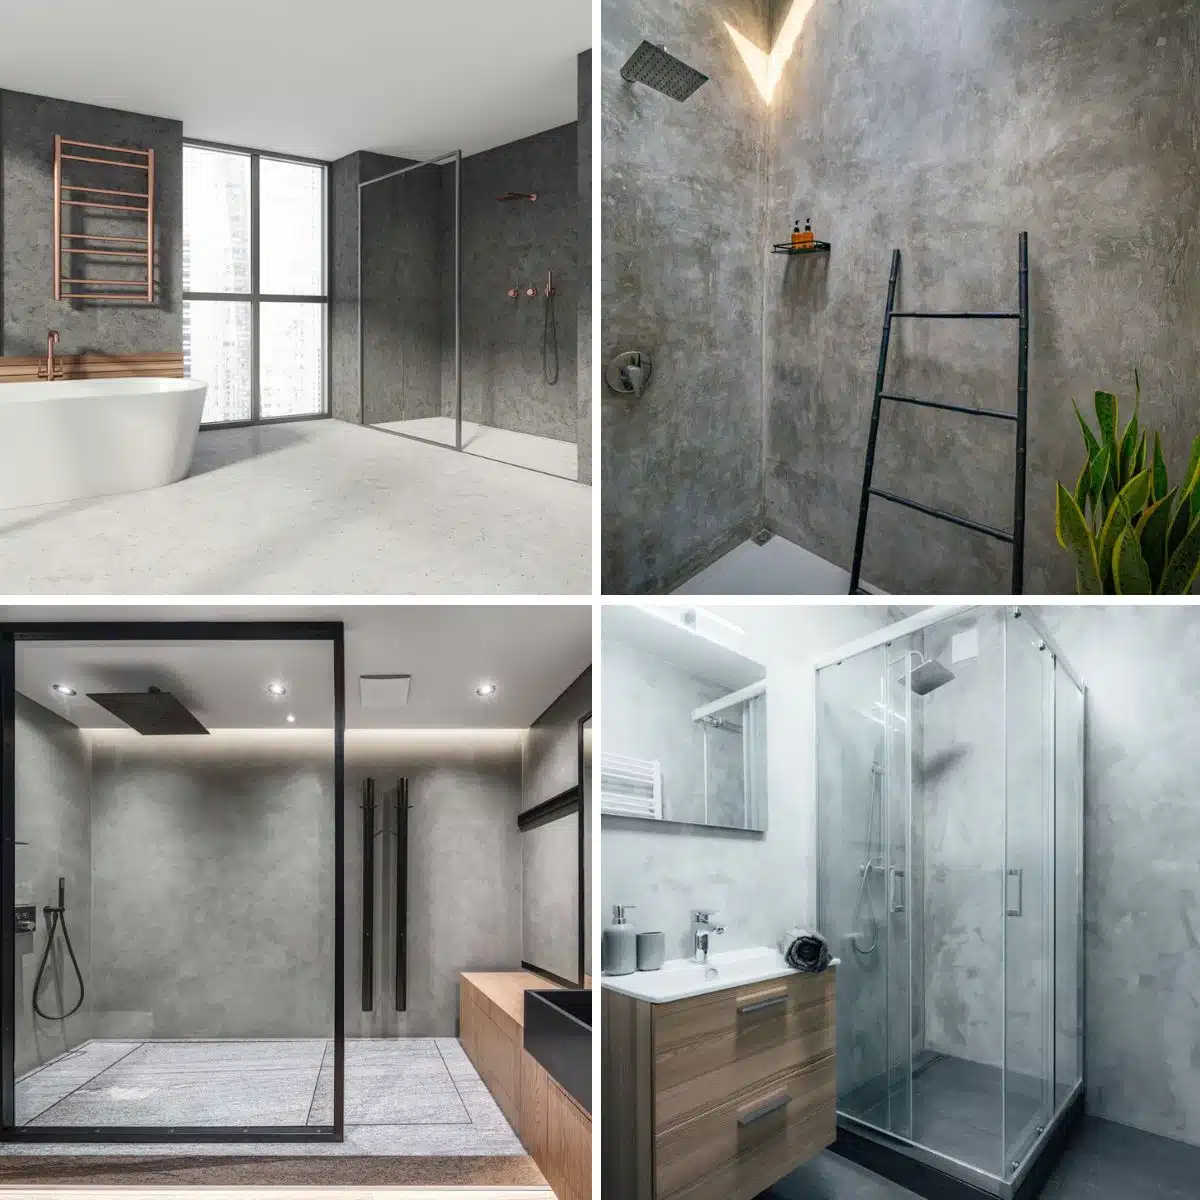
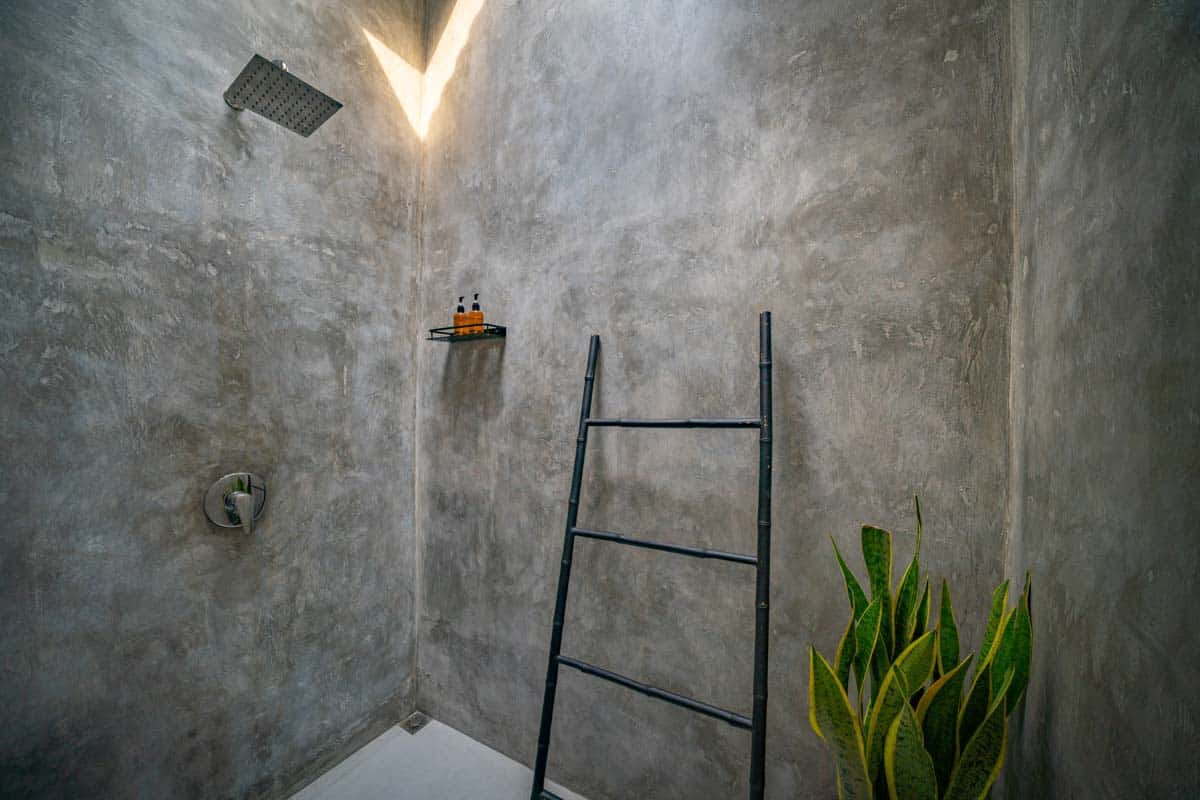
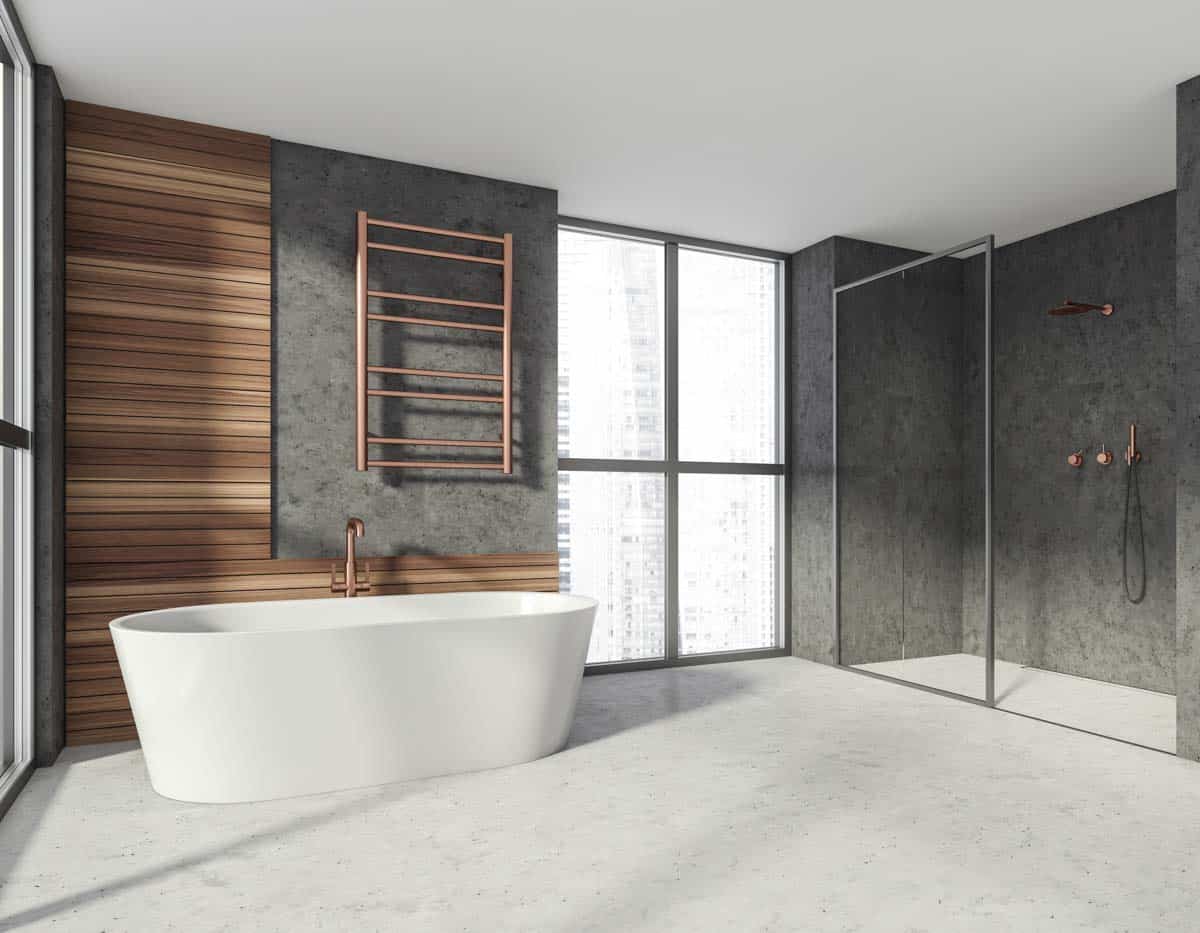
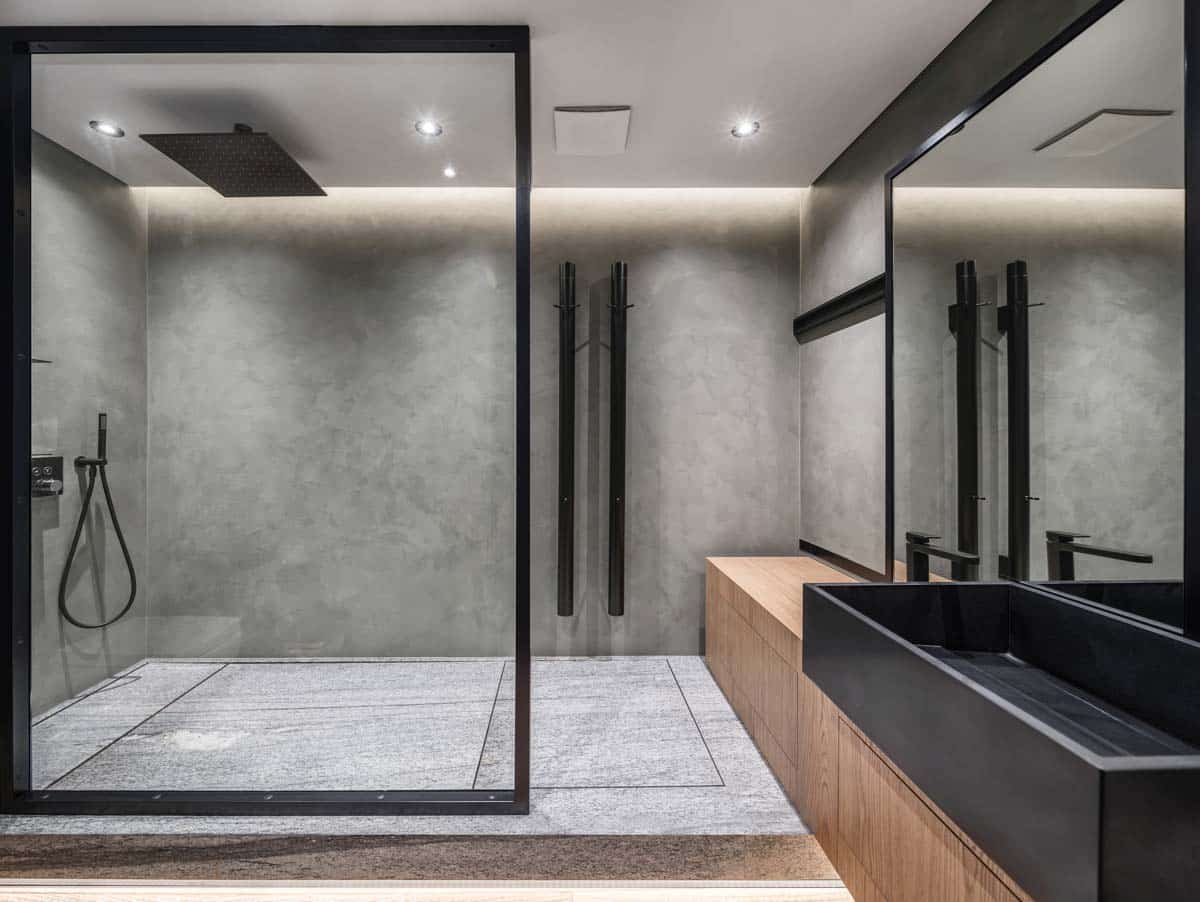
Offers a Wide Range of Design Options: Microcement in its basic form mimics the look of poured concrete, conveying that industrial and rustic quality. As it is associated with these styles, like poured concrete, microcement is versatile and offers a wide range of design options. This versatility makes it easy to recommend a wide range of bathroom interiors.
The added features such as texturing, coloring, adding metallic effects, or even simulating the look of wood planks are possible with microcement. Homeowners can request customized designs from professional installers with specified finishes, textures, colors, and other added features to create unique bathroom showers.
Microcement Finishes:
• Polished
• Silky
• Cloudy
• Acid Stain
• Smooth
• Metallic
• Patina
• Rustic
• Matte
Elevate Space without Major Renovations: Since microcement can be applied on any stable surface, knocking down walls is unnecessary. Furthermore, a microcement wall can be reapplied to change the appearance by simply grinding off the top layer and reapplying a microcement coat with the new color.
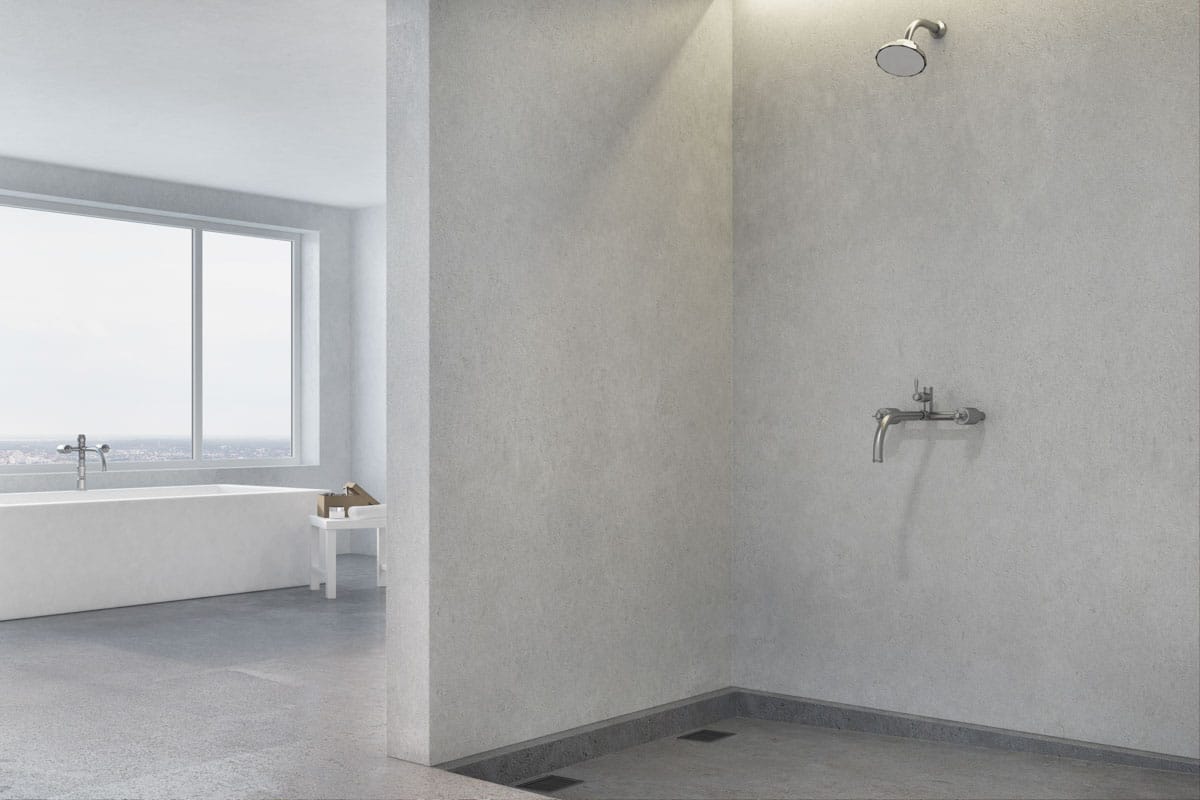
Showcases a Luxurious and Modern Look: The plaster-like consistency of microcement but more hardwearing and waterproof makes it possible to create a smooth and clean surface. The ability for a microcement to look high-end can easily make a bathroom space pass for a luxury interior, adding to a home’s property value.
Waterproof: The cementitious application creates a monolithic surface, which creates an impervious surface when sealed properly. Along with a waterproofing membrane (depending on the type of substrate), it can create a waterproof shower wall.
Excellent Adhesion and Flexibility: Many microcement products are formulated with improved tensile strength due to the interlocking aggregates and added liquid polymers. This means there is less cracking caused by minor movements. The shower wall finish can adhere to virtually any type of material that is properly prepared.
Less Structural Load: One of the downsides of having concrete walls is the added weight; with added weight, there will be a need for larger foundation columns and walls. The added square footage for structural systems can take up livable space. Since microcement is applied with thin layers (2 to 3 millimeters), it contributes to less weight, making it possible to apply on higher floors.
Convenient for Existing Projects: Microcement is ideal for existing shower walls, whatever size or configuration, as it doesn’t require complex equipment. Moreover, it doesn’t require a wall to be removed.
Less Construction Waste: Application is straightforward, especially with microcement wall kits, without producing much construction waste.
Does Not Stain Easily: Microcement, when properly sealed, will stain easily compared to other shower wall materials.
Less Maintenance: With a groutless surface, microcement shower walls are easy to maintain but will need periodic resealing.
It can be Matched with Microcement Fixtures: There are microcement fixtures such as microcement wash basins and bathtubs. The matching of similar materials can enhance the minimalist and modern look.
Limitations and Disadvantages of Microcement
Required Skill Set for Complex Finishes: Even for a smooth and uniform finish, an experienced finisher who has knowledge in the application of microcement is recommended. The thin coat with improper application can lead to uneven surfaces, cracks, and other issues.
Involves Labor Intensive Processes: Surface preparation involves many steps and, when not done correctly, can produce a poor-quality finish.
Time-consuming: The curing time in between coats, along with the meticulous steps and mixture preparation and surface preparation, can take time.
Ideal Temperature During Application and Curing: Like wall plasters, the cementitious formula can cause unattractive hairline fractures or other issues with improper application. The ideal temperature for microcement to be applied is from 15 degrees Celsius to 25 degrees Celsius.
Sealing and Maintenance: Microcement needs to be properly sealed to ensure water resistance and durability, especially in wet areas like showers. Proper maintenance, including resealing periodically, is required to prevent water infiltration.
Initial Cost: When not taking into account demolition costs to achieve the rustic finish, microcement can be more expensive compared to traditional wall finishes. Price can range from $65 to $108 per square foot.
Factors such as the complexity of the final finish, existing substrate, and the shower wall area to be covered will affect the price quote. The need for a professional installer to ensure quality finish is another added factor to the initial cost of installing microcement shower walls.
Not for All DIYers: As mentioned, skilled and knowledgeable installers are recommended in applying the microcement. In addition, specialized tools are needed, especially for complex designs.
Longevity Concerns: While microcement is durable when applied correctly, there might be concerns about its long-term performance and resistance to wear and tear, especially in high-traffic areas like shower walls.
Not Immune to Dents and Other Damages: Sharp objects or high impact can scratch or dent the surface, and over time, scratches can appear on the surface.
Limited Designs Compared to Tiles: While microment has a variety of colors and textures to choose from, tiles still dominate the plethora of colors, patterns, and textures available in the market.
Professional Installation Needed: Given the complexities and challenges associated with microcement installation, relying on skilled professionals is essential. This can add to the overall project cost.
How to Install Microcement in a Shower?
Protect Surrounding Areas: While applying microcement shower walls produces less construction waste, the possibility of accidentally spilling over the mixture can happen. Protect existing fixtures such as bathroom sinks, water closets, hardware, etc.
The necessary workability of the microconcrete is activated by an appropriate dosage of a superelasticizer. – Proceedings of the Third International Symposium on Cement and Concrete, Wu Zhaoqi
Surface Preparation: Like paint and any other surface coat, a shower wall or substrate must be free from debris, water, sealants, or paint. Remove any soap residue, old sealants, or grout from existing shower walls.
These contaminants can affect the adhesion of microcement to the surface. Holes, cracks, or any other damages should be patched up with a waterproof putty to prevent leakage from water and other contaminants from either side of the wall.
Level the Surface: Along with filling in cracks and repairing damages, make sure that the surface is virtually free of depression and bumps.
Apply a Primer Coat: A primer or a bonding agent consolidates the wall surface so it can bond with the microcement application.
Functions of Microcement Primer:
• Ensure adhesion between the substrate and microcement.
• Ensure proper curing process as the primer prevents premature loss of moisture.
• Creates a surface that’s easy to apply on the first coat. For tiles, make sure to fill in the grout lines with micro cement to ensure adhesion between these joints.
Apply the Base Layer: The first layer of microcement is also crucial in ensuring quality outcomes. Prepare the mixture as per the manufacturer’s instructions. The formula will usually include a polymer liquid. Make sure no lumps or bubbles are created when mixing.
Then, using a trowel, spread the base coat evenly across the wall with the required thickness (usually 1 to 2mm). Other manufacturers recommend a 0.1mm thickness. It will depend on your requirements and the manufacturer’s recommendation.
Sand In-between Coats: After the curing process. Sanding in between coats with 180-200 grit can help even out surfaces, but be careful not to create depressions along the surface.
Apply the Second Coat: The second coat is usually applied after 24 hours or as specified by the manufacturer. Like the first layer, make sure that the surface is evenly distributed using a trowel.
Texturing: Creating a desired texture requires skill and experience. Tools such as the trowel, sponge, and special brushes can create the required texture.
Coloring: When it comes to microcement, the first color that comes to mind is that it is colored gray or white. However, a variety of dyed microcements come with the color of your choice. There is no need for dying or painting over the coat, but you can paint over an existing microcement. You can sand over the final coat, reapply a thin base layer, and paint it over just like any type of wall.
Sealing Microcement
Sealing and waterproofing a microcement shower wall is crucial in ensuring the surface is protected from constant humidity and water exposure.
When choosing the type of waterproofing, choose a waterproofing product that is specifically designed for microcement applications. These products will act as a barrier but allow the material to breathe, preventing vapor from getting trapped in the wall cavity.
Before applying the waterproofing product over the microcement, make sure that it is free from contaminants. Use a brush, roller, or spray to apply the sealing coat evenly over the shower wall.
Allow the waterproofing applications to cure. Depending on the product, the drying and curing time may take a few hours or days. Additional coats can be applied according to recommendations to achieve a well-sealed microcement shower wall.
Application Tips
Applying Microcement Over Tiles: Opting to apply microcement over a shower wall with tiles reduces build work. Choose a microcement product formulated with varnish and recommended by the supplier on such a particular application. A high-quality varnish with the microcement mixture seals off the tiles completely, preventing water and other environmental humidity from getting through the substrate.
Use the Recommended Primer from the Manufacturer: While polymer-modified primer and concrete bonding agents can be used as base coats for your microcement, it is best to use primer products recommended by the microcement’s manufacturer to ensure optimal results.
Use the Right Angle Corner Trowel: Be sure to pay special attention to corners and edges to ensure a seamless transition between the areas. There are a number of tools that can be used for tricky areas of the shower wall.
Maintain the Waterproofing Coat: Regular reapplication of the waterproof coat over the microcement bathroom wall is recommended. Also, be sure not to use harsh cleaning agents or brushes when cleaning the surface. You can test a partial area of the wall if you are unsure of how the cleaning agent will react with the wall sealant.
Practice Applying it in Small Portions: When aiming to apply microcement as a DIY project, practice with smaller areas or on a sample board before finally applying it on the shower wall.
Follow the Manufacturer’s Recommendation: Microcement products can vary in terms of composition, mixing ratios, application techniques, and curing times. Each manufacturer has developed their products based on specific formulations and intended uses. Following their recommendations ensures that you’re using the product as intended.
Don’t Forget Warranties: Many manufacturers provide warranties for their microcement products when applied according to their recommendations. Following these guidelines ensures that you can take advantage of any warranties or support in case of unforeseen issues.
See more related content in our article about stucco shower walls on this page.
To showcase highly specific designs, some images on this website use advanced AI-generation software to illustrate ideas and room inspiration. See our editorial policy to learn more.

Upload a photo and get instant before-and-after room designs.
No design experience needed — join 2.39 million+ happy users.
👉 Try the AI design tool now