Crown Molding Sizes (Styles & Dimensions Guide)
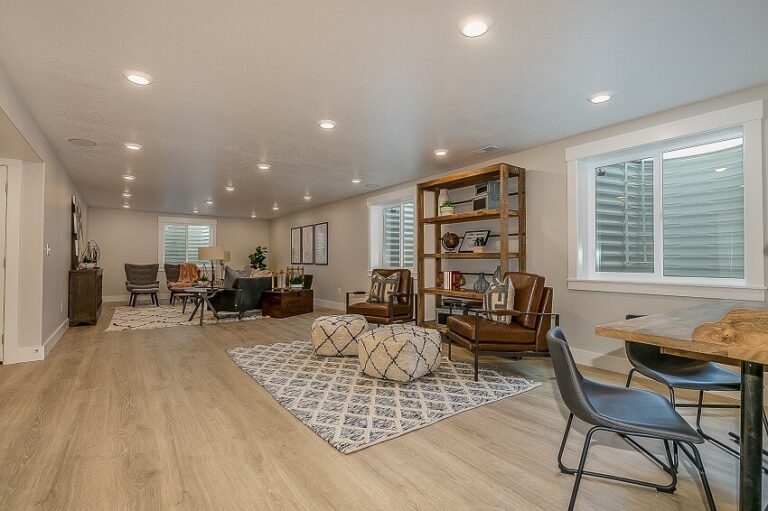
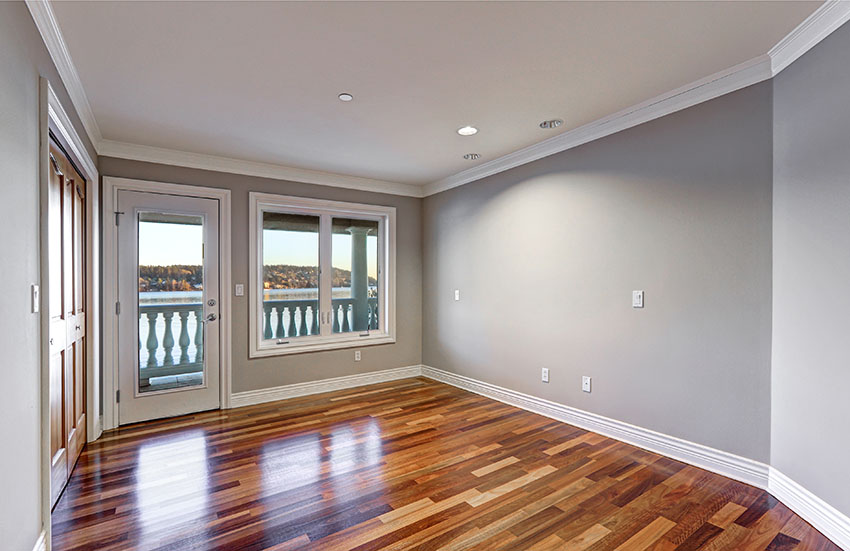
Architects and interior designers rely on extensive knowledge and professional judgment to decide the correct crown molding sizes to go into any room. These decorative trims can add a luxurious vibe or a welcoming charm to a living space, allowing homeowners and building owners to convey the right atmosphere to occupants and guests.
As a rule, crown moldings create balance and proportion, making the space more inviting and pleasant. Unfortunately, not all homeowners have an architect or interior designer’s keen eye or in-depth understanding of different sizes. Regardless, homeowners can adhere to established guidelines to make them more confident in choosing the right size for their living spaces.
Standard Crown Molding Sizes
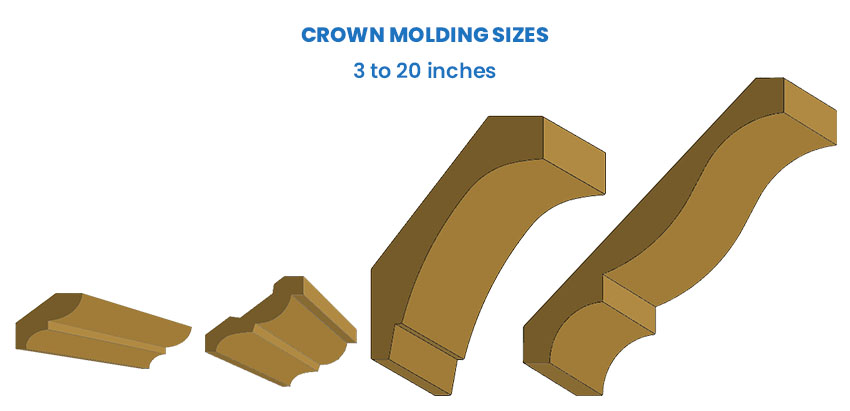
Crown moldings range in size from 3 to 20 inches, although some interior designers might opt for a 24-inch piece if the living space can benefit from it.
Like other architectural trims, crown molding sizes vary depending on the living room dimensions. For instance, installing a 3-inch profile in a 1,000-square-foot room defeats the purpose of creating balance in the living space. Likewise, a 20-inch elaborate mold in a 100-square-foot room might seem overbearing.
Square footage is not the only consideration in choosing the right size. Homeowners must also check the wall or ceiling height. For example, an eight-foot wall can benefit from crowns 2.5 to 6 inches high, with a 3 to 5.25-inch face.
The goal in choosing the right trim size is to achieve balance and proportion in the living space—the larger and taller the room, the more leeway interior designers have in using larger-sized pieces.
Size of Moldings for Lower Ceilings

Homes with lower ceilings, such as seven feet or less, can install a crown molding not exceeding four inches tall. Mounting larger-sized crowns can make the room look smaller or lower than it already is.
Painting them in a similar hue as the ceiling boards or drywall can make the latter look higher. Moreover, installing them to extend about 2.5 to 3 inches from the wall should add to the illusion of a high ceiling.
Molding Measurements for 8-Foot Ceilings
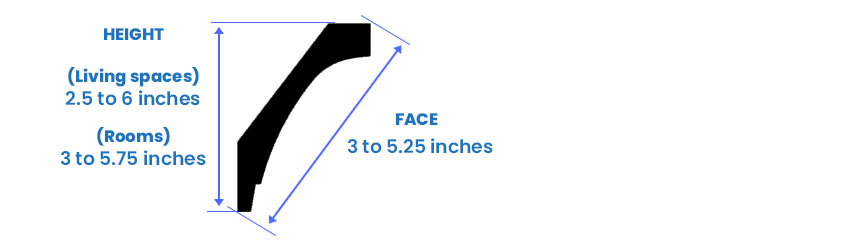
Most homes have eight-foot-high ceilings, allowing homeowners to use 2.5 to 6-inch tall crown moldings in living spaces. However, most eight-foot tall rooms look more attractive with 3 to 5.75-inch crowns. The size is adequate for additional ornamental trims.
One must also consider the room’s square footage to decide whether to use crowns at the lower or higher end of the range. The living space’s purpose (formal vs. casual) can also dictate the crown’s appropriate size. Ideally, the face should be anywhere between 3 and 5.25 inches.
Molding Dimensions for 9-Foot Ceilings

Buildings and homes with nine-foot ceilings can benefit from crown moldings with 3 to 7.5 inches heights. The taller trim allows designers and homeowners to create a more expansive and detailed profile face, from a low of 5.25 inches to a high of 9 inches. Cornices and picture moldings are perfect for such crowns, giving the space a more formal look.
Expansive rooms can benefit from a spring angle crown molding to cover the wall seam and ceiling. The angle can be 38 degrees or 48 degrees, depending on the molding’s height. A 4.5-inch to a 7-inch piece will look grand in a large room.
Taller Room Molding Dimensions
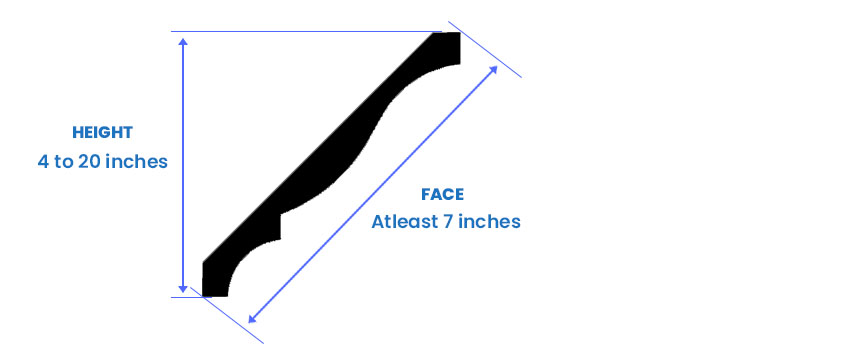
It’s easier to make a large and tall room look grander and lavish than a smaller space. Interior designers could add 4 to 20 inches tall crown moldings into these rooms, depending on the purpose.
Building owners can combine multiple trims to create pieces with at least a seven-inch face. The crown’s visual impact relies on the picture mold and cornices added to the structure.
Homeowners who want a more casual vibe in their living spaces should use four-inch tall moldings. Meanwhile, formal spaces will look grander with at least a nine-inch high crown. Some architects and interior designers pick 24-inch high pieces with picture mold and cornices to create a more lasting visual impact.
Molding Thickness Measurements

The molding’s thickness varies with the room height. Although dramatic improvements in materials and designs exemplify modern crown moldings, they remain noble to their age-old purpose of creating the illusion of height.
Rooms with ceilings lower than eight feet should have thinner (not exceeding three inches) moldings. Anything thicker than the recommended figure can create an illusion of a “smaller” room. On the other hand, the standard eight-foot-high ceiling can benefit from pieces between 3 and 5.75 inches thick.
Homeowners should also consider the room’s square footage, remembering to establish the correct proportion between the moldings and other architectural elements. Hence, picking a thickness in the lower end should be appropriate for a room with a small square footage.
Nine-foot tall ceilings can get away with thicker crown moldings from 4.5 to seven inches, allowing homeowners and businesses to create more stunning trims that catch the eye. Spacious rooms with vaulted ten-foot ceilings can benefit from at least a seven-inch-thick piece for a more dramatic effect.
Molding Size Chart
Here’s a rundown of the trim sizes homeowners can refer to for their respective living spaces.
| Wall Height | Crown Molding Size | Face Profiles Size | Thickness |
| 7 feet | <4 inches | <3 inches | <3 inches |
| 8 feet | 2.5 to 6 inches | 3 to 5.25 inches | 3 to 5.75 inches |
| 9 feet | 3 to 7.5 inches | 5.25 to 8 inches | 4.5 to 7 inches |
| 10 feet | 4 to 24 inches | >7 inches
(multiple trim types) |
>7 inches |
If you have your room’s measurements you can use our crown molding calculator to quickly determine the amount of material needed accounting for waste and the total price.
Molding Styles
Crown molding can add elegance to any living space if property owners pick an appropriate style. Some are simple, while others are ornate, perfect for Victorian homes, mansions, and similar residences.
Homeowners and businesses have several trim profile style options to choose from, and they are as follows.
One-piece Moldings

Perfect for DIYers, a one-piece profile is effortless to install. This style adds depth to the ceiling and wall while making a tray ceiling look more elegant. The cost of installing a one-piece trim is also lower than other styles.
Two-piece Moldings
This trim style adds a decent, more detailed look to the ceiling-wall interface than a one-piece can. One mold forms the top, and an inverted piece makes up the second. Households can consider various types and angles to create a unique look.
Traditional Two-piece Moldings
Although it resembles a two-piece mold, a space between the two moldings allows homeowners to create a more stately room.
Three-piece Moldings
This trim style involves three molding trims. However, it doesn’t prevent homeowners from using up to five. Multiple crown molding angles can create a stunning, grander look to a living space. However, installation requires a more professional approach to eliminate gaps and ensure a perfectly straight line.
Craftsman Moldings
Adding moldings to a window or door frame requires multiple pieces and trims to produce a unique look.
Crown Molding Materials
Size and style aren’t business owners’ and homeowners’ only concerns when picking decorative trim work. They must also consider the materials.
Medium-Density Fiberboard
Budget-conscious homeowners can pick MDF for crown molding without sacrificing efficiency and elegance. These materials feature wood fibers bound by wax and high-quality resin. They are ready to paint, giving homeowners quicker project completion and costing them only one to seven dollars per linear foot.
As efficient and practical as MDF is, it’s not suitable in humid living spaces or rooms with high moisture levels, such as the bathroom. This material is not only susceptible to moisture-related damage but also nicks and dents.
Finger-Jointed Poplar or Pine Wood
A linear foot of pine wood can cost homeowners three to ten dollars, while popular variants can set them back by $4.25 to $11.75 for every square foot of finger-jointed crown molding. It might be costlier than MDF, but finger-jointed materials make for stunning wall borders.
These materials produce zig-zag-shaped, finger-like interlocking lines, giving another element to the molding’s aesthetics. Although finger-jointed pieces don’t warp as much as other materials, poorly constructed interlocking joints can be unsightly by revealing the primer. Hence, only high-quality finger-jointed crowns will suffice.
Solid Wood
Adding luxury and warmth to any living space is a cinch with solid wood crowns. Although installation is not as straightforward as with MDF moldings, experience is necessary to allow for controlled expansion on warm days and contraction on cool ones.
Some solid wood pieces are as inexpensive as MDF, costing homeowners only one to six dollars per linear foot. However, more exotic wood species can set families and businesses back by ten to forty-five dollars per linear foot, often depending on the design and size.
How Is Molding Measured?
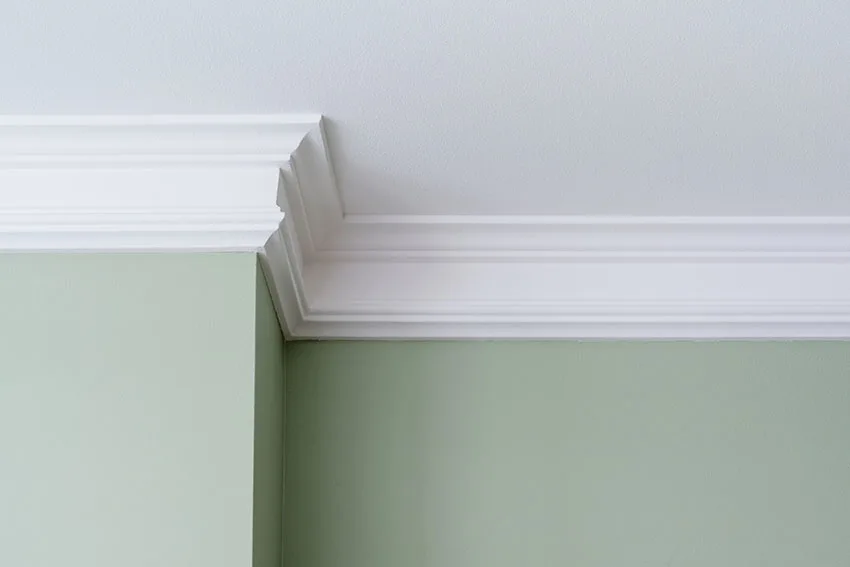
The best way to measure crown molding is by looking at it as an inverted or upside-down right triangle with two legs and a hypotenuse. One leg lies next to the wall and extends from the ceiling’s bottom surface to the molding’s lower end. This measurement (vertical or top to bottom) is the molding’s height.
The inverted triangle lies adjacent to the ceiling, describing the molding’s “projection” or how far it “extends” from the wall. Measuring this aspect requires determining the crown’s horizontal dimensions from its end on the wall to the molding’s outermost edge.
The triangle’s hypotenuse describes the line opposite the angle formed at the junction between the horizontal and vertical legs. This measurement is the molding’s “face,” defining the diagonal distance between its outermost edge on the ceiling and its lowest end on the wall.
Like other wood materials, these decorative boards also have length, allowing manufacturers to determine their pricing in linear-foot terms. It describes the mold’s side-to-side dimensions.
Nail Size to Use for Crown Moldings

A two-inch finishing nail with 15- or 16-gauge is sufficient to secure crown moldings. This nail size is enough to fix boards to a half-inch drywall and a 3.5-inch wall stud. A finishing gun and compressor are almost always necessary in such instances. Meanwhile, exterior corners can benefit from a one-inch brad nail.
Should Moldings Be the Same Size As Baseboards?
No, crown moldings should never be the same size as baseboards. Interior designers observe several rules when adding room elements relative to the baseboard.
For example, the baseboard should not be greater than the room’s height. Hence, a seven-inch baseboard is perfect for an eight-foot ceiling. Vertical trim elements must be 50 percent of the baseboard’s size.
As far as crown moldings are concerned, they should be smaller than the baseboard. Although there are no percentage rules to guide homeowners in sizing these versus baseboards, they can consider the room height and baseboard size to determine a proportionate and balanced cornice.
Corner Block Sizes for Moldings on Walls
Corner blocks for crown molding are available in different sizes, depending on the manufacturer. For example, a brand might offer a 1.5-inch corner block for small-sized trimwork.
A 2.5-inch corner block might have a similar effect, while larger-sized options can benefit more from a 3.5 to 6-inch corner block. Some manufacturers might offer longer blocks for businesses and homeowners.
Do Moldings Make a Room Look Bigger?
Yes, crown moldings can make a room look bigger and taller, provided the homeowner or business owner uses the correct size and color. An oversized trim can make a room with a low ceiling appear smaller.
Painting crown molding similar or close to the ceiling’s color can also create an illusion of a tall and big room. The trick is to create a continuity between the wall and the ceiling, faking the eye into believing that the living space is huge. On the other hand, a contrasting color breaks the continuity and creates an anchor for the eyes to determine the room’s ceiling.
Visit our guide to painting baseboard the same color as walls for more content like this.
To showcase highly specific designs, some images on this website use advanced AI-generation software to illustrate ideas and room inspiration. See our editorial policy to learn more.