7 Essential Things To Know Before Popcorn Ceiling Removal

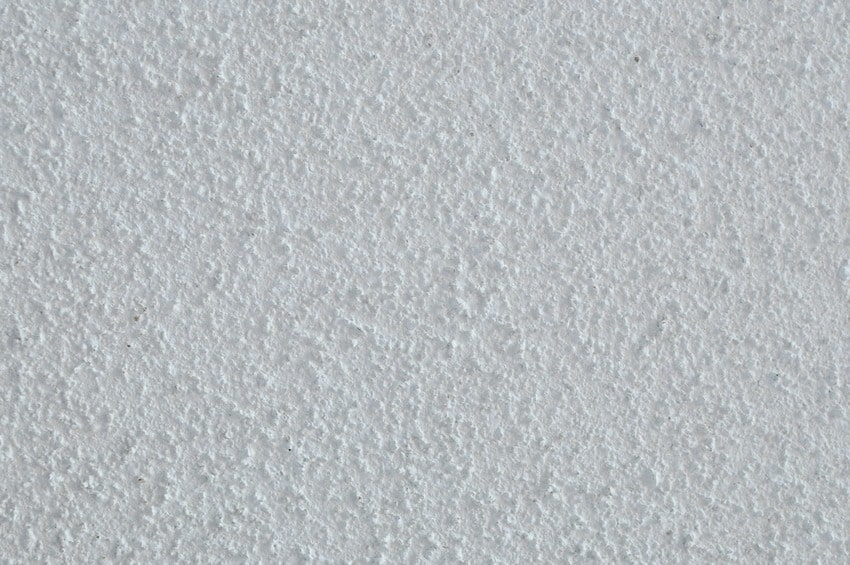
Popcorn ceiling is actually made of spray-on material that was massively popular back in the 50s until the 80s, mainly for allowing builders to easily hide imperfections in their construction projects. Unfortunately, the popcorn ceiling became a hit at the same time asbestos was the first choice for construction material. The essential guide to popcorn ceiling removal, including why do you need to remove it, how to remove it, cost, hiring contractors, disposal and more. [toc]
Why Remove Popcorn Texture From the Ceiling
Early popcorn ceiling, also known as acoustic ceiling or cottage cheese ceiling, was actually made of about 10% asbestos. In fact, the asbestos content is also the main reason why you may need to remove the popcorn ceiling texture from your home. Homes built after the mid-1980s are less likely to have asbestos. However, any percentage of asbestos, no matter how small, can pose significant health risks. The process of getting it removed is a highly specialized one that requires a lot of precautions.
That said, it’s highly recommended that you hire a professional for the popcorn ceiling removal and not attempt to do it yourself at any point in time. The popcorn ceiling is a highly friable material, meaning it’s quite prone to damage. It can release toxic dust at the smallest possibility of disturbance.
Asbestos needs to be contained or encapsulated as much as possible. Inhaling this toxic dust can lead to serious health issues like lung cancer, asbestosis, and mesothelioma which is a malignant or cancerous tumor that can form in the lining of the stomach, the lungs, or even the heart. Aside from the potential health risks, there is also the obvious crumbliness of the popcorn ceiling texture where at the slightest disturbance, it can crumble up. This will not only affect your home’s overall aesthetic but will also lead to the release of toxic fumes.
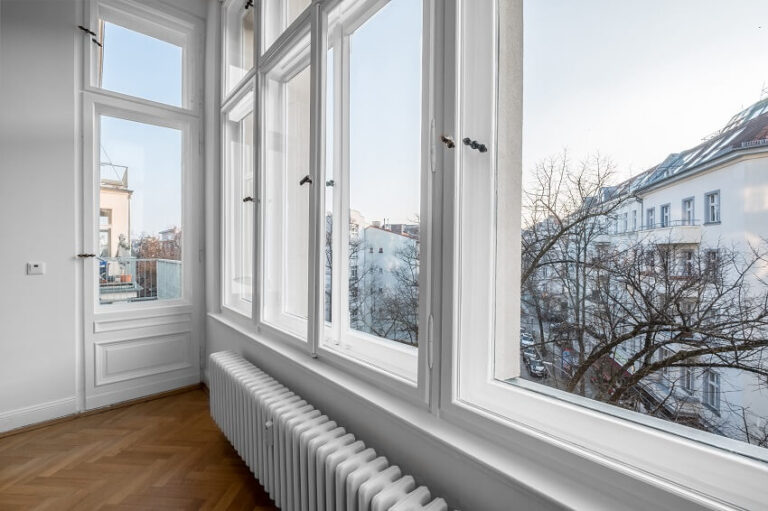
Removing popcorn ceilings results in better lighting for your home space as well. Because of its textured surface, the light can bounce off it which can give an unflattering effect to any room. If you’re trying to create a light and airy atmosphere, you have to do away with the popcorn ceiling first and foremost. Moreover, a popcorn ceiling also promotes discoloration. These ceilings can especially look dull and dirty especially if they’ve been around for quite some time.
It’s much safer to give your ceiling a simple upgrade such as a fresh coat of paint if you get the popcorn ceiling removed first. Getting rid of this texture in your ceiling will improve your home space overall. The ceiling occupies a lot of space so it can be the focal point of any room. Updating it and removing the popcorn texture from your ceiling will solve the problem, providing your house a cleaner and more modern look.
Do Popcorn Textured Ceilings Have Asbestos
Pre-1980s popcorn ceilings generally contain asbestos but they do vary in percentage content. Some contain less asbestos while others contain as much as 10 to 20 percent asbestos content. Either way, asbestos can pose a significant health risk regardless of its percentage content and the safest bet would be to just get rid of it altogether. However, for safety reasons, you can actually get your ceiling tested for asbestos content. It can usually be done by carefully scraping a small sample of the ceiling and getting it tested at an EPA accredited laboratory.
Popcorn Removal: Process Flow
| Phase | Steps |
|---|---|
| Initial Assessment Phase | |
| – Age Determination | – Check home construction date |
| – Review any previous renovation records | |
| – Document ceiling’s current condition | |
| – Testing Requirements | – Collect ceiling sample using EPA-approved kit |
| – Send to accredited laboratory | |
| – Wait for asbestos test results (typically 3-5 business days) | |
| Planning Phase | |
| – Square Footage Calculation | – Calculate total square footage |
| – Assess ceiling height and accessibility | |
| – Document Repairs Needed | – Document existing damage or repairs needed |
| – Ventilation Assessment | – Evaluate ventilation requirements |
| Preparation Phase | |
| – Clear the Work Area | – Remove furniture and fixtures |
| – Seal off work area | |
| – Install protective coverings | |
| – Set up proper lighting and ventilation | |
| Execution Phase | |
| – Ceiling Material Removal | – Apply water solution |
| – Scrape ceiling material | |
| – Surface Finishing | – Clean and repair surface |
| – Prime and paint |
DIY vs Professional Decision Tree
Start Here → Is your home built before 1980?
- Yes → Get professional asbestos testing
- No asbestos → Continue to next question
- No → Continue to next question
- Contains asbestos → Hire professional contractor
Is the ceiling height under 10 feet?
- Yes → Continue to next question
- No → Consider professional help for safety
Do you have any of these complications?
- Multiple layers of paint on ceiling
- Water damage or repairs needed
- Complex lighting fixtures
- If YES to any → Hire professional
- If NO → Continue to next question
Do you have the following:
- 3-4 days available for project
- Proper safety equipment
- Help for heavy work
- If YES to all → DIY suitable
- If NO → Hire professional
Popcorn Acoustic Ceiling Removal Cost
The popcorn ceiling removal process can be quite time-consuming, messy, and even potentially dangerous. There’s also the issue of determining whether the ceiling is sprayed on or built-in. It’s recommended that you hire a professional to get the job done for convenience and safety purposes. If it has been tested that your popcorn ceiling has, as a matter of fact, asbestos content, the removal can significantly cost more.
The first step is encapsulating or containing the popcorn ceiling that has been tested positive for asbestos, which costs around $5 to $7 per square foot aside from the actual cost of the removal of the ceiling itself. This is only for externally hired labor. However, if you want to actually hire a contractor for the encapsulation and removal, the cost can jump up on top of the per square footage charges. Most contractors have a minimum cost of $1500 to $3000 no matter how small the area of asbestos being removed.
Here’s a more detailed breakdown of the popcorn ceiling removal process, including additional jobs related to it:
Square Footage Based Pricing
- Small rooms (under 500 sq ft): $3-5 per square foot
- Medium spaces (500-1000 sq ft): $2-4 per square foot
- Large areas (1000+ sq ft): $1.50-3 per square foot
Regional Price Variations
- Urban Areas: Add 20-30% to base costs
- Rural Areas: Standard to 10% below base costs
- High Cost of Living Areas (NYC, SF, LA): Add 40-50% to base costs
Standard Removal (No Asbestos)
The ceiling size is one of the main factors since this is where the majority of your expenses will go. As mentioned earlier, it can be at $5 to $7 per square foot and $75 to $200 per hour, while some high-end contractors ask for up to $40 per hour. Either way, the cost will mainly depend on the size of your ceiling area.
Basic Professional Service Package:
- Under 500 sq ft: $1,000-1,800
- 500-1000 sq ft: $1,800-3,500
- 1000-2000 sq ft: $3,500-6,000
- Whole house (2000+ sq ft): $6,000-10,000
Package Typically Includes:
- Surface preparation: $0.50-1.00/sq ft
- Removal labor: $1-2/sq ft
- Basic cleanup: $0.50-1.00/sq ft
- Basic ceiling repair: $0.75-1.50/sq ft
Asbestos Removal Costs
Whether you’re planning on purchasing an asbestos testing kit or scraping up a small sample and sending it to a lab, the costs may be anywhere from $300 to $500 on up just to get started. Asbestos removal requires special handling that can tack on an extra fees per square foot because of how potentially dangerous the task can be, not just for the homeowner but for the contractor, as well.
Professional Asbestos Removal:
- Testing: $300-500 per sample
- Containment setup: $2-3/sq ft
- Removal: $5-7/sq ft
- Professional disposal: $1-2/sq ft
- Air quality testing: $400-800
Total Asbestos Project Costs:
- Small room (12×12): $3,000-4,500
- Average room (15×20): $4,500-7,000
- Whole house: $12,000-30,000+
Ceiling Refinishing
- Basic smoothing: $1-2/sq ft
- Skim coating: $1.50-3/sq ft
- Texturing: $1-2.50/sq ft
- Primer and paint: $1-2/sq ft
Repair Services
- Minor repairs: $200-500 per area
- Drywall replacement: $2.50-4/sq ft
- Water damage repair: $3-7/sq ft
- Structural repairs: $500-1,500 per area
Essential Tools and Materials
Basic Equipment:
- Scraper tool: $20-40
- Spray bottle/garden sprayer: $15-30
- Drop cloths: $30-50
- Protective gear: $75-150
- Basic tools: $50-100
Safety Equipment:
- N95 masks (box): $25-40
- Goggles: $15-30
- Disposable suits: $30-50
- Heavy-duty gloves: $15-25
Materials
- Joint compound: $15-25 per 5-gallon
- Sandpaper: $20-30
- Primer: $30-45 per gallon
- Paint: $35-50 per gallon
- Miscellaneous supplies: $50-100
Total DIY Costs:
- Small room: $400-600
- Medium room: $600-900
- Large room: $900-1,500
Preparation Costs
When you’re in the process of removing the popcorn ceiling from your home, you need to clear out the entire space to protect the furniture from getting damaged. This service can easily be pinned at around $200 or more depending on the number of furniture pieces you need to move out of the space.
- Furniture removal/storage: $200-500
- Floor protection: $0.50-1/sq ft
- Wall protection: $0.30-0.75/sq ft
- HVAC protection: $100-200
Post-Project Costs
- Deep cleaning: $200-400
- Air duct cleaning: $300-500
- Waste disposal: $100-300
- Paint touch-ups: $100-200
Additional Variables
- Emergency repairs: Add 20-30%
- Weekend/holiday work: Add 25-50%
- Multiple story homes: Add 15-25%
- Limited access areas: Add 10-20%
Timing Considerations
- Off-season discounts (winter): 10-20% savings
- Bundle with other renovations: 15-25% savings
- Mid-week scheduling: 5-15% savings
Scope Optimization
- Room-by-room approach vs. whole house
- Combining multiple services
- Group projects with neighbors
- DIY prep work
Return on Investment
- Property value increase: 2-5%
- Energy efficiency improvements: 5-15%
- Insurance premium reductions: 2-8%
- Marketability improvement: 10-20% faster sale
How To Remove Popcorn Material On The Ceiling
Regardless of the amount of asbestos on the popcorn ceiling, understand that this is a painstaking process that you have to take seriously and requires a lot of effort. Improper handling can lead to terrible consequences, including possible contamination and potential health risks. If you short-change the process to save up some money on the front end, it will actually end up costing you more in the long run.
It’s advisable to contact a local general contractor who has experience with dustless textured ceiling removal. They can generally give you a price estimate and share information about your available options. Before agreeing to any contractor quote make sure it covers the complete area affected and includes the total cost of removal, cleanup, and disposal of all debris. However, if you want to do it yourself, it’s important to first get a test kit to check for asbestos content. You can procure samples through a DIY test kit and then get it sent over to a laboratory.
To start with, make sure that you have your safety gear on. It’s always important to have gloves on, a dust mask or some sort of ventilator, and glasses for eye protection. Nonetheless, if your ceiling test positive for asbestos, you need to get the job done professionally for better safety precautions. Otherwise, you may proceed with doing this DIY project yourself.
The next step is for you to gather your tools. Start off by removing all pieces of furniture from the room to avoid getting damaged. Cover all your walls and floors with plastic sheeting for additional protection. Take down any ceiling or lighting fixtures as well. Remove any hanging fixtures to make the scraping job easier.
Get your electronics in check. Cover your exposed electrical boxes with painter’s tape to protect them from dust and water damage. Additionally, make sure to cover all vents and electrical outlets with plastic sheeting. Turn off your HVAC system as well.
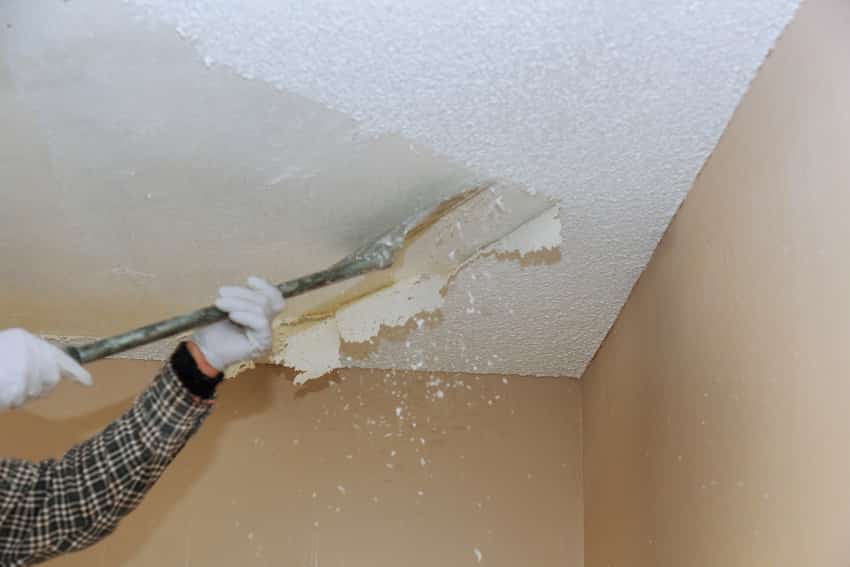
This job basically entails water dripping all over the place so you also ought to turn off the electricity. Similarly, make sure to open all windows to keep the space well ventilated. Finally, wet the ceiling since doing so will make it easier to scrape off the popcorn texture. Make sure that you do it in small sections and not all at once as some areas might dry off before you get to them.
Wait it out for about 15 minutes to allow the water to fully absorb into the ceiling. Make use of a drywall taping knife or a putty knife for the scraping job. Do this carefully so you don’t end up gouging certain spots in the ceiling.
Tools Need To Remove
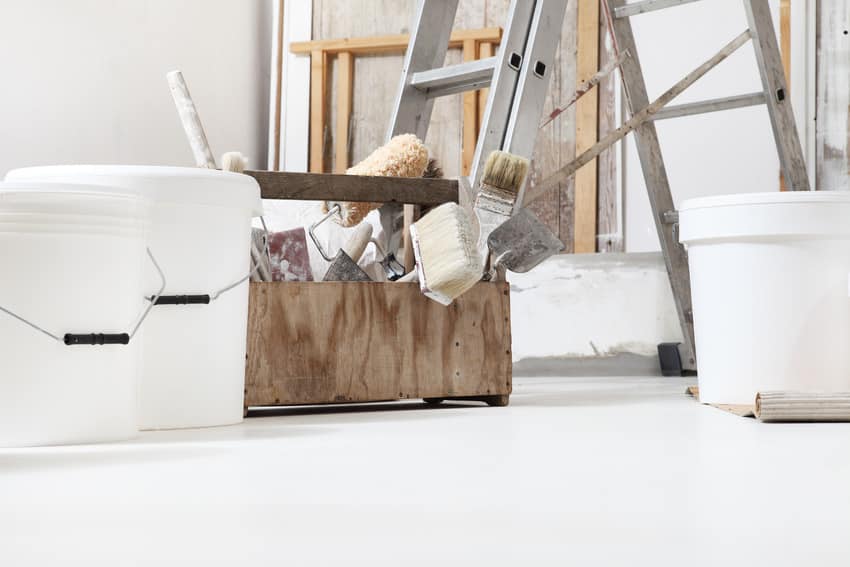
Take note of the following essential tools you’re going to need to start removing your popcorn ceiling:
Personal gear
- Protective eyewear
- Gloves, preferably rubber
- Dust mask
Ceiling prep work
- Asbestos testing kit
- Tarps, cloths, plastic sheeting
- Garden hose or sprayer
- Painter’s tape
- Putty knife or drywall taping knife
Post-scraping tools:
- Joint compound
- Sander
- Primer
- Paint
- Paint roller/brushes
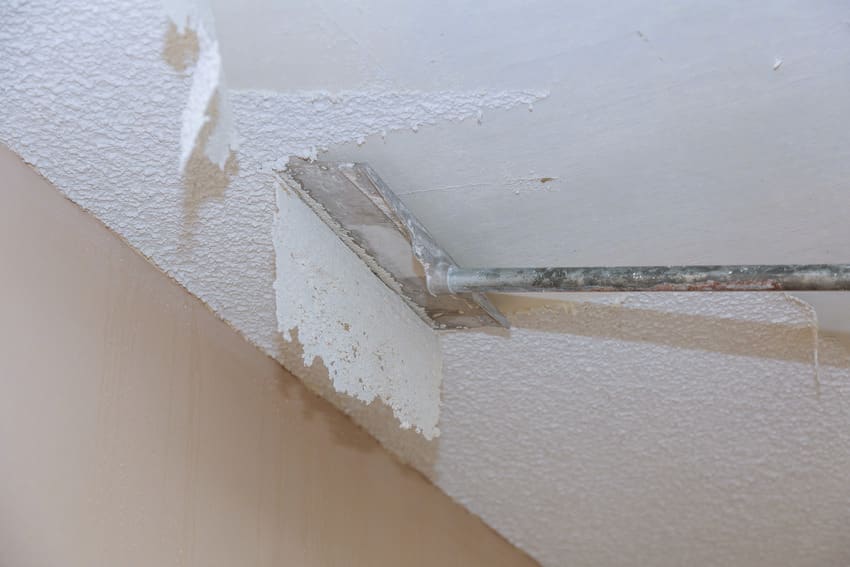
Popcorn Surface Scraper
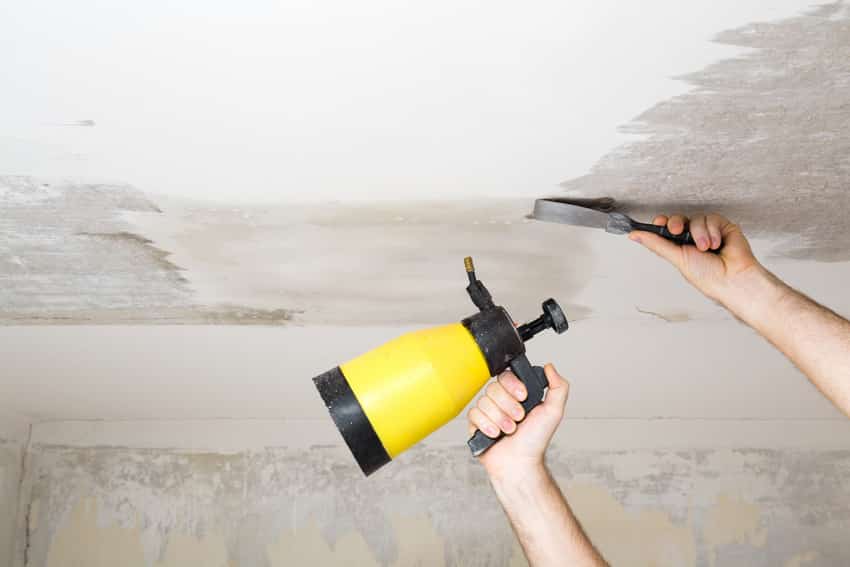
The best and most easily procured tool to get rid of a popcorn ceiling texture is a drywall knife, preferably 6 to 10 inches in size. However, if you want to make your job easier and less messy, make sure you get a specialized popcorn scraper tool which is only at around $20 to $30. It has a loop attached to a garbage bag so you can conveniently scrape the particles straight into the bag.
Popcorn Removal Spray
It’s highly discouraged to opt for a paint roller if your popcorn ceiling happens to test negative for asbestos. Because it’s textured, spraying the paint on is the best way to go. Insisting to use a roller or a paintbrush might cause some parts of the ceiling to flake off or fall off.
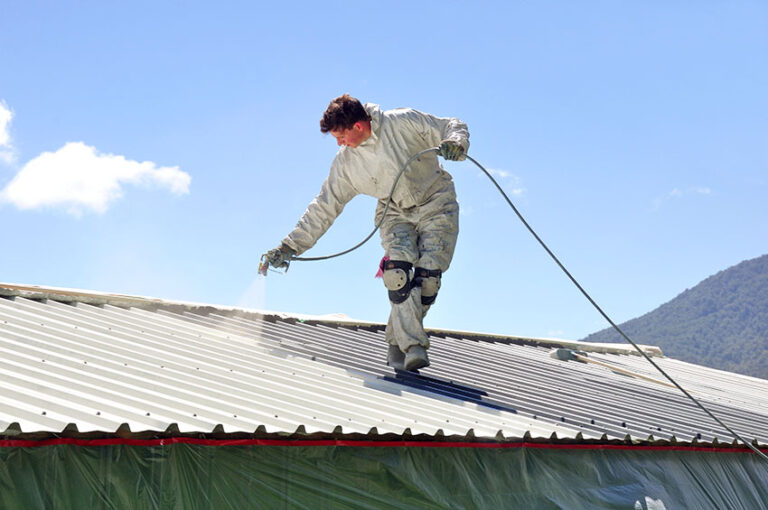
Instead, use an airless paint sprayer to equally save time and preserve the integrity of the overall appearance and form of the ceiling. This way, it will provide you with a more uniform and comprehensive paint coverage.
What To Do After Removing Popcorn From The Ceiling
Once you are done with removing the entire popcorn ceiling area, it is ready to be sanded down, primed, and then painted. Read more about the best paint finish for ceilings here.
If there happen to be any gouges and small damages, repair it with some joint compound prior to sanding it down. You can also cover any visible joints or screws while you’re at it to achieve a more seamless look. Once the paint job is over, remove all the plastic sheeting and you’re ready to enjoy your newly updated ceiling.
How To Cover a Ceiling With a Popcorn Finish Without Removing It
If you’re a bit short on time and budget, and you don’t really have the means to remove the textured ceiling, a more cost-friendly option would be to simply cover it. Here are some ways to cover up your popcorn ceiling without actually removing it:
Paint over it. A simple paint job, preferably with the use of a sprayer, is a fast way of updating the color and look of your ceiling without extensive labor getting in the way.
Ceiling tiles. If you don’t want to mess with the textured ceiling, tiling them can be a great alternative. You can suspend PVC or metal grids so that the tiles have something to hang from or you can purchase specialized ceiling tiles that you can glue or screw directly on the ceiling.
Wooden ceiling planks. If you want to go for a more natural and sustainable look, wooden ceiling planks are the way to go. They’re stylish, affordable, and overall pretty easy to install. These materials can weigh heavily so make sure that they’re screwed on the actual joints of the ceiling for complete stability.
How To Paint Over Popcorn
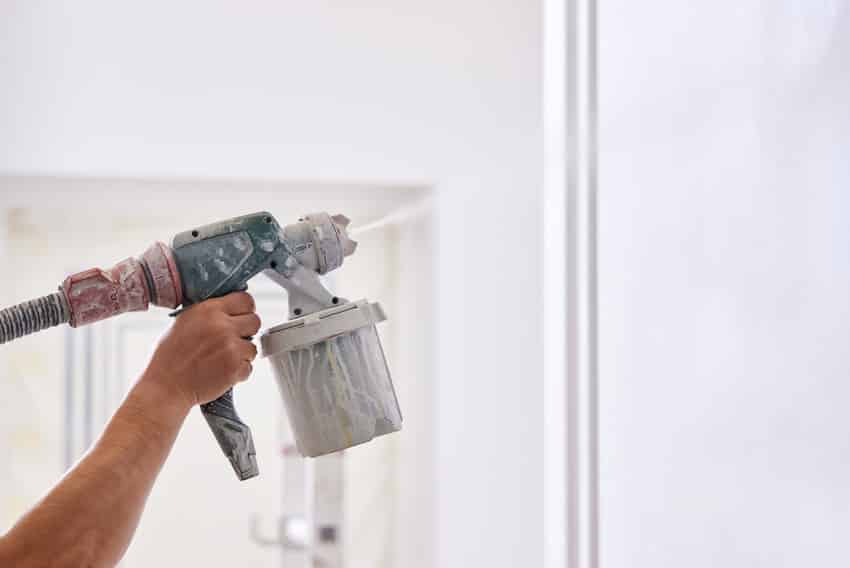
Spray painting. We’ll go straight to the point. Don’t attempt to brush or roller paint a popcorn ceiling lest it’s going to fall down in messy flakes or chunks. Opting out of spray painting is only advisable if the ceiling has already been previously painted on and you’re just trying to update it.
It means that it’s already intact and less likely to fall off. Otherwise, spray painting would be the safest option since it doesn’t directly touch the textured surface area which reduces the risk of damaging it. Not to mention, spray painting is also a lot faster compared to using paint rollers.
How To Clean a Popcorn Coated Ceiling
Start off by clearing the entire room. Remove all hanging and lighting fixtures, as well as all pieces of furniture. Similarly, make sure to cover the entire room with plastic sheeting or tarps. Prepare all the tools needed and make sure that you prioritize ease of access. You might need a HEPA vacuum, some lint rollers, cleaning solutions, spray bottles, sponges, and some primer and paint. You will also need a stepladder to reach the actual ceiling height.
Clean-Up Protocol
- HEPA vacuum all surfaces
- Wet wipe all horizontal surfaces
- Double-bag all debris
- Dispose properly per local regulations
Make sure that you have all of your personal protective gear on as well. Once you have all that set up, start with a vacuum to remove all cobwebs and dust from the ceiling surface. Use the widest vacuum brush you have. If any stubborn particles persist, finish it off with a lint roller.
Deep clean stained areas. You might have mildew, water stains, or even grease and smoke. Use the appropriate cleaning solution for a particular stain type. Popcorn ceilings don’t react well to moisture so make sure you test out a small area before working on the entire surface area. Make sure that you don’t wet the ceiling too much or it might disintegrate.
Once done, let it dry overnight, preferably with fans to hasten the drying process. Finally, you can paint over it or leave it as is, depending on the overall look of the ceiling once you’re done with the whole cleaning process.
Have you had experts remove acoustic ceilings in your home or have you done this as a DIY project in your home? Share your best tips and overall experience in the comments to help other readers. For more related content, read this article on styles of ceilings.
To showcase highly specific designs, some images on this website use advanced AI-generation software to illustrate ideas and room inspiration. See our editorial policy to learn more.