Here’s our guide to the different types of ceilingcracks, including what causes cracking and when to worry.
In an action or superhero movie, a crack appearing in the ceiling is a telltale sign of imminent danger and destruction. If a crack has appeared somewhere in your room overhead, you may be wondering if your safety is in danger.[toc]
Read on to figure out which types of ceilingcracks you’re dealing with and when to worry.
Popular Types of Cracks in Ceiling
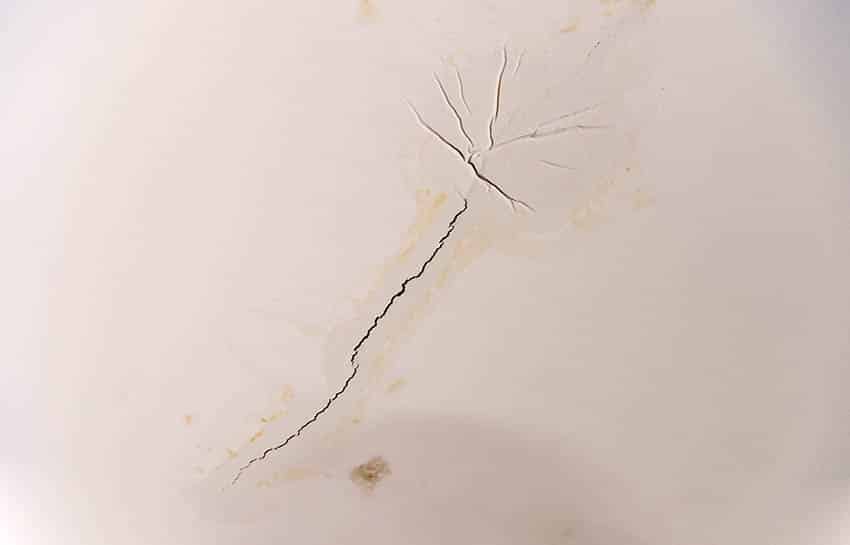
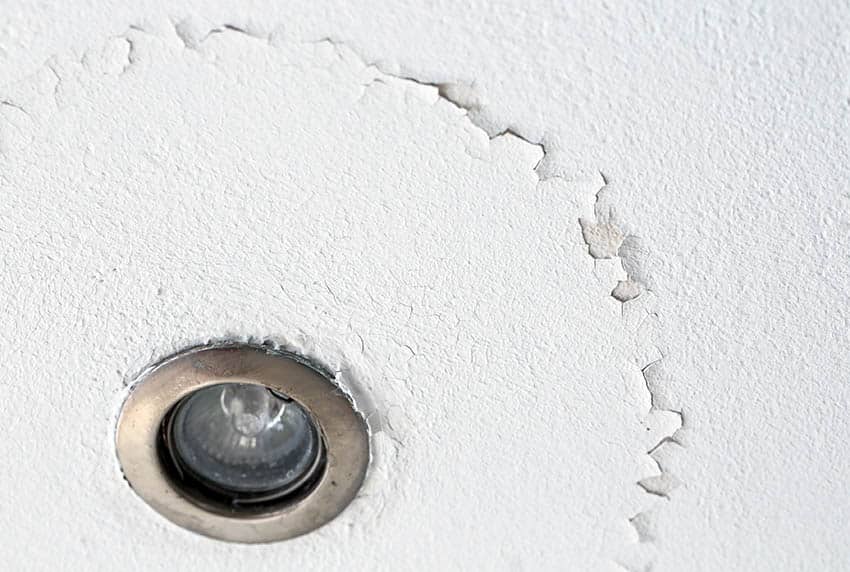
● Spiderweb cracks. Usually due to cracking paint or plaster. It has a central point, and thin cracking extend around that point in all directions.
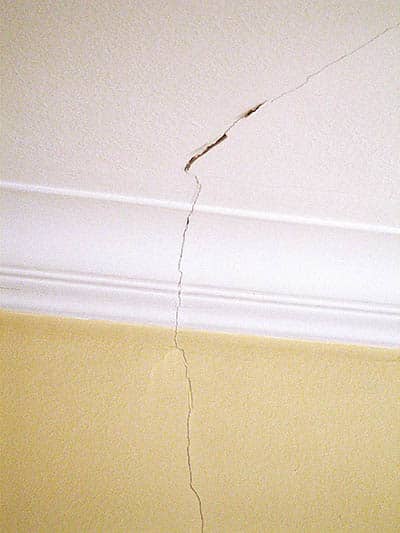
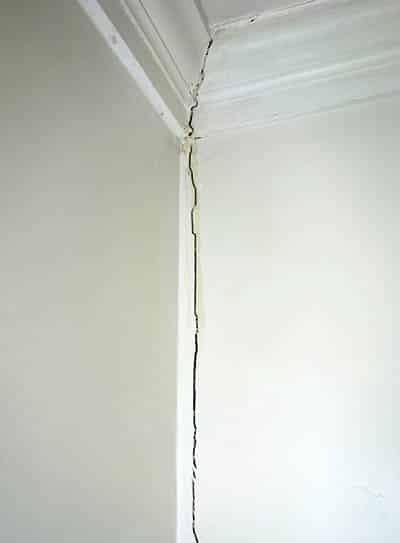
● Matching Vertical Cracks. Vertical lines that start on the wall and go across the ceiling. Indicates structural damage may have occurred.
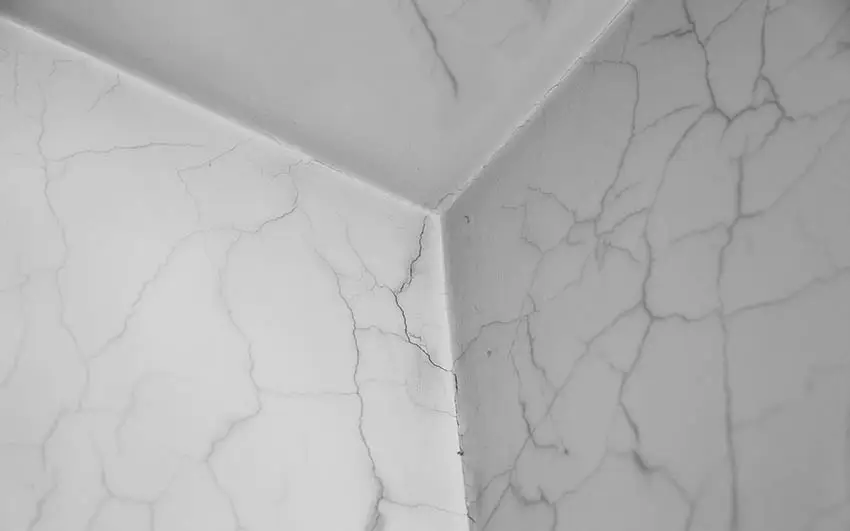
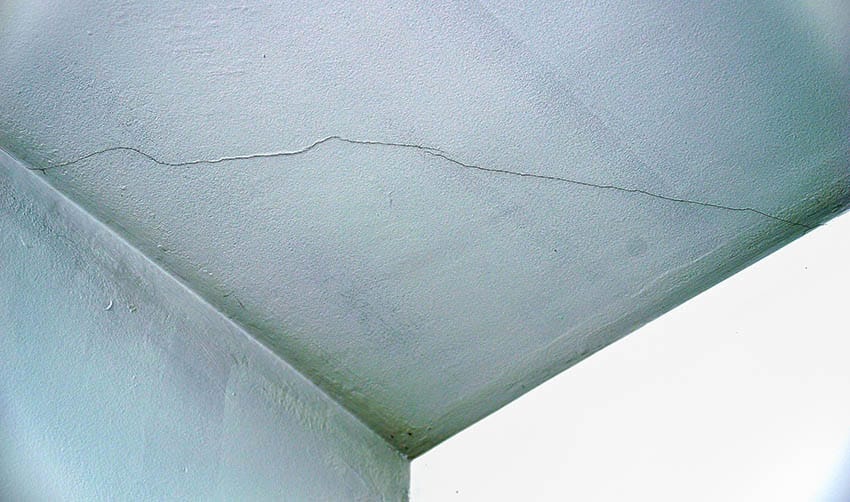
● Wall/Ceilingcracks. Horizontal cracking between the wall and ceiling. Usually indicates foundation settling.
● Hairline cracks. Very thin cracking, (1/16” or smaller) are almost always purely cosmetic in nature.
What Causes Cracks in the Ceiling
Cracks in the ceilings have two causes: natural aging and structural damage.
In the first few years after a new home is constructed, the soil underneath the foundation continues to settle.
Gravity works on the structure and the foundation of the house, and slight shifts happen.
Expect a few cracks to appear in the first few years of the home’s life. As long as they are no more than 1/16” wide, and less than 12” long, it’s nothing to worry about.
Unfortunately, one of the most common causes of cracking in drywall ceilings is poor workmanship.
Drywall panels have a slight gap between them. When used to form a ceiling, this gap needs to be filled, then taped and covered in drywall mud.
If any of these steps were skipped or performed poorly, the gap between panels may eventually start to show.
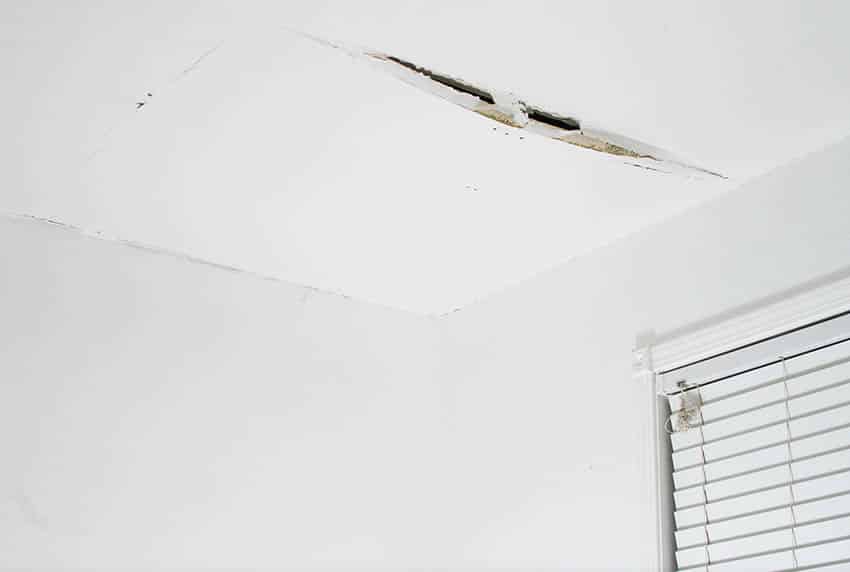
Moisture can also cause ceilingcracks. Damage in the ceiling on the top floor of your home could indicate a leak in your roof. A leak under the upstairs bathroom sink can cause water damage to the room below.
One telltale sign of moisture damage is a discoloration in the crack. A brownish, yellowish tinge at the edges of the crack is a sign to look for water where it shouldn’t be.
Speaking of the upstairs bathroom, have you made any changes or alterations to it lately? Maybe you’ve added a marble vanity or restored an iron clawfoot bathtub?
Overloading an upstairs room can put pressure on the ceiling and walls they weren’t built to withstand. This could be why your ceilings are cracking.
What to Do About Cracks in the Ceiling
When you notice a crack in your ceiling, what should you do? The first step is to measure it. How long is it? How wide? Is there only one crack, or are there several? Do you see any discoloration?
Take notes of when the cracking appeared. Use a pencil to mark the beginning and end of the crack. Monitor the cracks and see if they grow or change.
It’s also a good idea to do a visual inspection of the entire home. Walk around the interior and exterior of the home, looking for cracks, damage, or signs of stress.
A single small crack appearing in one ceiling is not cause for concern. Large, wide cracks appearing in multiple rooms are a different story.
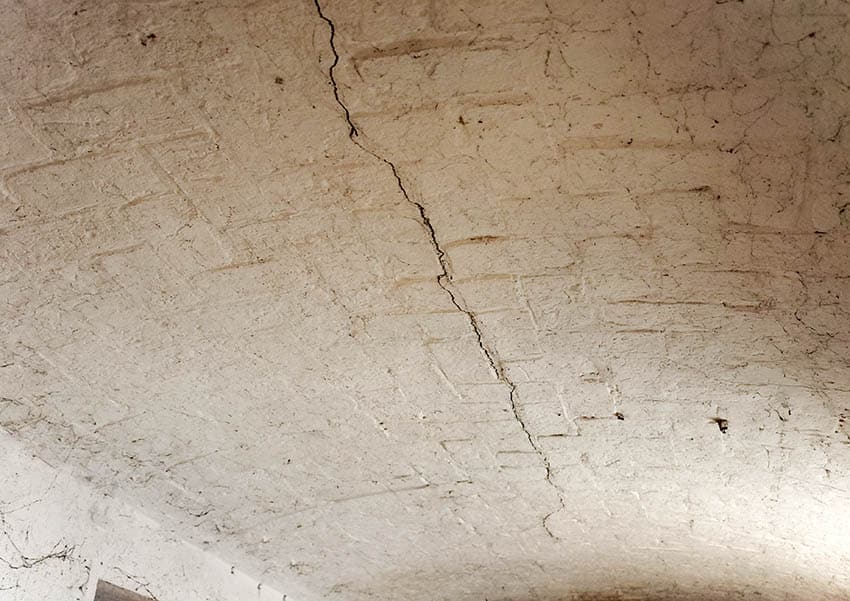
Cracks in Ceiling Plaster
Plaster is a very thin layer of cement applied as a finish to ceilings and walls. It is very rigid and inflexible. If the walls and ceilings are made of wood, or if plaster was used in a wood framed house, cosmetic cracks can occur.
Wood expands and contracts with the weather, humidity, and temperature changes. The flexibility of wood and the inflexibility of plaster is usually to blame when these kind of cracks appear.
If the crack is small enough, you may be able to fill it in and plaster over it. If it’s larger, or if multiple cracks appear in the same area, it’s usually best to remove the whole section and replace the plaster with drywall. Visit this page for more on different types of ceiling textures.
Hairline Cracks in Walls
They may look spooky, but hairline cracks in walls are usually not dangerous, nor are they usually related to structural damages. The most common cause of hairline cracking in walls is old paint.
When a wall has been painted many times without removing the old paint underneath it, problems start to occur. The old paint dries and curls, which causes the top layer to splinter into hairline cracks.
Cracks Where Wall Meets Ceiling
Cracks where the wall meets the ceiling are usually due to foundation settlement. Foundation settlement happens when the soil around and underneath your home undergoes a shift in placement or composition.
Extreme weather, vibrations from earthquakes, maturing vegetation, and soil consolidation can all play a role in foundation settlement.
When foundation settlement occurs, the walls of your home can shift as well. This causes a crack where the wall meets the ceiling.
If you have a crack of this kind, it’s probably nothing to worry about. Mark the edges of the crack with a pencil and measure it’s width. Check back periodically.
Ceiling Cracking and When to Worry
Most ceilingcracks are merely cosmetic. If they bother you, they can often be repaired. But cracking may also indicate an underlying problem. So when should you start to worry?
There are two kinds of problems associated with ceilingcracks; structural problems and foundational problems. The foundation is the base of your house — what separates the rooms where you live from the soil below.
The longer foundation problems go undetected, the more difficult they are to solve, so in a way, a crack can be a helpful warning sign to the attentive homeowner.
Structural problems in a traditional wood-framed house would include weak or missing studs and joists, and could compromise your immediate safety. If you’re worried about structural problems in a room with ceilingcracks, there are some questions you can ask yourself:
● Do the doors and windows open and close as easily as they used to?
● Is there cracking in your tile or vinyl floor?
● Have new cracks recently appeared above doors and window frames?
If the answer to any of these questions is yes, you should have a building professional evaluate it as soon as possible.
The worst-case scenario is, of course, ceiling collapse. If you’ve been driving yourself crazy worrying about this, here are some questions you can ask to alleviate that worry.
● Was there a loud crack?
● Are there small circles or bubbles on the ceiling? (It might mean the ceiling is pulling away from its fasteners.)
● Is there sagging or drooping anywhere in the room, especially at the top of the walls?
If you answered yes, evacuate the area immediately and don’t reenter until it has been declared safe by a structural engineer.
Dangerous Ceiling Cracks
While many types of ceilingcracks are purely cosmetic, some can be dangerous.
Get a structural engineer or building professional to evaluate your home’s structural integrity and foundation if you notice any of the following characteristics.
Structural Ceiling Cracking
● Sagging or bowing. A ‘load-bearing wall’ is a wall in your home responsible for distributing the weight of the roof/upper floors to the foundation. These walls cannot be removed without compromising the structural integrity of the house.
There is also a limit to the amount of weight they can support. Sagging, bowing, and cracks in the ceilings often happen when a load-bearing wall has been removed or a heavy item has been installed on the second floor.
● There are multiple cracks, some longer than 1-2 feet or some wider than 1/16” wide.
● The crack in question is vertical, extends all the way across the ceiling, and continues down the wall.
How To Repair Cracks In A Ceiling
Here’s how to repair the most common types of ceilingcracks you’ll find in your home.
Material: Gypsum Board (Drywall)
Common Cause of Damage: Continuous exposure to moisture can cause cracking and mold growth.
The following are popular methods to repair cracks in a ceiling with varying sizes and severity of the crack.
Spackle. The most common method in repairing cracks on a drywall ceiling is using a spackle. It has a thicker consistency, dries faster (30 min average.), and has less shrinkage compared to joint compound. Spackle is also termed drywall mud
Best For Medium to Large Cracks: Sheetrock, plaster, and gypsum board.
Joint Compound. A joint compound is mainly a finishing compound but can be used to repair minor damages if a spackle is not available.
Best For a Filling Small 1/8” Crack or Less and to Smoothen Undetectable Seams. Plaster and Gypsum
Mesh Tape or Fiberglass Tape. It is used mainly for loose seams and employs the use of a joint compound application to cover the damage.
Best for Loose Seams. Plaster Board and Gypsum.
Plaster Compound. A mixture of lime or gypsum powder, sand, and water has a relative thickness compared to a joint compound.
Best for Resurfacing and Repairing Larger Cracks. Plaster Board and Gypsum
Stain Ceiling Paint. Also used as a stain blocker, the stain paint is an oil-based paint that also contains acrylic, shellac, primer, and water. Most stain ceiling products come with a nozzle which makes it easier to direct solutions accurately when working overhead.
Best for Covering Stains. Drywall.
CeilingPanels. For severe damage or cracks that are too large, consider installing a ceiling panel. Cut the panel to size and attach it overhead with adhesive or screws. Finish with a coat of paint.
Best for Large and Deep Cracks. Plaster Board and Gypsum
General Steps for Repairing Cracks
Clean the Damaged Area. Remove loose paint or ceiling material and vacuum or dust off debris. Finish off by wiping off dirt using a damp cloth.Especially for medium to large cracking, be sure to remove drywall with visible mold growth and flaking paint.
Slightly Widen the Crack. Use a utility knife, decorator’s knife, or drywall saw to widen the crack slightly this will help the compound filler to adhere to the material. Also, make sure to remove loose or crumbling drywall.
Place a Fiberglass Tape. For loose seams or hairline cracks, place fiberglass tape to cover the damage before applying the compound.
Apply Filler. Using a putty knife, apply a layer of the filler over the crack. Make sure the layer is thin and smooth. Then, allow the mixture to dry completely.
Apply a Second Coat. Apply a second layer of filler over the crack, this time making it slightly wider than the first. Smooth the surface with the putty knife and let it dry.
Sand the Area. After the filler has dried, use a sander (for large areas) or sandpaper to smoothen and level with the surrounding surface.
Apply Primer Paint. Apply a coat of primer to the repaired area, following the manufacturer’s instructions. Allow it to dry completely.
Final Paint. Paint the area with the same color paint as the rest of the ceiling. Apply a second coat if necessary.
Do you have experience dealing with any of these types of ceilingcracks? Let us know if the comments section. For more related content visit our gallery of the types of ceiling designs here.
To showcase highly specific designs, some images on this website use advanced AI-generation software to illustrate ideas and room inspiration. See our editorial policy to learn more.
Here we share our types of basement walls guide including the pros and cons of poured concrete, masonry, and precast panel options. Basements are great….
Here’s the pros and cons of prefinished hardwood flooring including what is, its benefits, disadvantages, cost, and tips on refinishing and maintenance of prefinished floors….
Find out all about using melamine wood including what it is, pros and cons, different products, wood grains, finishes, colors and how melamine compares to…