How to Stain Stair Railing Without Sanding: Designer Tips

The railing for your stairs can be an important accent piece in your home. If they start to look old or weathered, it can hurt your interior design. Staining your stair railing can be intimidating, not to mention messy if you need to sand it down. However, there is another way. Below, we will take a look at how stair railings can be stained without sanding.
Worth knowing before you start: this method darkens what’s already there. If you’re still deciding on the look, browse the types of indoor stair railings first, then come back and pick your color.
What You’ll Spend in Money and Time to Stain Your Stair Railing
Nothing here is expensive, which is the whole appeal. These are typical US retail prices and they bounce around by store and by stain color.
| Supply | Cost |
|---|---|
| Liquid sander deglosser, 1 quart | $9 to $13 |
| Gel stain, 1 quart | $21 to $27 |
| Water-based protective topcoat, 1 quart | About $23 |
| Cloths, foam brushes, gloves, tape, tarp | $15 to $20 |
| Average railing, total | $70 to $85 |
A quart of each is more than enough for a standard staircase. You’ll have leftovers for the next project.
How Long It Takes
Most tutorials make this sound like a single day. The work is, but the drying is not.
start to finish, with only about 3 hours of hands-on work in there.
Here’s how it breaks down. Cleaning and deglossing takes roughly an hour. Staining takes another hour or two depending on how many spindles you’re working around. Then you wait 72 hours or more before a second coat of stain, because the stain is sitting on top of an old finish instead of soaking into bare wood. After that, three coats of topcoat with two hours between each, and a final 24 hours before anyone’s hand touches that railing again.
Plan around it. If your stairs are the only way to the bedrooms, start on a morning when you can use the wall side for a few days.
Step #1 Protect the Area Around the Stair Railing
The first thing to note is that stain is called stain for a reason. Whatever it touches, it is going to mark. So, when you are getting ready to stain your stair railing, you should ensure the stain only gets on the railing. Just like when you paint something, you shouldn’t depend on yourself to avoid getting the stain where you don’t want it. Instead, lay down tarps or newspapers and tape off the areas you want to stain.
Open some windows before you start. Stain and deglosser both have a strong smell, and good airflow makes the whole job more pleasant. Wear chemical-resistant gloves and splash goggles too. These are strong chemicals and a few dollars of protection saves your hands and your eyes.
Step #2 Clean the Railing First
This is the step almost every no-sand tutorial skips, and it’s the reason a lot of them fail.
Think about what a stair railing actually is. It’s the one surface in your house that every single person touches, every single day, with hands that have been doing who knows what. Years of skin oil and hand lotion build up in a film you can’t really see. Stain won’t stick to that.
So give it a real cleaning. General Finishes recommends scrubbing high-use surfaces with a Scotch-Brite pad and a household detergent like Dawn, then rinsing well with water. Follow that with a wipe-down using a 50:50 mix of denatured alcohol and water, which cuts anything the soap left behind. Let it dry for one to two hours before you move on.
It adds maybe forty minutes to the project. It’s the difference between a finish that lasts and one that peels off the newel post in six months.
Step #3 Apply Liquid Deglosser
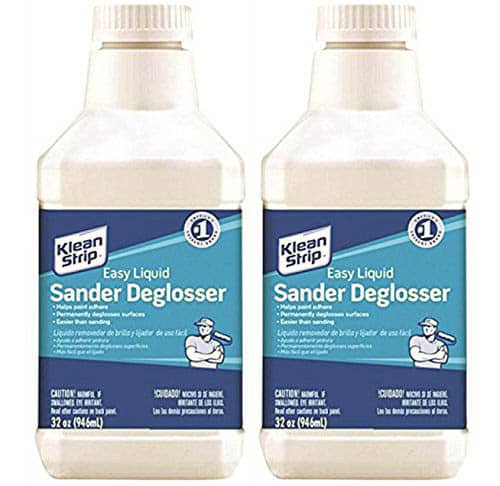
For an easier time, though, you can purchase a liquid deglosser or a liquid sander. This removes the glossy layer from the wood.
It is important to note that the purpose of this is not to strip the wood just to remove the glossy shine and create a smooth surface that isn’t greasy.
When you are completing this step, don’t forget to use the deglosser under the stair railing as well.
Using it is simple. Goggles and gloves on, then soak a coarse, lint-free cloth with the deglosser and rub the railing in small circles. Fold the cloth and re-wet it often. A dirty cloth just smears the grime back onto the wood you already cleaned.
The good news is you’re not waiting long. Klean-Strip says you can apply your new coating any time after the surface dries, which takes about ten minutes. If your railing runs past the kitchen or has old wax buildup on it, wash it with a TSP substitute first. Deglosser alone won’t cut through wax.
Liquid Deglosser (Sponsored) See at Amazon
Step #4 Choosing a Stain
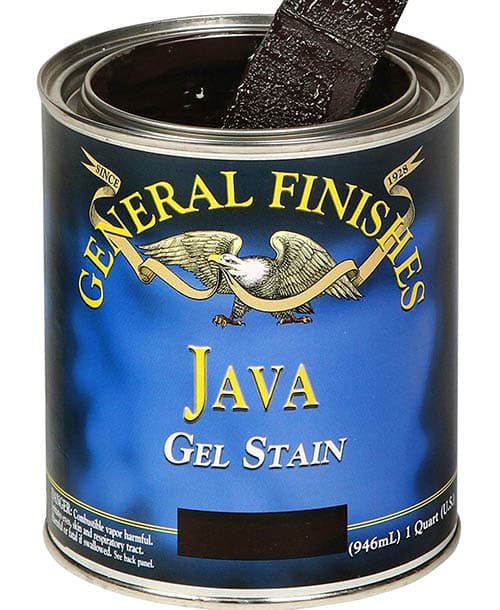
Gel stain is a great option because it doesn’t need the heavy sanding that traditional stains call for. While gel stain is much thicker than traditional stain, it doesn’t completely cover the natural beauty of the wood.
Still not sure about color? Gel stain only goes darker, so it helps to see the range first. Our roundup of stair railing paint ideas is a good place to figure out where you want to land.
General Finishes Gel Stain (Sponsored) See at Amazon
Gel Stain vs Regular Stain vs Paint
Gel stain isn’t the only way to change a railing’s color. It’s just the only one that skips the sanding. Here’s how the three options compare when you’re standing in the paint aisle trying to decide.
| Gel Stain | Liquid Stain | Paint | |
|---|---|---|---|
| Prep needed | Clean and degloss | Sand to bare wood | Degloss and prime |
| How it sits | Films on the surface, grain still shows | Soaks into raw wood | Fully opaque, no grain |
| Dry time between coats | 72+ hours over old finish | 4 to 24 hours | 2 to 4 hours |
| Best for | Going darker without stripping | Raw or stripped wood | A total color change |
The tradeoff is right there in the dry time column. Gel stain buys you a weekend of not sanding, and charges you a few days of waiting for it.
Step #5 Applying a Gel Stain
For the application of a gel stain, a thin cloth or foam brush is the best option. You will want to apply a thick layer of gel stain to your stair railing. However, be sure that the coat is not so thick that it drips down the railing. These drips will dry this way and you will have an uneven surface to your stair railing.
Wiping matters as much as applying. General Finishes recommends using absorbent paper towels or open-weave cloths to pull off the excess, and specifically warns against old cotton t-shirts. T-shirts push the stain around instead of soaking it up, which is exactly what you don’t want on a railing full of curves.
Keep a natural-bristle brush in your other hand for the tight spots. Stain pools where spindles meet the handrail, and if you leave it there it dries into a dark blob. Pull it out before you move to the next section.
One coat usually isn’t enough. But here’s the part most tutorials get wrong, and getting it wrong is how projects fail.
Gel stain dries in 12 to 24 hours on raw wood. Your railing isn’t raw wood. It has an old finish on it, and stain sitting on top of a finish dries much slower because it can only dry through the air, not down into the grain. General Finishes says to wait 72 hours or more before a second coat in that situation.
Test it before you recoat. Rub a white cloth on a spot nobody looks at. If more than a faint trace of color comes off, it isn’t ready. Wait another day.
And know this going in: if the stain is still tacky after five days, the dry time requirements weren’t met and it may never cure. The only fix at that point is stripping it off and starting over. Stick to two coats maximum. A third one is where people get into trouble.
Oil-based stain rags generate heat as they dry, and that heat has nowhere to go inside a trash bag. The NFPA attributes around 900 home fires a year to oily rags. When you’re finished, lay your rags flat outdoors until they’re completely dry, or seal them in a metal container filled with water. It takes two minutes and it’s the most important thing on this page.
Step #6 Seal It
Once the last coat of stain is fully dry, seal it. Skip this and every hand on that railing is rubbing directly against your stain.
A clear water-based protective finish like Minwax Polycrylic is the easy pick here. It dries clear instead of yellowing, and cleans up with soap and water. Stir it well before you start, and keep stirring occasionally as you go. Don’t shake the can, that just fills it with bubbles you’ll be brushing onto your railing.
Brush on a thin coat with a good synthetic-bristle brush, working with the grain. Minwax calls for at least 2 hours of dry time, then a light pass with 220-grit sandpaper before the next coat. Three thin coats is the recommendation. After the final one, wait 3 hours before light handling and a full 24 hours before the railing goes back into normal use.
One quart covers about 125 square feet, so the smallest can on the shelf is usually plenty for a staircase.
Common Questions
Can you stain over polyurethane without sanding?
Yes, and that’s exactly what gel stain was made for. Clean the surface, degloss it, and use thin coats. Just plan for the longer dry times, because the stain is sitting on the poly rather than soaking into wood.
How many coats of gel stain do I need?
Two at the most. One coat is often enough if you’re only deepening the color a little. Three or more coats stretch the drying out dramatically and can leave you with a surface that stays tacky indefinitely.
Do I have to seal gel stain?
Yes. General Finishes calls for three coats of topcoat over oil-based stain to lock the color in. On a railing that gets touched constantly, it’s not optional.
Can I make my railing lighter this way?
No. Gel stain over an existing finish only goes darker. If you want to lighten a dark railing, you’re either stripping it back to bare wood or painting it. There’s no shortcut for that one.
Visit this page for additional entryway and foyer ideas for your home. If all this waiting sounds like more than you signed up for, painting your banister instead is a faster route with its own set of tradeoffs.
To showcase highly specific designs, some images on this website use advanced AI-generation software to illustrate ideas and room inspiration. See our editorial policy to learn more.