Wood Plank Stamped Concrete Patio
Here’s our guide to wood plank stamped concrete patio including what it is, how to stamp concrete wood planks and types of stamps to use.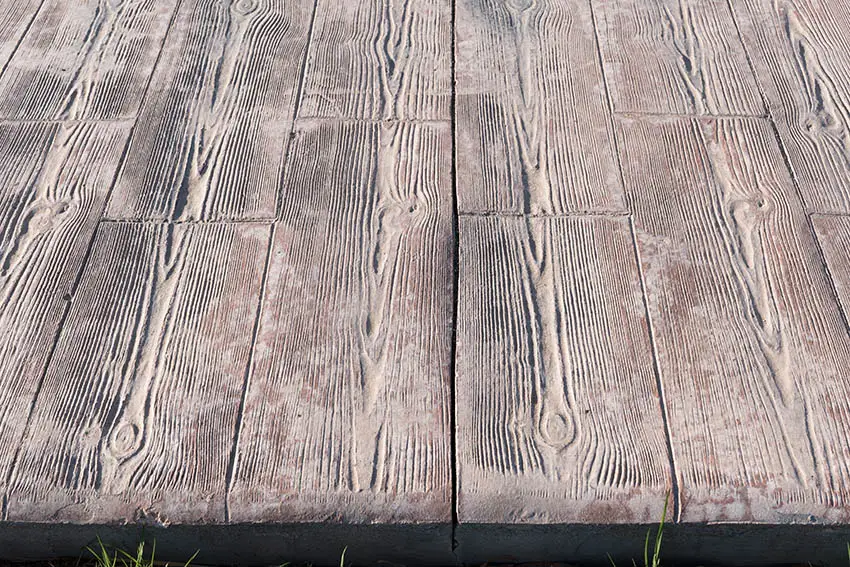
To get the most out of your patio, look for a simple, inexpensive solution that is more attractive than a basic concrete slab.
Stamped concrete fits the bill perfectly. Hire a decorative concrete contractor, and this project can be completed in a weekend. For a stylish and on-trend final result, consider a wood plank stamped concrete patio. [toc]
What Is Wood Plank Stamped Concrete
A wood plank stamped concrete patio starts out as a plain concrete slab. When the concrete is partially cured (hardened), rubber mats are laid down on top of it.
The mats have a pre-cut design on the side that is laid against the concrete. When pressure is applied to the top of the mats, the design is pressed (stamped) into the concrete.
In the case of wood plank stamped concrete, the pattern on the rubber mat is intended to replicate the appearance of wooden planks.
How to Stamp Concrete Wood Planks
First, choose the size and pattern of your concrete stamps. To help guide your research, know that these are also sometimes called ‘forms’.
Choose Type of Concrete to Use
Next, decide on the size of the aggregate in your concrete. Concrete has two major components; aggregate, and concrete paste.
Aggregate is a fancy word for any particulate material, such as gravel or crushed rock. Cement paste is created by adding water to a ‘cementitious material’. In most cases, this is a blend of limestone and clay. The paste coats the aggregate material and binds it together.
Cement paste shrinks during the hardening process. If the mixture you used has too much paste and not enough aggregate, this shrinking will cause cracks in the finished project. If you use too much aggregate or the size of the aggregate is too large, the stamp won’t work.
Different professionals have differing opinions on the ideal ratio of aggregate to cement paste for stamped concrete. A stamp with a deep design will work best with aggregate of ½ to ¾ of an inch in diameter. See more exposed aggregate patio designs here.
For the best results, partner with a ready-mix supplier in your area. Ready-mix suppliers have extensive experience in preparing the best materials for the job at hand. Explain your needs and take their recommendations.
Coloring Concrete
If you’re coloring the concrete, the colorant should be added to the water before the cement paste and aggregate are introduced. Keep careful track of how much colorant you add. The ratio must be consistent across multiple batches.
The window of time for stamping is not unlimited, so make sure you only pour as much concrete as you can stamp before it dries. 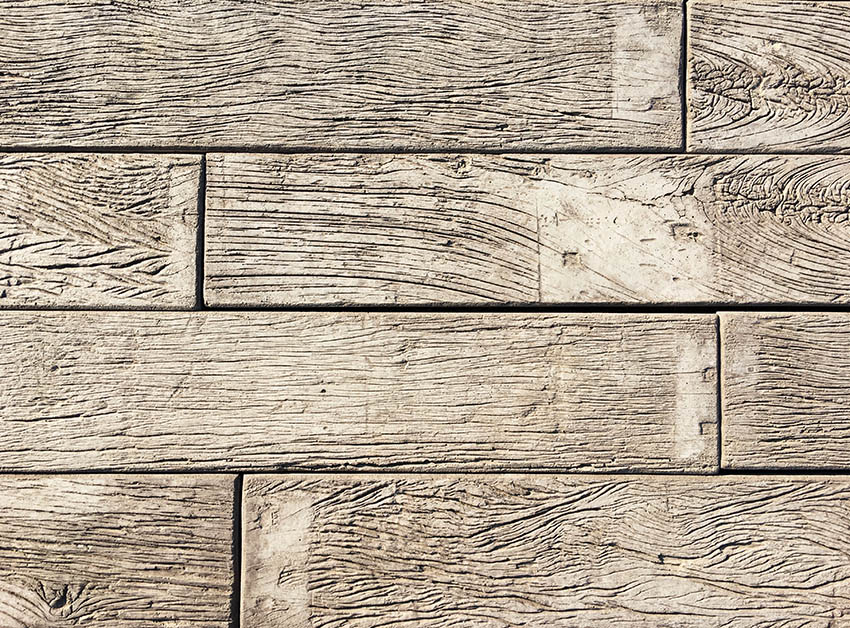
Concrete Stamping Process
Experts recommend no more than five or six square yards at a time, less if this is your first time using concrete stamps. Do not add more water to the concrete once you’ve started pouring. This will dilute the color of the concrete and give you an unevenly colored finished product.
When the concrete has been mixed, and poured, take a break for a few hours. If the patio is in direct sunlight or winds are high, check back after just one hour.
To confirm that your concrete is ready to be stamped, place your hand gently on the surface without pressing down. When you remove your hand, if there is sand or particulate matter clinging to it, the concrete is not yet ready to accept stamping.
If you attempt to stamp at this point, the concrete paste will be displaced rather than molded, leaving you with an unclear pattern and excessive buildup around the edges of the stamped area.
When the concrete is ready, use a texture skin or flex mat to pretexture the edges for a uniform finish.See other examples of concrete patio finishes here.
Texture skins don’t have seams – they’ll impart the impression of wood grain without dividing it up into planks. Once your edges are textured, start to lay down the mats in the pattern you’ve chosen. It may be helpful to number the back of the mats so you can quickly and accurately reposition them.
Start stamping in the same place you started pouring, working in rows across the patio. The first row must be laid perfectly straight — use string as a guide if necessary — or the entire pattern will be off-kilter.
Each time you lay a row of stamps, press them into the concrete by walking on them. A handheld tamper tool can be used to make sure even coverage is achieved. Lay the next row, and step onto it. While you’re tamping the second row, a helper can carefully lift the rubber mats from the first row and place them in a new, third row. Repeat this process until all the concrete has been stamped.
Wood Plank Stamping for Concrete Patio Video:
Applying Sealer to Stamped Concrete
When the concrete has cured, apply a penetrating, water-based sealer. Add a slip-resistant additive to avoid slick areas after rainfall. The concrete should be resealed every three to four years.
You want the sealant to have worn away by the time you apply a new coat. Applying sealant every year is overkill, and may lead to a cloudy appearance on the surface of your patio.
Wood Plank Concrete Stamps
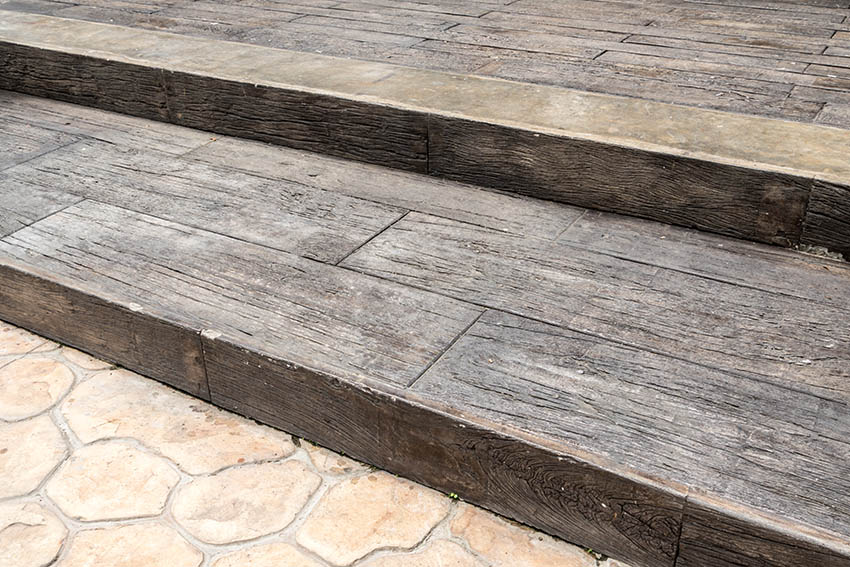
Typical plank widths are 3½ inches, 6 inches, and 12 inches. Oversize planks are also available to mimic the look of old barns or bridges; these are 16 inches wide.
For a wood plank look, you will need a full set of stamps. This usually includes two planks that measure six feet in length, and three smaller planks, measuring one, two, and three feet. This should cost about $1,000 if you choose to purchase a brand new set, a considerable investment.
You will also need a texturing skin, which can be up to $600. Luckily, the stamps are reusable, so you may be able to pick up a second-hand set from another enterprising DIY enthusiast. You can also plan on reselling the planks when you complete the project.
Another interesting choice is a ‘timber end-grain’ patterned stamp. End grain is the pattern that results when the planks produced by these stamps are much shorter, since they are intended to replicate pieces of wood cut horizontally, across the rings of the tree. These stamps are much shorter — usually about 12 inches long.
For more ideas see our gallery of different types of patios here.
To showcase highly specific designs, some images on this website use advanced AI-generation software to illustrate ideas and room inspiration. See our editorial policy to learn more.