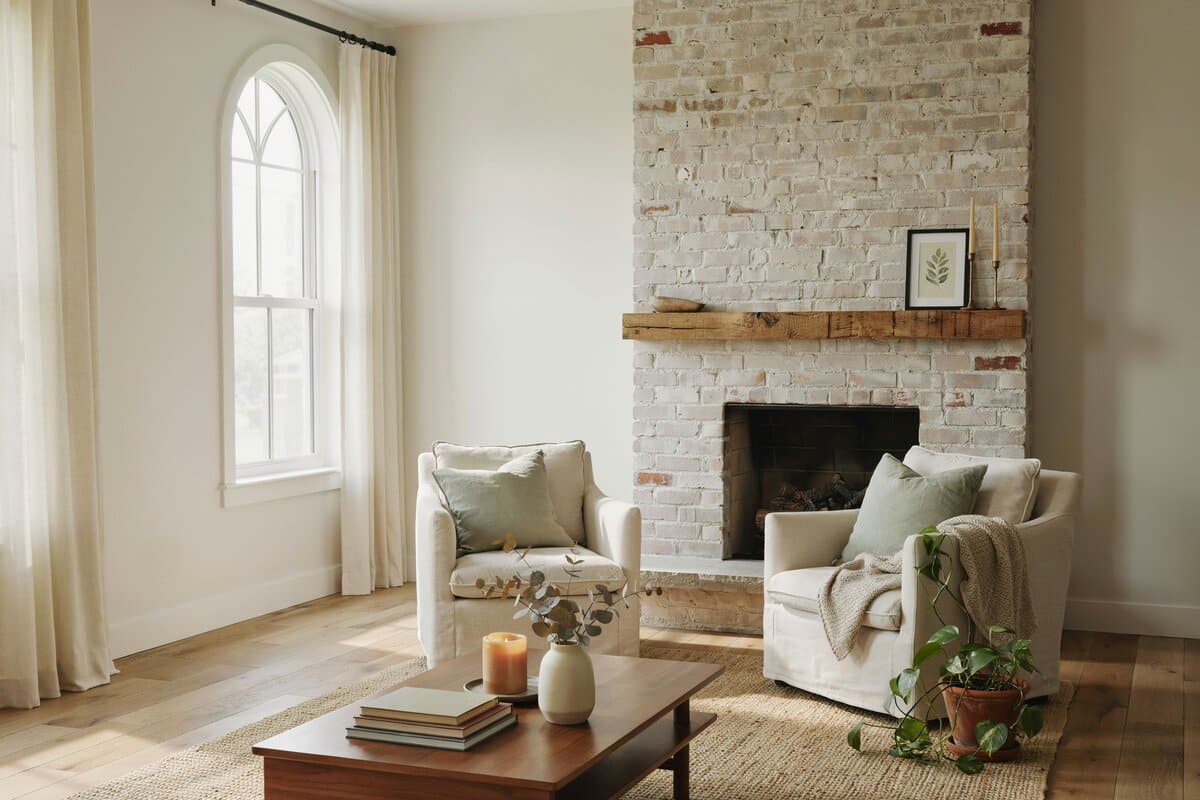
How to Whitewash a Brick Fireplace (Design Ideas)

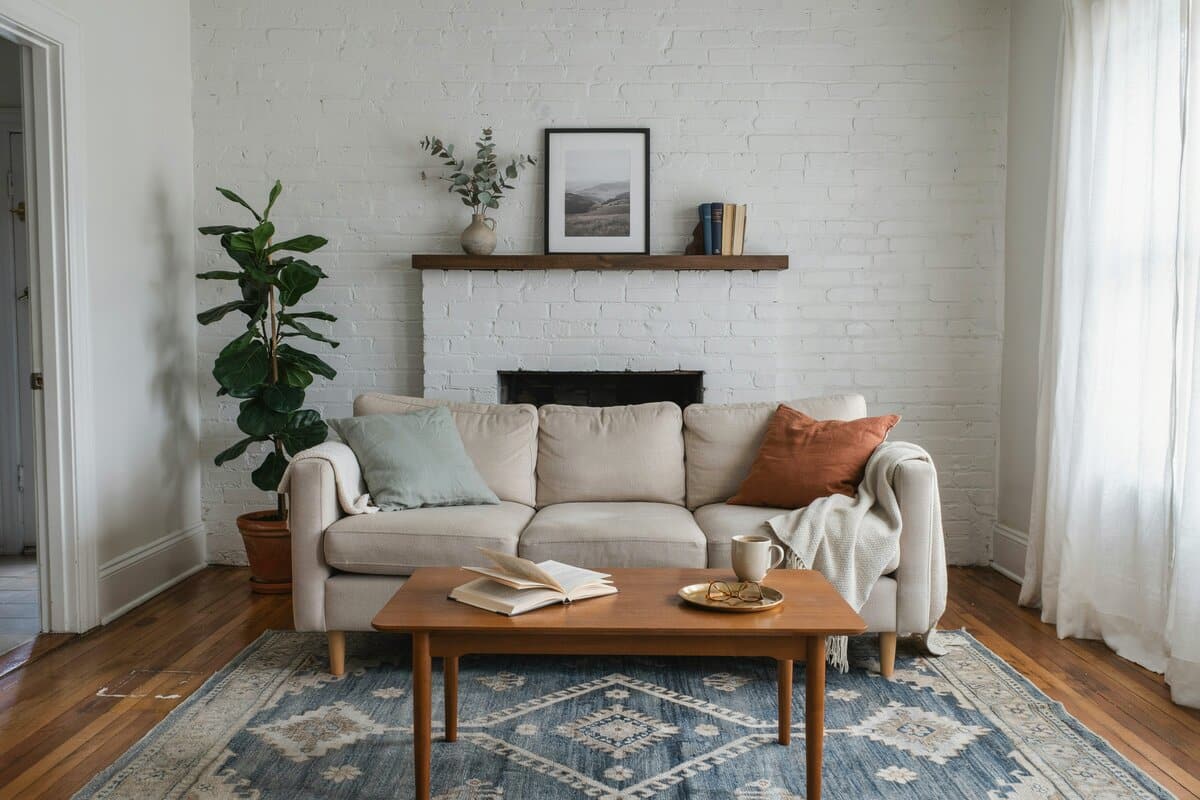
A brick fireplace brings warmth to a home not only in a literal way but also aesthetically. Its warm undertones can easily give your living room design a cozy and inviting atmosphere. But as the years go by and with all the constant use it endures, chances are your once amazing brick fireplace turns into a dull and faded stone. In some cases, your living room just simply needs a makeover to look updated and fresh.
Thankfully, renovation and demolition isn’t always the answer. For those looking for an easy way to change the look of a brick or stone fireplace, whitewashing is one of the easiest and most effective ways to give your fireplace a much-needed tweak. Below, we give you our very own guide on whitewashing a brick fireplace and a stone fireplace. Read on to know more about the steps, how-to’s, cost, and everything and anything you need to know as to why this finishing treatment deserves a try.
What is Whitewashing?

Whitewashing is a finishing treatment applied to bricks which gives them a washed appearance. It is typically used for exteriors but was later on utilized for interiors too. A typical whitewash solution is created by mixing an even amount of white latex paint and water then smearing the thinned paint solution over clean bricks using uneven strokes.
The whitewash cures through carbonation — a process in which carbon dioxide in the atmosphere chemically reacts with the paint, thus forming calcium carbonate in the form of calcite.
This technique was popularized in the 1960s when A. Hays Town utilized it in his iconic homes in Baton Rouge. It is prominently used in English cottage homes, in Ireland, Spain, and Greece. In interior design, it was traditionally used for food preparation areas such as dairies because of its antimicrobial properties. Nowadays, it is mainly used for aesthetic purposes and as a unique finishing treatment for brick and stone fireplace surrounds.
Why whitewash your fireplace?
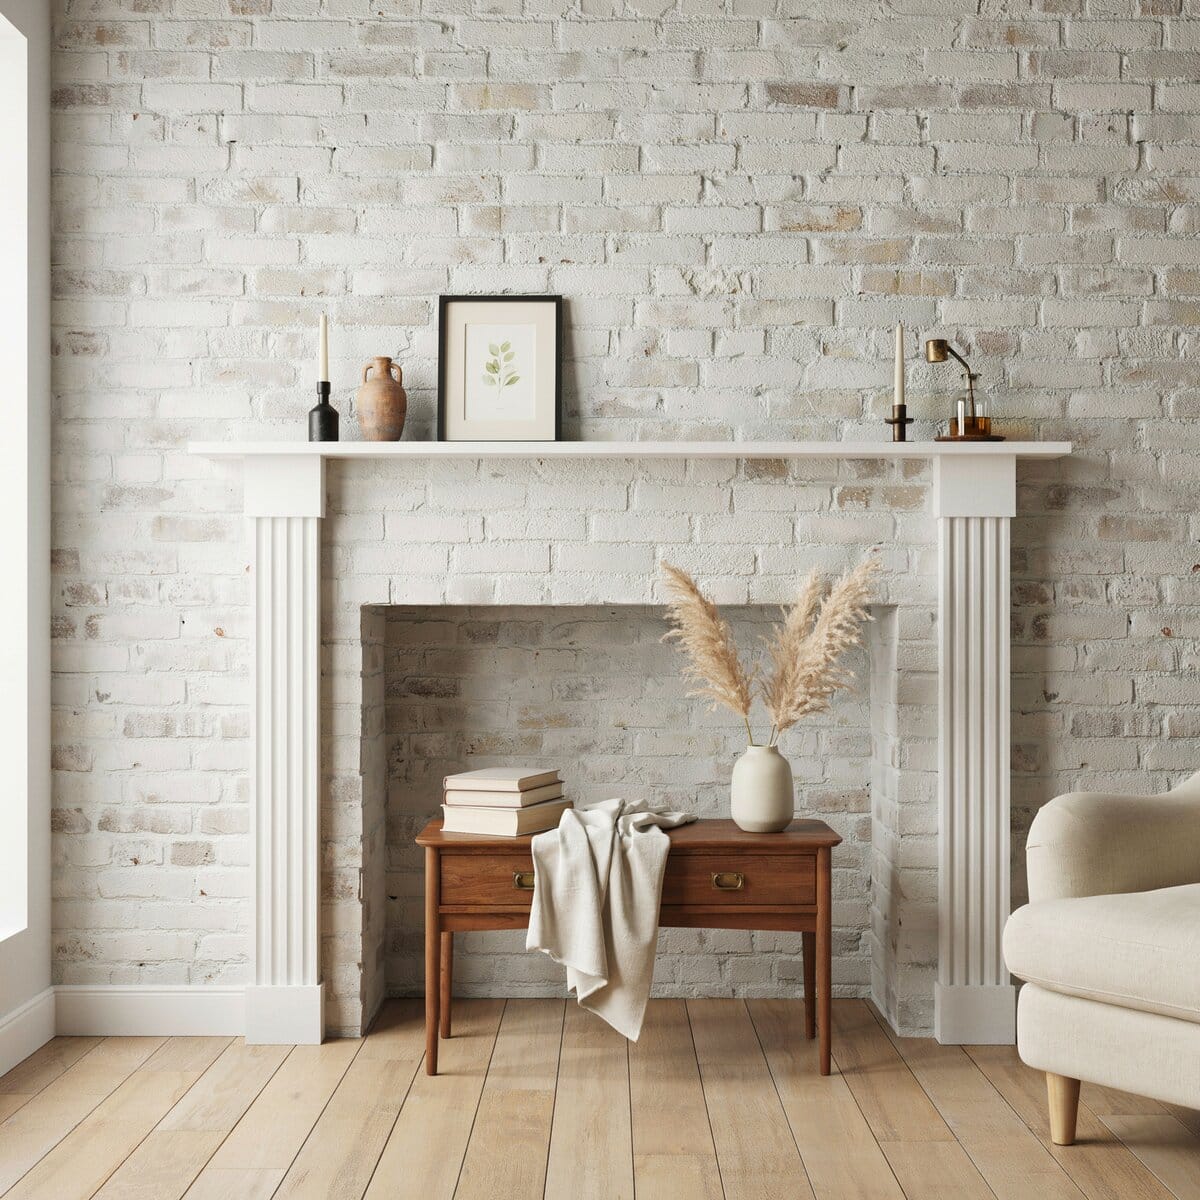
- Easily updates the look of your home – Whitewashing a brick or stone fireplace gives it a refreshing and more updated appearance, which in turn affects the overall look of your home. If you feel like your replacement looks a bit outdated, you can give it a more modern vibe by whitewashing it.
- Gives bricks and stones a more softer look – Red bricks, brown bricks, burgundy bricks, or orange bricks — all of these are known for their warm colors and strong appearance. A good way to tone down and soften their looks is by whitewashing. Whitewashing a brick fireplace surround alters its appearance significantly while maintaining the brick’s natural texture and variety.
- Lightens and brightens a space – Muting the dark tones of a stone or brick fireplace has a surprising effect on the overall ambiance of your home. It is an easy DIY project that can lighten and brighten surfaces in your living room.
- Conceals stains and imperfections from your fireplace – Brick is extremely difficult to clean and sometimes even if you use the strongest cleaning agent, black stains and soot can be quite hard to remove. Whitewashing a fireplace offers an easy and inexpensive way to conceal any imperfections in the stones or bricks.
- Inexpensive finishing treatment- Whitewashing a stone or brick fireplace is generally inexpensive. You do not need to hire a professional to it but instead, it can be undertaken as a weekend DIY project.
Whitewash vs. Limewash
There are two methods you can use for whitewashing a brick fireplace — whitewash and limewash. A typical whitewash mixture is made by combining equal parts of white latex paint and water, which results in a thinned paint solution. Traditional whitewash mixture is also known as “limewash” — which is an age-old, natural method that makes use of a combination of equal parts of lime powder and water. Paint whitewash results in a somewhat textured paint finish, while limewash results top a faded, plastered look.
Cost of Whitewashing a Fireplace
In general, paint whitewash is generally more expensive than limewash. A paint whitewash project has an average cost of $110 to $200 per 250 square foot or $0.45 to $0.80 per square foot .
This includes materials such as paint, brushes and roller brush. Limewash, on the other hand, can cost about $30 to $60 in materials (hydrated lime, salt and Portland cement), but with tools like paint brushes and rollers included, a whole project would only take about $50 to $100. This total cost is enough to cover not only a fireplace but an entire house.
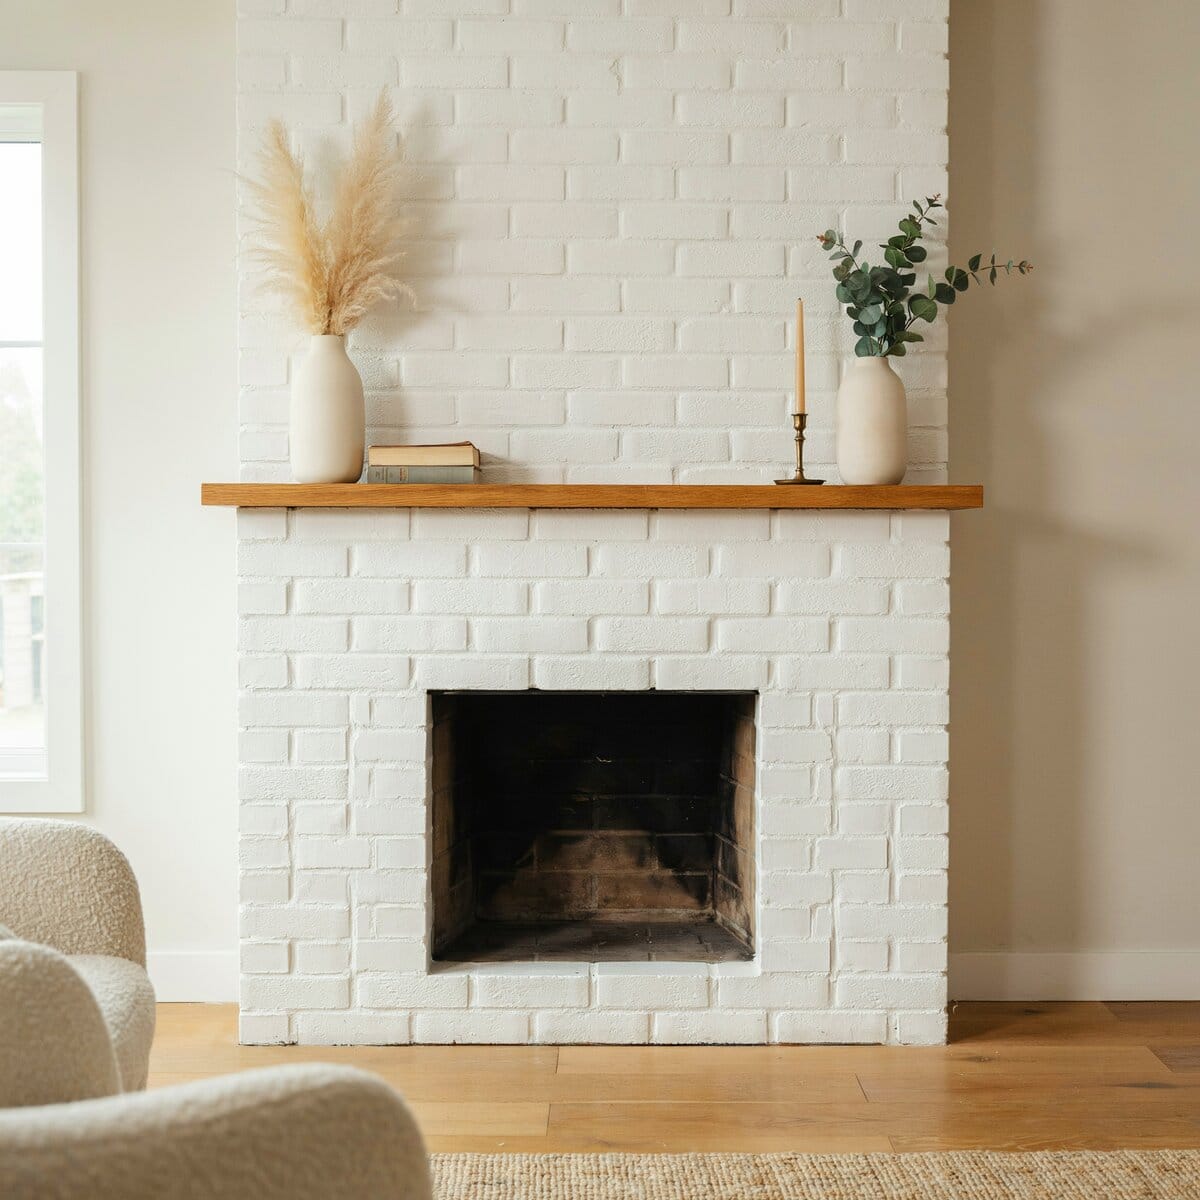
How To Whitewash Brick Fireplaces
Whitewashing a brick fireplace is a task that has medium difficulty which can be accomplished in 1 or 2 days. It is suitable for beginners, can be taken on as a one weekend DIY project and costs less than $100.
Tools needed:
- Protective eye wear
- Face mask
- Rubber gloves
- Sash Brush
- Scrub Brush
- Paintbrush
- Paint grate
- Spray Bottle
- 5 Gallon Bucket
- Putty knife, paint scraper or wire brush
Materials to prepare:
- Painter’s Tape
- Cardboard or Kraft Paper
- Paper towels
- Garbage bags
- Newspapers
- Clean Cotton Rags
- Grease cutting dishwashing soap
- Boric acid powder
- Salt
- Ammonia
- Pumice powder
- Trisodium Phosphate (TSP) Cleaner or Grease-Dissolving Detergent
- White Interior Flat Latex Paint and Primer
Some things you need to know before whitewashing your brick fireplace surround:
- If the faces of your brick fireplace have large deposits of soot, you may need to put a fireplace door so you can protect your whitewashed bricks later on from excess smoke and heat.
- It is not recommended that you whitewash or paint the inside part of a fireplace or the opening. Although you have the option to paint it using high-temperature paint, there is still a chance for the finish to fade and the bricks to get tarnished. So your best option is to leave the masonry bricks in the fireplace opening unfinished.
- These steps are suitable for whitewashing all common colors of bricks like brown, orange, burgundy, red, pink and grey.
- In some cases whitewashing a red brick fireplace would require an extra step known as “gray washing”. Graywashing would require treating the brick fireplace with a coat of thinned gray paint before layering on a coat of whitewash solution. This ensures that the resulting color is not pinkish or peach.
Steps in Whitewashing a Brick Fireplace
Step 1. Preparing all the materials and the fireplace.
Prepare all the materials you need and the surrounding area of the fireplace. Lay down newspapers or garbage bags around the floor so you can catch any cleaning agent or paint and prevent your flooring material from getting damaged. Wear the necessary safety gear such as rubber gloves, face masks and protective eyewear.
Step 2. Thorough cleaning of the brick fireplace surround for painting
The next phase would mainly focus on thoroughly cleaning your brick fireplace. It is necessary to clean the brick and grout as whitewashing over dirty bricks will not achieve the desired effect, so you need to dedicate ample time for this process. Using your desired cleaning solution and a scrub brush, wash the brick and grout of the brick fireplace. Scrub with a bit of pressure so you can remove any deep seated dirt and grime. Make sure that you remove any soot around the opening of the fireplace. Rinse the bricks thoroughly using a cotton rag that has been dipped in clean warm water and then leave it to dry completely.
- There are also other cleaning solutions which you can try in cleaning your brick fireplace. It is recommended that you start with the mildest cleaning method first then use a stronger approach if needed.
Here are some cleaning solutions which can be used for bricks. Make sure to follow the instructions in applying any of the cleaning agents listed below to avoid any damage onto your fireplace’s surface:
Dish soap – The mildest solution. Mix one part of mild grease cutting dish detergent with one part salt. Add in enough water to create a loose paste like consistency. Using a clean rag, apply the paste onto the bricks and spread it using a scrub brush. Let the paste sit on for 10 minutes before rinsing with a damp cloth dipped in warm water.
Boric Acid – Mix one tablespoon of boric acid powder to one gallon of warm water. Dip a scrub brush onto the solution and gently scrub the surface of the brick. Rinse thoroughly with warm water using a clean cotton rag. Make sure to use rubber gloves when using this solution.
Ammonia – Mix one part ammonia with two parts mild grease cutting dish soap and one part pumice powder. Mix thoroughly until you reach a loose paste consistency. Wearing rubber gloves, apply the paste onto the bricks using a clean cotton rag. Let it sit for 10 minutes before rinsing with warm water. Pumice powder can be bought in arts and crafts stores and beauty supply stores.
Trisodium Phosphate – This is the most common solution used for cleaning bricks but it is also the most aggressive. Trisodium Phosphate or TSP is an effective heavy duty cleaner that comes in the form of an odorless dry powder.
It consists of 75 to 80% trisodium phosphate and 20 to 25% sodium carbonate. TSP requires extreme care when you work with it since this cleaning solution is very strong, so you need to wear full protective gear when touching it.
TSP, both in dry or wet forms can irritate the skin so make sure to wear rubber gloves and protective eyewear. Wear full skin protection like a long sleeved shirt and pants.
For cleaning bricks, mix ½ cup of trisodium phosphate (TSP) into a gallon of hot water. Apply the solution to the bricks using a scrub brush. Thoroughly scrub the bricks and then rinse with clean warm water. If some stains are still left on the bricks, increase the ratio of your cleaning solution to 1 cup of TSP one cup per gallon of hot water.
- Some additional info: What is soot? Soot is the black powdery or flaky substance which builds up when an organic matter is incompletely burned. It is largely consisted of amorphous carbon
Step 3. Preparation for painting of the brick fireplace
Cover the surrounding area, walls and cabinets around the brick fireplace with painter’s tape.
If needed, you may also tape down kraft paper or cardboard around the fireplace to protect the mantel. Do this also for the support and over the firebox of fireplace insert. If your fireplace has doors, tape them shut. It is not recommended that you whitewash the inside part of your brick fireplace. Lay drop cloths on the floor to catch any spills. It is also good to have a garbage bag ready at hand where you can put trash or any old paint you will be stripping.
For brick fireplaces that have been painted before, you may need to repair any damage and then apply a coat of primer. Make sure to check for any damages on the surface of the bricks such as blistering, flaking and chipping. Carefully remove any lingering or chipping paint using a paint scraper, a putty knife or wire brush. Any lingering paint will cause your whitewashing to crackle.
Step 4. Graywashing before whitewashing a red brick fireplace (Optional Step)
As mentioned, this step is optional and is only typically done for brick fireplaces that have a reddish or pinkish undertone. Graywashing ensures that the resulting color of the whitewashed bricks is not pinkish or peach. However, most red brick fireplaces would look just fine if your proceed with whitewashing right away. Layering the colors only gives a more dimensional effect.
Prepare your gray wash solution by combining equal parts (1:1 ratio or 50/50) of the following ingredients in a plastic container or paint tray:
- 1 part white chalkboard paint
- Water – Slowly add clean, cold water to the solution
Mix it to achieve an even consistency. You can test out the solution first in a small spot to see if you like the color. If you are satisfied with your gray wash color, proceed with applying it. Using a paintbrush, apply the gray wash solution over the red brick fireplace.
Do this in small manageable sections using different painting techniques such as X like strokes, circular motion or stippling. The goal is to create more “washed effect” and not a flat, painted like surface. Apply the gray wash until the whole red brick fireplace is finished.
Let the paint dry overnight before applying the next coat (if needed). You have to wait a day in between applying the gray wash layer and the white wash layer over the red brick fireplace.
Step 5. Preparing the whitewash solution
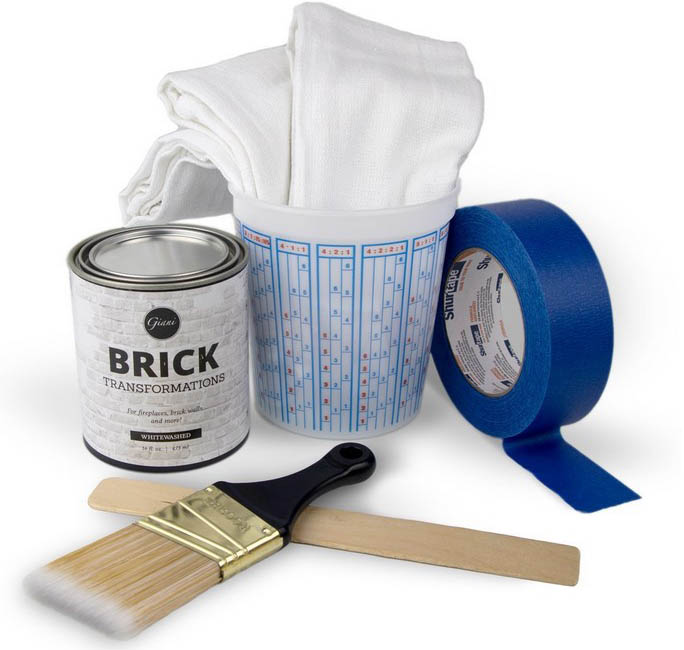
See this whitewash fireplace kit at Amazon
Prepare the whitewash mixture by mixing equal parts (50/50) of white latex paint and water in a container or a bucket. Mix them well together to an even consistency.
If you want your bricks to be less white, you will need a more diluted solution. Add more water to your latex paint to make the color lighter. While if you want to make your bricks more white, you will need a higher paint to water ratio. You can also test the solution first in a small area of your fireplace so you can adjust your whitewash solution until you reach the desired effect.
If you want a subtle color, you can dab a different shade of white paint over some of the brick faces. Make sure to use a thinned paint solution too and wipe it in the same way you apply your first coat of whitewash.
Step 6. Applying the Whitewash solution using a cloth or rag
There are two effective methods that you can try in whitewashing a brick fireplace surround:
First method: Fill a spray bottle with water and lightly spray it over the face of the brick fireplace. While the bricks are still moist, wipe the thinned paint or whitewash mixture onto the surface using a cotton rag. It is best to use rags which are wadded or stuffed together.
It is easier to do this in sections, rather than misting and whitewashing the whole brick area at once. Repeat the steps (alternately misting and wiping on thinned paint) until you finish the whole fireplace. If an area has too much paint, you may spray more mist and blot up the moisture to remove the excess paint.
Second method : Dip a paint brush into the thinned paint or whitewash solution. Make sure to remove any excess paint on a grate so the paint does not drip on the bricks. Whitewash the bricks in small sections, keeping the area to a maximum of two foot square patches.
Start with the grout lines then work your way to the faces of the bricks. Once you apply the paint onto the bricks, quickly blot it with wadded cloth or paper towels. You have to do this step while the paint is newly applied so you can achieve a washed and not painted effect.
Also, it has to be blotted or dabbed and not wiped with a rag or paper towel so the resulting texture is more natural. Repeat the process until the whitewashing is complete.
Step 7 . Dry brushing hard to fill in areas
After whitewashing the brick faces of a brick fireplace surround, you need to proceed with dry brushing. Using a rag, dry brush hard to reach areas to make sure that all the parts of the brick fireplace is covered.
For fireplaces which have mortar that is deeply recessed from the bricks, you may use a sash brush to apply the thinned paint or whitewash mixture. Lad the sash brush with thinned paint and use a dry brushing technique as you go along the mortar, the edges and the ends of the brick.
- Dry brushing is a painting technique in which the paint brush is only loaded with a small amount of paint, making it quite dry. This is done using light, gentle and quick brush strokes.
Step 8. Drying the brick fireplace.
Let the whitewash or paint dry overnight before using the fireplace. See more living room paint ideas here.
Whitewashing Steps Using Lime

Aside from using latex paint in whitewashing a brick fireplace, another option that you can explore is to use all natural lime.
What are the advantages of using lime and cement whitewash?
- Lime is an all natural material and is less harmful to the environment
- It is less expensive than paint
- It is durable and can last for decades
- Lime is self healing and is easy to repair
- Unlike paint, lime can easily fill small holes and cracks in the mortar
- Lime is odorless, antiseptic and antifungal
- Lime and cement chemically bonds with masonry bricks
Tools needed:
- Protective eye wear or safety glasses
- Face mask
- Nitrile gloves
- Thick whitewash brushes
- Measuring Scoop
- Spray Bottle or garden spray pump
- Large Bucket
- Small Bucket
- Lid for large Bucket
- Fine mesh strainer
- Putty knife, paint scraper or wire brush
Materials to prepare:
- Hydrated Lime
- White Portland Cement
- Painter’s Tape
- Cardboard or Kraft Paper
- Paper towels
- Garbage bags
- Newspapers
- Clean Cotton Rags
- Grease cutting dishwashing soap
Some important safety precautions and additional information on using lime whitewash:
- You can find hydrated lime in your local home improvement store. It is not the same as garden lime and you can often find it with cement. Masonry lime works best, but if you can’t find it, you can use garden-variety hydrated lime as an alternative
- Make sure to wear the necessary protective gear such as safety glasses, face masks, and gloves. Although lime is non toxic, it is caustic and super alkaline, which means you can get skin irritations and burns from handling it. If you can wear a long sleeved shirt and pants when handling lime, the better.
- Cover all areas in the fireplace that you want to keep clean, especially the floors. Once the lime solution spills, make sure to wipe it off immediately. Lime alone can be easily washed off with soap and water. However, when combined with cement, it does not come off once it dries
- This requires a very slow and tedious process. Applying the first coat of limewash can take hours, but it pays off in the end as the finish practically lasts forever.
Steps in Whitewashing Brick with Lime
Step 1. Preparing all the materials and the brick fireplace.
Prepare all the materials you need and the surrounding area of the fireplace. Lay down newspapers or garbage bags around the floor so you can catch any spills and prevent your flooring material from getting damaged. Wear the necessary protective gear before handling lime.
Step 2. Thorough cleaning of the brick fireplace
As mentioned before, you cannot skip this step because whitewashing over dirty bricks will not achieve the desired effect. The whitewash solution adheres to the bricks through carbonation. Clean your fireplace using your desired cleaning solution.
You can choose from the cleaning agents mentioned above. Follow the necessary instructions for each cleaning solution. Gently use a scrub brush for cleaning your bricks and rinse with clean, warm water using a cloth. Leave it to dry completely.
Step 3. Preparing the lime whitewash recipe
Lime +Cement Whitewash Mixture
Adding white portland cement makes your lime whitewash mixture more opaque without taking away the natural brilliance of lime.
To make lime whitewash , mix the following ingredients in a bucket to an even consistency:
- 1 part lime powder
- 1 part portland cement
- Water – Slowly add in clean, cold water to the lime and table salt until you reach the consistency of thin pancake batter.
If using hydrated lime powder, mix the following ingredients in a bucket to an even consistency:
- 1 cup portland cement
- 1 cup hydrated lime
- Water – Slowly add in clean, cold water to the lime and cement until you reach the consistency of heavy cream
Strain the mixture with a fine mesh strainer for a smooth application.
If using lime putty instead of lime powder, mix the following ingredients in a bucket to an even consistency:
- =1 cup portland cement
- 1 cup lime putty
- Water – Slowly add in clean, cold water to the mixture until you reach the consistency of thin pancake batter.
Let the mixture sit at least 24 hours.
How to Make Lime Putty
Fill a 5 gallon bucket halfway with hydrated lime powder. Then slowly pour clean, cold water and mix well until saturated. Add some more lime powder and water to the mixture and mix well until you reach a thick consistency.
Do not fill the bucket to the brim but instead leave a few inches for water on top. Seal the bucket with a lid and let it sit for 24 hrs before using.
Although not required, making the lime putty mixture the day before will give a smoother whitewash finish. Lime putty can last for days, just make sure that you have some space for water on top. Mix it well before using.
Step 4. Lime wash application using a brush
The steps that you need to follow in applying lime whitewash is almost the same as the process of applying paint whitewash. First, you have to fill a spray bottle water with mist the face of the bricks with a little water. It is best to start with a small section first — at least 3’ x 3’ , as it is more manageable. Start with the top of the wall and work your way down in small sections.
Traditional lime putty is made by adding water to quicklime, or the modern approach of mixing autoclave lime with water – Old-House Journal Sep-Oct 2006
Load a paint brush with lime wash. Then, while the bricks are still damp and moist, apply the lime wash using a paint brush. Make sure to go over the grout lines, nooks, cranny and all edges of the bricks and mortar. Do this in quick strokes and avoid putting too much lime and cement solution as it tends to crack when it dries.
Mist the bricks, paint with lime wash and repeat the steps until the whole fireplace is covered.
- As you go along the application, the brush may tend to get heavy and messy so it is good to have at least two pieces of paint brushes ready at hand — one dry and the other for applying the lime wash.
- Older bricks tend to absorb more water so you have to spray down water more often so they stay moist.
- One coat of lime wash will allow some of the color of the bricks to show, while two coats makes it more opaque.
- If you want a more faded color, you can spritz some more water over the lime wash and wipe it away with a damp cloth. Do this is a random pattern, using a blotting motion, to reveal some spots of the red bricks.
- If you want a brighter white color, you’ll need a thicker coat of the lime wash. Apply at least two to three coats of lime wash solution over the bricks. Make sure to let the first coat dry for at least 24 hours before applying the next coat. You’ll have to follow this 24 hour interval between each time you apply a new coat. You can do this until you reach the desired effect and color.
Step 5. Drying the whitewash
Let the brick fireplace dry for at least 24 hours. Leave it to air dry, do not rush this process or force dry using fans. Allowing the bricks to dry slowly will make the lime and Portland cement bind better.
As the whitewash dries, you’ll see fine cracks developing in the brick faces – that’s okay and is actually a good sign as it means that carbonation is taking place.
How to Whitewash a Stone Fireplace
Tools needed:
- Paint brush (angled, medium to stiff bristled brush)or stiff bristle chip brush
- Sponge brush
- Staining pads
- Paint tray or plastic container
- Protective eye wear or safety glasses
- Face mask
- Rubber gloves
Materials to prepare:
- White Chalk Paint – you can choose whatever shade of white you prefer
- Gray Chalk Paint – use this if the stones have pinkish or orange undertones
- Water
- Painter’s Tape
- Cardboard or Kraft Paper
- Paper towels
- Garbage bags
- Newspapers
- Clean Cotton Rags
- Grease cutting dishwashing soap (for cleaning the stone fireplace)
Whitewashing a Stone Fireplace: A Step-by-Step Procedure
Step 1. Preparing all the materials and the stone fireplace.
Prepare all the materials you need and the surrounding area of the fireplace. Lay down newspapers or garbage bags around the floor so you can catch any cleaning agent or paint and prevent your flooring material from getting damaged. Wear the necessary safety gear such as rubber gloves, face masks and protective eye wear.
Step 2. Thorough cleaning of the stone fireplace for painting
Just like in whitewashing a brick fireplace, the first step would require you to thoroughly clean the stones on your fireplace. Again, you cannot skip this step because whitewashing over dirty stones will not achieve the desired effect. Clean your fireplace using your desired cleaning solution. Follow the necessary instructions for each cleaning solution.
In most cases, the trusted solution of grease cutting dishwashing soap and warm water can do the trick. Gently use a scrub brush for cleaning your bricks and rinse with clean, warm water using a cloth. Leave it to dry completely. If the dirt does not come off, you may need a stronger cleaning agent like TSP to get the job done.
Step 3. Graywashing the stone fireplace
Graywashing is very important especially if your stone fireplace has pinkish to orange undertones. If you skip this step, and proceed with applying the white chalkboard paint, the resulting color would be pink or peach due to the stone’s original colors.
Prepare your gray wash solution by combining equal parts (1:1 ratio or 50/50) of the following ingredients in a plastic container or paint tray:
- 1 part white chalkboard paint
- Water – Slowly add in clean, cold water to the solution
Mix it to achieve an even consistency. You can test out the solution first in a small spot to see if you like the color. If you are satisfied with your gray wash color, proceed with applying it.
Using a paint brush, apply the gray wash solution over the stone. Do this in small manageable sections using different painting techniques such as X like strokes, circular motion or stippling. The goal is to create more “washed effect” and not a flat, painted like surface. Apply the gray wash until the whole fireplace is finished.
Let the paint dry overnight before applying the next coat (if needed). In some cases, the stone is more porous so they get dried more easily. You have to wait a day in between applying the gray wash layer and the white wash layer.
Step 4. Preparing the whitewash solution
To make the whitewash solution for a stone fireplace, mix equal parts of the following ingredients in a plastic container to an even consistency:
- 1 part white chalkboard paint
- Water – Slowly add clean, cold water to the solution
You can adjust the amount of water you add depending on the effect and color you want to achieve. Too much water will result in a lighter color, while too much paint can create a more opaque appearance. You do not want your stone fireplace to appear like it was “painted on” so be careful in adjusting the paint-to-water ratio. You can test out the solution first in a small part of your fireplace to get a sample of the results and to see if you like the color.
Step 5. Whitewash application
Using a stiff bristle paint brush, apply the whitewash mixture to your stone fireplace. Use X like strokes, a circular motion or stippling to create an uneven, washed effect. It is best to start with a small section first — at least 3’ x 3’ , as it is more manageable. Start with the top of the wall and work your way down in small sections. Make sure to evenly cover the whole surface of the stone, including the edges.
Once you brush your whitewash mixture onto the stone, wipe off any excess using a staining pad. You can also dab or blot the excess mixture just to even it out. Repeat the steps — brush on and wipe off, until you finish the whole fireplace.
Step 6. Drying the whitewash
Let the stone fireplace overnight. If you are laying colors, you have to wait for the first coat of whitewash to dry completely before applying the next coat.
For more related designs see our bedroom fireplace ideas page.
To showcase highly specific designs, some images on this website use advanced AI-generation software to illustrate ideas and room inspiration. See our editorial policy to learn more.