Wainscoting Ideas To Transform Your Interior Designs

Wainscoting is a type of wall paneling that homeowners, interior designers, and architects have used for centuries. When it comes down to it, though, these wall panels aren’t a one-size-fits-all design. There are plenty of factors that allow you to personalize wainscoting to your personal preferences, home, and room design. This can all seem overwhelming at first if you are considering wainscoting in your own home. To help you out, we’re going to break down what it is and what design styles might work for you. [toc]
Characteristics of Wainscoting
Wainscoting is a rather all-encompassing design term. Generally, it refers to paneling that covers the lower half of the wall. It can be used as an accent design or for more structural purposes such as covering or preventing damage or even adding insulation to a room. Wainscoting is also referred to as Wainscot and is frequently made from oakwood. The origin of the word is thought to have originated from the Dutch word ‘wains’ which meant wagon. This type of paneling was originally used extensively for wagon construction and coachwork.
There are a few terms to know when it comes to discussing wainscotting. The two main pieces of this concept are the panel and the frame of that panel. The panel itself is made up of four pieces; the top rail, bottom rail, and pair of side rails. The side rails are often referred to jointly as the stiles.
Wainscoting Height
Wainscoting can vary by design and homeowner wants but, by strict definition, it covers the bottom 3 to 4 feet of your wall. For an eight foot wall the standard panel size is 32″ and for a nine foot wall the standard size is 36″. For higher ceiling rooms and larger spaces a size of up to 48″ is a good fit.
Of course, you can have paneling that’s taller or even cover the whole wall. In fact taller paneling designs have currently been trending lately. It’s also an interior wall design, so it fits a living room, bathroom, hallway, or even kitchen well. This definition varies slightly from beadboard which is a term that is often used interchangeably with wainscot. We’ll take a look at the differences in these definitions a little later on.
Types of Wainscoting
One of the first decisions you’ll make when it comes to wainscoting is the material you want to use. Luckily it is a rather versatile design piece meaning that it can be done with a number of materials, allowing you to match your unique architecture and interior design.
Wood
When it comes to aesthetics, wood offers plenty of options. Wood can range in a variety of colors from white and light colors to deeper colors. This is especially true for woods that take to staining very well such as cherry and oak. You can also paint your wood to get a unique look – we’ll get into how to do that later. You can also get different appearances by choosing different grains. If you aren’t a fan of wood grain, many kinds of wood are easy to camouflage, once again, with paint or stains.
The cost of wood wainscoting has an extra variable that not many other materials have: type. Just like wood flooring, you have quite a few options that vary in hardness, grain, and color. Poplar veneer costs about $7 to $17 per square foot, oak runs around $12 to $30 per square foot, maple runs about $13 to $35 per square foot and $14 to $40 per square foot. This makes wood one of the more expensive choices among materials.
Another factor that can affect the price of wood is if you are ordering pre-stained. Factory-stained oak is about $19 to $31 per square foot, stained maple ranges from $20 to $37 per square foot, and factory-stained cherry is estimated at about $20 to $40 or more per square foot. You can reduce these costs if you have the skills and supplies to stain the wood yourself.
When installing that beautiful reclaimed wood wainscoting in your dining room, you’ll want to make sure it can adjust to the normal humidity levels in your home before slapping it up on the walls. Give it 2-3 days to acclimate or you may notice some unsightly gaps or buckling down the road. Once it’s up, keep your wainscoting looking sharp by dusting it regularly and polishing every now and then with cleaners made specifically for wood. Properly cared for, wainscoting can last for years and stand up well to normal wear and tear from daily life.
Painted
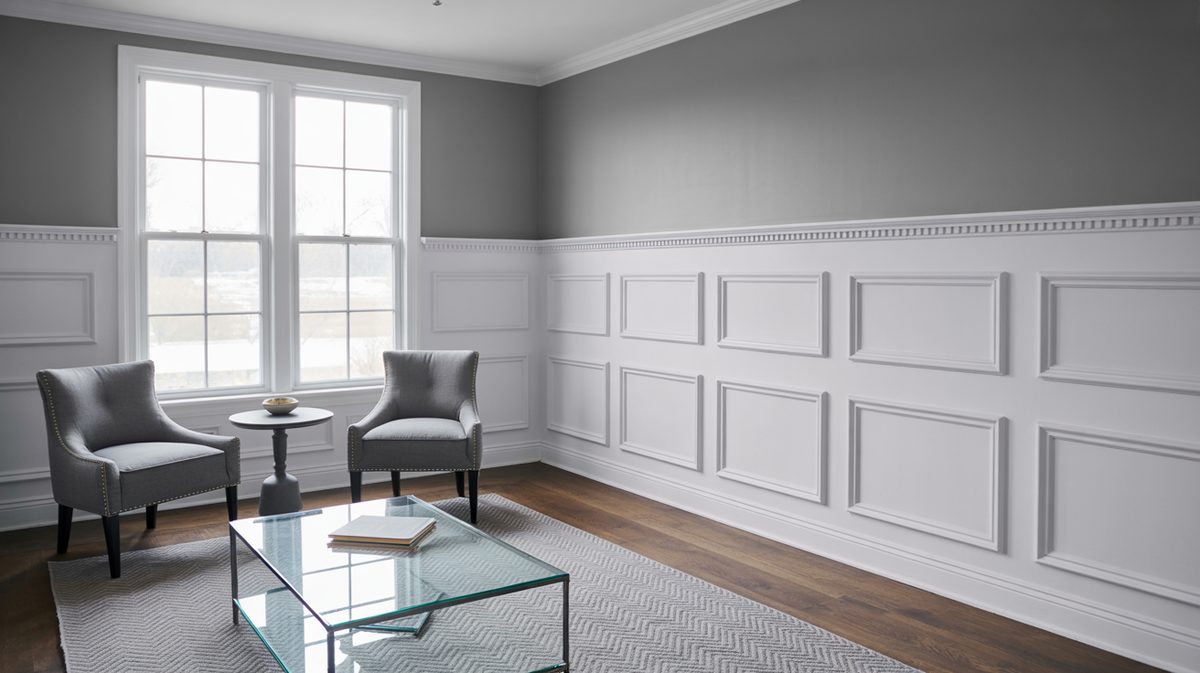
Painted wainscoting can be almost any color you can imagine although white is most common. Another classic choice for darker decor is shades of gray. Painted panels could also be more than one color. It isn’t rare that panels use a pair of colors either. This is used a lot with raised panels with the raised design painted white and the area flushed against the wall matching the wall color.
There are some variations in the cost of painted wainscot. To purchase panels that are only primed for you to paint, it’s probably going to be around $7 to $11 for each square foot. Factory-painted panels are more expensive at around $15 to $18 per square foot.
When it comes to painting wainscoting, you’ll want to start off on the right foot by properly preparing the surface. Give the wainscoting a good, thorough sanding to remove any gloss or roughness, then wipe it down so it’s clean. Priming is also a must – oil-based primers work best to prevent bleed-through.
For the topcoat paint, you’ve got options depending on the look you’re going for. Latex paints make for easier cleanup while oil-based paints give off that subtle sheen. Most folks opt for a semi-gloss finish since it’s easy to clean and gives a nice classic look. Though if you want something more modern, consider a soft satin sheen. Just keep in mind that no matter what paint you choose, you’ll need to give your wainscoting some TLC every 5-7 years in the form of touch-ups.
It’s also good to pay attention to the weather when you paint. If there’s high humidity or it’s really hot or cold, that can negatively affect drying times and how smoothly the paint finishes. Ideally you’ll want to paint when there’s low humidity and temps around 60-80 degrees for best results. The most important thing is making sure the surface is properly prepped – so sand, clean, prime.
PVC
PVC wainscoting panels are an attractive option that also happens to be durable and low maintenance. They are often used in kitchens and bathrooms. This material handles moisture well and it’s easy to wipe off any spills or splashes without permanent stains. These panels can withstand temperatures ranging from -10°F to 140°F, so they will look great through cold winters and hot summers.
They’re also fire-resistant, so they add a little safety to your home too. And there is no need to worry about household cleaners either – PVC has excellent resistance against most of them. Furthermore, the UV stability ranges from moderate to high depending on the treatment, so you can expect the color and luster to hold up well for some time. And with moderate sound dampening abilities, this wainscoting can help reduce noise and echoes for a more peaceful environment.
When it comes to cost, PVC wall panels are easy to install and can be as inexpensive as $1 to $4 per square foot. The biggest downfall of PVC panels is that they aren’t the most environmentally friendly choice to manufacture.
Vinyl
Vinyl wainscoting is one of the most affordable options you can make since it’s only about $4 to $7 per square foot on average. Even better, it’s one of the easiest options to install as well. So, if you’re hiring someone for installation, you won’t have to pay as much for labor. Vinyl also has a smooth, clean surface and stands up well to wet and humid environments. This is why many homeowners choose vinyl panels for bathrooms. However, vinyl is more prone to cracking than other materials. Some homeowners dislike what they often refer to as the “fake” appearance of vinyl over options like wood.
Ranging from 1/32″ to 1/8″ thick, vinyl wainscoting panels snap together or easily adhere directly to the walls. The most popular size comes in sheets of 4′ x 8′ size, making it simple to customize. While not as thick as or durable as traditional wood panels, vinyl still provides moderate impact resistance at a lower price. The material can withstand the occasional bump and bang without showing wear and tear. Just remember that significant temperature changes may cause slight expansion or contraction.
Tile
Tile wainscoting, just like tile flooring, is another fitting option for bathrooms or environments that are exposed to humidity. Like wood, there are a few types of tile you can choose from that will vary in cost. When picking tile, sizes usually range from 4×4 inches up to 12×24 inches. The smaller the tile, the more grout lines you’ll have to contend with.
Larger format varieties like 12×24 inch subway tile can give a modern look. Just remember larger tiles are heavier, so make sure your wall can support the weight. Speaking of weight, tile can get heavy so it’s critical to have the right substrate (the surface underneath the tile). Cement backer board is often used to provide a water-resistant base layer that will support tiles long-term without sagging.
Choosing the right grout is important since this area can get splashed with water. Epoxy grout is our top recommendation – it will resist moisture and prevent staining better than standard grout. You will also need to consider spacing, so plan for expansion joints (these are spaces between sections of tile) at least every 12-16 feet. This allows your tiled sections to shift naturally as temperatures fluctuate without cracking grout or tile.
For lower end costs, options like linoleum, laminate, and vinyl will run an average of $2 to $7 per square foot. Classic materials like porcelain and ceramic are around $5 to $10 per square foot. This is also a material that is easy to keep up with although you will have to make sure to keep grout lines clean for the best appearance. It doesn’t retain heat well but this isn’t as problematic with wainscot compared to tile floors.
Metal
Metal wainscoting might sound off the beaten path but it can be attractive with a variety of home decor. For one, it fits well into a modern or minimalist design. It also matches well with natural materials such as stone or wood, making it an interesting pop-in rustic design.
It’s also durable, so many use metal panels not only in the home but in shops, barns, garages, or even in exterior siding. When considering it as an exterior wainscot, though, keep in mind that metal will rust if it isn’t properly taken care of. Stainless steel is an alloy that is more resistant to rust which makes it a good material to consider.
When considering metal varieties for your home, you have stylish options like aluminum, copper, stainless steel or galvanized steel to fit your design. The most popular metal gauge ranges from 24-28, providing durability without being too heavy for indoor installation.
Each metal type offers different corrosion resistance and sound dampening abilities. For example,unfinished galvanized steel can corrode over time when exposed to moisture, while durable stainless steel offers rust protection. Proper installation is key to prevent noisy rattling issues. You’ll also want to account for metal’s high conduction of hot and cold temperatures. Insulation backing helps prevent temperature transfer to interior walls, though copper offers a charming patina as it ages naturally.
Since metal can be bent, it’s a good way to get a textured appearance. So, if you aren’t sure about flat metal panels, you should consider corrugated metal before dismissing the idea entirely!
Wainscoting Styles
Wainscoting styles are made up of the design of the panel type. We’ve already looked at the type of material you can use, but here we’re going to look at the shape or design of the panels themselves that are often used with almost any material. This will also be a factor to consider when it comes to costs.
Wall Paneling
To further define these styles, contractors, manufacturers, and interior designers refer to them more specifically as wainscot wall paneling. Each of these panels has one of a few options of design that we will look at below. When installed, these panels are meant to look seamless.
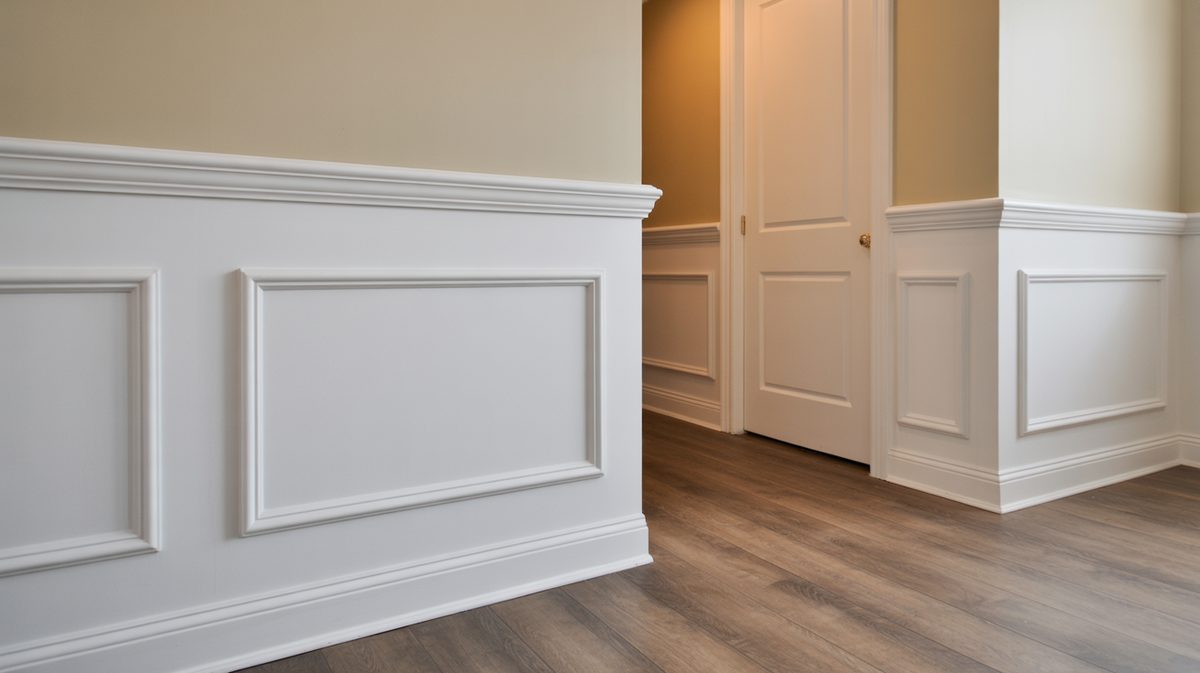
Raised Panel
Raised panel wainscoting is a traditional style that many use to give a room an elegant or more formal look. The style gets its name not from being raised entirely but rather from using raised designs. The most common pattern is raised squares in the center of each panel. This style also typically has raised top and bottom rails. These styles don’t extend out to an odd length but rather have the appearance of molding. This can be one, simple line of molding or a beaded raised portion.
When installing traditional raised panel varieties, you’ll want it to make a statement while still fitting into your home’s style. We recommend a height between 30″-40″ for the best visual impact. Space the decorative panels 16″-24″ apart so they can showcase their subtle details without feeling too crowded or busy. Go for a classic relief depth of 1/2″ to 3/4″ to get an appealing amount of dimension and light play.
Now comes the fun part – choosing your corner and edge profile. Do you want to highlight the crisp lines with mitered joints that are cut at neat 45 degree angles? Or allow the eye to flow from panel to panel with simple butted joints? You shouldn’t be afraid to add some extra flair with a decorative router pattern or hand-carved embellishment to truly make your design shine.
While raised square frames are the most common style, homeowners can arguably use any design they can think of. As for cost, raised panel wainscoting costs about $10 to $30 per square foot.
Flat Panel
Flat panel wainscoting is the in-between for recessed and raised options. The design for these is rather simple and doesn’t use decorative molding. It’s also a style that’s incorporated into other designs such as Shaker-style panels. The middle panel is completely flat – hence the name. It’s a great fit for transitional rooms and gives a room a traditional feel. This runs anywhere from $7 to $20 per square foot.
You can find wider planks, ranging from 12 inches on up to 36 inches, and pair it with sleek trim to create a contemporary vibe. The thicker the panels, the more dramatic the effect, with many homeowners opting for 1⁄4 to 3⁄4 inch thick boards. The great thing about flat panel options is that they can complement all different interior design styles and color palettes. Whether your home leans traditional or modern, the structured look acts as a neutral backdrop that lets other elements shine.
Recessed Panel
Recessed panel wainscoting, as you might have guessed, is the exact opposite of a raised panel. Instead of using raised shapes as decoration, these designs fall back – or “recessed” – into the wall. To create this look, the wainscot panels themselves are often made a little thicker and slightly more protruding in the same way raised panels are in their raised designs. The design of a recessed panel is made as an indent, usually to look either slightly inward or even to look as though the design is flush against the wall.
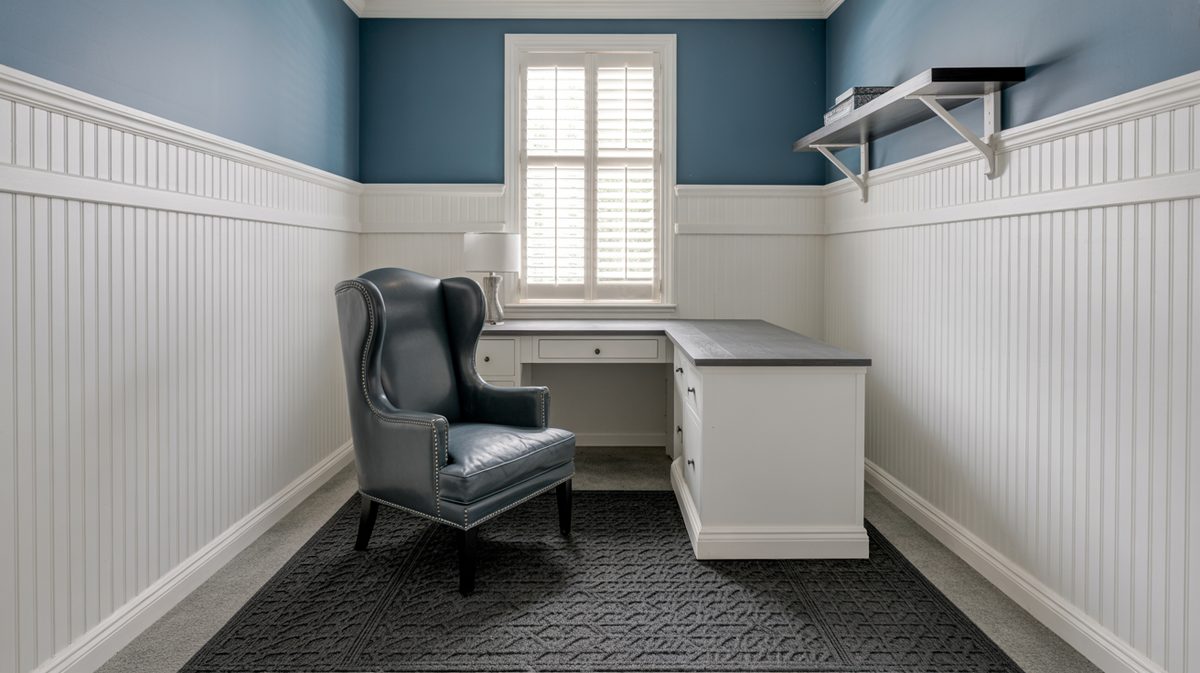
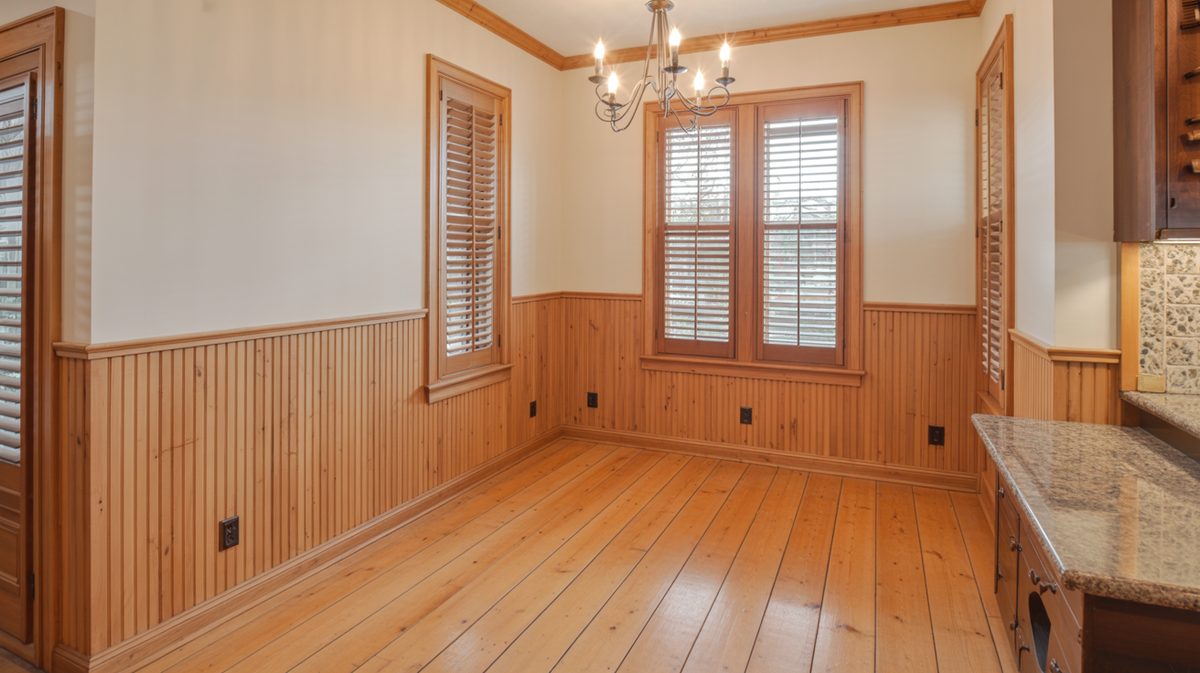
Beadboard Wainscoting
We mentioned earlier that beadboard is technically different from wainscot even though the terms are often used in place of one another. First, let’s look at the pattern. The beadboard has side-by-side vertical paneling. At the top and bottom of the paneling, horizontal top and bottom rails are used to give the design a complete feel. The feature that makes it specifically beadboard is the slight ridge – or “bead” – that sits between each panel. These aren’t as thick as the main panels, though. They work more like an outline between panels and look like a narrow strip between each panel.
Beadboard is also more likely to be installed at a taller or, less often, a lower height than strictly defined wainscot. Traditionally, beadboard is made of wood but in recent history, it’s branched out to include more affordable or even more durable materials as well.
When choosing beadboard for your next project, you’ll want to consider a few primary options. The most common spacing between the bead ridges is 1.5″ to 2.5″, which creates that classic look you may have seen – but you can adjust up or down for different effects. Play around with traditional half-circle profiles, modern V-shaped grooves, or square-cut beads too for a more modern twist.
You can make a design statement by taking the beadboard from floor to ceiling for lots of visual impact. Arrange it vertically for a standard aesthetic or try a more modern horizontal pattern. Just remember that sealing the materials properly is crucial when dealing with moisture and humidity to prevent warping.
Board and Batten Wainscoting
Board and batten wainscoting is a popular choice among homes with a more rustic design. This is, in large part, thanks to its clean and simple lines. This is a very similar concept to recessed wall paneling but the pattern itself is different. Instead of being recessed from molding or only recessed in a certain shape, board and batten panels have recessed squares or rectangles taking up almost the entire panel. Around the edges, there is a very slightly raised trim but it isn’t as drastic as the molding used in many other styles. These panels are rather inexpensive with many companies estimating even full wall panels at as little as $11 per square foot.
Chair Rail Wainscoting
Chair rail wainscot features a decorative wood treatment on the top of the panel that is reminiscent of a handrail. It usually only appears as trim molding at a “chair rail” or wainscot height. This style is usually installed around 32” to 36” from the floor. It also often has a bottom rail that is simpler and less protruding than the top rail. Since there is less material, chair railing is rather inexpensive at an average of $1 to $3 per linear foot.
Shiplap Wainscoting
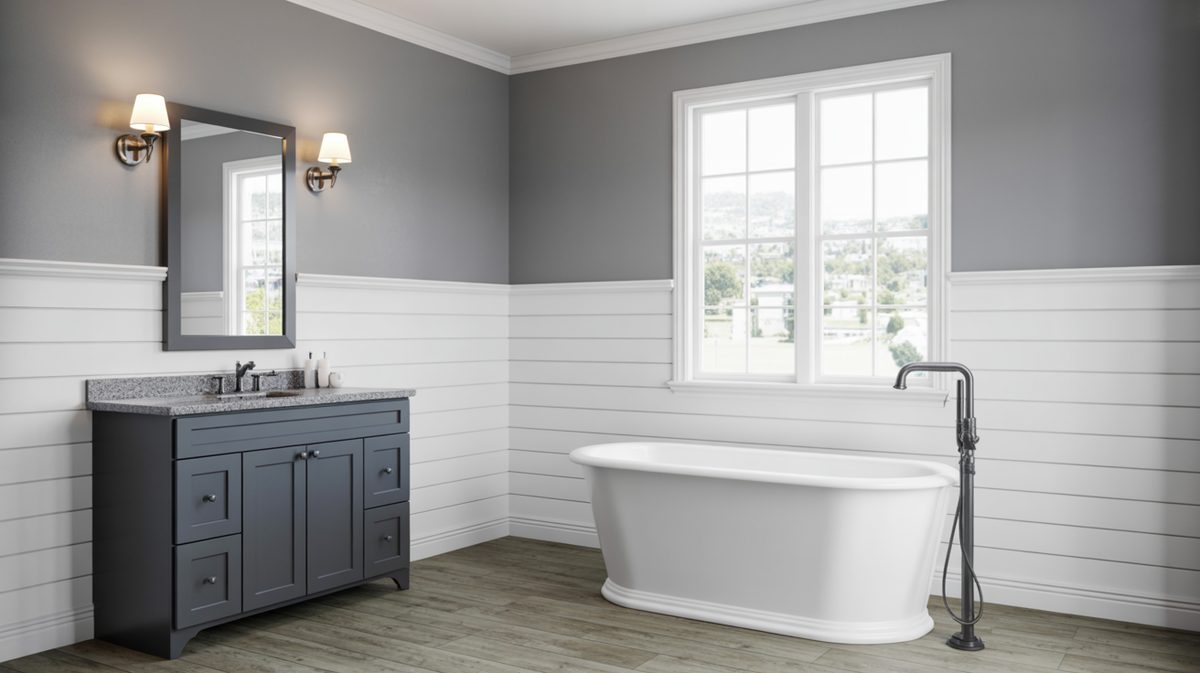
Shiplap wainscoting is unique in the fact that its design is often horizontal rather than vertical. While shiplap can have a traditional vertical side-by-side design, it’s more often differentiated as slats on top of each other vertically. Vertical designs do well in making a room look larger while many think horizontal designs work well at giving a room a sense of direction. This is why it’s often used leading up a stairway or in the entryway of a home. This style costs around $2.50 to $7 per square foot. See more shiplap bathrooms here.
When installing shiplap boarding, you’ve got options to personalize the look. Traditionalists prefer boards that fit snugly together, revealing only hairline gaps that speak to a carpenter’s precision. The modern trend embraces the organic beauty of small, revealed gaps between boards. You can get the recommended look with 1/4″ to 1/2″ overlap at board edges.
The direction you run shiplap also makes a design statement. Horizontal suits traditional aesthetics with clean lines. Vertical evokes a sleek, modern sensibility. Go bold with diagonal rows that add visual interest through the interplay of angles.
Exterior application brings weather resistance into consideration. Shiplap’s rabbeted edges provide better protection than tongue and groove boards. The overlapping joint shields from precipitation infiltration while allowing the wood to swell and shrink through changing seasons. For best performance, maintain 1/8″ expansion gaps where boards meet surrounding trim.
Shaker Wainscoting
Shaker wainscoting is incredibly similar to the board and batten style and, thanks to their design similarities, runs at around the same price. It utilizes a rather recessed look and is often installed by adding wood and molding to the wall rather than adding full panels. This is also a style that is usually carried over to doors in the room as well. These could be side-by-side rectangles or smaller rectangles stacked vertically.
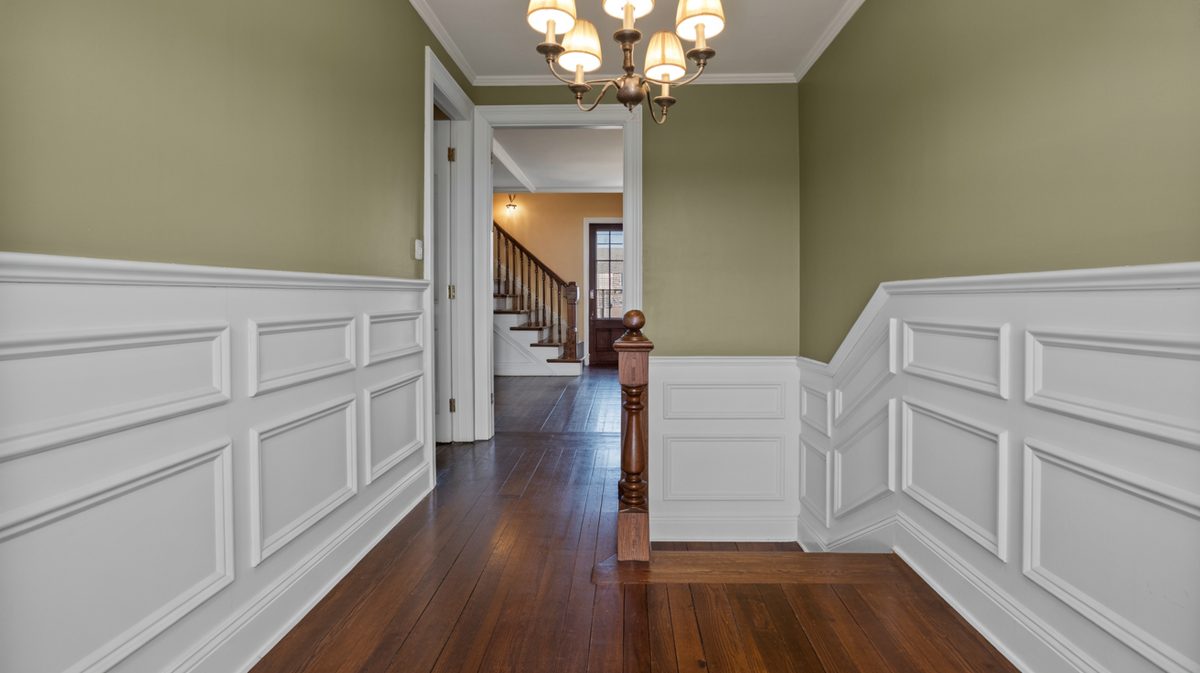
Picture Frame Wainscoting

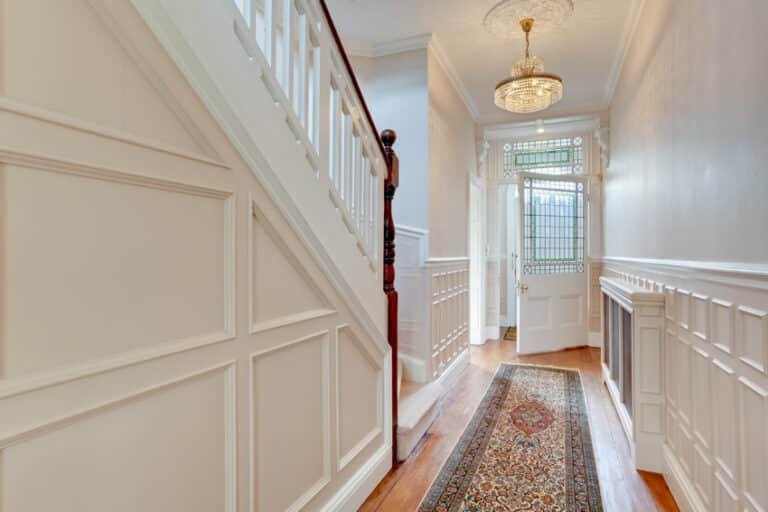
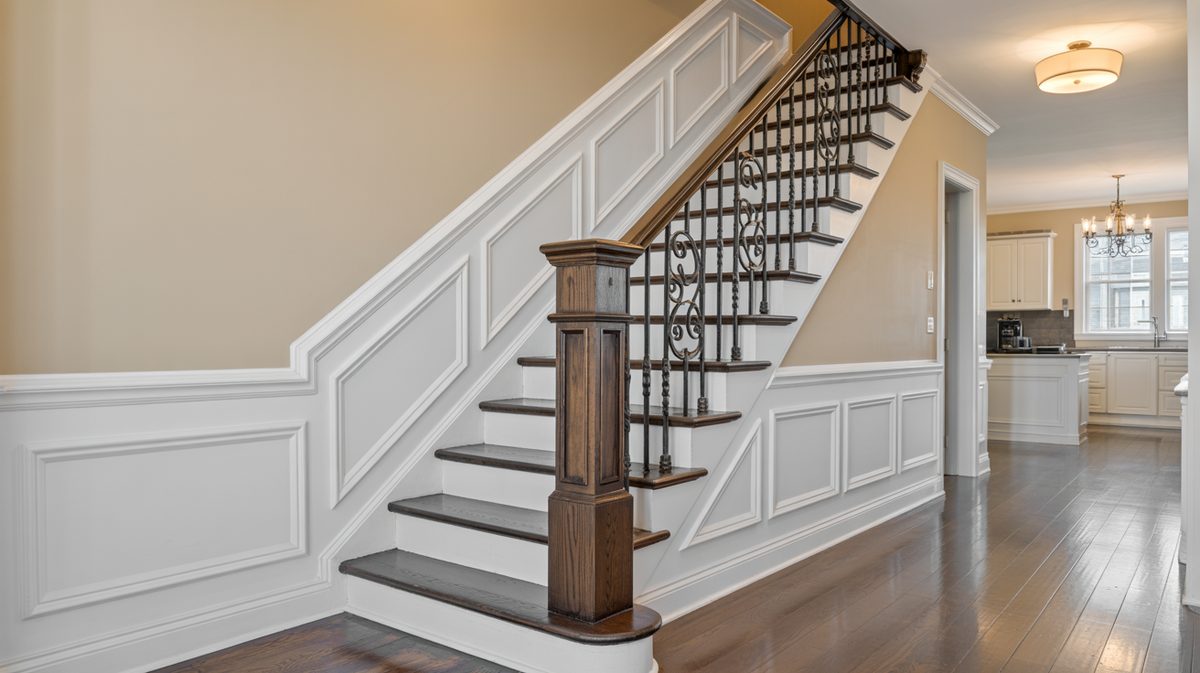
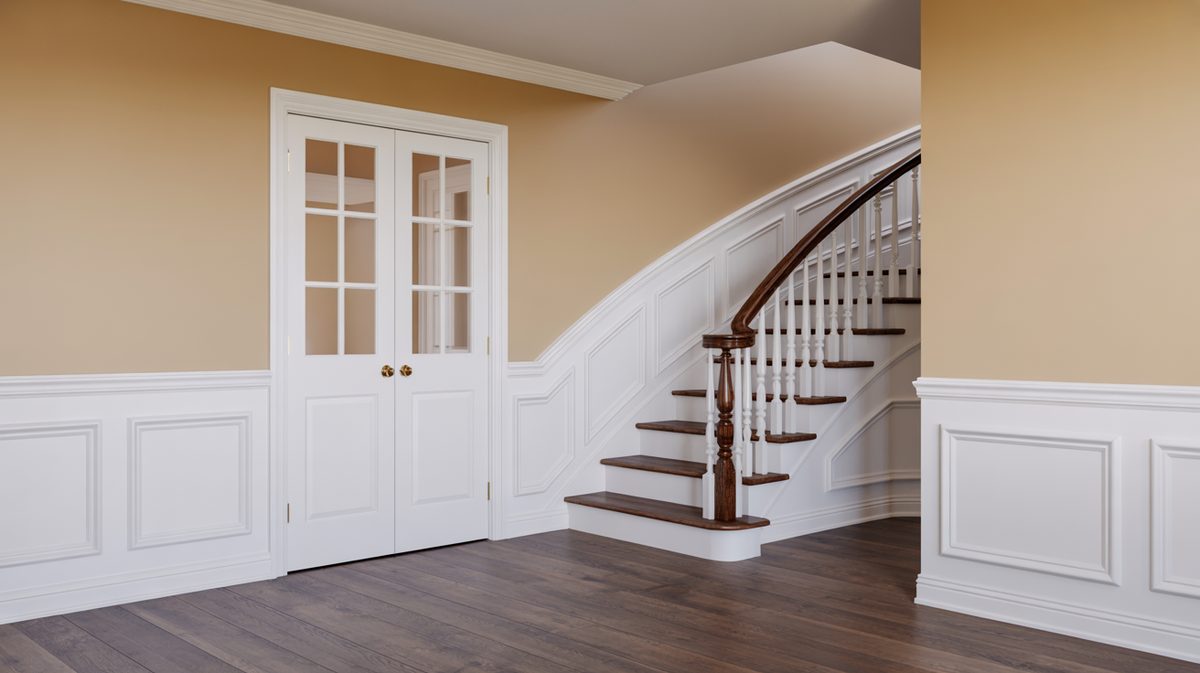
With a similar look to the board and batten style, picture frame wainscoting is often used for DIY projects to create the look and an inexpensive price. By adding small strips of wood in the shape of a picture frame one can create this type of design with little construction experience. You would first assemble the picture frame in the size desired and then attach it to the 1/4″ wall paneling using glue and finishing nails.
After it’s attached you can paint the area to match the other trim and molding in the room to create a cohesive interior design. For the image above white picture frame paneling is used for the home’s foyer and is contrasted by the natural wood floors and Victorian style staircase.
Two Tone Wainscoting
Two-tone wainscoting often uses the picture frame style and the wall base paint color with the trim color to achieve the look desired if you are creating this style from home it’s a good idea to paint the trim before attaching it to the paneling to save time and energy. You can buy the material painted or primed, however many choose a paint and primer in one. A lot of wainscot uses a semi-high gloss painting, so all-in-one paint can be a huge time saver. You’re also going to want painter’s tape to keep lines clean. An angled brush is helpful to tackle ridges in the design. We cover painting in more detail later in this article.
Wainscoting Wall Design
Now that you know the styles and materials you can choose from with Wainscot, let’s take a look at that information in action and consider some room-specific design ideas.
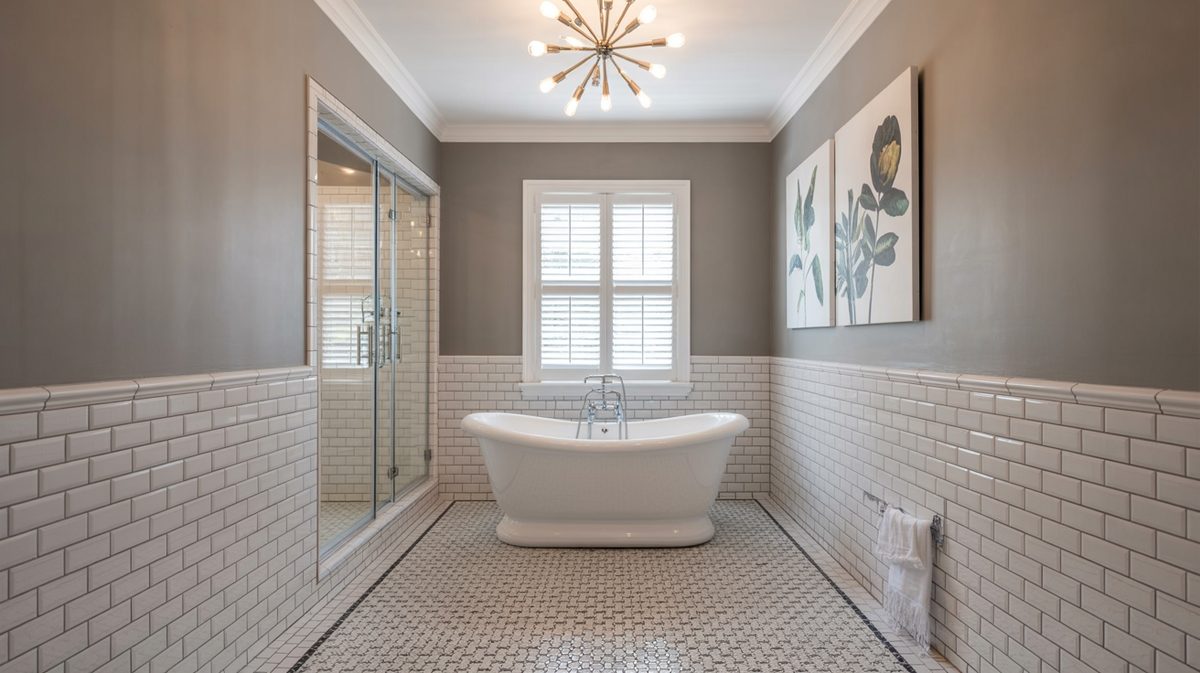
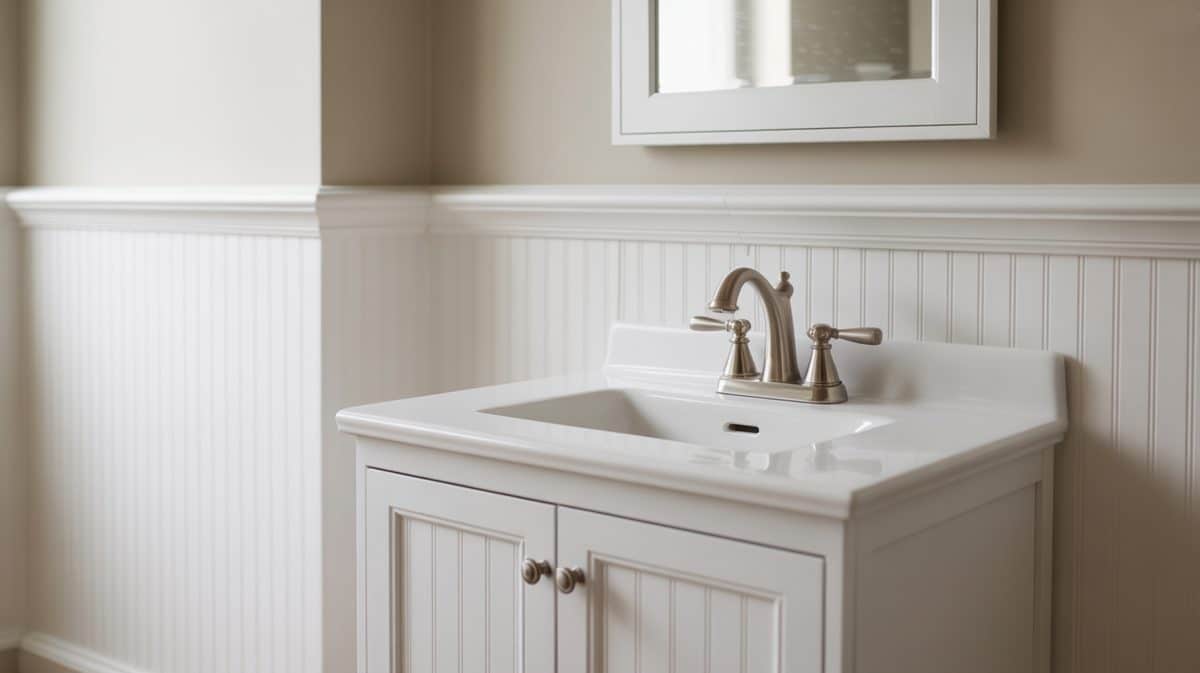
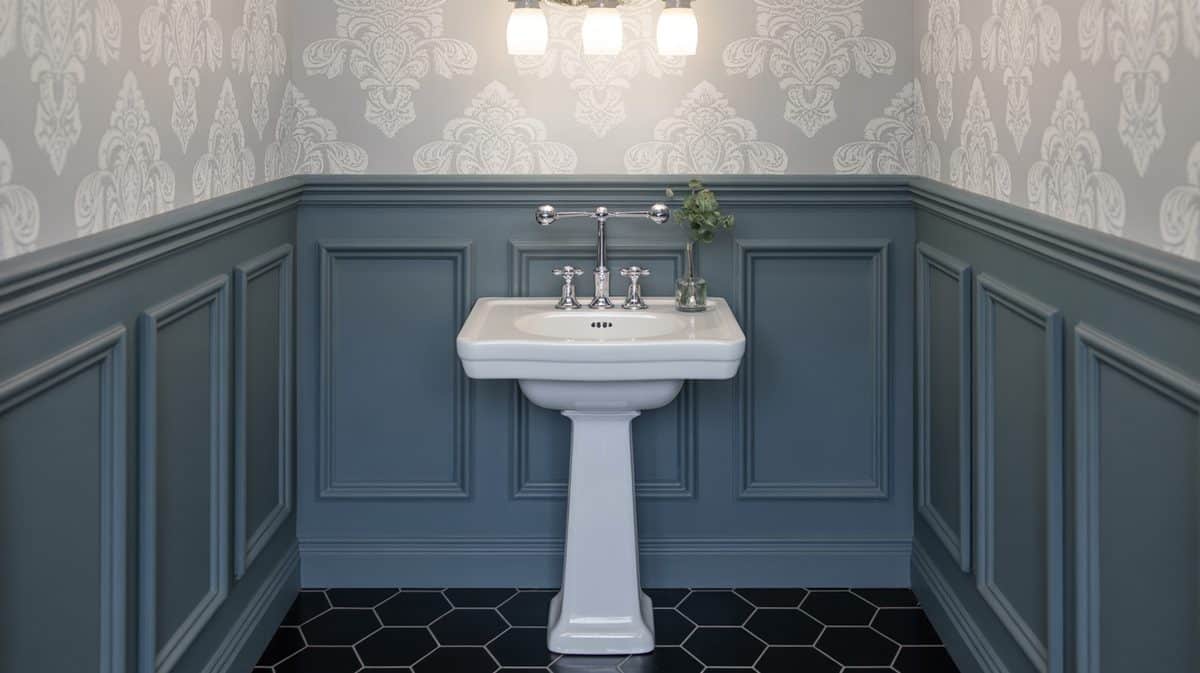
Bathroom
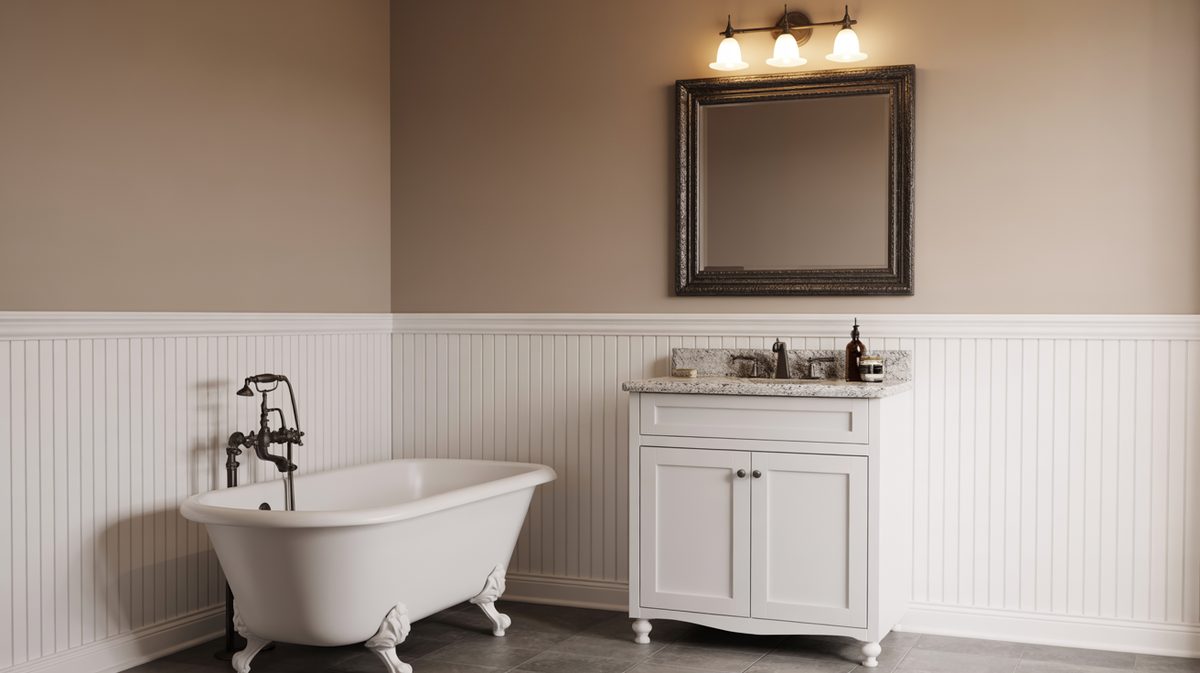
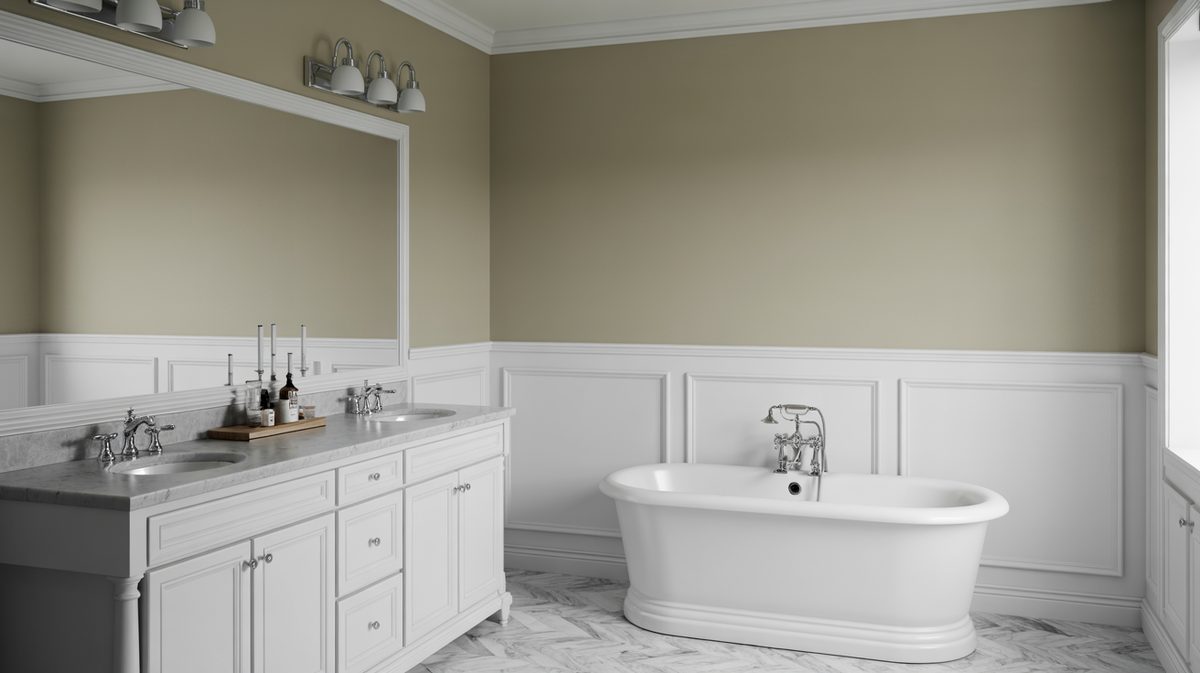
Using a wainscot in a bathroom is a great way to create a unifying style. It’s a style that many love because it can match a bathroom with a free-standing tub well but it can really be attractive in any bathroom. You’ll want to choose a material that can stand up well to water, though, or you might have a hard time with longevity.
When using wainscot to make a powder room look bigger as well as attractive, there are a few tips to keep in mind. For one, don’t go with anything tall and dark – especially full-wall wainscot in dark colors. You can visually open up the room by using light colors and contrasting them against the rest of the wall. See more bathroom wainscoting ideas here.
Using wainscot in a bathroom is a great way to create a unifying style. It’s a style that many love because it can match a bathroom with a free-standing tub well but it can really be attractive in any bathroom.
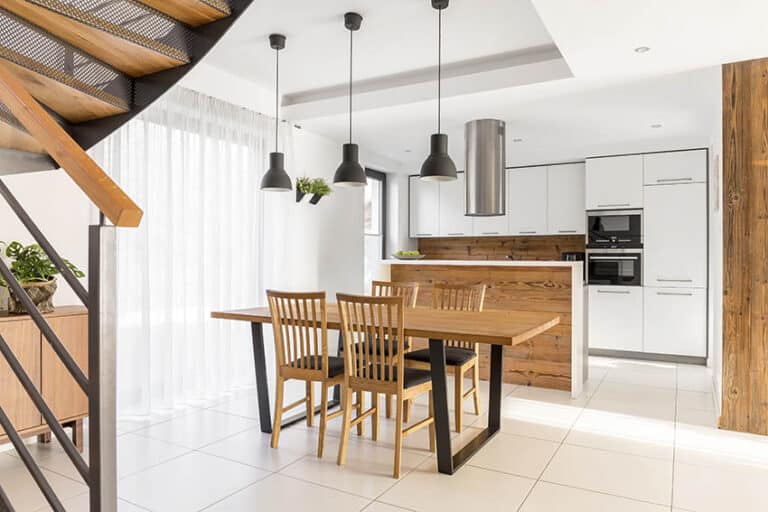
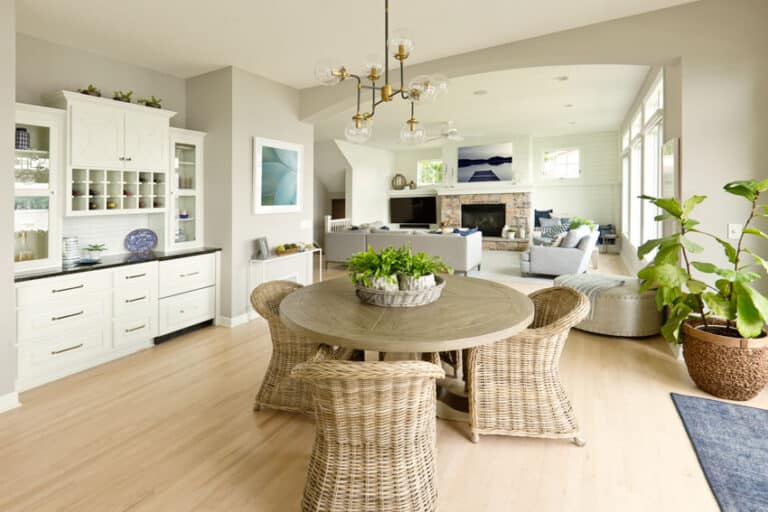
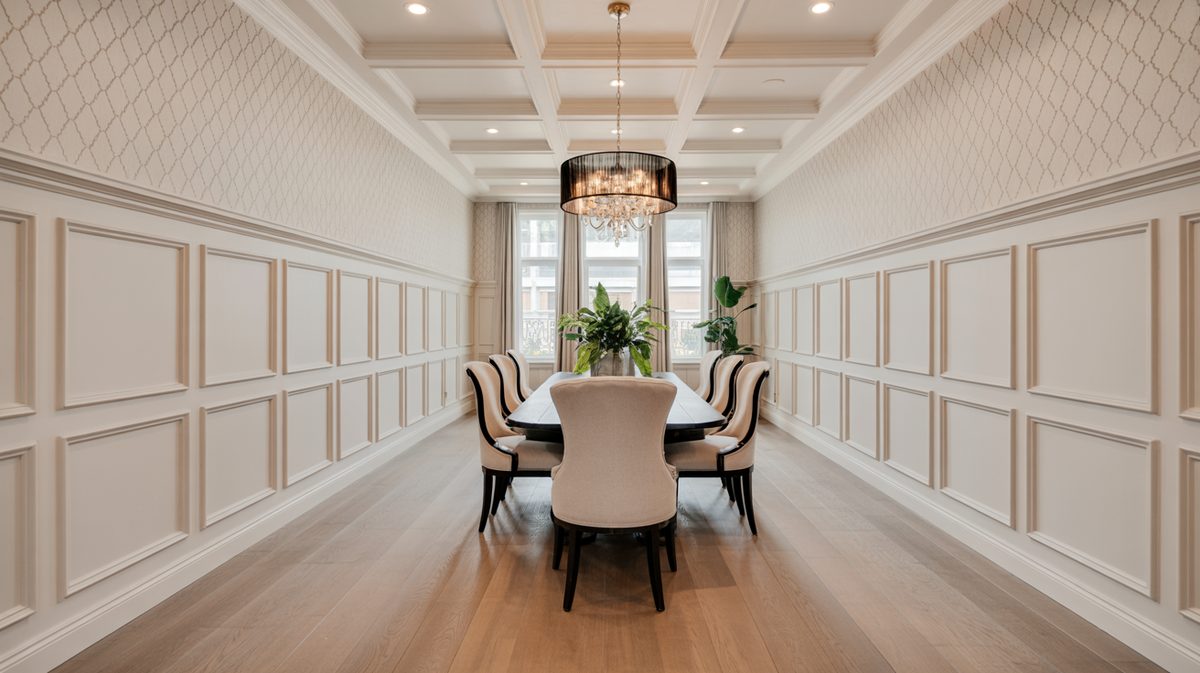
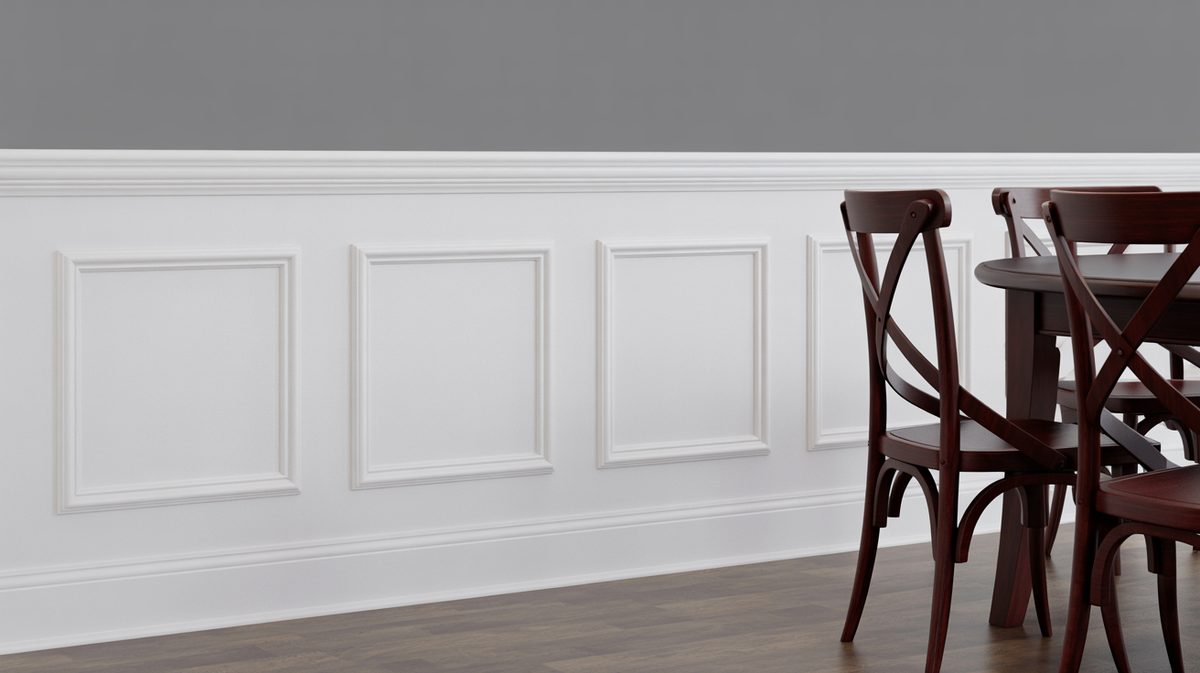
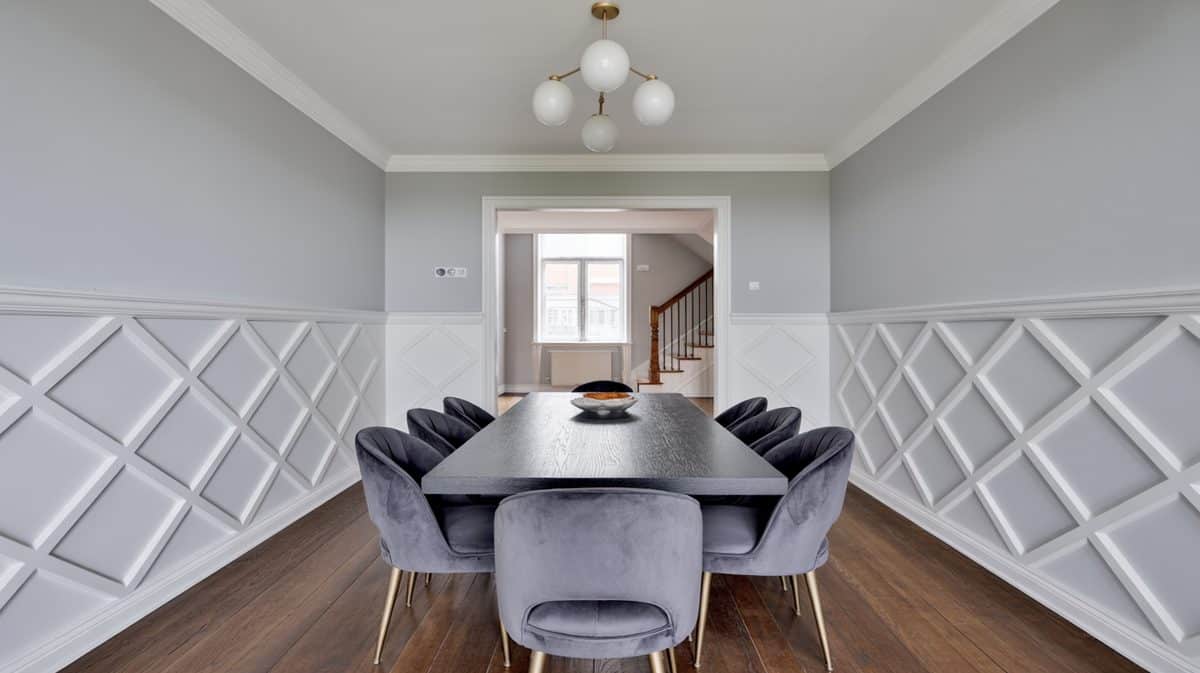
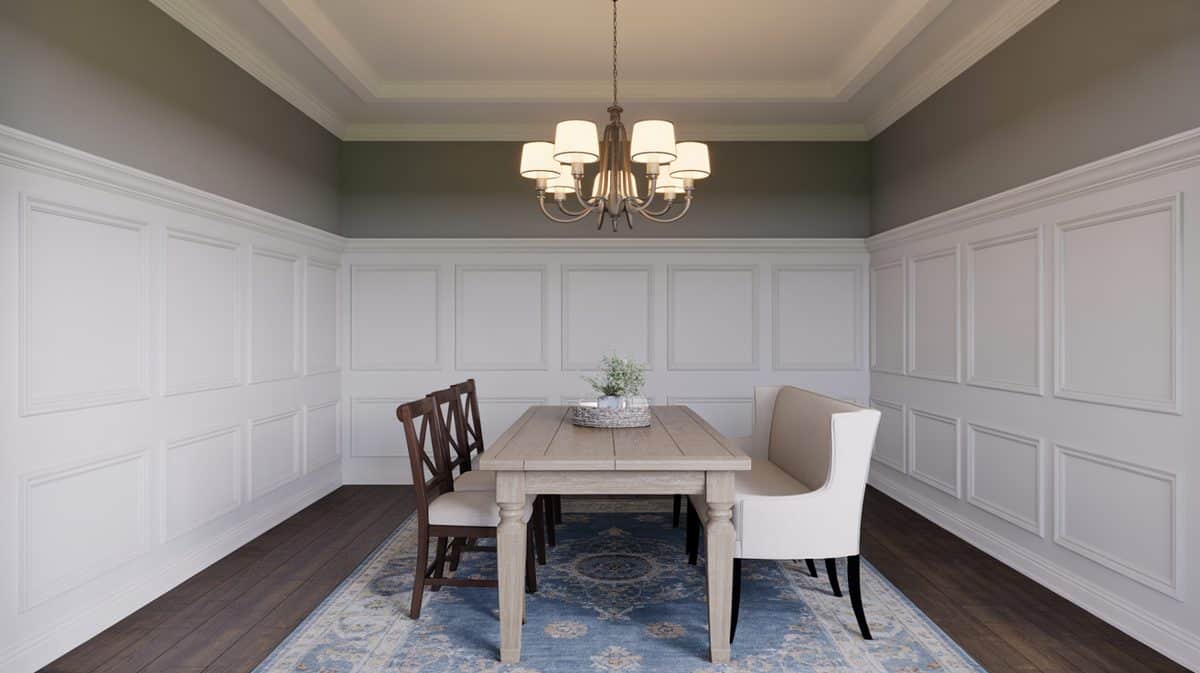
Dining Room
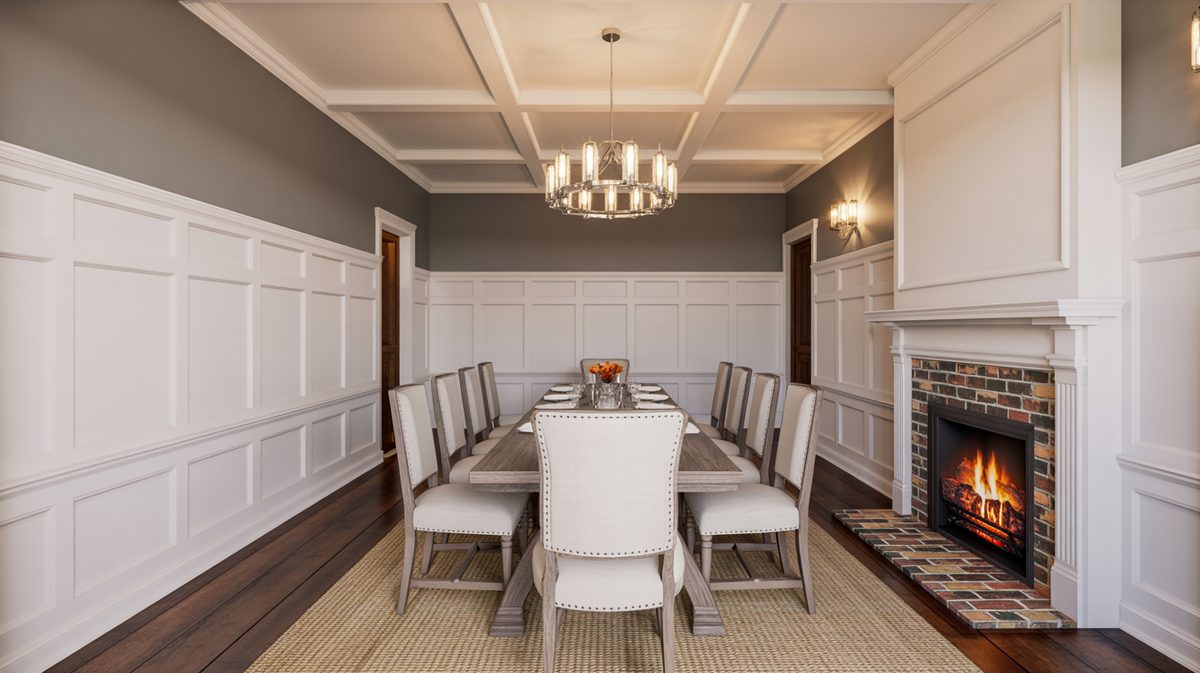
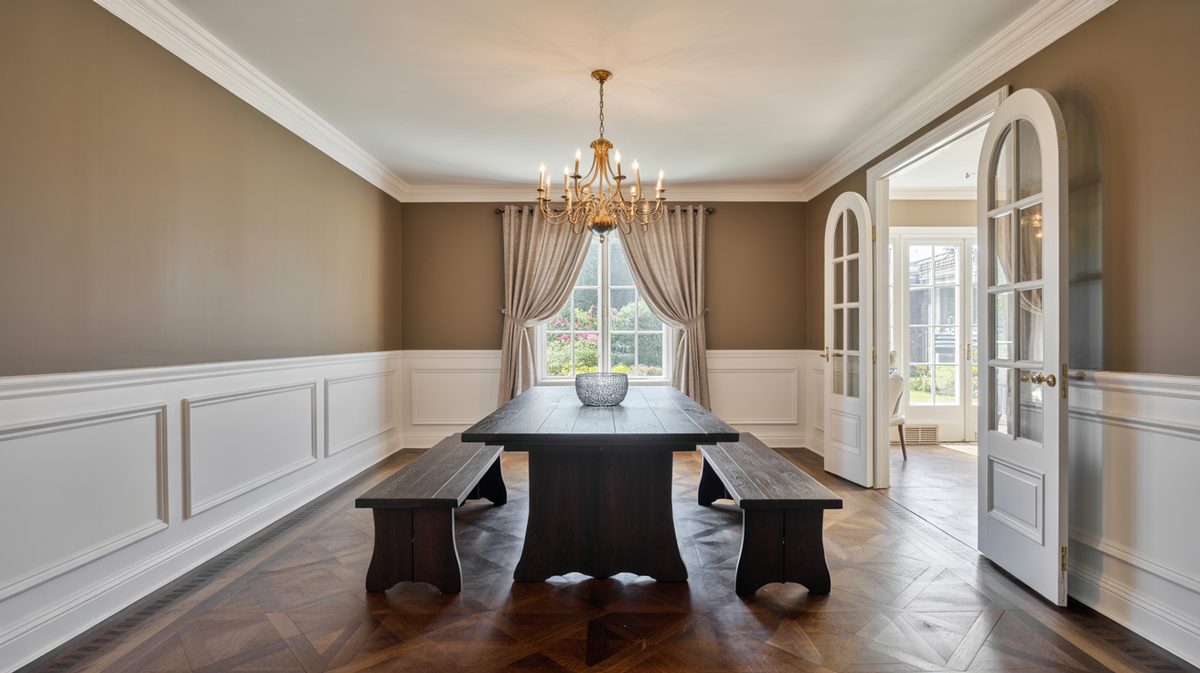
Wainscoting in a dining room can add an elegant touch and it’s a great way to frame a large dining room table. You have a lot of freedom with the style here. Standard height and shoulder height wainscot work well. White or stained wood paneling are among the most popular choices.
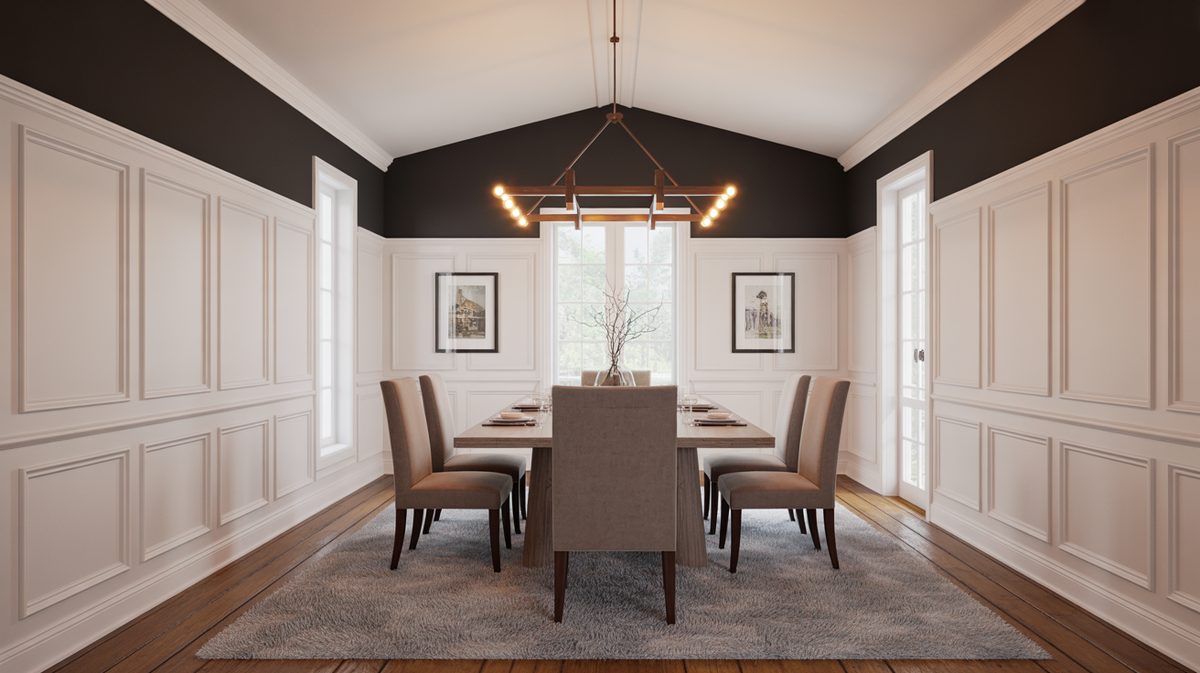
A three-quarters high wall paneling option looks elegant with a raised edge profile and painted white, so it lightens the mood and goes with any other color theme you want.
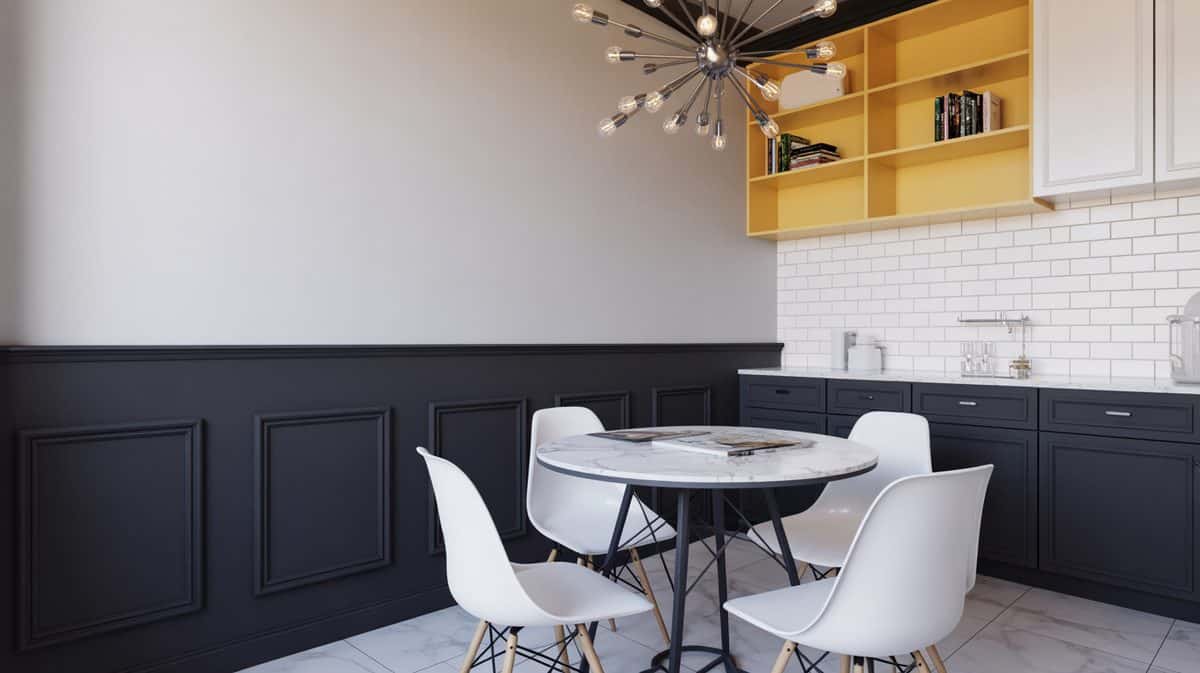
Kitchen
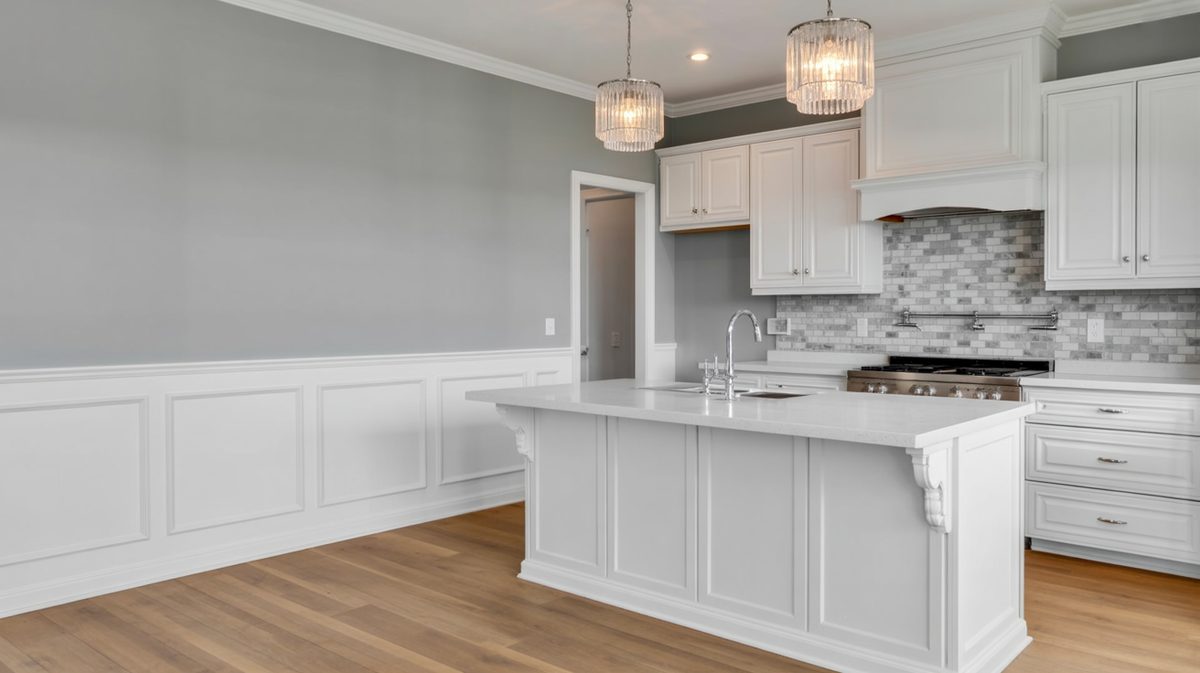
We already discussed that PVC or vinyl surfaces are easy to clean. Because of this ability to stand up to messes without staining, this can make them perfect for the kitchen. Specifically, wainscoting in the kitchen can work well next to a dining area and they can make a great backsplash. A bare wall against the counter or behind a stove isn’t a look that many homeowners fall in love with. That’s why many opt for backsplashes.
There are still a lot of options when it comes to backsplashes and adding wainscot can be a way to add some texture to your kitchen and match the cabinets as well as connect your backsplash to the rest of the decor. Around the counter space flowing into the standard wall space, tall paneling can be utilized.
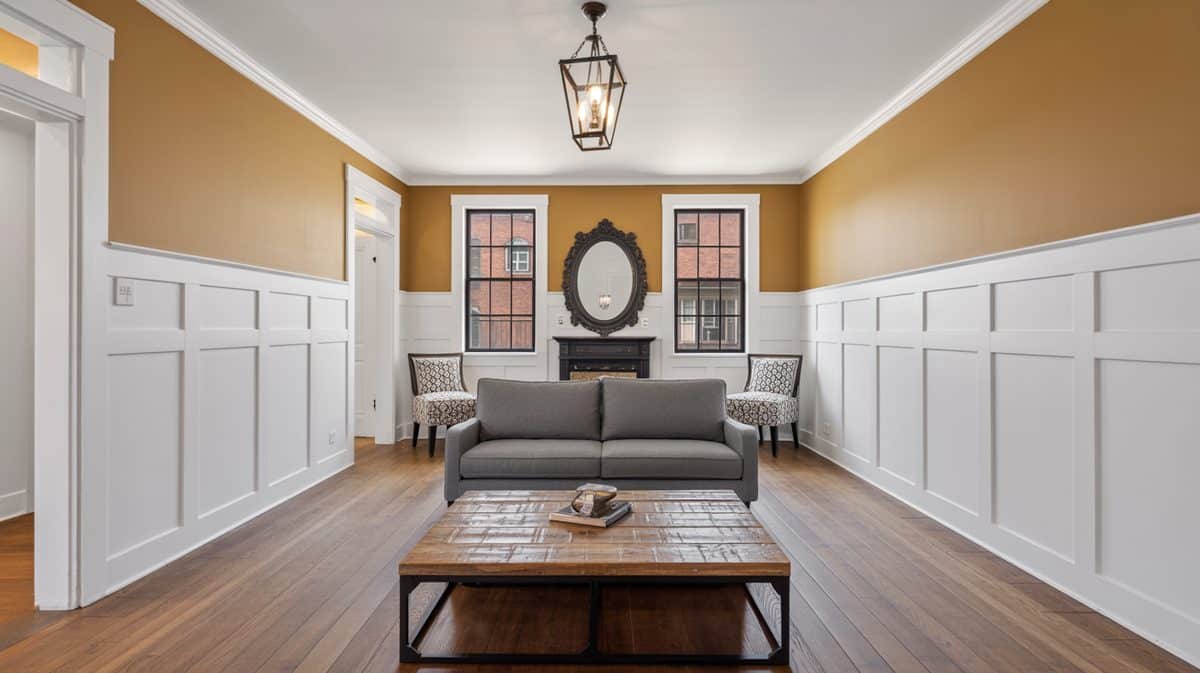
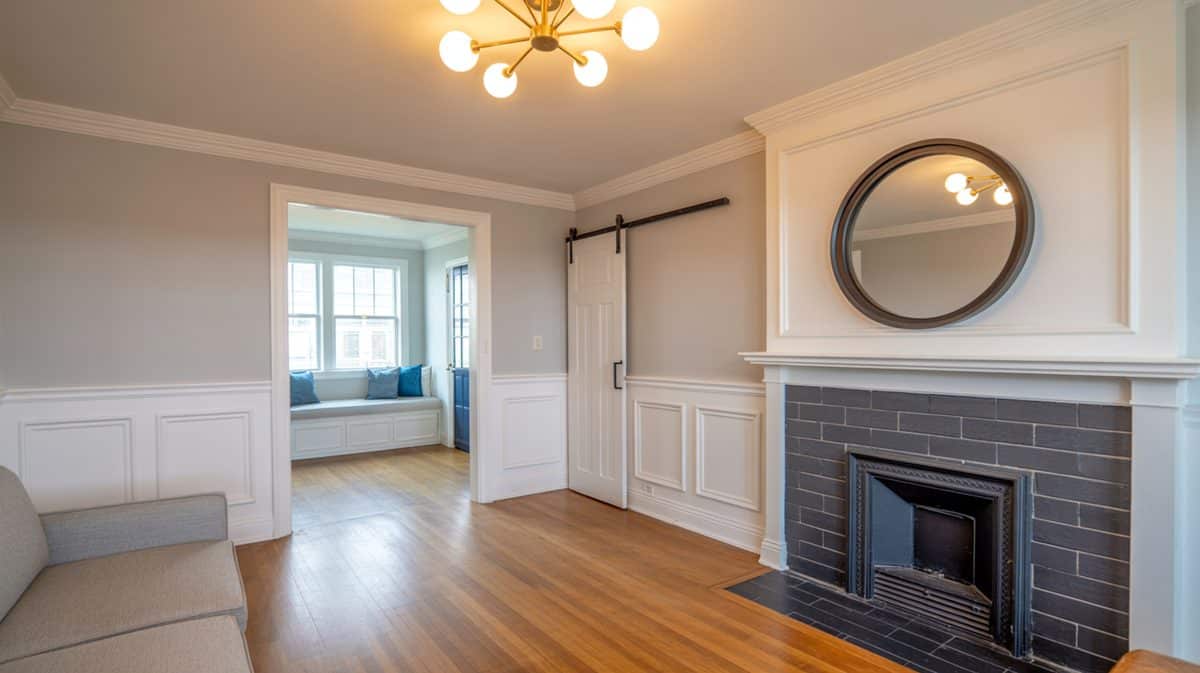
Living Room

Living rooms have a lot of versatility when it comes to wainscot panels. One option, like most other rooms in the house, is to use standard height wainscot and let the color blend into the door frames. However, you can also get a great look by playing with colors or height. Since living rooms are one of the highest traffic areas in the home, you can use paneling to cover any existing damage, protect the walls, as well as add a decorative touch. In living rooms specifically, it is often used to match the design of molding at the joints of the wall and ceiling.
Hallway
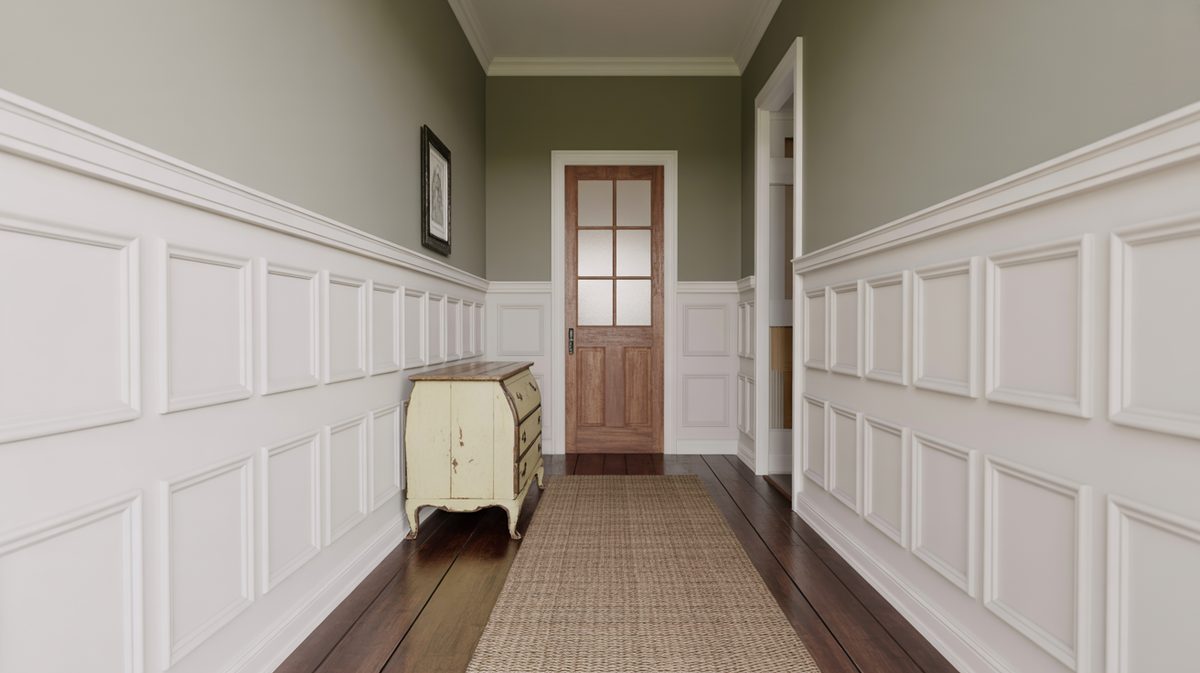
Wainscoting your hallway has many of the same practical benefits as using it in your living room. After all, your hallway gets almost as much traffic as your living room. In addition, a wainscot can lend itself to the flow of a hallway and make it look longer and larger. It can also help homeowners play with paint colors in a structured way if they aren’t sure how to tackle paint pairings on a blank wall.
In addition, wainscot can lend itself to the flow of a hallway and make it look longer and larger. It can also help homeowners play with paint colors in a structured way if they aren’t sure how to tackle paint pairings on a blank wall.
Wainscoting On the Stairs
Wainscoting can be a great way to lead up a set of stairs and, again, add an elegant touch to your stairwell. Most often, this is standard height panels. This way, the top rail lines up with the wall railing if the staircase has it. Even if it doesn’t, the paneling is measured to line up with the standing railing on the other side of the staircase. There is also the concern of panels on the wall that run underneath the staircase. This can be full wall staircases or standard height staircases. Either way, this job usually calls for at least one specially cut panel to compensate for a narrowing wall.
Modern Wainscoting
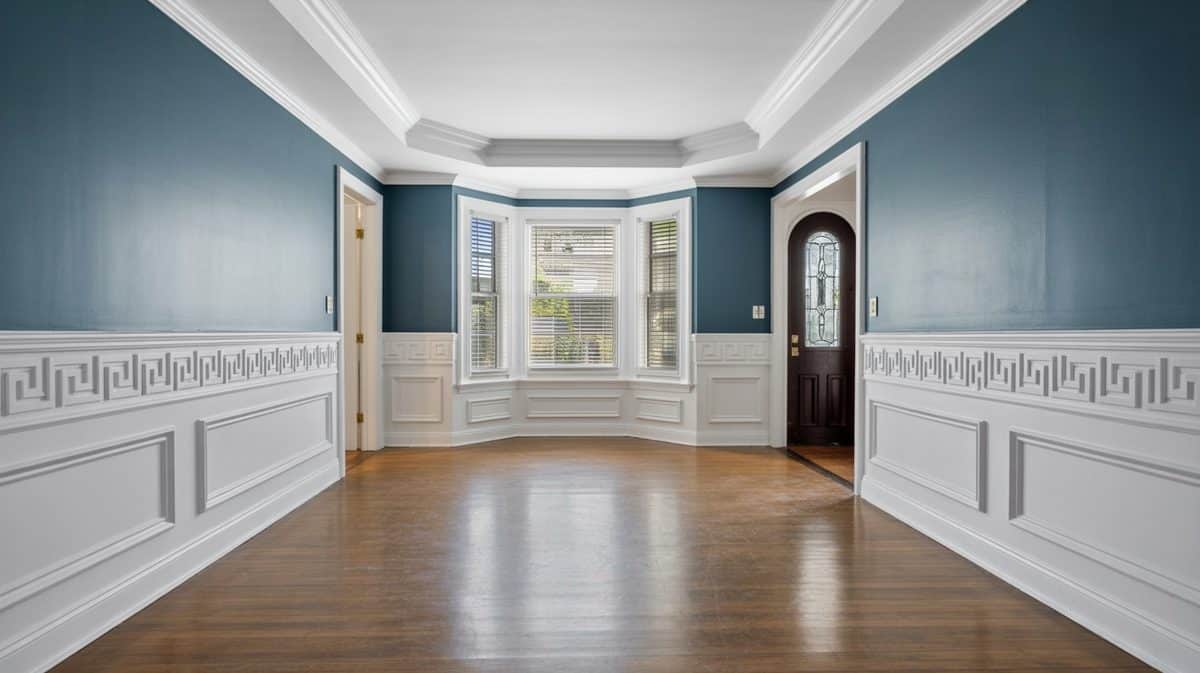
When we think of wainscot, we often think of traditional home design. However, there are plenty of ways to modernize this design facet to ensure a one-of-a-kind appearance. The best way to do this is to use out-of-the-box design choices. For instance, instead of the average square raised panel, you could try circular patterns or out-of-the-box colors for the design.
Wainscoting accent walls can also be interesting. Similarly, tall paneling with a bold color on the wall above it can add a fun, modern twist – especially in a kid’s room! An entryway is the first place visitors see when they enter your home. A modern wainscoting with a geometric design can make a great first impression especially paired with the right furniture pieces and decor.
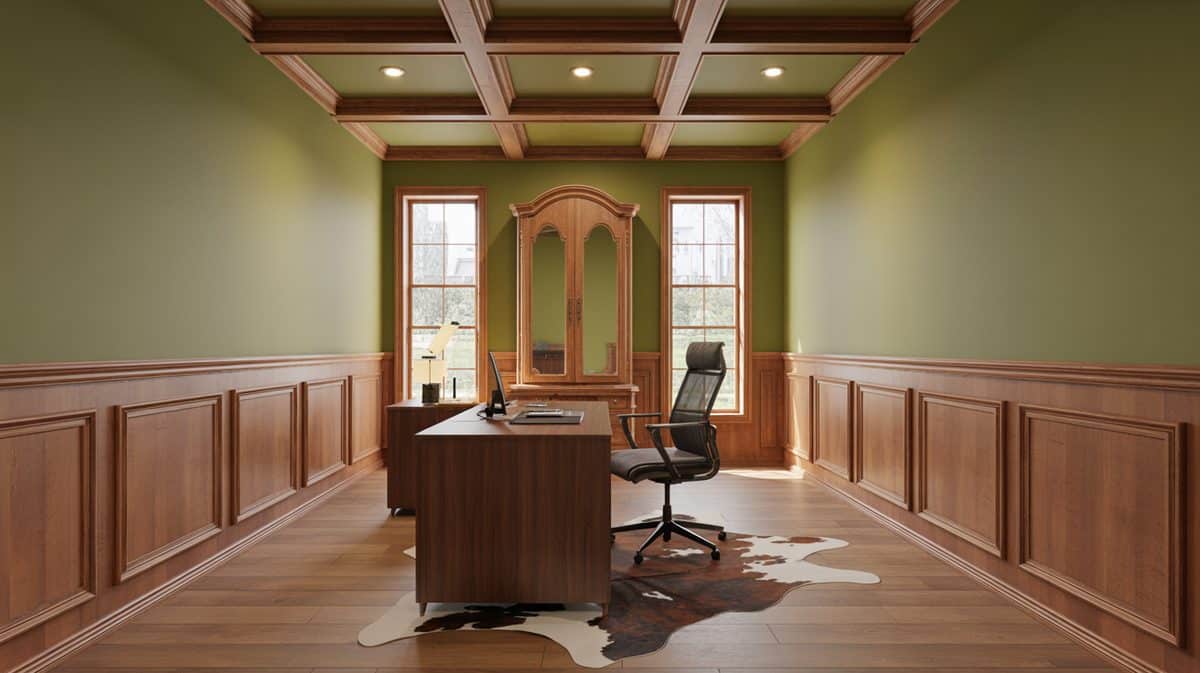
Craftsman Wainscoting
Craftsman wainscoting is custom-made by an artisan or, if you’re handy, maybe even yourself. This type is done by purchasing an order of panels. Instead, materials are custom-cut, made, and installed. This is a good way to make sure that wainscot fits your home’s architecture perfectly especially when it comes to odd angles such as around staircases or low-sloping ceilings. If you’re having a professional create paneling by hand and custom install it, don’t be surprised if you end up with a higher cost than simple premade panel installations.
Rustic Wainscoting
Rustic design leans heavily on natural beauty and rugged elements. Due to its affinity towards earthy elements and organic textures, wood wainscot is the most popular choice. Even with one medium, there are plenty of options that can make rustic design your own. We’ve already covered that there are many different types of wood used in wainscot. With the addition of staining, there is an almost limitless chance of customization. To be really true to rustic design, go for a bare wood you like and let the grain be the focal point.
Barn Wood Wainscoting
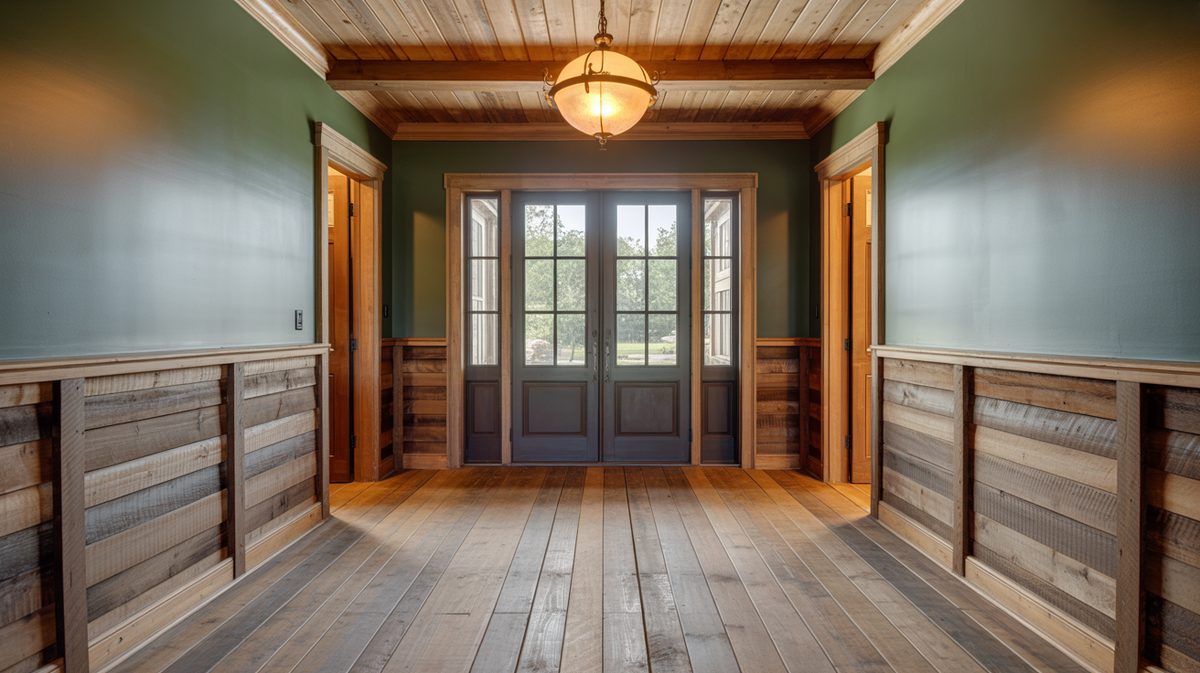
Barn wood wainscoting fits well into a country or rustic design as well but it can really give any home a custom flair. You might also see this style referred to as reclaimed wood paneling. That title describes what this style is perfectly. Instead of ordering freshly cut, uniform wood for each panel, you repurpose older, reclaimed wood. This can work well in rustic design for a couple of reasons. First, the slightly mismatched pieces give it a more down-to-earth vibe. On top of that, it’s a green option that not only captures nature’s beauty but protects it as well.
Art Deco Wainscoting
The Art Deco style originated in France in the early 1920’s and is considered by many the start of the modern movement. Some of the standout features of this style are streamlined shapes, geometric designs, and surface embellishments.
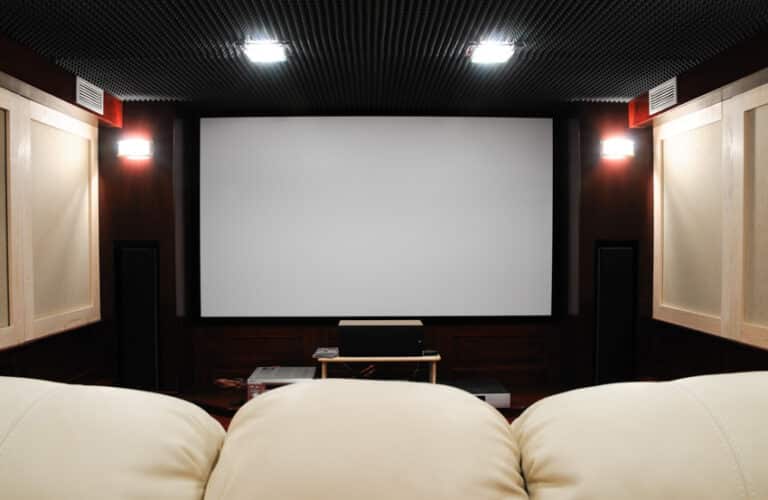
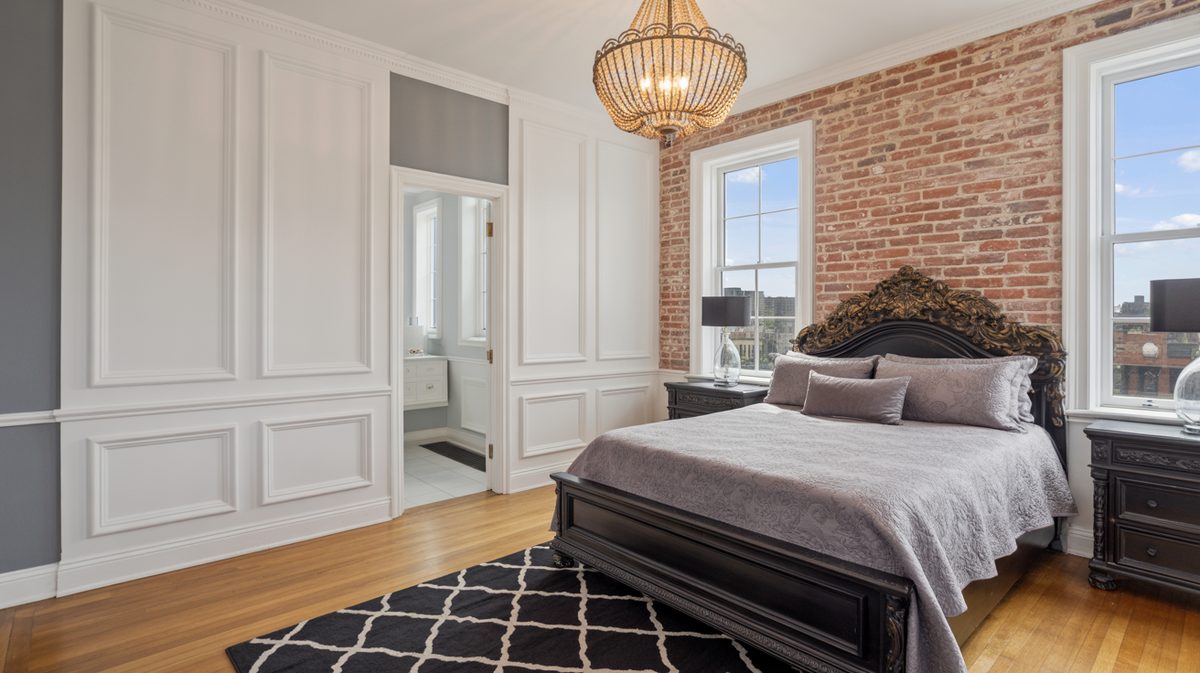
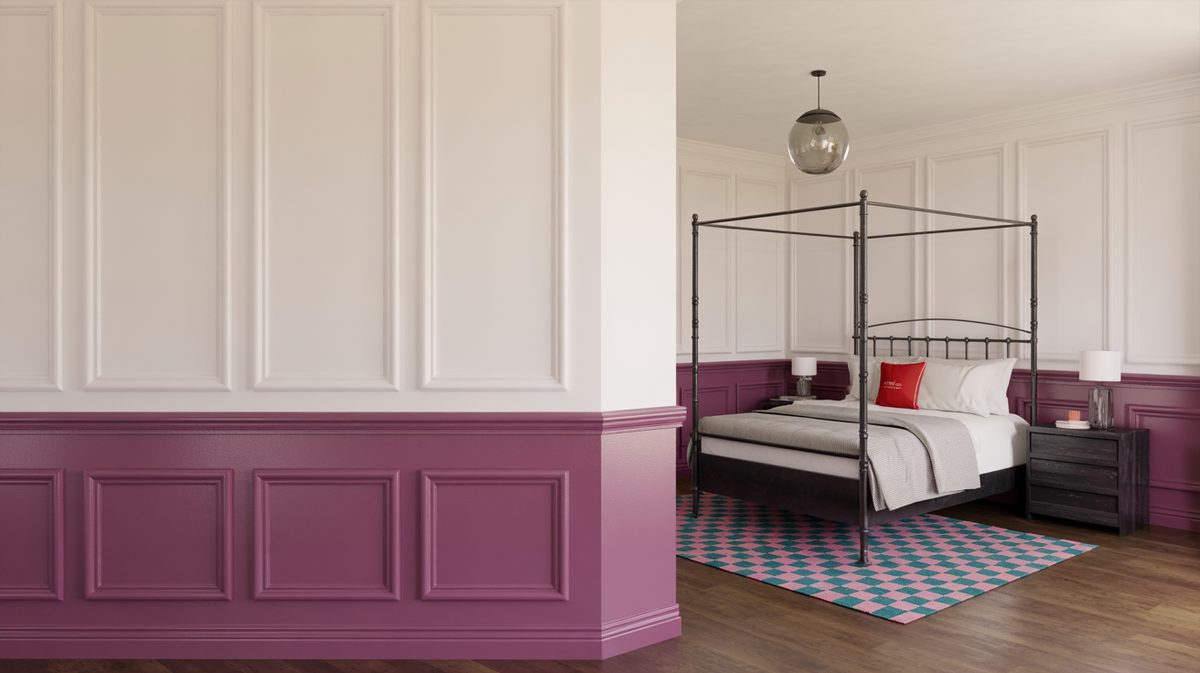
Black Wainscoting
At this point, we’ve talked about a lot of materials for wainscoting and even touched on painting. It can be hard to choose a color but one you may not have considered yet is black. We discussed modern panel styles earlier and this can be a great way to get this vibe. This option works well for creating contrast and is best utilized in larger rooms or those with an abundance of light. It should be noted that while black can give an elegant look, it can also make a room look smaller. This means that full-wall black paneling might not be the specific design and color scheme for smaller rooms.
Exterior Wainscoting
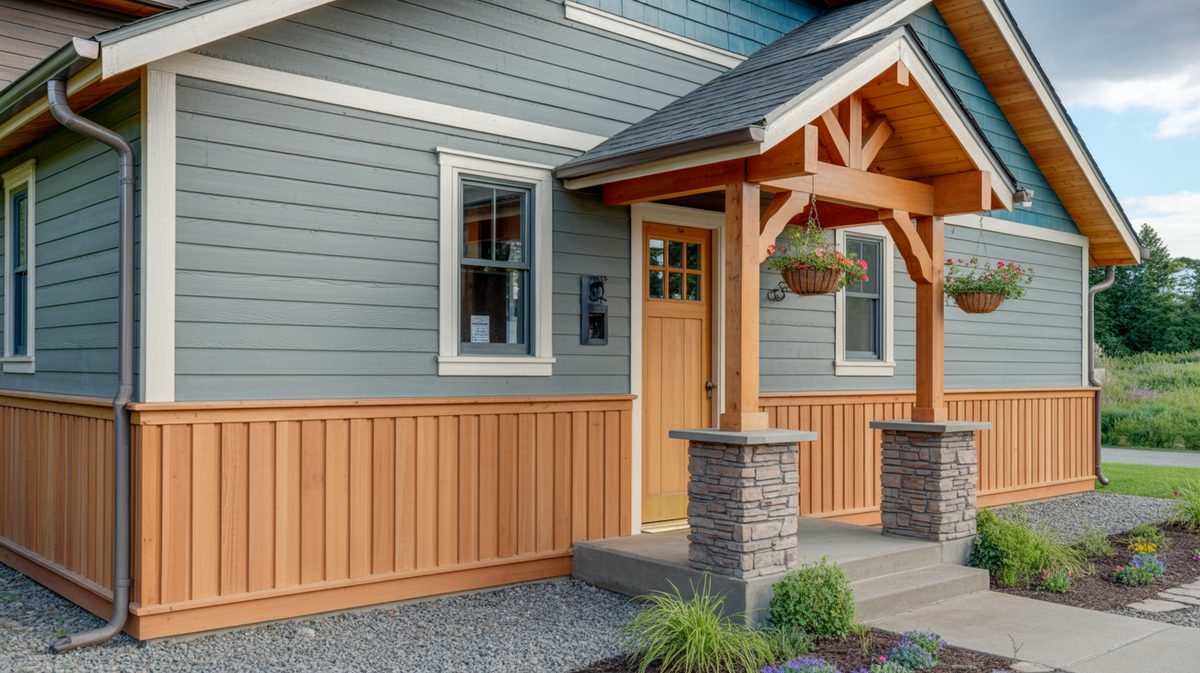
While wainscoting is often used in interior design, it’s also an interesting way to add to exterior design. Many times, it exists as a structural feature. For instance, a house may have a brick or even cinder block thick strip around the bottom of the house. Brick designs are more popular for their aesthetic appeal. Brick is also durable, so it holds up the elements rather well.
For a more rustic appearance, metal is also popular. Almost every choice for exterior wainscot uses a very clearly defined top railing to help create an attractive transition between the panels and siding. Ground-to-roof paneling is sometimes associated with high-end homes using irregular stones.
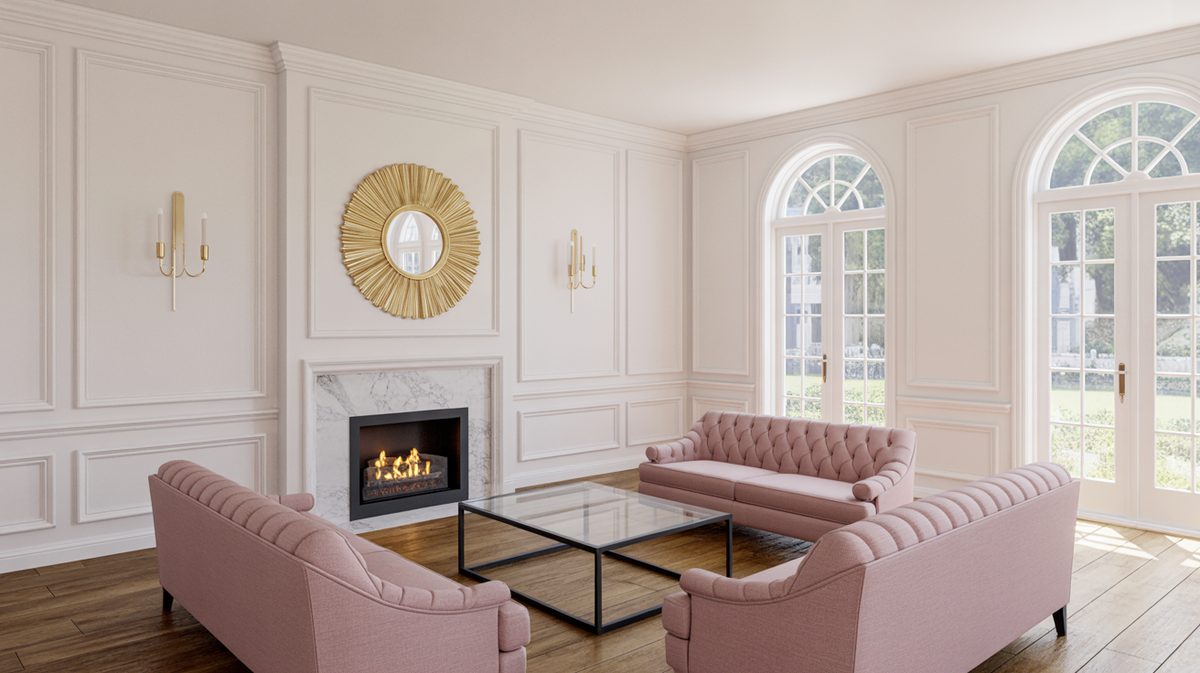
Full Wall Wainscoting
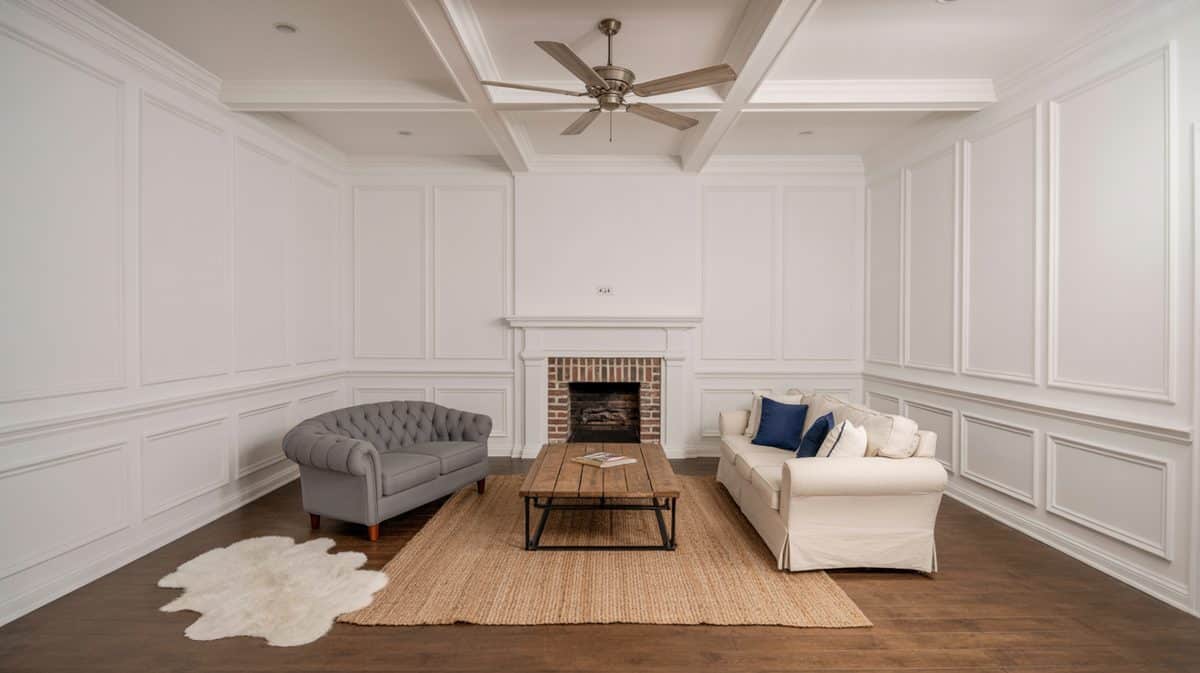
We discussed earlier that wainscot panels had a general height. We also discussed that this height could be changed for a unique look. One way it can change is to use full floor-to-ceiling panels. Typically, full wall wainscot is referred to as panel molding or just wall paneling. As a rule of thumb wainscoting reaches up to 32″ above the floor.
An attractive way to use full wall paneling is to create a colored accent wall to add a dramatic touch to a room. Again, it can also be used as a dramatic touch to long or narrow hallways. Of course, it isn’t unheard of for full-wall paneling to be used in all walls of a room for a regal appearance.
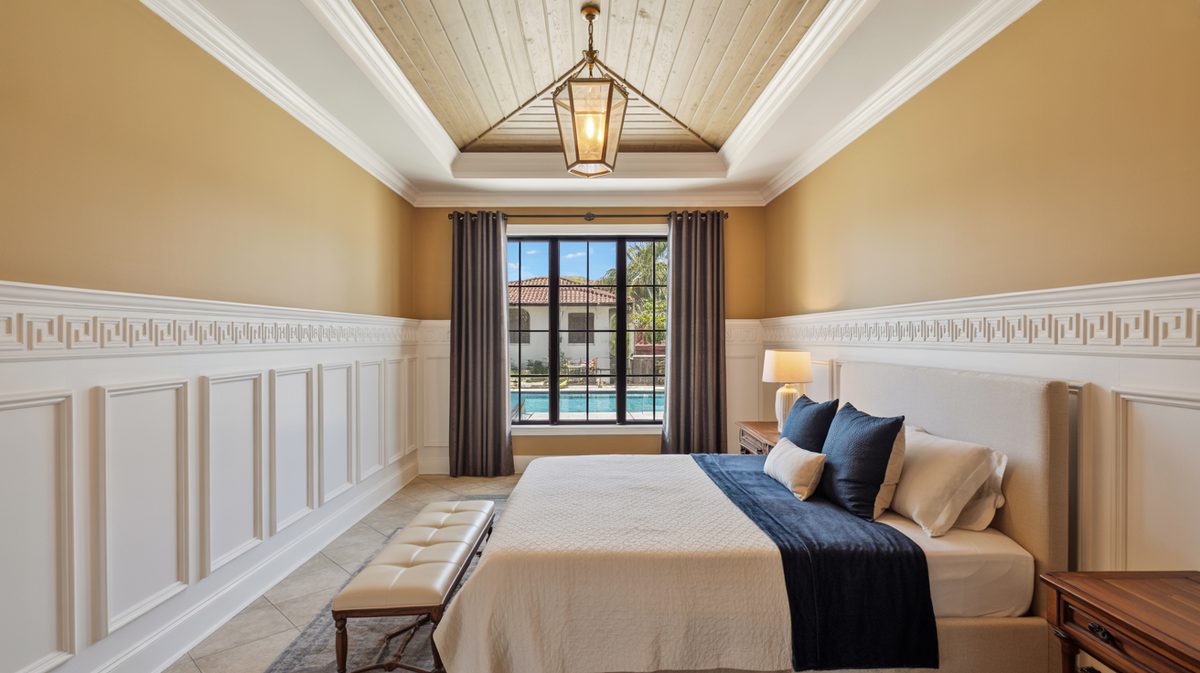
Tall Wainscoting

On a similar note, tall wainscot paneling extends higher vertically than the standard height. Usually, it’s installed at around average shoulder height. There are a few ways to make the most of this design. A classic choice is to use a rectangular recessed design with a square recessed design for the extra height. An interesting idea for tall wainscot is to use extended molding for the top rail to create a shelf. This style is also a great way to frame a room that has a large fireplace or hearth. Unlike full-wall paneling, tall panels are almost always used around an entire room.
DIY Wainscoting

If you’re into DIY home projects, you’ll be happy to hear that wainscoting is a project you can take on with the right tools and time. Here, we’re going to look at some of the basics for this project.
Wainscoting Kits
If you’re new or nervous about building from the ground up, a wainscoting kit can be the perfect middle ground. These kits come with pre-cut panels or, if you’re buying wood, they may also be pre-finished. This is also a great way to speed up the process of a paneling DIY while still saving on installation costs.
An example of a panel molding kit is this Nordic knotty pine kit that covers 24 linear feet of wall with chair railing molding. (See a pine paneling kit at Amazon sponsored)
Cost to Install Wainscoting
The cost of installing wainscoting depends on quite a few factors. These can include material, design, installation, labor, and the area and size of the wall or walls you’re installing paneling on. As for materials, prices can vary greatly. Some you can find at as little as around $7 per square foot while others can be up to $40 or more per square foot. It’ll be easier to break these prices down more specifically when we look at different material options.
Then, there are installation costs. While wainscot can be taken on as a DIY, labor costs can add up if you choose to go that way. This depends on how difficult the style and type are to install as well as hourly labor costs. On average, most contractors work at around $90 an hour on this project but this can vary on who you hire. So, you’ll need to consider that cost multiplied by the time the installation will take.
Your contractor should give you an estimate before they start the job. If you are taking this on as a DIY, remember that you’ll need to buy the tools to do it. Luckily, you won’t have to worry too much about maintenance. While they may need extra dusting, high-gloss finishes make paneling easy to wipe off – often easier than bare walls themselves. Unlike some home improvement investments, you aren’t likely to need services such as resealing. Just a little soap and water from time to time usually does the trick.
How to Install Wainscoting
The first thing to do when installing your own wainscoting is to clean the walls. If there are any holes in the wall, use a drywall filler to patch them up and sand the filler down when it’s dry. Be sure to measure and mark the walls to ensure the paneling goes where you want it to. Use a level to be safe.
Prime the wall in the area where you are paneling. Then, start by installing the top and bottom rails. Then, you’re going to start on the design itself which is variable. This could include adding molding in a traditional raised panel, or raised frames to install recessed, or board and batten styles. Glue is a common choice for installation since it doesn’t have an outside appearance and caulk can help you fill in any gaps.
Painting Tips
When it comes to wainscoting there are a few tips and tricks that help make any painting project successful, and a few more to help with the aesthetics. There are not too many things needed to paint wainscot, just the same products you use when painting anything else. Paint, primer, painter’s tape, and most importantly, an ANGLED brush – trust me on that last one it will come in handy – and any other drop cloth, towels, rollers, etc. that you may use depending on the size of the space at hand.
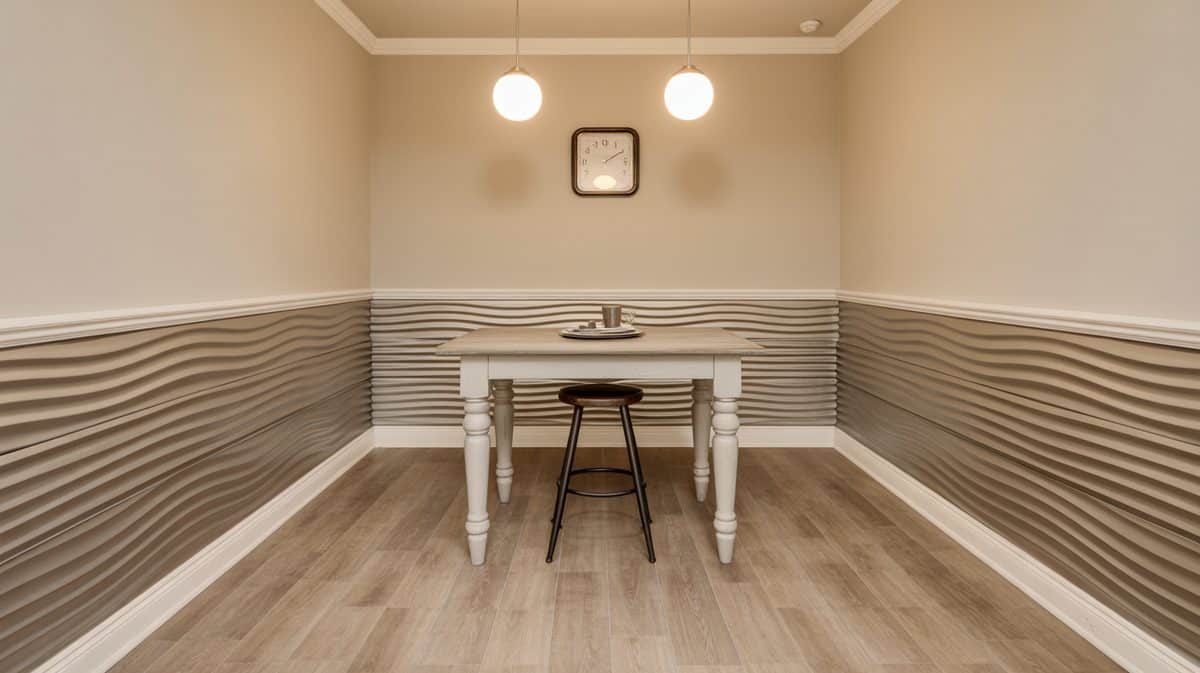
Starting off is the selection of the color and patterns of the panels. Traditionally white is used for moldings and trims, but why do we have to stick with traditional? This is an excellent opportunity to add an accent and really spice up this space, or even just bring an extra dimension to the space with a gray or beige.
The possibilities are as big as your imagination takes you. Not only will adding colors to the bottom part of the wall be able to coordinate with the rest of the wall and ceiling colors, but it will also be more forgiving to the bangs and bumps the lower half of the wall is sure to get. Sometimes paneling is on the entire wall, which gives an even better opportunity to bring dimension to the space with lights and darks of the same colors.
Depending on which style of panel is selected helps determine what color is most suitable as well as how many different colors can be selected. Consider that an area such as the basement with little natural light is more suited to lighter-colored panels.
Now that the color is selected, time to start the painting, right? Hold your horses, first we need to prepare. It is of utmost importance that you use the painter’s tape to separate the neatly painted top wall from the current painted area. As much as you think you can paint a straight line, use the tape, it will be worth it. This can also be useful for making any additional designs or separating multiple colors if that is what is being applied to the different parts of the panels.
Painting time! Typically wainscoting is in a semi-gloss paint, meaning if you are repainting it is a little more difficult to cover. Instead of sanding or scraping, get a primer, or better yet a 2 in 1 paint and primer. This takes a coat or two depending on the gloss level of prior paint.
If the 2 in 1 paint and primer are missing some spots, taking an extra coat of primer should get the right level of adherence. While painting wainscoting it is beneficial to work in sections, particularly focusing on the horizontal and vertical sections separately to get the correct brush strokes.
This is where the angled brush comes in handy, in most wainscoting applications there are a lot of creases and seams, which is where that angled brush will give the best chance at reaching. Make sure all brush strokes are going in the proper direction to get a professional, well-done paint job.
Wainscoting Design Pictures

Did you enjoy this wainscoting ideas article, or planning to try this project in your own home? Share your thoughts in the comments to let us know. For more like this check out our guide to interior wall treatments here.
To showcase highly specific designs, some images on this website use advanced AI-generation software to illustrate ideas and room inspiration. See our editorial policy to learn more.

Upload a photo and get instant before-and-after room designs.
No design experience needed — join 2.39 million+ happy users.
👉 Try the AI design tool now