8 Small Bathroom Layout Ideas with a Shower

A small bathroom, when properly planned and executed, can be a stylish and highly functional space. Making the most of a small space today is much easier thanks to modern designs such as wall-mounted lavatories, slimmer profiles of water closets, or lightweight but very durable materials. However, aside from the updated fixtures, how you position and orient your functional areas is critical to creating the illusion of space and maintaining an ergonomically designed workspace. In this guide, we have 8 small bathroom layout ideas with showers that can inspire your next build or renovation bathroom project.
According to Eric Jensen of Badeloft USA, which is one of the leading fixture companies in luxury bathrooms, a bathroom is small when it has a square footage of less than 41 square meters. It can be difficult to position major fixtures, and it can seem impossible to fit a shower or bathtub area. [toc]
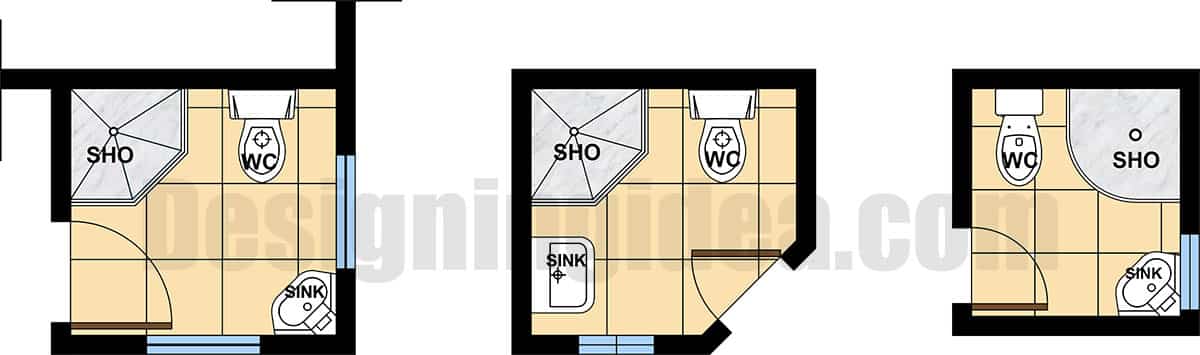
Corner Shower Layout
Opens up the central section of a bathroom.
One of the greatest advantages of placing your fixtures at the corners of a bathroom is that you can free up more space for maneuvering between fixtures. The larger negative space gives the impression of a larger floor area, while you can utilize the corners, which are typically challenging to fill in.
For shower areas, not only are they more space-efficient, but they can also give a sense of security when you have two walls as perimeters. A challenge, though, is finding a reliable installer. If you are confident in your plumbing skillset, then, you can always choose to DIY your installation.
Types of Corner Showers:
Quadrant Shower Enclosure: The last image above showcases a quadrant shower enclosure as seen with its curved frontage.
Square Shower Enclosure: The straight-edged shower enclosure can match minimalist bathrooms with its simple profile especially when made from glass. The simple design also means a straightforward installation compared to your curved and neo-angle stall. For rectangular or squarish corner enclosure bathrooms there is a freer space inside the shower compared to your curved or neo-angled enclosure.
Neo-Angle Showers: This enclosure allows you to save more space by utilizing the corner and its walls will usually meet at 135 degrees instead of 90 degrees.
Positions of Major Fixtures:
Shower: Since the enclosure takes up much of the space, this is a major fixture that is oriented at the corner to free up more central space. Aside from the shape, there’s also a selection of frames and wall surfaces to choose from. There are also frameless, semi-framed, and framed enclosures with a common thickness of 12mm (1/2 inch) or 9.5mm (3/8 inch).
Vanity: You can position the vanity opposite the shower either with a wall-mounted sink or a floating vanity to free up the floor area. Corner vanities are also available; however, it is best to have enough elbow space to wash or do other personal hygiene activities in front of a mirror and sink. It is recommended to have 20 to 24 inches of counter space at least on one side of the sink.
Toilet: The toilet can be adjacent to the shower, creating a triangular layout that uses every inch effectively. There’s also an option of placing the toilet opposite the shower against a corner with a triangular-shaped cistern.
Storage: Due to the limited space, you can make use of the vertical space by incorporating built-in shelves or niches. A niche for soap and shampoo area is common and convenient when taking a shower.
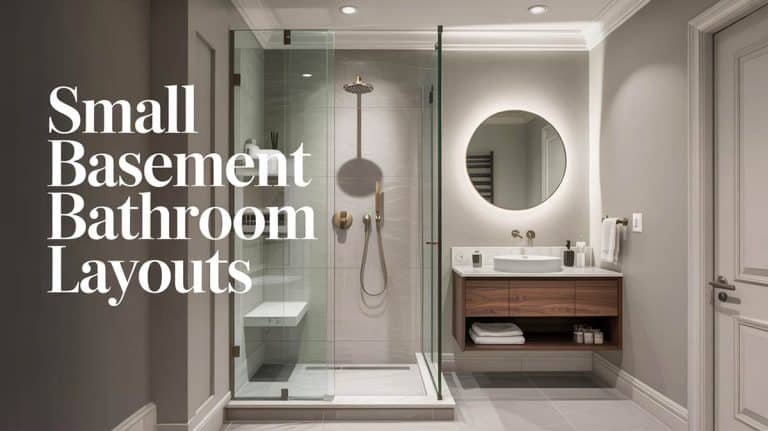
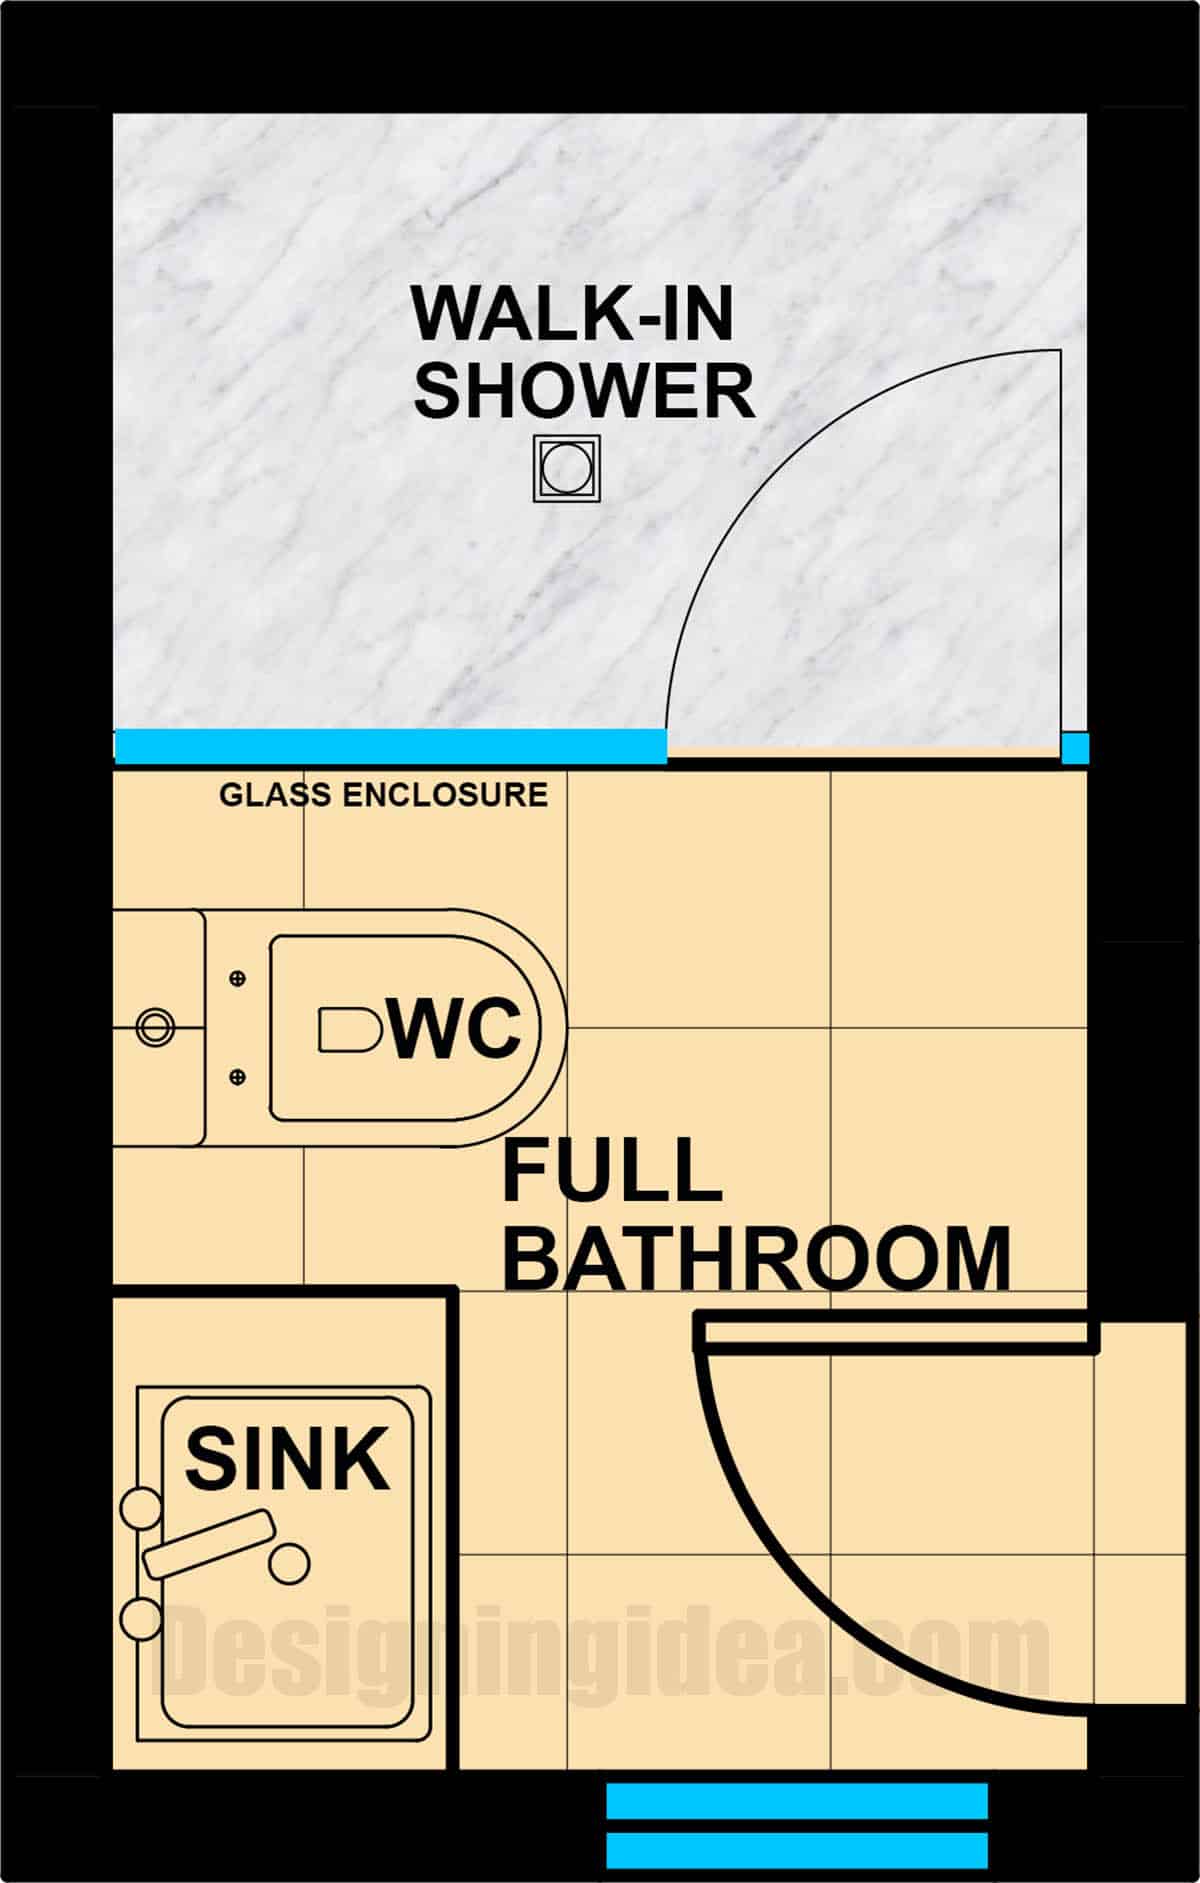
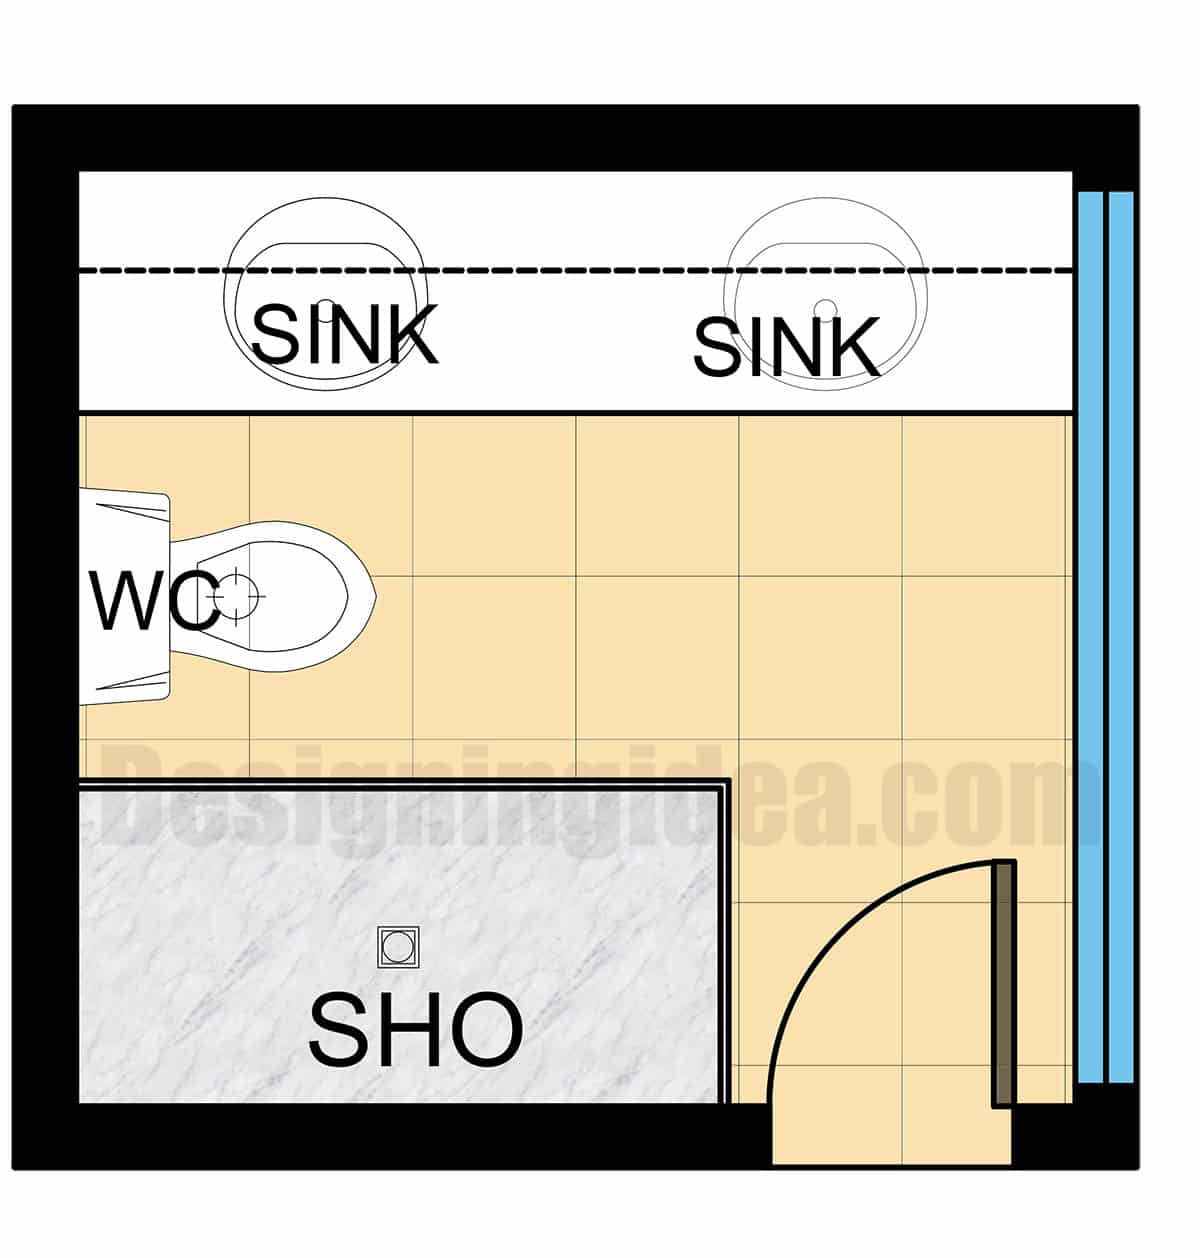
Walk-In Shower Along One Wall
The added negative space gives the viewers a blank space for the eyes to rest.
Since the shower is stretched on one wall while the other fixtures are placed on the other wall sides, you get an uncluttered look which creates a blank or negative space. When a glass enclosure is used, it further makes a small bathroom feel more spacious. This bathroom layout leaves a clean and organized space even for smaller square footage.
Positions of Major Fixtures:
Shower: Run a walk-in shower along one full wall, with a glass panel or half-wall to separate it from the rest of the bathroom.
Vanity: Place a compact vanity on the opposite wall, with a mirror to reflect light and make the space feel larger.
Toilet: Position the toilet at the end of the bathroom, next to the vanity.
Storage: Utilize vertical storage solutions, such as tall cabinets or floating shelves above the vanity and toilet.
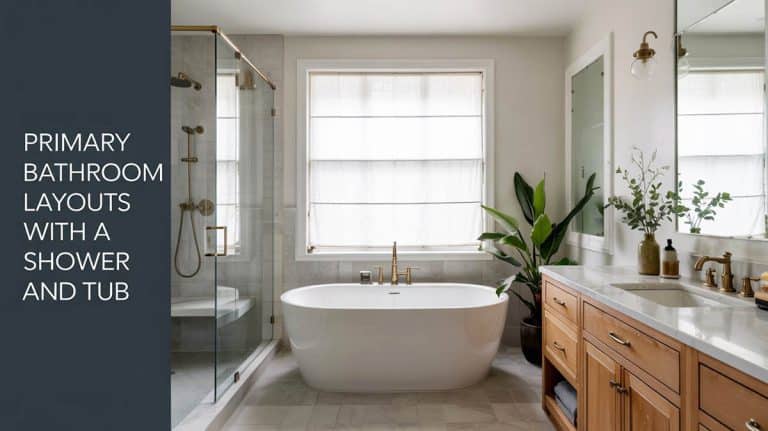
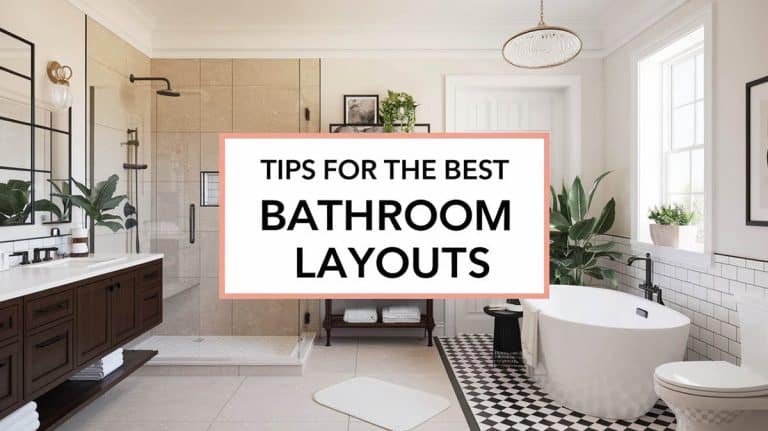
Shower-Tub Combo Layout
Saves space while preventing slippage.
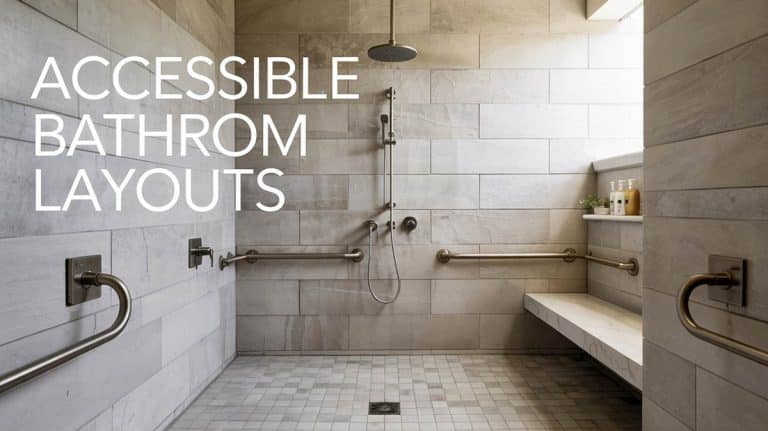
Enjoy both a shower and soaking area without taking up much space through a shower-tub combination layout. This is a safe space for showering or soaking up due to the added enclosure. People with difficulty in standing up due to a disability or old age will benefit from the added support by holding on to the rim of the tub besides having a grab bar installed on the side when bathing. However, you’ll need a bathroom space that has a squarish floor plan to accommodate the width of the tub and shower combination.
Positions of Major Fixtures:
Shower: Install your shower-tub combination along the widest wall of your room to utilize space since this design requires the most space. If you decide to add these to the end of the room you may need a larger bathroom floor plan.
Vanity: Further free up the circulation space by placing the vanity at the opposite end of your showering/bathing area. A vanity with a large mirror or complete with a countertop and built-in cabinets.
Toilet: You can fit the toilet beside your vanity or next to it to create continuous use of your fixtures.
Storage: Use recessed shelves or a medicine cabinet above the sink for storage without taking up additional floor space.
Wet Room Layout
Without the need for shower enclosures or dividers, there’s less visual weight and a minimalist look.
A wet room layout is basically a type of bathroom that has flooring, walls, and a ceiling installed with waterproofing and usually has a seamless finish, including its corners. This eliminates the need for enclosures along or around your showering area since there is no issue of water seeping through the tiles. Provide a drain system for the whole room to allow water to drain from the floor area. A common layout is to place the drainage at the center to serve the areas equally; however, for aesthetic purposes, you can also use linear drains, which give a modern look.
Positions of Major Fixtures:
Shower: Convert the entire bathroom into a wet room, with the showerhead mounted on the wall and a slight slope in the floor to drain water.
Vanity: Use a wall-mounted or floating vanity with minimal cabinetry to keep the space open.
Toilet: Position the toilet at the far end of the room or beside the vanity, with waterproof finishes throughout.
Storage: The common depth of niches is 3.5 inches or almost 9cm based on the common depth of wall studs. Integrate built-in niches within the walls for toiletries and towels, avoiding bulky storage units.
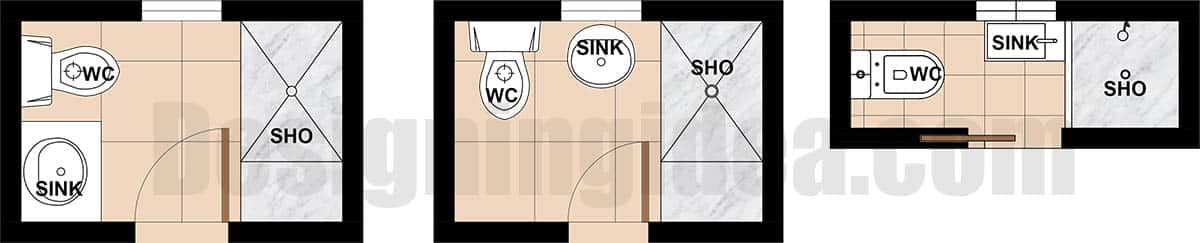
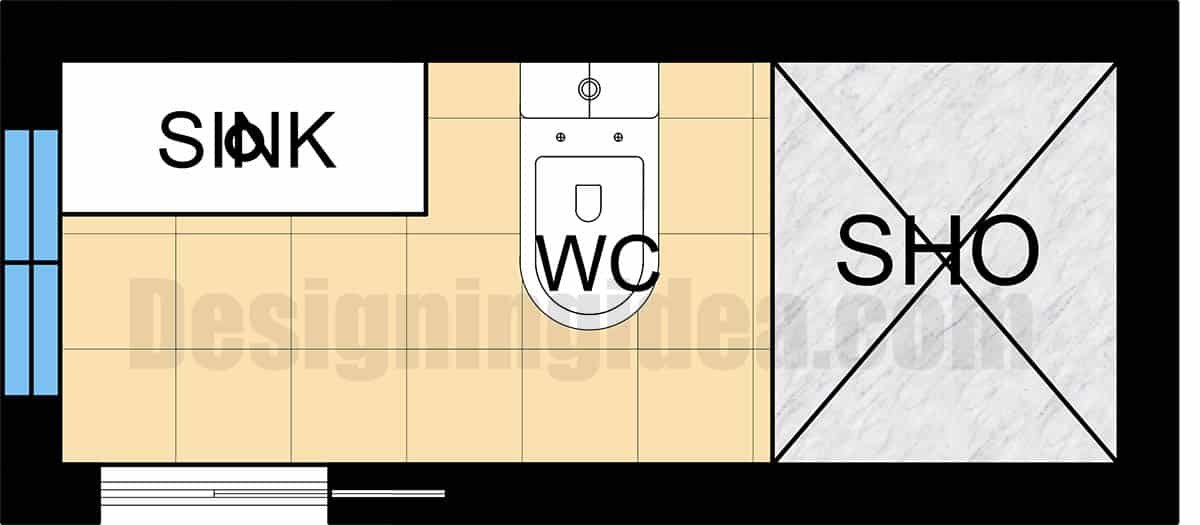
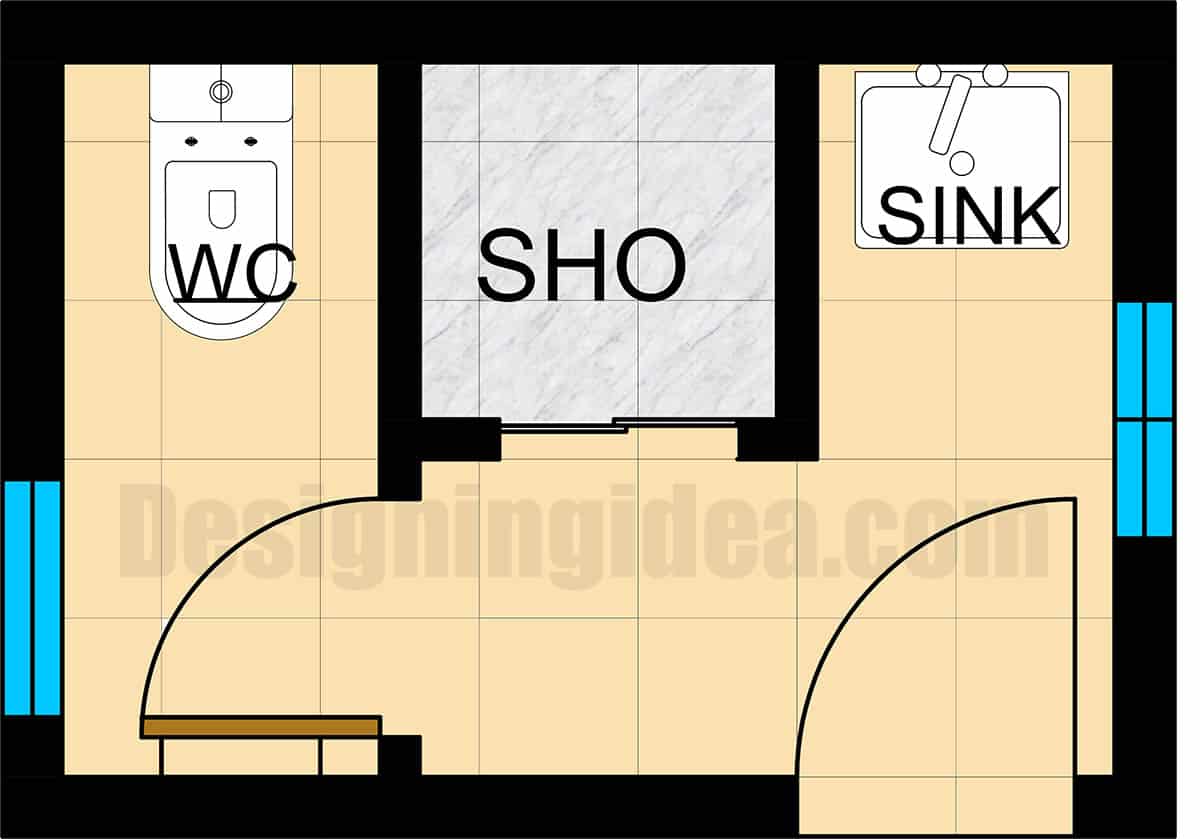
Linear Bathroom Layout
This simple, popular layout provides a straightforward plumbing system that’s easy to tap on or reconfigure for future expansions.
One of the most common full bathroom designs is the linear layout. It is suitable for narrow bathrooms with a straightforward plumbing system. The layout aligns the major fixtures, such as the toilet, sink, and shower, along a single wall.
Since all fixtures are in close proximity, the linear layout makes everything easily accessible. This can be particularly useful in homes where mobility or accessibility is a concern.
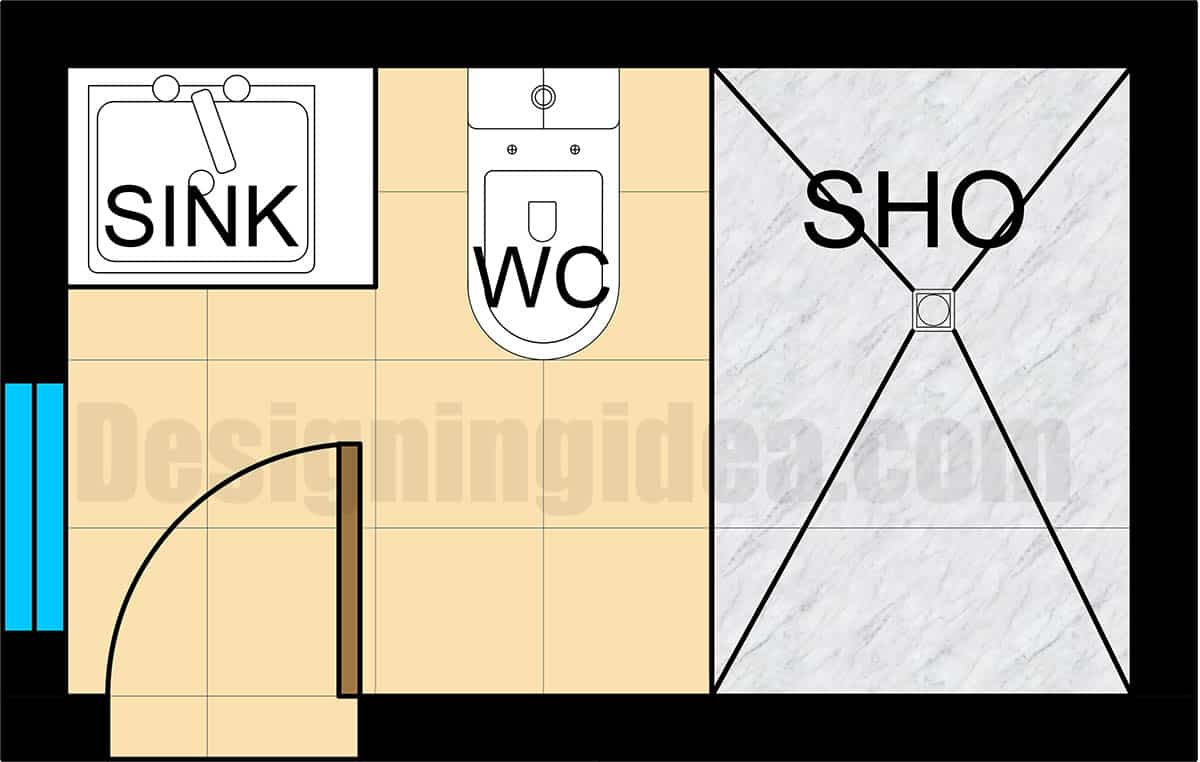
Long Rectangular plan:
Wider Rectangular Plan:
Positions of Major Fixtures:
Shower: Place the shower at one end of the rectangular bathroom plan, with a glass enclosure or a curtain.
Vanity: Install a vanity directly opposite the entrance, with the mirror centered above it. Mirrors are great for giving the illusion of space, though take note that there are certain cultures that may not agree with a mirror opposite a door. For instance, Feng Shui recommends placing a mirror perpendicular to the front door instead of the front.
Toilet: Position the toilet between the vanity and the shower, maintaining a straight, linear flow.
Storage: Include storage options like recessed shelving, under-vanity storage, or over-toilet cabinets to maintain a streamlined appearance.
Compact Galley Layout
This layout creates an efficient space because major fixtures are arranged in a parallel manner with one single walkway.
The bathroom galley layout basically has fixtures such as the shower, sink, and water closet positioned on either side creating a parallel layout. This leaves a walkway in the middle that can easily access each major fixture, similar to your galley kitchen. If you have a room with a narrow and long layout, you can create a compact galley layout, keeping in mind a comfortable and safe walkway.
The NKBA, or National Kitchen Bath Association, recommends 30 inches of clearance in front of a wall or fixture. Meanwhile, you’ll need 21″ of clearance space between a wall, sink, and other major fixtures. If you plan to place to sinks to cater dual or multiple users, you can opt for a double sink in one side opposite the walk-in or water closet.
Shower Position: Position the enclosure on one side of the bathroom, with a clear glass door or partition to keep the sightlines open.
Vanity: Place a narrow vanity along the opposite wall, creating a galley-style layout.
Toilet: Install the toilet at the far end of the bathroom, with space on either side for additional storage or a small hamper.
Storage: Use vertical storage solutions such as wall-mounted cabinets or open shelves above the vanity and toilet.
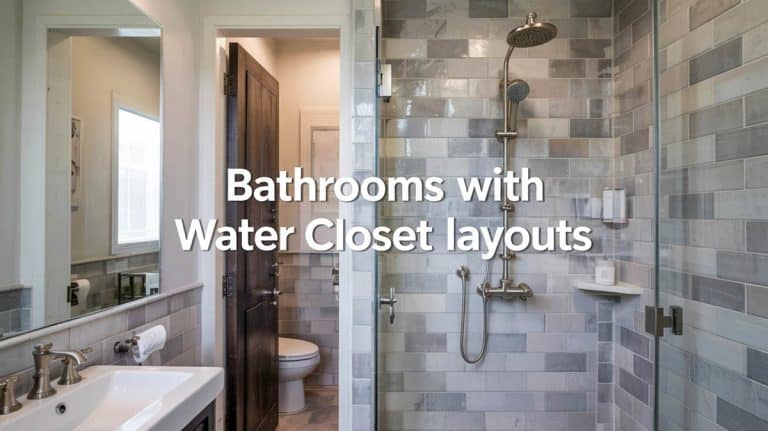
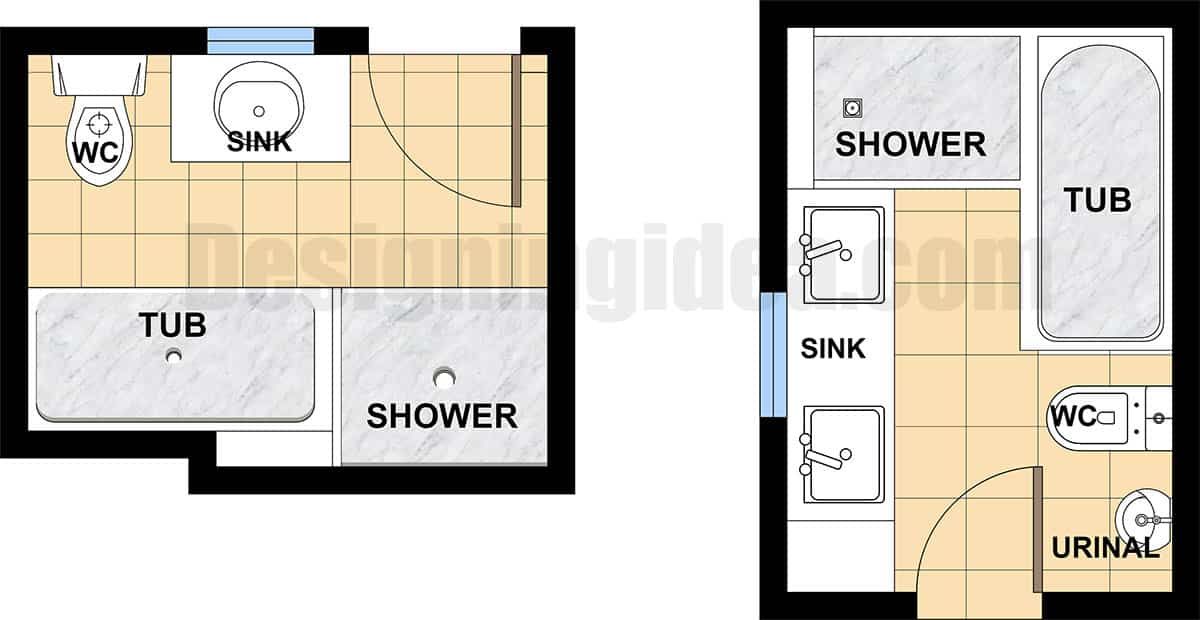
Split-Plan Shower Zone Layout
Utilize your shower to separate main fixtures such as your sink and water closet.
The concept of the split-plan layout is to create zones using the enclosure. This layout is beneficial for bathrooms that are used by multiple family members and where privacy is needed. Thus, the central divider is usually fully opaque to maintain privacy. The plan is to minimize cross-traffic within the space, which is beneficial when preparing in the morning since you use different areas at the same time.
The concept of the split-plan layout is to create distinct zones within the room by using the shower enclosure as a central divider.
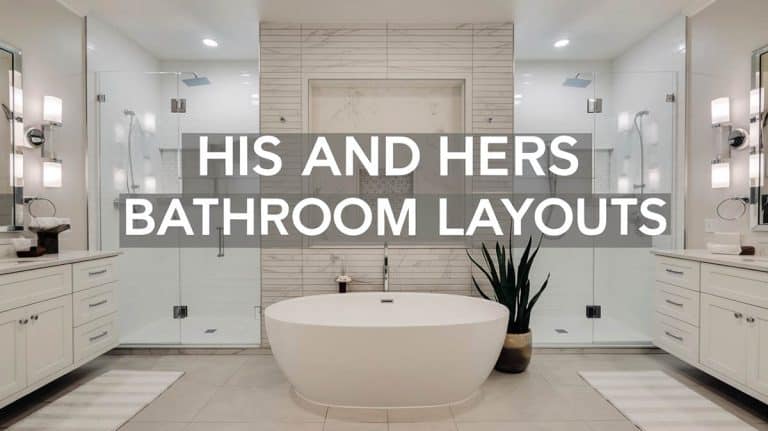
His and Her Bathroom Sink floor plan:
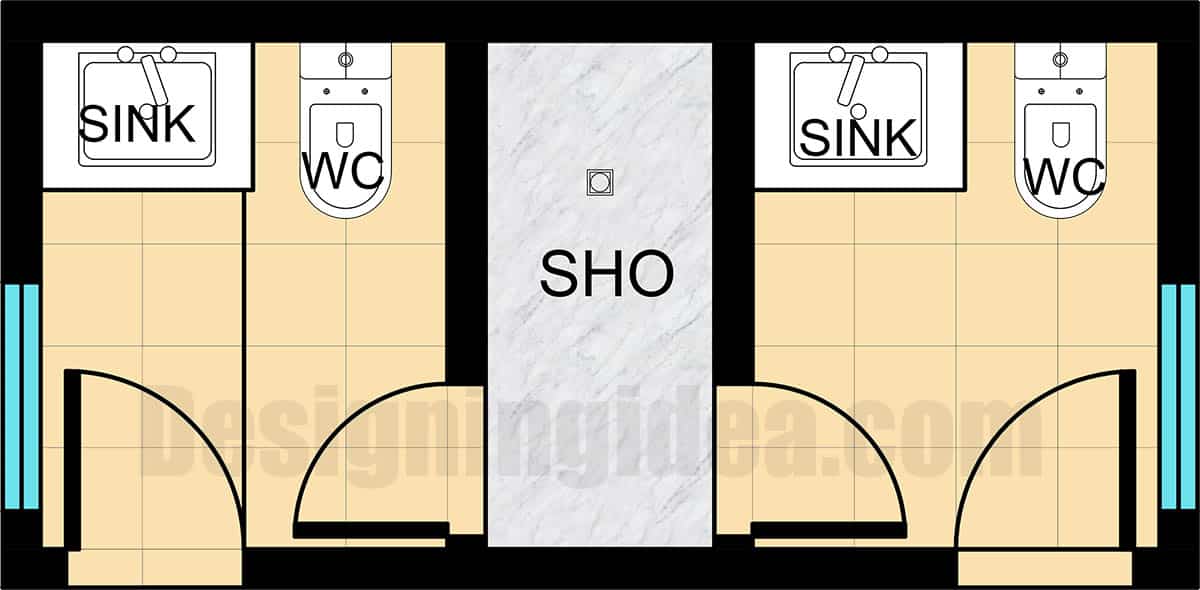
The first image shows the enclosure positioned in the middle to serve as a boundary between the two major fixtures. By providing an enclosure for your toilet, you can have three separate areas where three different users can use the bathroom simultaneously without causing much traffic.
A variation of the Jack and Jill bathroom layout showcases two different designs divided by one shared showering area. This is useful for couples or multi-users in one household. The door should have a provision to be locked inside the shower area.
Positions of Major Fixtures:
Shower: Install the shower centrally, with the vanity and toilet positioned on opposite sides.
Vanity: Position the vanity on one side of the shower, utilizing a compact design to maximize space.
Toilet: Place the toilet on the opposite side of the enclosure, creating distinct zones within the room.
Storage: Include recessed shelving in the shower, along with floating shelves or a small cabinet above the toilet.
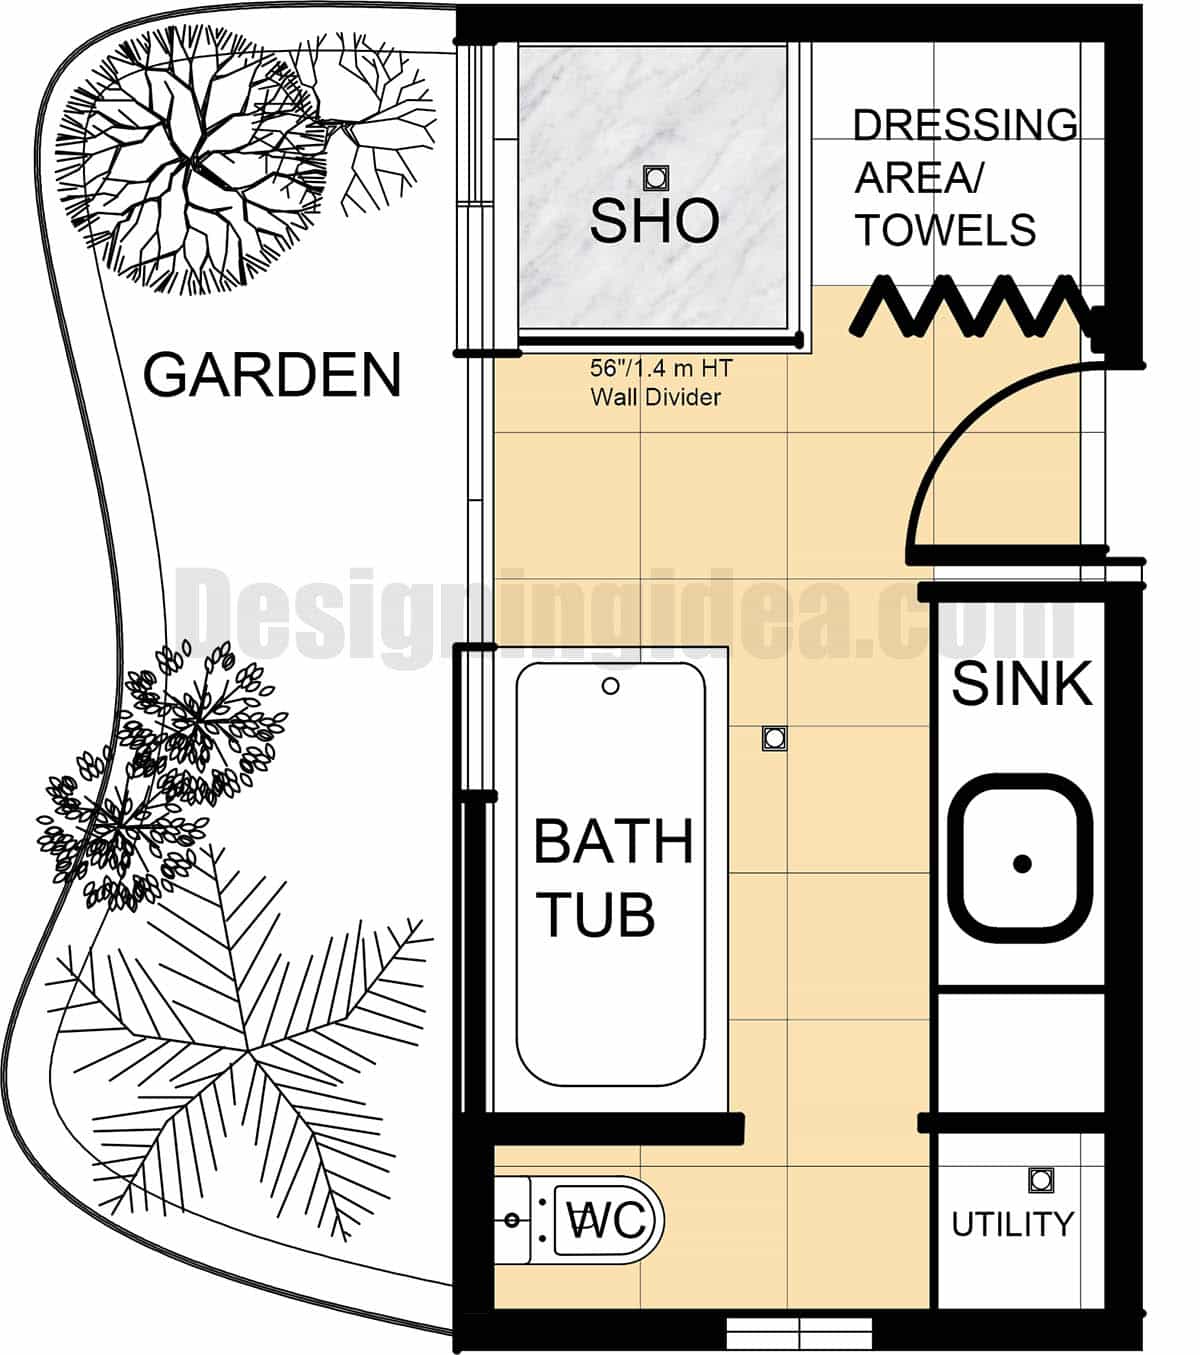
Open Plan Bathroom Layout
The uninterrupted flow of space makes a bathroom feel and look spacious, allowing light to fill the room.
An open-plan layout bathroom is a modern design approach where traditional barriers are removed. Your typical walls or partitions are minimized, if not entirely removed, to allow a sense of space to flow through the room. Walls can be replaced with smoother transitions between areas, such as through a change of tiles, flooring material, or color. By minimizing the space taken up by walls, you free up more space for circulation, both visually and physically, making the small area feel larger.
Positions of Major Fixtures:
Shower: Create an open shower with no enclosure, allowing the area to blend seamlessly with the rest of the bathroom.
Vanity: Position a minimalist vanity with an open design and no base cabinets, allowing the floor to remain visible.
Toilet: Place the toilet at the far end of the room, separated by a partial wall or divider.
Storage: Integrate discreet storage solutions, such as under-sink drawers or hidden compartments behind mirrors.
If you’re in the process of planning your bathroom remodel, we are available to help. Contact us to have one of our experienced interior designers create a custom floor plan specifically designed for your home.
For the big picture, see every bathroom layout on one page.
To showcase highly specific designs, some images on this website use advanced AI-generation software to illustrate ideas and room inspiration. See our editorial policy to learn more.