Stunning Outdoor Kitchen Layout Ideas For Your Backyard
At the heart of an outdoor oasis is a kitchen, where family and guests are served while adding value and aesthetic purpose to your property. If you’ve finally zoned in on the perfect location, but are still in the planning stage, then read on and get inspired with our list of 10 outdoor kitchen layout ideas. We’ve selected foundational plans that blend both style and functionality—just the perfect list to kick-start ideas for your next construction project.
L-shaped Layout
A versatile outdoor kitchen layout that can define a space and create semi-open enclosures that work in almost any amount of square footage.
The L-shaped countertop is a popular option for open plans as it can create boundaries for a kitchen space while still maintaining continuity between working, traffic, and serving areas. Since most outdoor kitchens are located on either a deck or patio, expect unwalled areas. With the L-shaped countertop layout, you create semi-closed walls or dividers.
- It can be positioned in any rectangular or square-shaped outdoor grounds, regardless of the size of the floor plan.
- Easily achieve efficient countertop layout.
- Kitchen islands or mobile countertops can be added to the layout.
- The design can be curved or angled.
While it’s a popular option for open spaces, it also works for walled areas where one wall is along one arm of your countertop. Usually, the perpendicular countertop is configured to serve as a bar or, if it’s deep enough, extended as a dining table to serve diners.
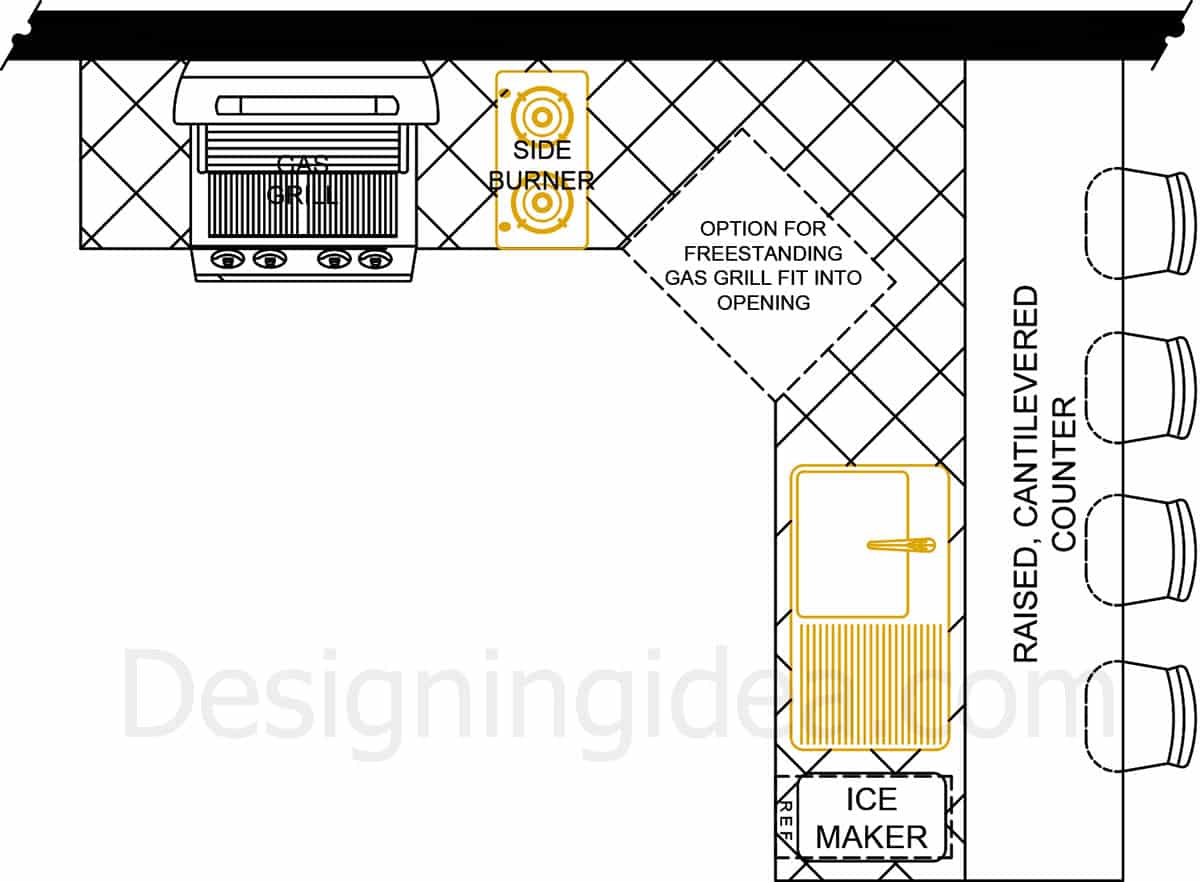
Efficiency-wise, the L-shaped layout is noted as an efficient design because it accommodates the work triangle layout. Moreover, it provides ample space for users and places where working zones can be separated but are easily accessible from each other.
Tip: The grill and surrounding area are one of the first areas to get dirty. You can position the back of the grill against an existing wall or durable backsplash material to protect the blackening of your grill and surrounding area. This is also safer to prevent small children or pets from touching the hot surface.
Island Layout
The budget-friendly outdoor kitchen layout that provides additional working areas while creating a focal point in the space.
The island layout can also be used as an add-on to existing outdoor countertop layouts to increase the work surface and add functional equipment. The island or basic island layout is also a variation of your linear layout but is usually more compact or shorter, positioned at the center of the kitchen.
- Great for backyards with limited space but can also be added with existing countertops.
- Can be utilized as a grounding element or focal point.
- Option for mobile outdoor kitchen islands.
- Provides all access on all sides of the countertop.
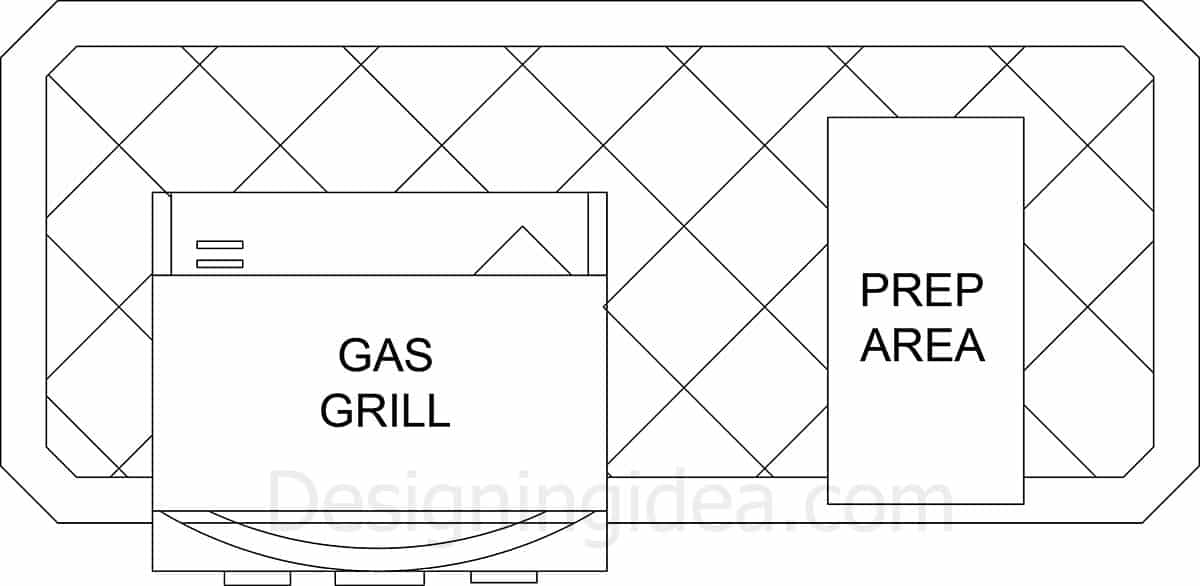
Best for small patio or deck areas as it includes the most essential equipment, often a barbecue or grill area, plus ample space for preparation.
The limitation of island layouts, though, is that the main zones, namely preparation, cooking, and serving, can have less clearance between each zone.
If you plan to solely use an island countertop for your outdoor kitchen, be sure that your basic functions can be accommodated. Generally, you’ll need 4 linear feet, which cover the major functions such as cooking (36-inch gas barbecue), washing (mini sink), and storing (refrigerator and pantry). Also, you’ll need at least 30 inches of depth and a countertop height of 36 inches.
Tip: Add sliding covers when not in use to protect your kitchen counter surface.
Linear layout
Ideal for narrow spaces that offers a simple and straightforward workflow.
For outdoor spaces that have narrow areas, linear countertop layout works well in providing ample working space while simplifying plumbing layout. Because fixtures and equipment are along one row, the pipes and wires used are minimized where rerouting or directing is minimized.
Linear layout, also known as straight-run, can fit in any outdoor space and does not cost as much as your L- or U-shaped outdoor kitchen. You can lay it as a foundation for future expansion of your outdoor kitchen that’s already functional and, at the same time, affordable.
- Opportunity for a textured backdrop on your wall against your linear countertop layout.
Aside from the wall, you can also locate your linear countertop in the middle of the space and add a dining or snack strip by extending the surface on one side. You can have the surface strip lower or higher as long as you’re extending the surface on one side guests can comfortably dine along the countertop.
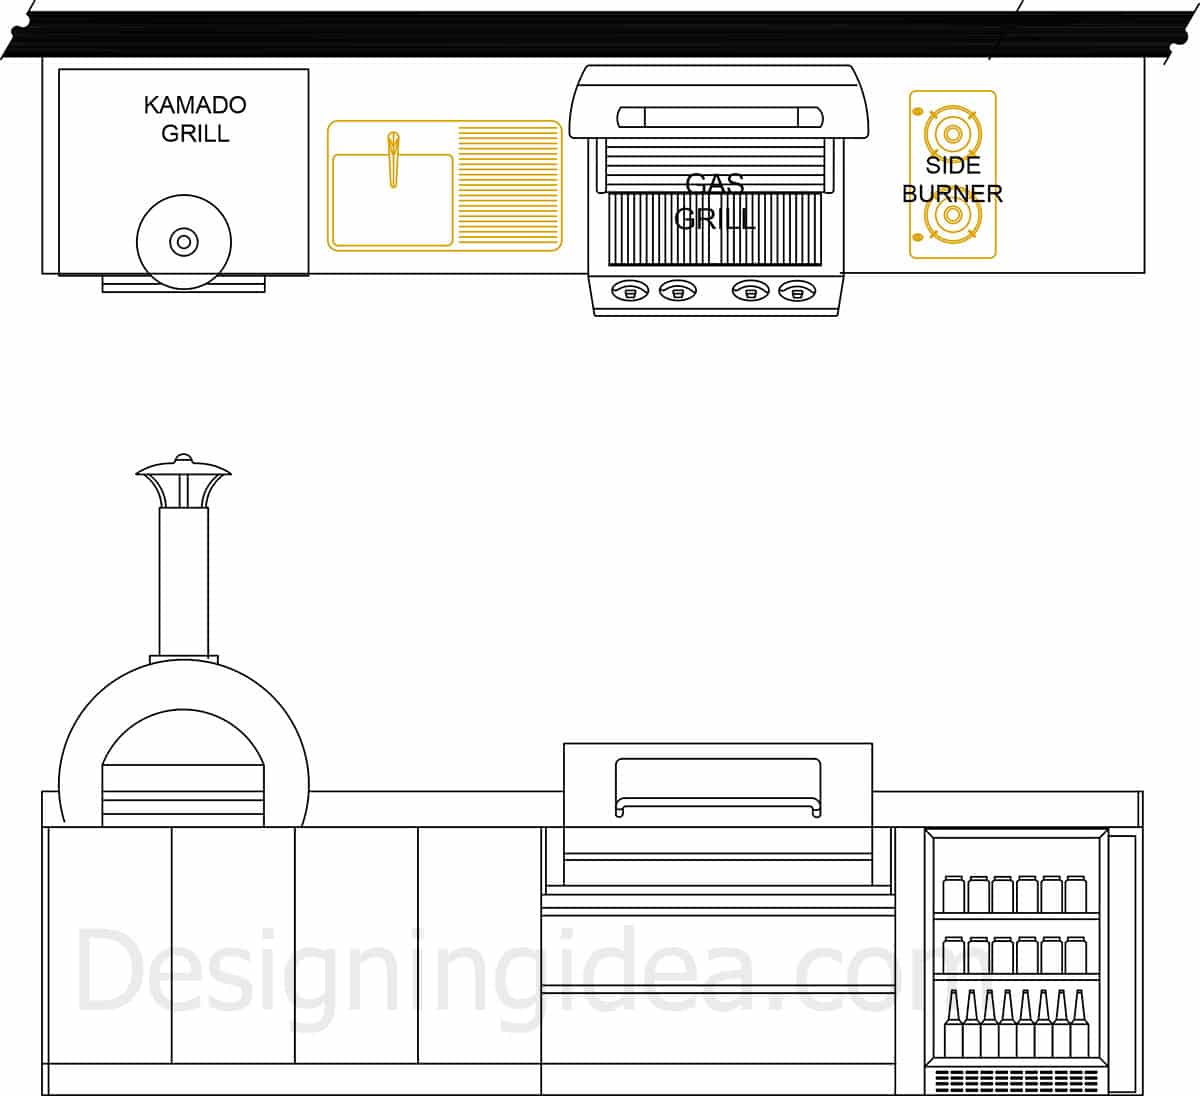
Since a linear layout does not close up the space, you can interact with your guests while cooking.
Tip: Showcase your countertop while enjoying minimalistic and clean lines. Exposed bolts, ceramic marble tops, or metallic finishes that are scratch-resistant are a few quality materials you can specify.
U-shaped Layout
Maximizes workspace and storage, perfect for larger outdoor areas.
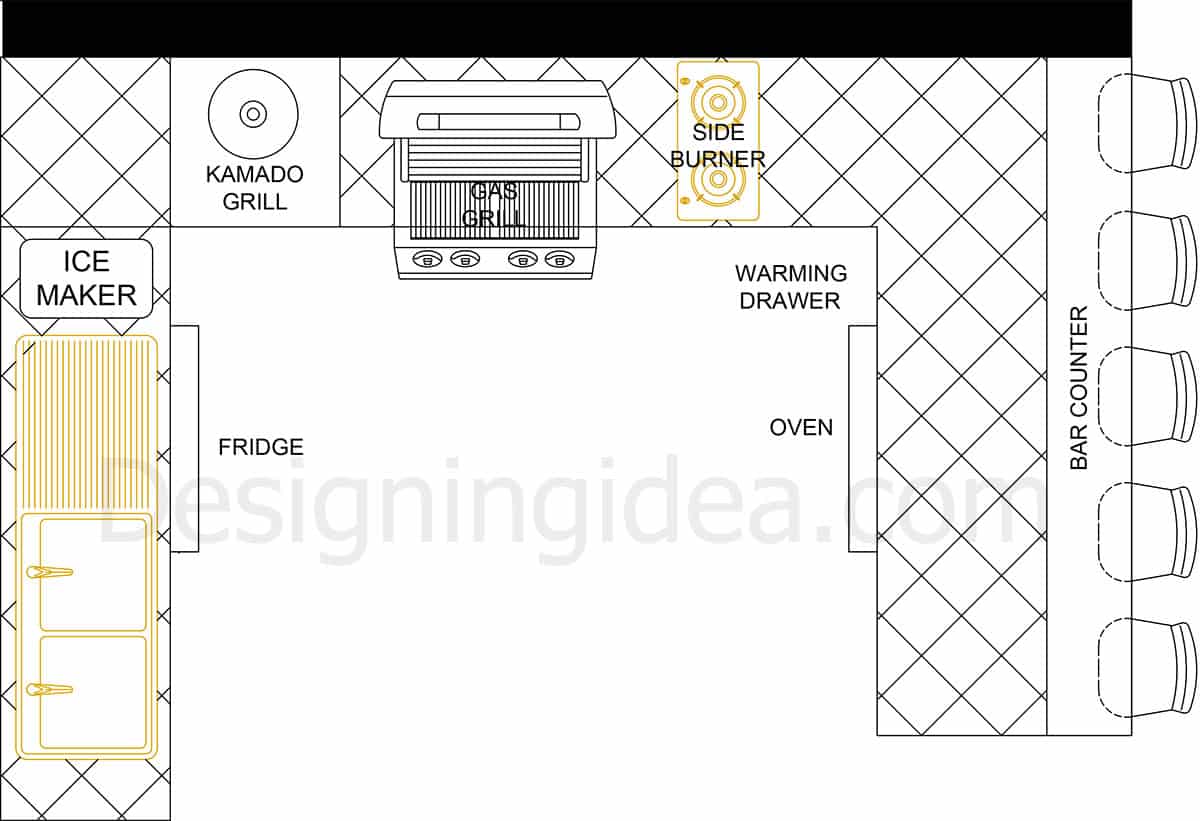
The U-shaped countertop layout for outdoor kitchens is described as having three sides, thus forming the letter U shape. This means it leaves a large central space for movement.
Aside from your typical grill, sink, ice maker, and oven, a U-shaped layout can accommodate other kitchen equipment and utilities due to the expansive space. Wine chillers refrigerated drawers or an option for a lengthy griddle.
While multiple work triangles can be assigned, such as having two on each arm or corner, it can add to the cost.
- The substantial space provided allows more equipment.
- Free up central space, which allows more users.
- Two or more cooks can work at the same time with wider movement.
- Opportunity to add an entertainment area.
- Works best for medium- to large outdoor spaces.
U-shaped outdoor kitchen space will need a spacious area and won’t be effective in small areas. It is recommended to have at least 107 square feet or 10 square meters of space. Meanwhile, according to Jordan Marie Diggs of RTA, an outdoor kitchen company based in Texas, a U-shaped outdoor kitchen will need a minimum of 10 feet by 16 feet of space, especially if you plan to add bar seating.
While a U-shaped outdoor kitchen layout is recommended for larger spaces, it can still work for small urban spaces by choosing a sleeker version. You can have an already built-in grill, a compact refrigerator, and a versatile serving area that also doubles as bar seating.
Tip: You might want to check your local ordinance when it comes to outdoor kitchens, especially when building an expansive version. Consider hiring professionals who can oversee the project, foresee potential issues, and thus provide feasible solutions.
Split-level Design
Incorporates different heights for various functions, like a raised bar area.
A split-level outdoor kitchen layout involves at least two different levels, often separating the preparation from the serving area. Different levels can also separate major functions such as cooking, washing, or cutting. This design gives dimension to the countertop instead of the straight-level design, adding visual interest and looking more organic compared to your streamlined straight-lined layout.
A wrap-around or multi-side serving area that’s lower than your countertop kitchen is becoming a trendy option for your kitchen layout.
With the right design strategy on your split-level outdoor countertop kitchen, you can create a statement piece as it gives off that sculptural look from the stacked stone.
- Option for a lower serving or dining area that’s perfect for kids.
- Maximize horizontal space.
- Better organization of space available.
Aside from your wraparound serving area, a lower table springing off from a side of the countertop with a lower level can also be an attractive option for long outdoor areas. This design can convey that modern and sleek theme as the linear elements elegantly stretch through the outdoor space.
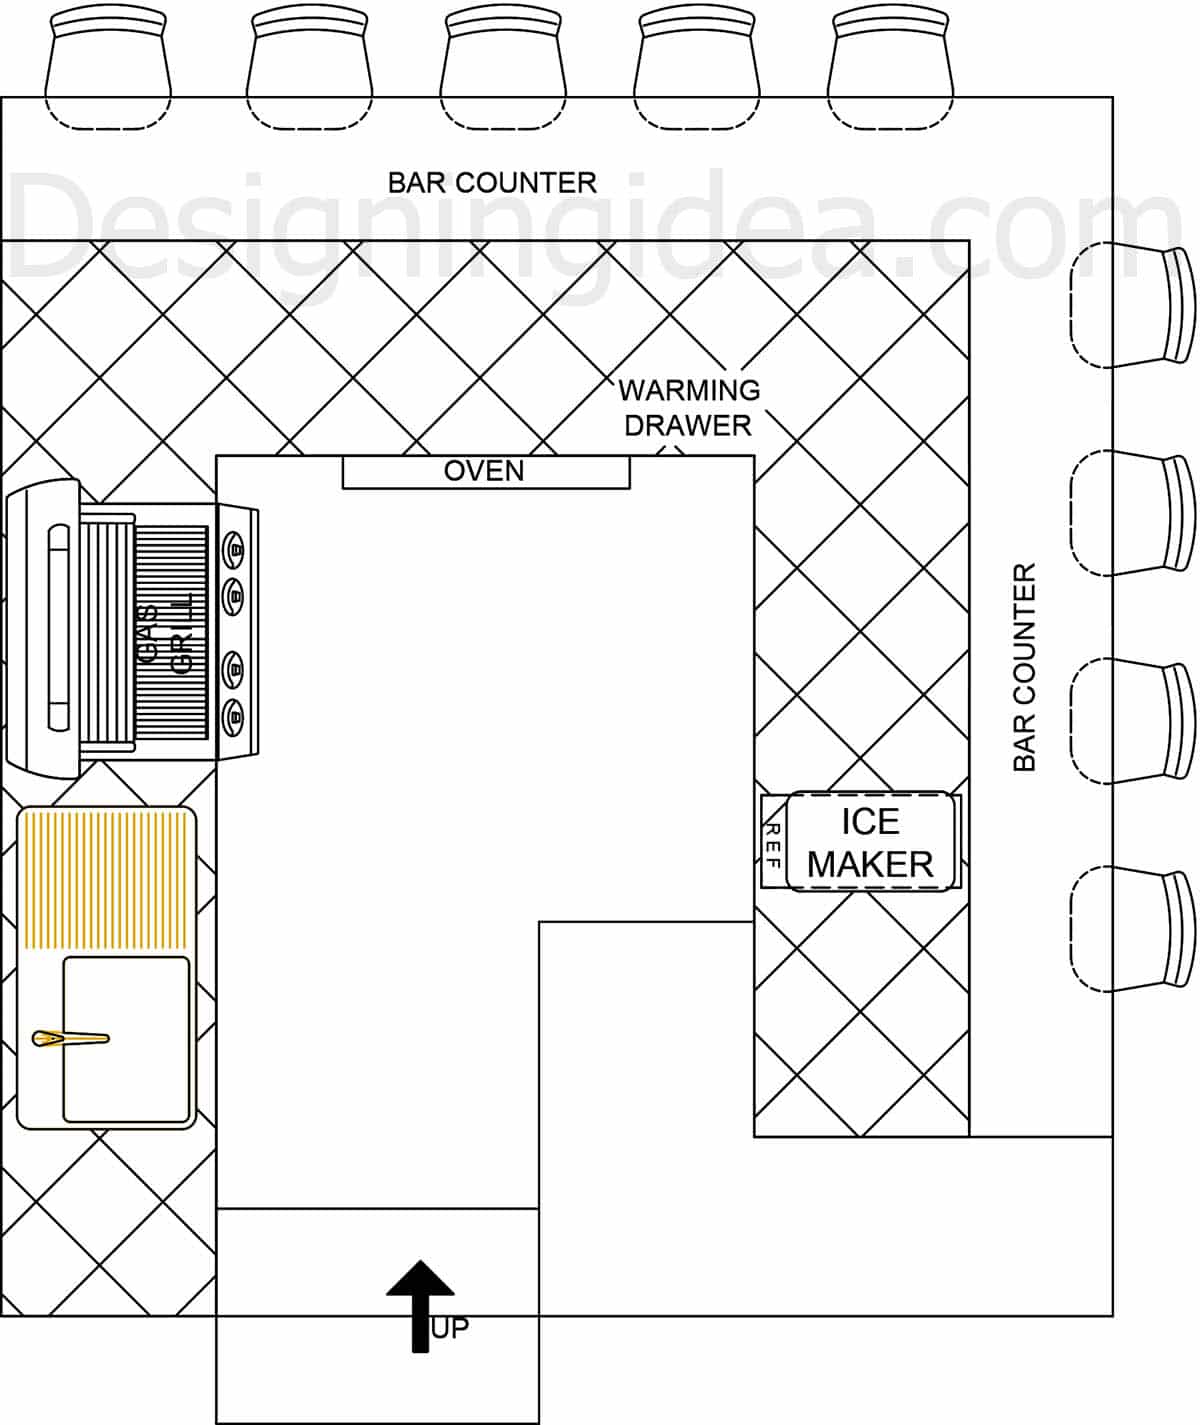
Split-level surface countertops are also ideal for homes with limited square footage since they have that compact feel and organized areas.
Tip: Specify a 34-inch height for your countertop or 34 to 36 inches. Also, as a rule of thumb, the countertops should be lower than the height of your bent elbow from the ground.
Galley Layout
Features two parallel countertops, great for smaller spaces or along a wall.
Perfect for outdoor kitchens that are parallel to one wall of a house where the overhang can be extended to provide shade to the work area. Pergolas and trellises are also popular design combinations with galley countertop layouts, especially for lean-to-framed sheds.
Like your interior version, the galley layout for the outdoor kitchen is composed of two parallel counters where the middle runs straight through or with a dead end.
- Best to accommodate an outdoor space that has a hallway-like footprint.
Also, add upholstered seats or cushioned bar stools with backrests to create that relaxed and loungey vibe.
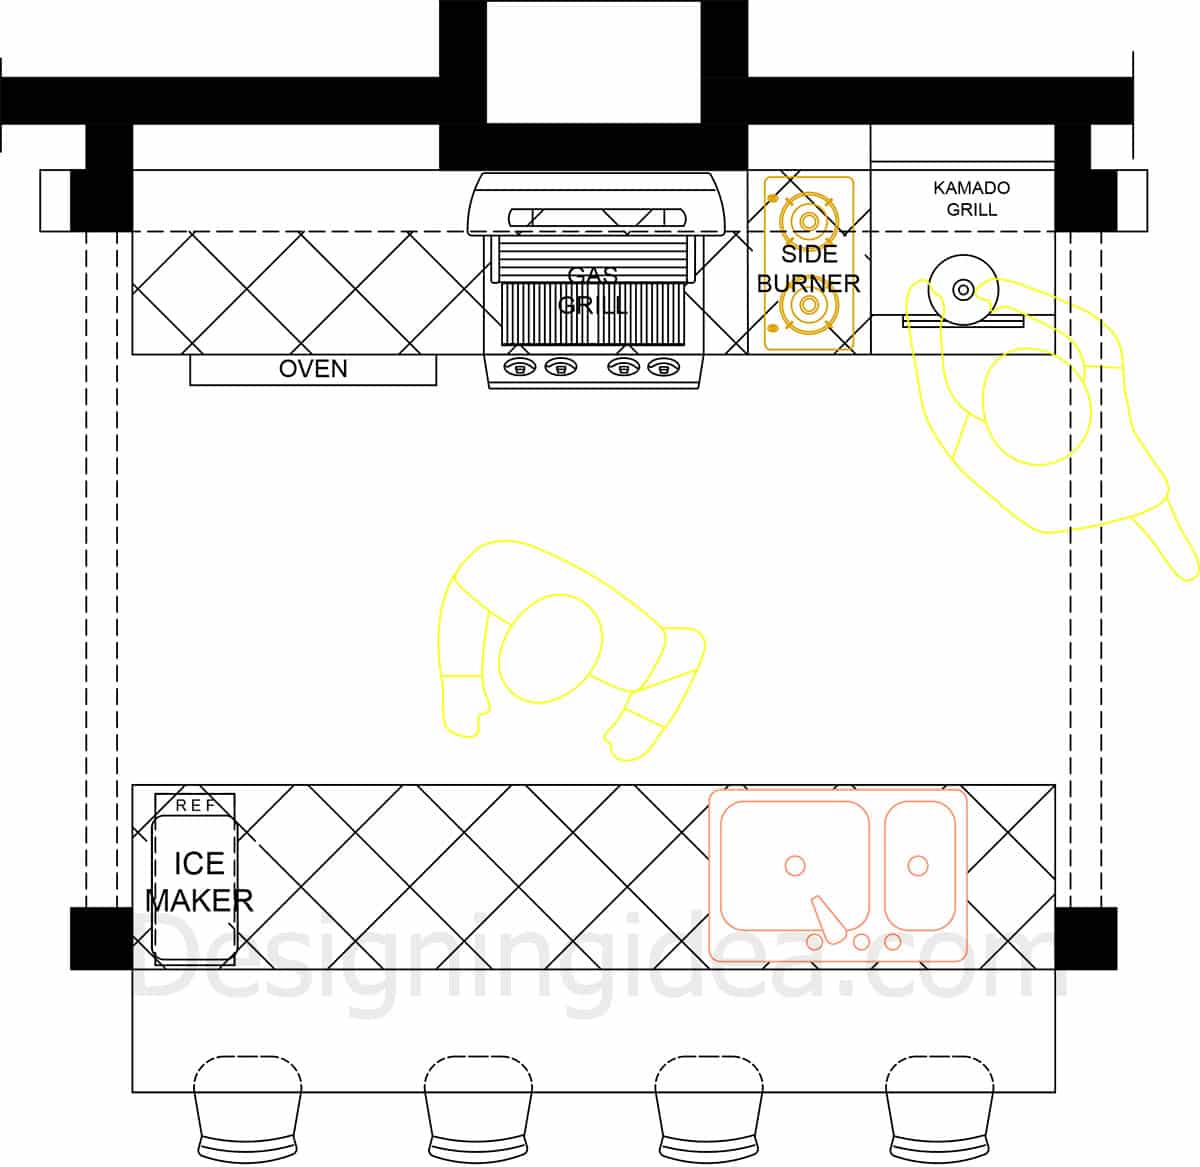
Tip: Increase your work surface by opting for open shelves where you can place unused items easily and access them when needed.
Outdoor Kitchen With Pergola
Combines cooking area with shade structure for comfort.
A kitchen countertop shaded under white lattice work is a visual stimulus for that afternoon teatime or when dining al fresco. The outdoor kitchen with pergola elevates the outdoor kitchen and gives a welcoming vibe to the social space. Often, it’s a popular upgrade from your patio or deck extension. You may also add vines or climbing plants, such as grapevines, that can make your pergola look just like the traditional pergolas. A string of fairy lights can also add to a relaxing ambiance to the pergola.
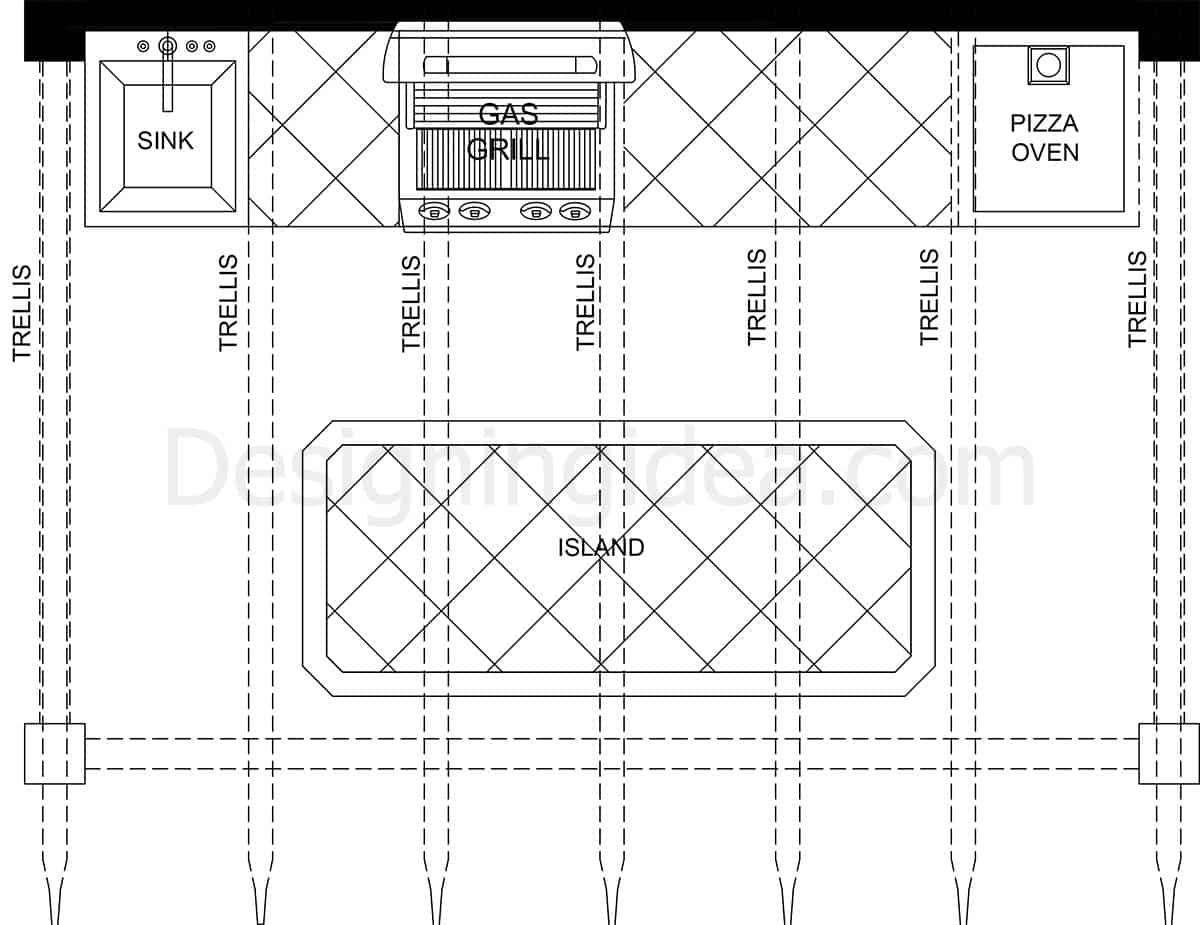
Tip: Consider integrating a bioclimatic pergola. A bioclimatic pergola is basically a pergola that can open, close, and adjust the angle of its slats or other components according to climatic conditions. For instance, the slats retract and close to shelter the outdoor kitchen from rain.
Built-in Grill Station
Focuses on a high-end grill as the centerpiece, with surrounding prep areas.
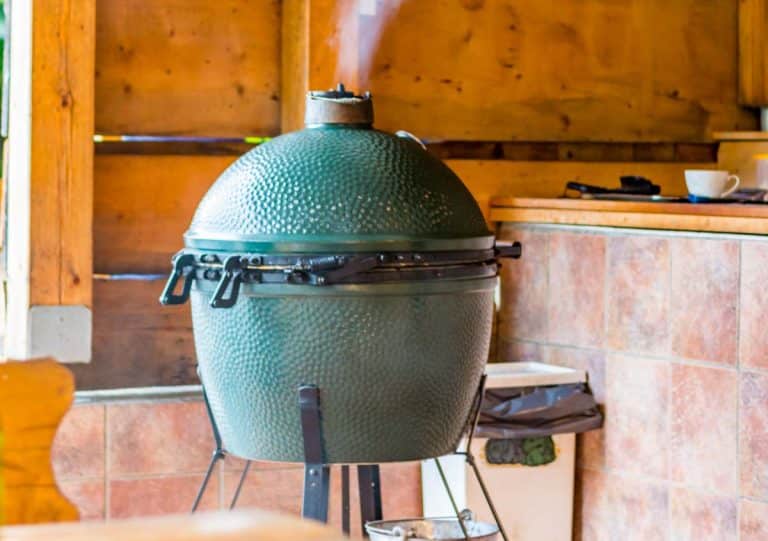
The cooking area, specifically the built-in grill station, is the perfect focal point in an outdoor kitchen, with grills stretching 24, 36, and 54 with as much as 56 inches wide. Grills or deep fryers are versatile and offer more cooking methods aside from the fact that it is the hallmark of outdoor activities completing the needed equipment profile.
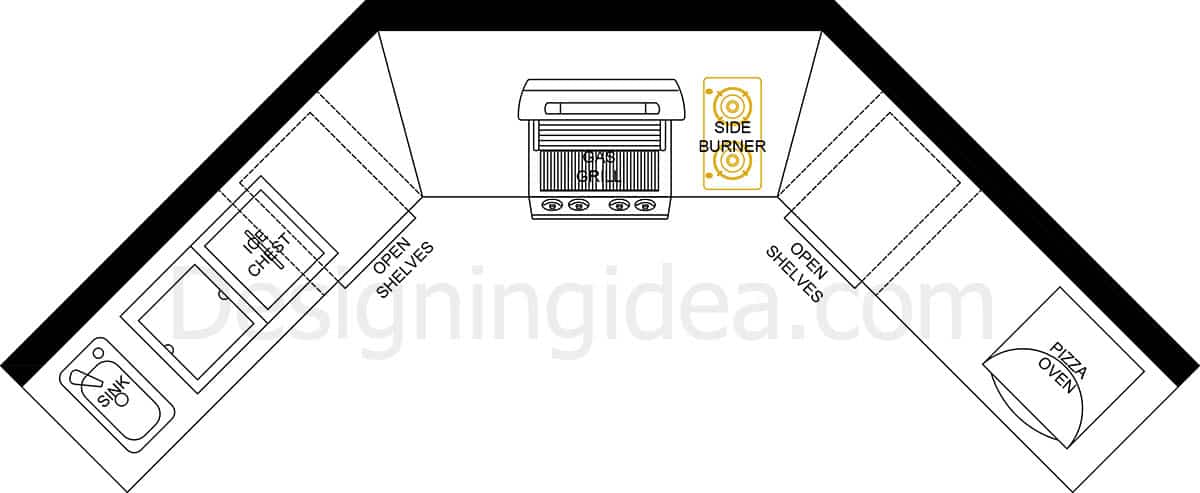
Tip: Don’t forget to consider proper ventilation when planning since grills produce significant smoke. The direction of wind and location of hedges or walls can affect wind orientation.
Pizza Oven Integration
Incorporates a wood-fired or gas pizza oven as a focal point.
The wood-fired pizza oven with hip roof is a popular centerpiece in Mediterranean as well as in contemporary-themed outdoor kitchens. It’s a staple in many shaded outdoor kitchens that gives volume to the workspace and entertainment area.
Instead of your typical gas grill as the focal point, the pizza oven is oriented at the center of the kitchen layout. You can choose between a wood-fired or gas pizza oven. Although the wood-fired pizza oven can demand a larger area as it requires thick walls and a vent for burning wood. Essentially, the wood-fueled pizza oven is like your fireplace in terms of needed square footage. This commands presence, making the pizza oven the perfect focal point.
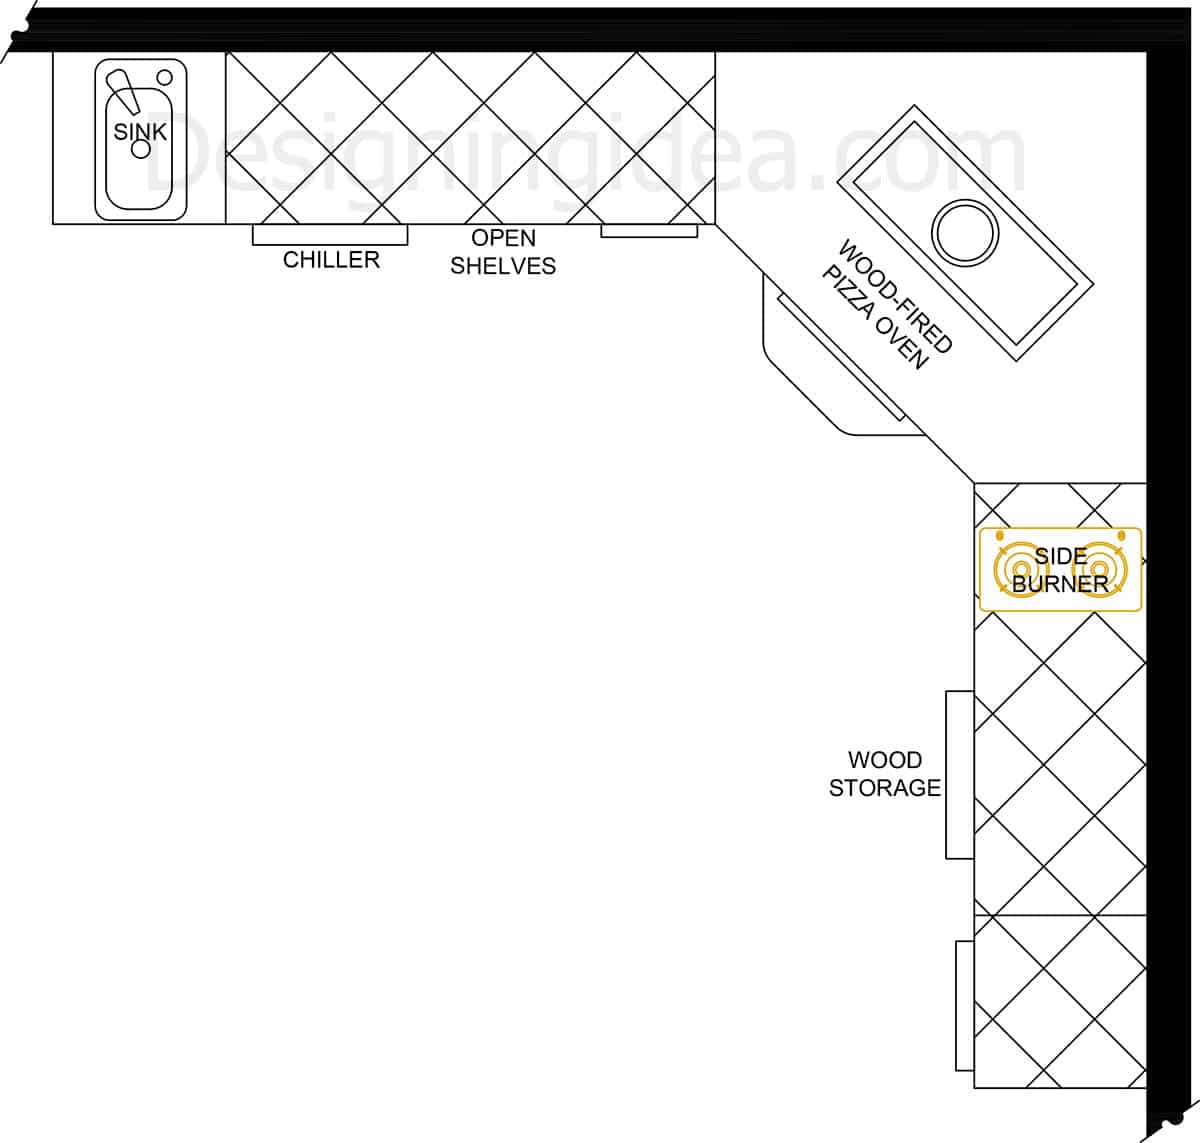
Tip: It is recommended to have 9 inches of countertop clearance between hot appliances and other equipment or walls.
Bar-centric Layout
Expect a busy kitchen area that includes active social activities that will require an efficient central bar area.
Best for people who just love to entertain, the bar-centric kitchen countertop layout focuses on lounging areas and food and drink service. When staging your social area, aim for a relaxing ambiance with comfortable chairs and right-leveled work surfaces.
- Typically connected to a pool, garden, patio, or any other outdoor activity area, it serves food and drinks to users.
- A flat-screen or projector is a staple in entertainment kitchen layouts.
- Streamlined and modern effect.
- With its two separate countertops, you can separate workstations effectively.
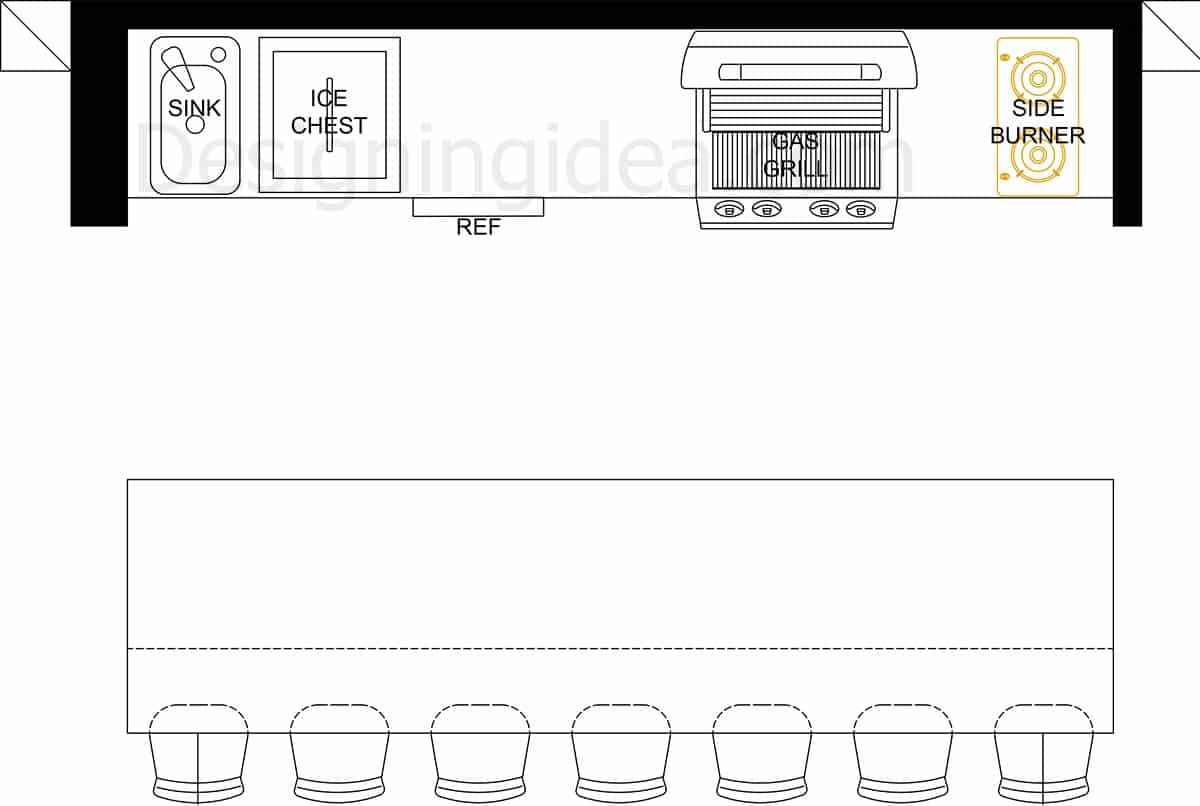
Similar to your galley kitchen in interiors, the outdoor version can also have the three types of galley, namely, single-wall galley, peninsula galley, and island galley. The single-wall galley places all cabinets and appliances against one wall.
The minimum depth of counters is 12 inches, with a recommended 12 inches to 18 inches of countertop overhang. Also, make sure to have 6 inches of space between seats.
You can use one of the outdoor planning apps to replicate and further add to these designs. If you’d like to have one of our experienced interior designers create a custom plan for your home, let us know.

