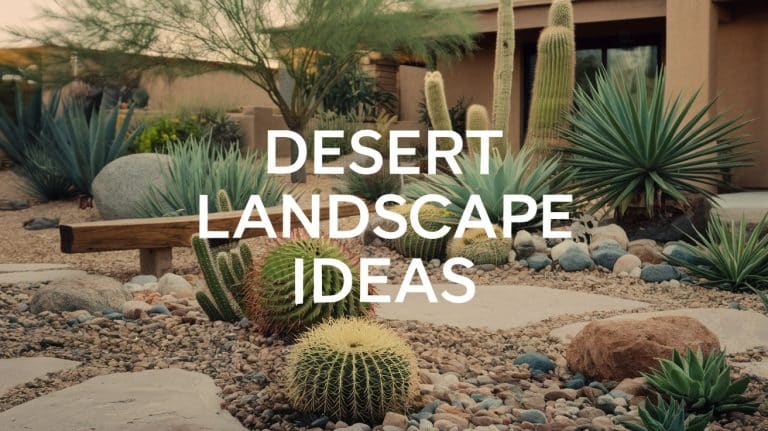
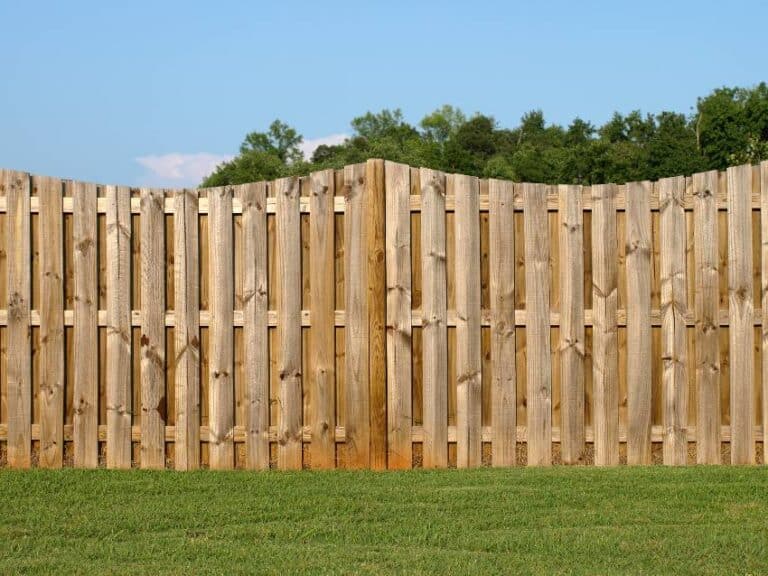
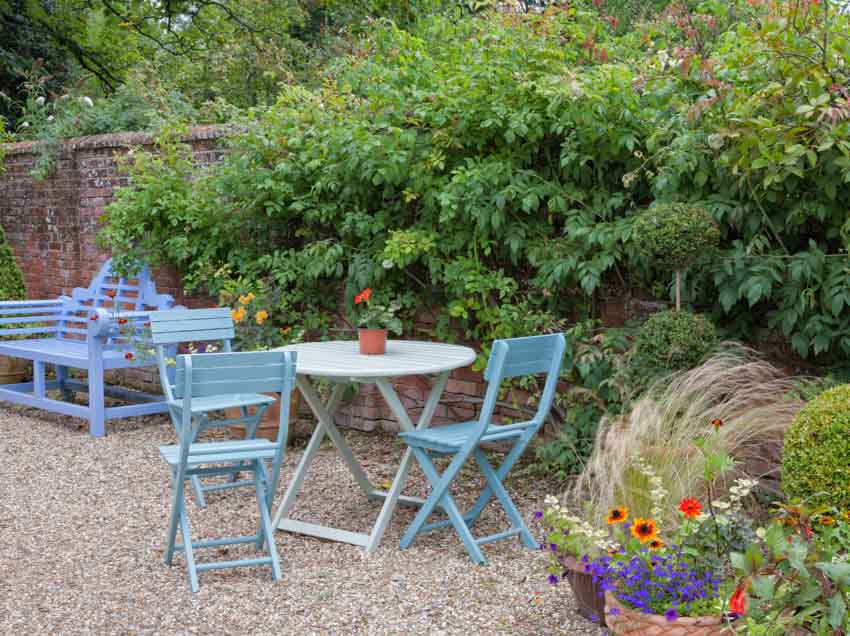
Gravel Garden Ideas (Plants & Landscaping Designs)

Gravel gardens are a dream come true for gardeners who hate digging up soil year after year. Instead, only a few smaller areas are replanted, and the work is minimal. Having a gravel garden is a great way to have plants and shrubs you love without the hassle of dealing with soil and mulch, much less having to continue to test soil and weed out unsightly invaders. The risks of pests are much lower in a gravel garden, and they require much less water than in a traditional soil garden. That being said, there are lots of variations in gravel gardens. Some gravel gardens may be only partial or may be planted to one sole species of plant.
On the other hand, they can also be grown with a much wider variety of plants and succulents than the soil can support in some regions, especially in hot, arid climates. While gravel gardens may not be perfect for a cold, wet climate, they certainly do well where the sun shines. In this gallery of gravel garden ideas you’ll find how to make a garden using gravel, type of gravel, tips on depth & layout, and best landscaping plants to use.
How Do You Make a Gravel Garden?
Putting in a new gravel garden is a bit of work. You’ll need things like a tiller to break up the ground if you plan to put in a gravel garden over topsoil, as well as a shovel to remove soil and make room for sand and gravel. It’s also important to keep tools such as a tape measure, wheelbarrow, and level on hand for steps that require them. Here is a basic, step-by-step starting guide on building a new gravel garden:
• Measure out your area: Plan out where you intend to put your gravel garden. Make sure that you choose an area that is well-lit for most of the day, and that will not be sprayed with above-ground sprinklers.
Think about how much area you want to cover, the shape of the garden, and how many plants you want to fit into it. This is the time to consider how you want the overall design to look.
• Remove debris and topsoil: At this point, you’ll need to begin removing any rocks and the top few inches of topsoil from the garden area. It’s sometimes best to do this with a shovel, but if the ground is already turned or is especially smooth, then a tiller can be used to break up the top layers here. Make sure that any weeds are pulled and that their roots are removed along with them.
• Dig out the garden area: If you plan on planting larger or woodier shrubs in your aggregate garden, you’ll want to dig deeper into the soil. A good place to start is about 15 to 18 inches down, which allows for the roots of larger plants to establish more readily in the garden. For smaller plants or cacti that don’t require much room for roots, 12 inches should suffice.
• Level the bottom layer of soil: This step may seem redundant since there will be plenty of leveling along the way, but rest assured that this step is crucial to maintaining an even garden and preventing spots that sink.
This is as easy as putting on a pair of boots and tamping down the soil one footstep at a time. It can even be fun if you have other people to join in and help!
• Add the first layer of sand: The sand for this layer should be coarse. Some big box stores have labeled bags of sand that indicate which step they should be used for in making a level surface.
This layer doesn’t need to be incredibly thick, but make sure you at least have 2 inches for very dry, hot climates and somewhere between 3-4 inches of coarse sand for very wet climates. Use a rake or shovel to level out the sand, and it’s on to the next step already!
• Pour in the second layer of sand: This layer isn’t necessary for the hot and dry regions of the country, but it’s definitely a must in soggy climates where soil likes to sink. An inch of this slightly finer sand is sufficient, and you’ll need to once again level it out.
At this point, when building paver types of patios or other flat outdoor surfaces, another layer of sand is used; however, since we’re filling this garden with natural stone mix, it isn’t necessary in this case.
• Begin to add a small amount of gravel: This is the base layer of natural stone mix, where the bottom of the roots of your plants will sit before they’re filled around.
This layer should be minimal and should be about an inch or two thick. Make sure that the layer is nice and even. This is a good point to start adding placement containers if you plan to add larger plants.
• Prep for larger plants to be added: For this, choose some containers that are slightly bigger than the ones that your plants come in. When you’ve decided where each plant will go, add another 2 inches of aggregates.
Remove the containers carefully so as not to disturb too much of the aggregate and set the loosened root balls of each plant into these indentations in the natural stone mix. Add some extra soil around the base of the plants in a natural stone mix to help support the plants as they establish roots and find their way into the earth below.
• Fill in the rest of the gravel: While some folks prefer to mound the natural stone mix around the base of their plants, you can choose to either keep a flush, flat look or stick with the traditional mounded look.
Your natural stone mix should ultimately sit a couple of inches above the surface of the soil to prevent weeds from creeping in, and also to prepare for the aggregate to settle a bit once it’s been watered a few times. Be sure to frequently water any plants in the natural stone mix garden, and if this is too much maintenance, you can simply install a drip irrigation system, which is minimal work and easy to maintain.
What Gravel Types to Use for This Garden

Most gravel types available for natural stone mix gardens will work perfectly fine for gardening purposes. However, some are better to use than others with plants. One major aggregate type to avoid, but is readily available, is lava rock. Lava rock breaks down quickly, absorbs enough heat from the sun to damage plants, and can be difficult to remove because of its pumice-like properties. Aside from this one type of aggregate, the possibilities are endless.
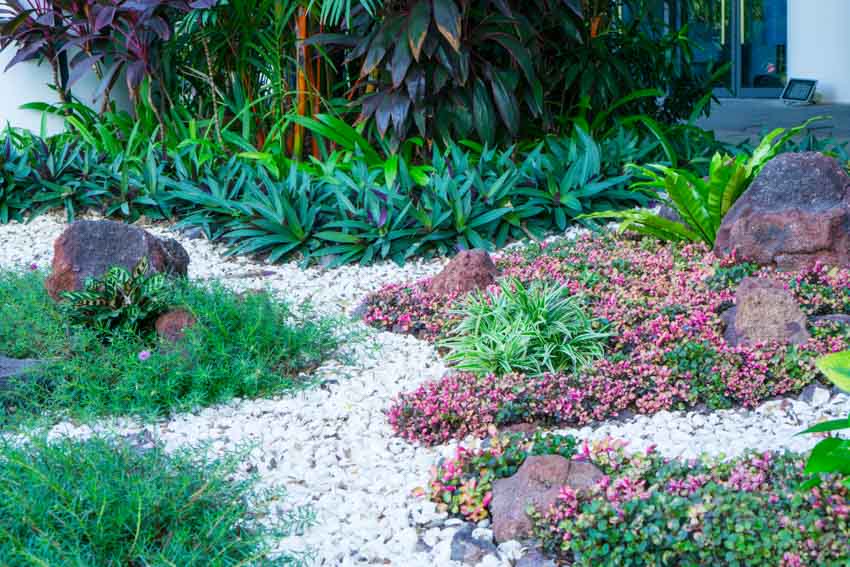
Decorative aggregate is usually the best for natural stone mix gardens, and it can be found in a wide variety of colors. Artificially dyed gravel can fade out, but fortunately, there are lots of variations in natural stone mix colors that are natural, so you can choose whichever kind of small stone aggregate you like.
White quartzite aggregate stone makes a fantastic backyard gravel design option, as it reflects light, heat, and is easily manageable. It is also heavy relative to other natural stone mix types, such as basalt, so it’s great for using a leaf blower to clean out any debris or pests. Another popular choice is pea pebble. These small stones have rounded edges that are comfortable under foot and offer a wide variety of color options.
How Deep Do You Need to Go for a Garden with Gravel?
This question depends directly on what types of plants you’ll be planting. A good rule of thumb is to dig out a few inches further than where the bottom of your plants will sit. This ensures that the newly placed plants will have adequate room to grow some heartier roots for establishing in their new home. If you can only dig down enough to replace topsoil with gravel, you may consider using some weed paper (or black plastic) to keep weeds from taking root and overgrowing the gravel.
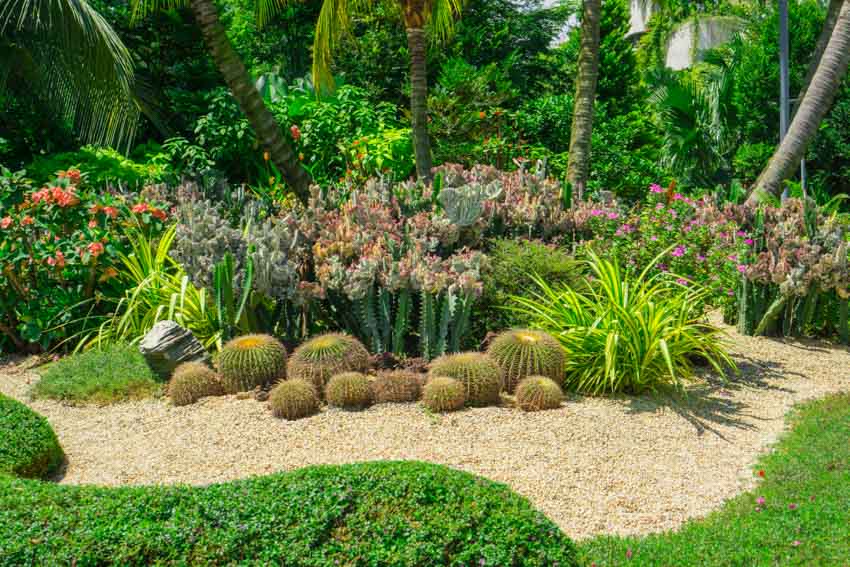
For shallower gravel gardens, larger plants may not be an option. If you don’t have the ability to dig out a deeper space but still want the look of a flourishing gravel garden, you can plant something that requires less root space, such as sedums, succulents, and small cacti.
Keeping up a succulent gravel garden is easy, and it is among the delightfully colorful desert landscape ideas one can consider. Try to stick to desert plants that are acclimated to your climate, such as those available at local nurseries.
How to Lay Gravel in a Garden
While it may seem as simple as dumping some rocks into your newly dug hole, working with gravel does require some finesse. As you lay gravel in the garden, stick with smaller amounts at a time, which are much easier to spread or manipulate than larger quantities. By adding a little at a time, you can more easily gauge how level your layers are, where your plants will go, and how to add to spaces between plants without harming their root systems.
That being said, laying smaller amounts of gravel at a time also keeps the dust down, which is a common issue working with gravel. Dust from gravel can not only harm your lungs, but it can also irritate your sinuses and cause some adverse effects.
Try not to dump an entire load of gravel into the workspace at once, and use caution when adding gravel around the bases of plants to avoid crushing any important roots the plants may need to get better established.
How to Make a Gravel Bed for Your Garden
Gravel garden beds are one of the easiest types of gardens to maintain. This looks just like making a traditional gravel garden, but you’ll need to plan out a design for building the walls of a raised gravel garden bed.
Use the same steps for planning out the area, and then construct your raised bed to be sturdy and withstand the pressure of gravel, which is heavier than soil. Retaining wall bricks are great for this purpose, as they can be adjusted once they begin to shift naturally.
Instead of adding soil to a raised bed, you’ll be planting your plants into the soil and then covering them with gravel. This method is preferable for climates where plants need more moisture from the ground to survive.
Essentially, all you need to do is break away the uppermost layer of topsoil, add a good raised bed soil mixture, and then plant your plants as you normally would. Make sure that your plants are not too close together and that they all have the right amount of sunlight they require in their forever spots.
At this point, make sure you have a few inches between the top of the soil and the top of the bricks or lumber you used to make your raised bed. After your plants are in the ground, it’s important to water them before adding gravel.
Since soil is fluffier when dry, it tends to shrink down a bit with water, so completing the first watering before adding gravel will help to prevent losing gravel under the surface of the soil layer.
Fill in the gravel to reach the top of the terraced garden bed, then make sure that each plant has a small indentation around the base of its stalks so that they have room to breathe.
Adding Plants to Gravel Patio

For pre-existing gravel, the process of planting looks quite different. Instead of prepping the ground underneath, you’ll be removing gravel to make way for new plants. A good rule of thumb is to always start by arranging your new patio plants where you’d like them to go. This way, you can make adjustments to how they look, and decide if they’re in the right places. From here, you can start the digging process.
Here’s a step wise guide for how it’s done best:
• Dig out holes for each plant: You’ll need the gravel from each hole you dig later, so make sure you save it in a bucket or other container where it won’t be mixed in with dirt or debris.
For each hole, you’ll want to make sure that the hole itself is an inch wider than the loosened root ball for each plant so that you have some room around the plant to add soil. The holes should be deep enough for the plant to sit happily at the bottom with its primary stalk above the gravel’s top.
• Set your plants in their new homes: Before you place each plant into their respective holes, make sure you loosen the roots a bit by rustling up the bottom inch or so of the roots.
Doing so will encourage new roots to form, which will eventually help the plant establish itself happily in its place. Then, add a small amount of soil to the bottom of each hole. Place the plants atop this layer.
• Fill the surrounding areas: Once your plants are where they need to be, add a bit more soil around the base of the plants to give them one last boost before you close them in. Gently water the soil here, then add gravel to the top of the hole.
While you can mound a bit near the plant for a nice aesthetic effect, try to avoid piling gravel up the main stem of the plants so they can breathe well in their new environments. Even roots need some airflow!
• Water regularly: Once you have your plants in the ground and covered with gravel, you can spread any remaining gravel evenly over top of the surface of your gravel patio.
Make sure to water these new plants regularly for the first few weeks of their residency in gravel to help them build healthy root systems that can find their own water in the ground underneath them. Remove any spent leaves or blooms that fall to the ground to keep a tidy look.
Types of Plants for Gardens with Gravel
Depending on your gardening experience, you can grow almost anything in a gravel garden. That being said, it’s best to stick with plants that can be a little drier than what they would expect in a standard soil garden.
Cacti and succulents, sedums, and sun-loving herbs are great beginner plants for a gravel garden. Woody shrubs such as juniper, rosemary, and azalea look fantastic in gravel, whereas hibiscus brings out a wonderful contrast between tropical blooms and any color of gravel.
Remember that plants that shed many leaves or dead blooms will make a gravel garden more difficult to keep clean, so try to choose plants with fewer leaves or that don’t shed leaves in the fall.
Desert plants are generally happiest in gravel, so try to experiment with different mixtures of plants of this variety if you’d like to keep it simpler. Agave, aloe, and prickly pear cacti are fun gravel garden companions.
Planting in Gravel Tips
Planting in aggregate stone can be tricky to master, especially in extreme climates. If you live in a wetter climate, you likely don’t need to water nearly as much. However, in very hot and dry climates, some added perlite in each planting hole or drip irrigation can help out tremendously.
Try to avoid using high concentrations of fertilizers in natural stone mix gardens, as the fertilizer won’t be as evenly spread out before reaching the roots. Instead, use a weaker mixture of fertilizer, and fertilize only in a pre-watered aggregate stone garden for best results. This gives the plants more of a chance to absorb what they need, rather than being bombarded by excess nutrients.
Another great way to maintain a pebble garden is to refresh the pebbles once a year. This can be done simply by removing the top two inches of natural stone mix, adding some soil around the bases of your plants, and then replacing the rinsed gravel overtop the garden.
This can help revive the look of a natural stone mix garden without having to replace the pebbles as often and helps the plants in the garden to continue to thrive and grow. Prune woody shrubs planted in gravel once a year, and try not to let them overgrow.
How to Decorate Your Garden
The most fun part about having a small stone aggregate garden is the endless decorative possibilities! Anything from gnomes to statues to certain backyard essentials can look great in a natural stone mix garden, but there are tons of ideas out there waiting for you to discover them.
Here are a few great ways to decorate a natural stone garden for some extra spunk:
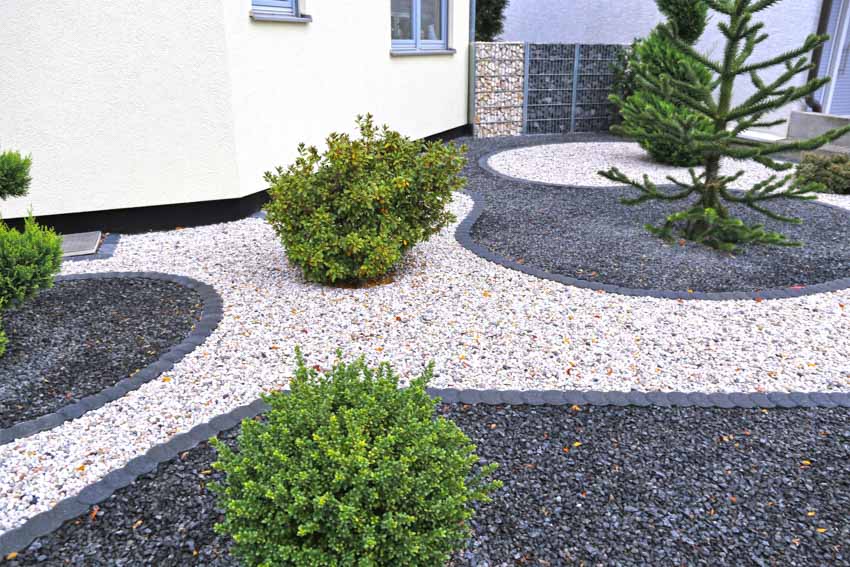
• Sprinkle contrasting stones throughout: Some natural stone mix gardens can look extra amazing just by adding a little bit of different-colored natural stone mix, or even luminescent stones.
Luminescent stones work by gathering up the sun’s energy and then releasing it at night, which makes for a super cool garden that can be enjoyed anytime, day or night.
• Add some characters: If you like frogs, then by all means, add some frog sculptures! If you’re more of a garden gnome person, these are great too; virtually any kind of sculpture, whether ceramic, stone, or metal, can look fantastic as a decoration in a natural stone mix garden.
The only rule is to not overdo the additions here; a few are great, but too many may take away from the natural beauty of the garden.
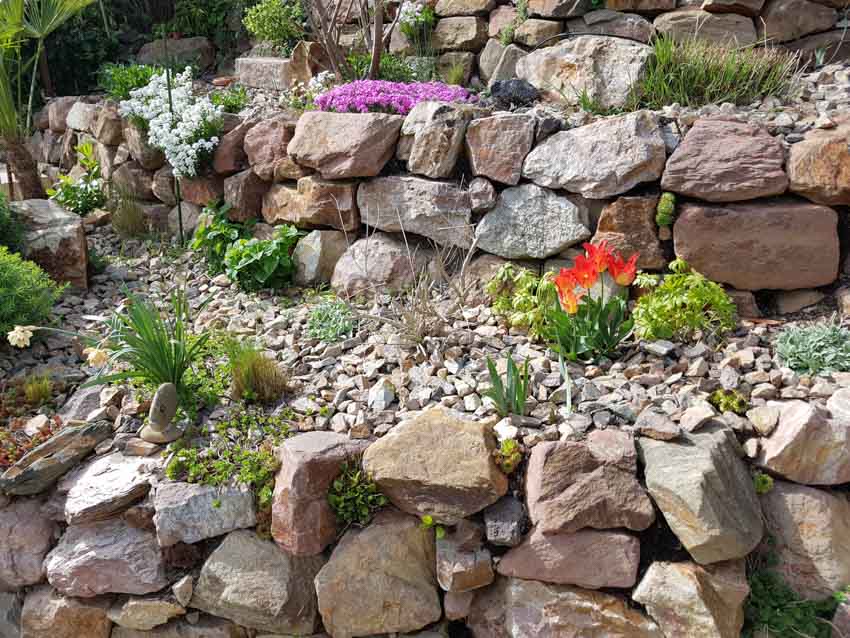
• Contrasting sized stones: These can either be strategically placed stepping stones for weeding, or even some zen rock stacks. Some gardeners even like to place some stone rings around the plants to help accentuate their presence among the natural stone mix
This also helps to keep weeds from making their way into your plants’ soil underneath. You can fill in these rings with mulch, different colored natural stone mix, or even soil.
Should You Put Sand under Gravel?
Sand is an important component of a successful small stone aggregate garden. It serves many purposes and helps prevent natural stone mix sinking, excess weeds, and even some burrowing pests (moles, we’re talking about you).
Sand also helps build a level foundation underneath new small stone aggregate, keeping it nice and even up top so that your small stone aggregate garden looks good months or years after you install it.
While sand is great to have under small stone aggregate, it isn’t necessary for hot and arid climates. If your natural soil is incredibly dry and hard, then sand is rather obsolete here.
The naturally dense, dry soil in these climates is usually enough to support the weight of aggregates in the ground without sinking, and weeds will already find it difficult to break through the soil, let alone a layer of small stone aggregate overtop.
When using sand, make sure you use enough to keep a level working surface throughout the entire process.
How Do I Keep Weeds from Growing Through The Gravel?
Weeds will be weeds, which means they’ll grow just about anywhere they can send a taproot down. This is a little trickier in small stone aggregate gardens, but some weeds don’t require real soil to establish.
The most effective way to keep weeds from growing in your small stone aggregates is to routinely remove any seedlings that might be trying to build a home in your natural stone mix garden. Nevertheless, some weeds are bound to get through, so you will need some extra measures in place.
Weed prevention is important with small stone aggregate gardens because once weeds take root, they’re difficult to get rid of without harming your desired plants. That being said, products are available that help keep weeds from sprouting without harming your plants, which are great for using just after planting to head off intruders.
If you keep up on these products, you’ll be able to avoid having too many instances of rogue weeds. Pull any ambitious weeds before they get very tall.
How Do I Make My Pea Pebbles More Solid?
Building a solid base is the best way to prevent small stone aggregates from shifting or sinking. As we mentioned before, sand is a great way to build a more solid base layer for a natural stone mix garden, but you can use a variety of different methods to prevent this from happening.
A great method is to use something more solid than sand if that isn’t enough. Try laying down some wood planks or even stone tiles at the bottom of your garden before adding sand to provide even more stability.
You can also simply use more small stone aggregates. It’s normal for natural stone mix to settle in a year or two after it is first applied, so continuing to add natural stone mix overtop will slowly build a more solid foundation as the layers underneath begin to break down.
If you want a walkable natural stone mix surface, try using finer stone aggregates for the top layer, but not so fine that water has a difficult time reaching the ground below. Again, roots need to breathe too, so make sure that however you stabilize your small stone aggregates, it doesn’t compromise the root systems of your plants.
See more related content in our article about garden landscaping design software on this page.
To showcase highly specific designs, some images on this website use advanced AI-generation software to illustrate ideas and room inspiration. See our editorial policy to learn more.