Designing With Gray Kitchen Cabinets (Color Matching & Tips)

Using shades of gray as the kitchen cabinet is continuing to be popular in both contemporary and classic kitchen designs. No matter what style or design of the kitchen, using gray cabinets seems to give it a more modern, sophisticated & elegant appeal. And just like white and brown, gray has timeless and universal appeal. [toc]
Choosing Gray for Cabinets
There are many shades and different undertones of grays you can play around with, depending on the design of your space and the ambiance you’d like to achieve:
- Neutral or mid-toned grays give any cabinet design a contemporary appeal, regardless of the carcass and panel design
- Warm-toned grays look great paired with finishes and give a more homey and relaxed ambiance
- Cool-toned grays would give your kitchen a young & refreshing look without being loud
Beyond tone alone, pay attention to a gray’s Light Reflectance Value (LRV): mid-50s LRVs strike a nice balance between depth and brightness, while grays above 60 feel airy, and those below 40 lean dramatically. Undertones matter just as much—greens read earthy, blues feel crisp, and violets lend a subtle elegance, so always hold a large paint swatch upright in your kitchen’s actual lighting before committing.
Finish levels influence the vibe, too: a matte or eggshell gray disguises fingerprints in busy family kitchens, whereas a satin or high-gloss lacquer projects an ultra-modern look that bounces light around. Finally, let hardware tie it all together: brushed brass warms cool grays, matte black intensifies mid-tones, and polished nickel harmonizes beautifully with almost any shade.
Below are some great examples of different shades of gray kitchen cabinets to consider and how to match colors and finishes.
Light Gray
Using light gray cabinets is a great choice for those with a smaller kitchen space, who have less natural light, or who just want a brighter overall look. When using gray in your kitchen it’s important to have adequate lighting. There are many different options such as recessed fixtures, pendants, sconces, or under-cabinet lights.
You will want to carefully consider how much natural light comes into the room and the direction your windows face to get a good idea of the amount of light in the space. To give a light gray kitchen some contrast you can pair it with a darker gray island, or use white countertops and light wood or floor tile with excellent results. Another alternative is to mix and match a lighter gray for the upper/top cabinets and a darker gray for the bottom/lower cabinets.
For an effortlessly cohesive scheme, anchor light-gray cabinetry with a soft greige wall color (LRV 65-70) and repeat the hue in subtle ways—think linen seat cushions or a stoneware backsplash with gray veining. If you crave a punch of color, pastel accessories (sage, blush, or powder blue) sit comfortably against light gray without overwhelming the palette.
On the technical side, aim for at least 3,000 lumens of ambient lighting in a small kitchen; pair overhead LED wafer lights with a 3000 K under-cabinet strip to eliminate shadows on the countertop. Popular paint picks designers love in this category include Sherwin-Williams Repose Gray, Benjamin Moore Classic Gray, and Farrow & Ball Cornforth White—all proven crowd-pleasers that stay true in most lighting conditions.
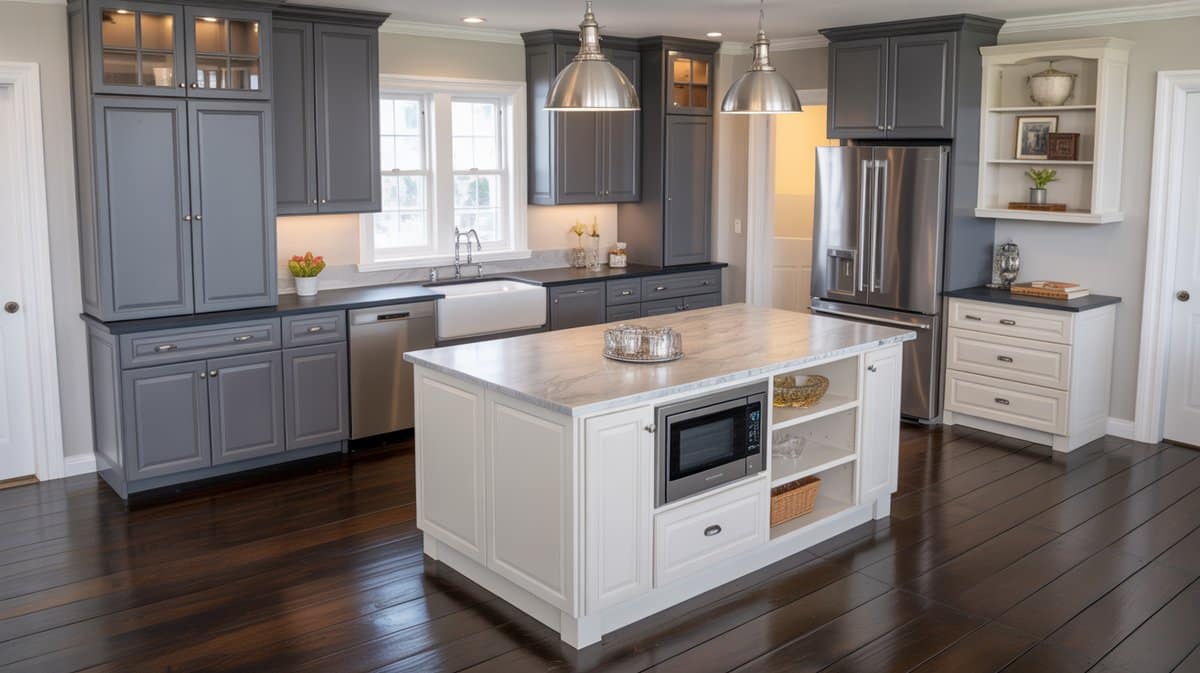
Dark Gray
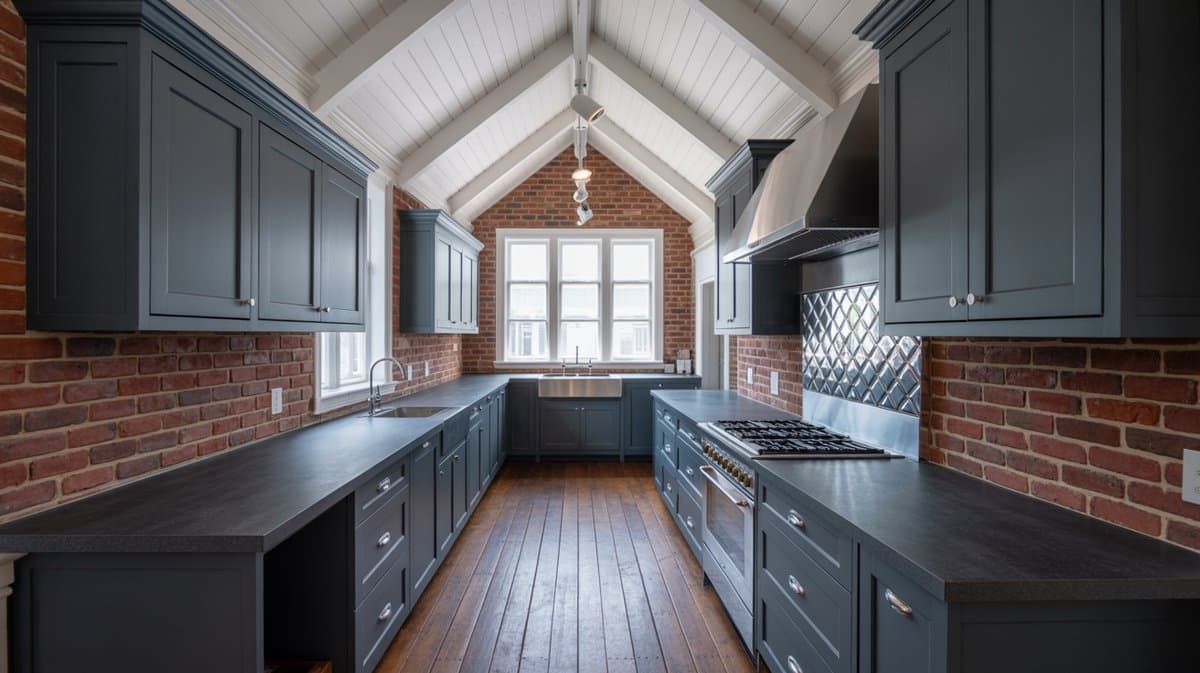
For lovers of a darker finish, a dark gray cabinet is an attractive choice. In order to ensure the cabinets do not make your kitchen appear too dark it is important to add proper contrast in the room’s design. This can be achieved by using a lighter wall paint color, light color countertops, light flooring, and accents. The color gray can look cold if not applied properly. The trick is to pair it with warm materials, such as wood, or to combine it with bold accent colors.
However, if you are using a lot of wood or marble surfaces you may want to select a neutral color palette to let the finishes speak for themselves without competing against bold accent colors. Gray is a very versatile color that can match with well with many colors and styles. You’ll find that many dark cabinet kitchens have a modern design. They can often be effectively brightened up with white finishes and plenty of lighting. To avoid a darker cabinet looking flat one can choose cabinets with a glossy finish such as an acrylic cabinet to make it stand out. (Visit our gallery of gray and white kitchens for more ideas using this design combination.)
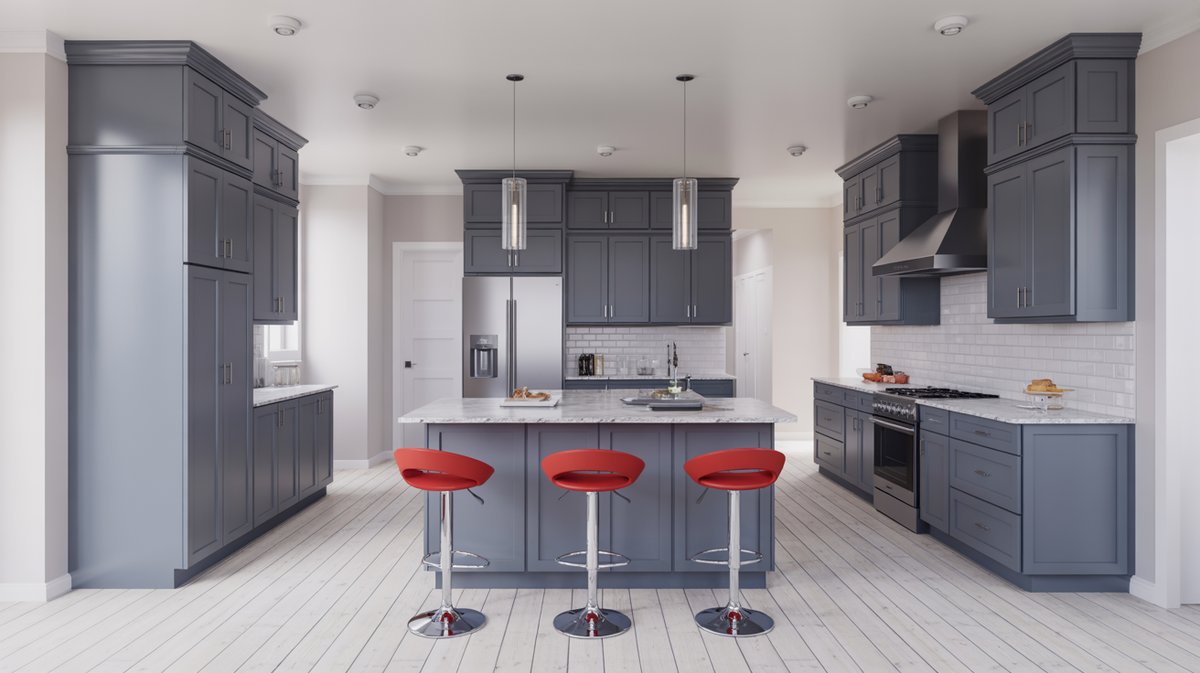
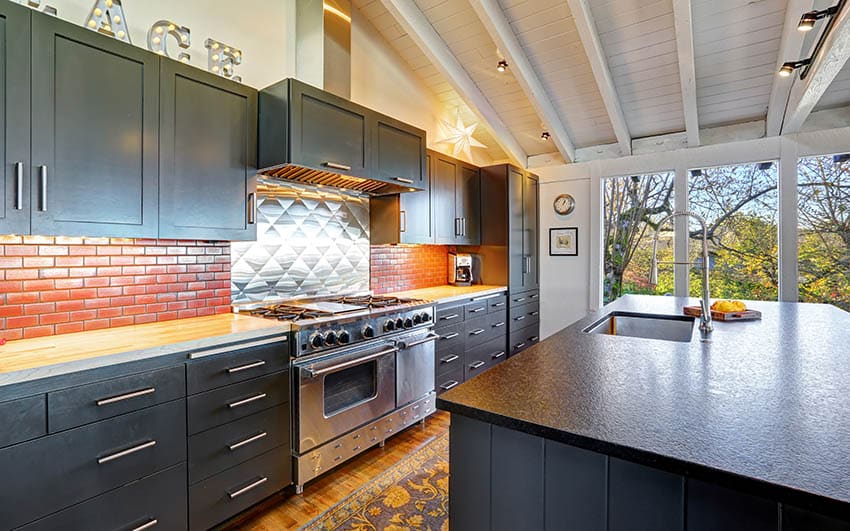
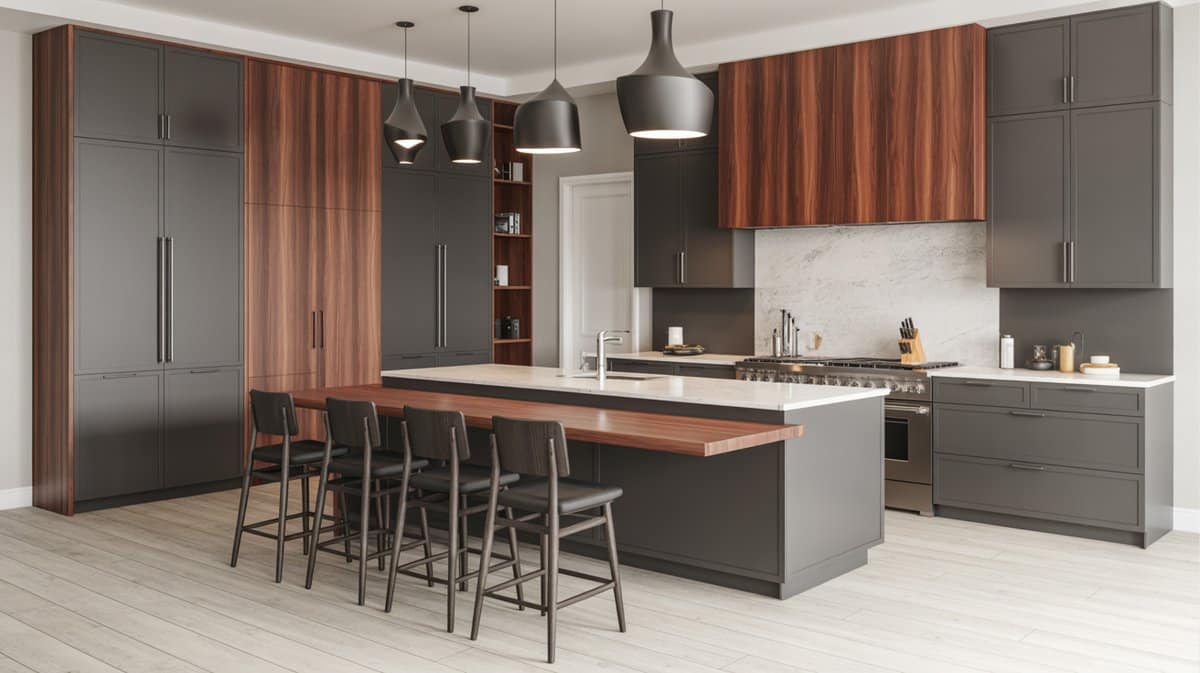
As this kitchen is placed in an open plan layout, it matches the main theme of the whole house. The color scheme uses dark grays with red accents, and the kitchen uses the same color scheme as well. To avoid looking flat, a darker shade of gray than the walls were used, while red leather was used on the bar seats for a pop of color.
When embracing moodier charcoal or graphite tones (LRV below 30), integrate layered lighting so the cabinetry never feels oppressive: wall sconces at eye level, puck lights inside glass-front uppers, and a statement pendant or two above the island. Countertops with a bold white vein—such as Calacatta quartz—or a warm butcher block prevent the scheme from skewing chilly.
To introduce subtle intrigue, specify reeded or fluted door fronts on a few upper cabinets or lean into tactile finishes like brushed oak veneers stained deep gray. Metallic accents are your friend: satin brass or aged bronze knobs deliver a heritage twist, while sleek stainless pulls keep things convincingly contemporary. Remember that a dark-gray backdrop makes colorful cookware or greenery pop, so display a few favorite pieces for a lived-in feel.
Painted Gray
Painting your cabinets gray can be done by a professional or on your own as a DIY project. If you decide to paint your own cabinets gray you generally have two choices. These are using a paintbrush and a small roller or spray painting them. Often people opt for using a paintbrush or roller as it can give more control and prevent overspray which is common with spray painting. For those who do want to use spray paint, it’s advisable to use a designated workshop or do the spraying outside.
Before beginning you will want to empty all of the cabinets, remove any obstructions or accessories from the space, and cover all of your appliances and countertops. You will need to remove all of your cabinet hardware including hinges, pulls, and knobs. To make the process go smoothly it’s a good idea to label each door with masking tape so everything can be reattached easily later on.
You will want to perform your painting on a nearby work table, a makeshift workbench, or at the very least on a drop cloth. Before painting you should prep all of the cabinets by first thoroughly scrubbing them to remove any excess dirt or grease. For those who intend on adding new hardware, you will want to fill the old hardware holes with wood filler. After that, you should sand the surfaces down using 100 grit sandpaper to smooth things down for painting. Make sure to remove all of the dust residue from the cabinet surfaces.
For best results, the cabinets should then be primed before painting. One of the difficult things with many types of wood cabinetry is its grain showing through the paint. For heavy grain wood cabinets such as oak, a sanding sealer can be used after cleaning and sanding to avoid needing many coats of primer.
Painting with an angled brush and a mini roller is a good way to apply the paint. Start your painting with the angled brush and finish with the roller for total coverage. A coat of satin polyacrylic sealer can be applied with a synthetic brush to provide a protective top-coat. After painting you can reattach the doors and drawers and install the hardware.
Opt for a hybrid alkyd-acrylic enamel if you want furniture-grade durability without oil-based fumes; it levels beautifully and cures rock-hard within a week. For the smoothest DIY finish, invest in a $20-$30 foam-drum mini hot-dog roller for flat expanses and a 2-inch angled sash brush for profiles. If you decide to spray, a budget-friendly HVLP turbine sprayer with a 1.3 mm needle will atomize cabinet paint nicely—just strain the paint first and practice on scrap.
Plan on two coats of high-bond primer plus two color coats, lightly scuff-sand (220-grit) between each. Let doors cure on a wire rack for at least 48 hours before rehanging, and wait a full 30 days before aggressive cleaning. Finally, choose a washable, non-yellowing water-based polyurethane or cabinet-grade clear coat to lock in color and repel grease.
For those with wood cabinets, it’s not always necessary to completely remodel your entire kitchen. If the existing cabinets are still in good condition and the kitchen layout still works for you, painting over the existing cabinet finish can be a quicker and more economical option. Painting gray over the existing cabinets can instantly spruce up your kitchen and give it a new look that would easily match with other colors or details you might decide to add later.
Gray Islands
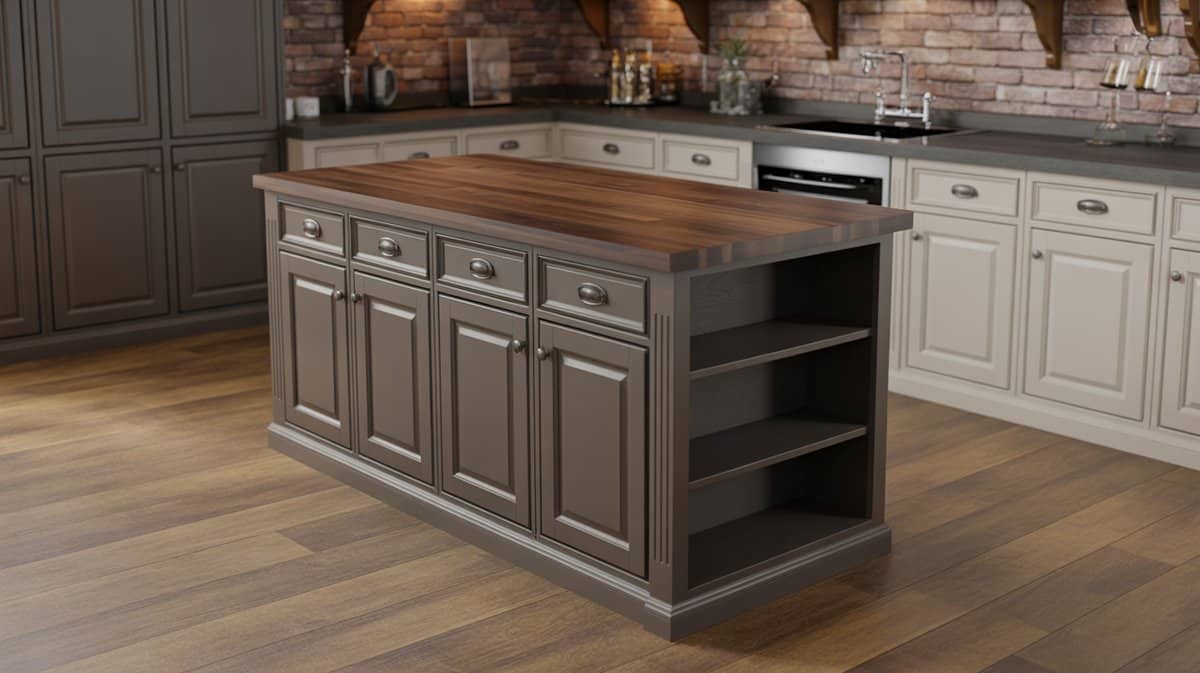
Gray kitchen islands can be alluring especially when paired with contrasting main cabinet colors, or a variety of textures and finishes. Gray islands can become a focal point of the kitchen when paired with a contrasting cabinet shade such as white. Elements such as waterfall countertops, natural lighting, and a mixture of colors can help keep the design interesting and attractive.
For those with a smaller kitchen without an existing island, there are portable islands available to purchase. These can provide the look you want, as well as more counter space for meal preparation, or can be used as a place for eat-in dining.
Functionally, a gray island is a perfect place to hide deep drawers for pots, a pull-out trash system, or a microwave drawer, keeping wall runs clutter-free. If the island doubles as dining space, allow 12-15 inches of countertop overhang and budget about 24 inches of width per stool for comfortable seating.
Visually, consider a ¾-inch waterfall edge in the same quartz as your perimeter counters to create a chic, continuous ribbon of stone around the island. Want extra contrast? Specify shiplap or vertical slat paneling on the island base and paint it the same gray—texture alone will make it a focal point. Finally, integrating LED toe-kick lighting not only adds drama at night but also makes the island appear to float, enhancing its statement-piece status.
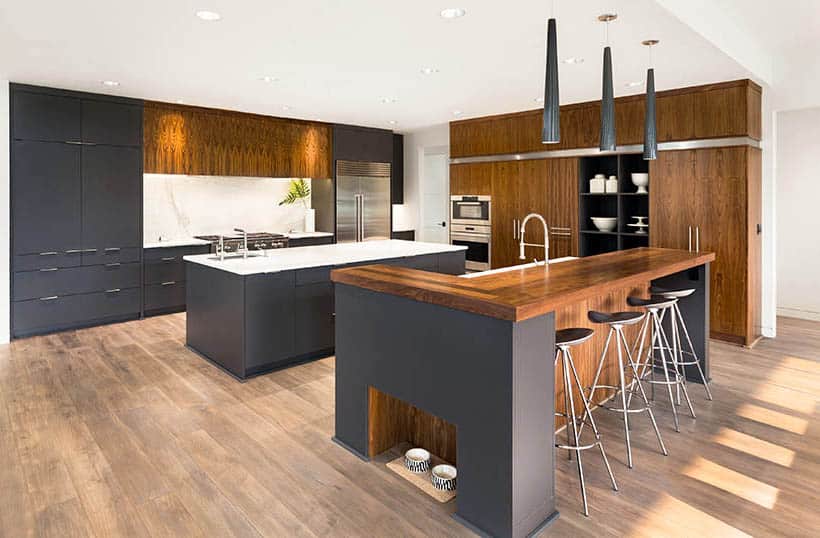
The dark gray and wood laminate combination on the cabinets gives this contemporary kitchen a very sophisticated appeal. The dark gray laminates create a bold contrast against the pale wood laminate floors and make it really pop. One large kitchen island with seating and one with a built-in sink provide plenty of space for meal preparation and eat-in dining.
Two different faucets provide ample space for meal prep and clean-up. One faucet has an extra large gooseneck spout for large pots and pans. An interesting feature of the breakfast bar island is the pet food bowl nook. The pet food nook provides a great place for keeping dog or cat food bowls out of the way without the worry of guests or family members constantly kicking them.
If you’re feeling bold, you can go for an even darker shade of gray for your kitchen cabinets. In this example, the kitchen is pretty spacious with lots of ceiling space and natural light, and the walls and ceiling are all in white, so using charcoal gray for the cabinets does not make the space too dark. For the kitchen island, it uses a textured black stone instead of the same white natural stone used on the main counter, to create a bit of a contrast and emphasize the different surfaces.
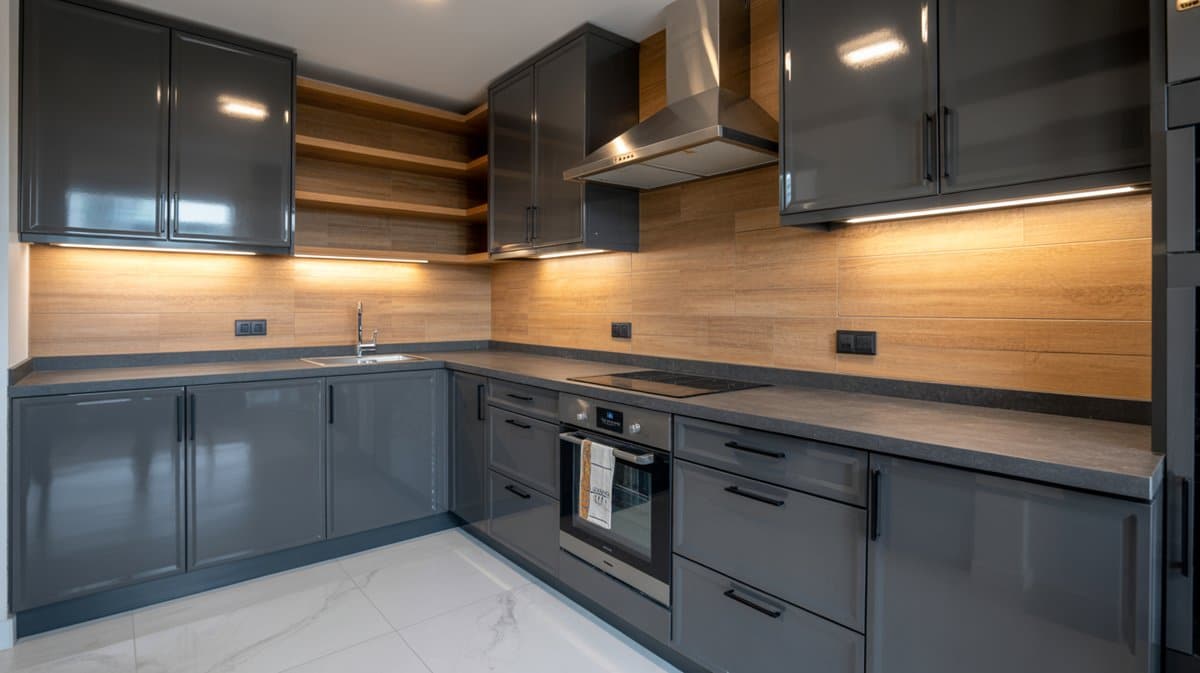
Clean lines and reflective finishes typical of modern design styles is the ideal style for small spaces such as this example. As such, in order to maximize the available space without making it feel too cramped, modular cabinets with glossy dark gray laminates were used.
As the space is small, appliances were built-in the cabinets to make the space loom cleaner and less cluttered. The use of wood laminates for the countertop and backsplash on the other hand helps add a subtle warmth to the small space.
Open shelves provide an area to display decor items and the no handle cabinets offer plenty of storage for this compact but well designed floor space.
You will need to remove all of your cabinets hardware including hinges, pulls and knobs. To make the process go smoothly it’s a good idea to label each door with masking tape so everything can be reattached easily later on.
For those who intend on adding new hardware you will want to fill the old hardware holes with wood filler. After that you should sand the surfaces down using a 100 grit sandpaper to smooth things down for painting. Make sure to remove all of the dust residue from the cabinet surfaces.
For best results the cabinets should then be primed before painting. One of the difficult things with many types of wood cabinetry is its grain showing through the paint. For heavy grain wood cabinets such as oak, a sanding sealer can be used after cleaning and sanding to avoid needing many coats of primer.
Painting with an angled brush and a mini roller are a good way to apply the paint. Start your painting with the angled brush and finish with the roller for total coverage. A coat of satin polycrylic sealer can be applied with a synthetic brush to provide a protective top-coat. After painting you can reattach the doors and drawers and install the hardware.
For those with wood cabinets it’s not always necessary to completely remodel your entire kitchen. If the existing cabinets are still in good condition and the kitchen layout still works for you, painting over the existing cabinet finish can be a quicker and more economical option.
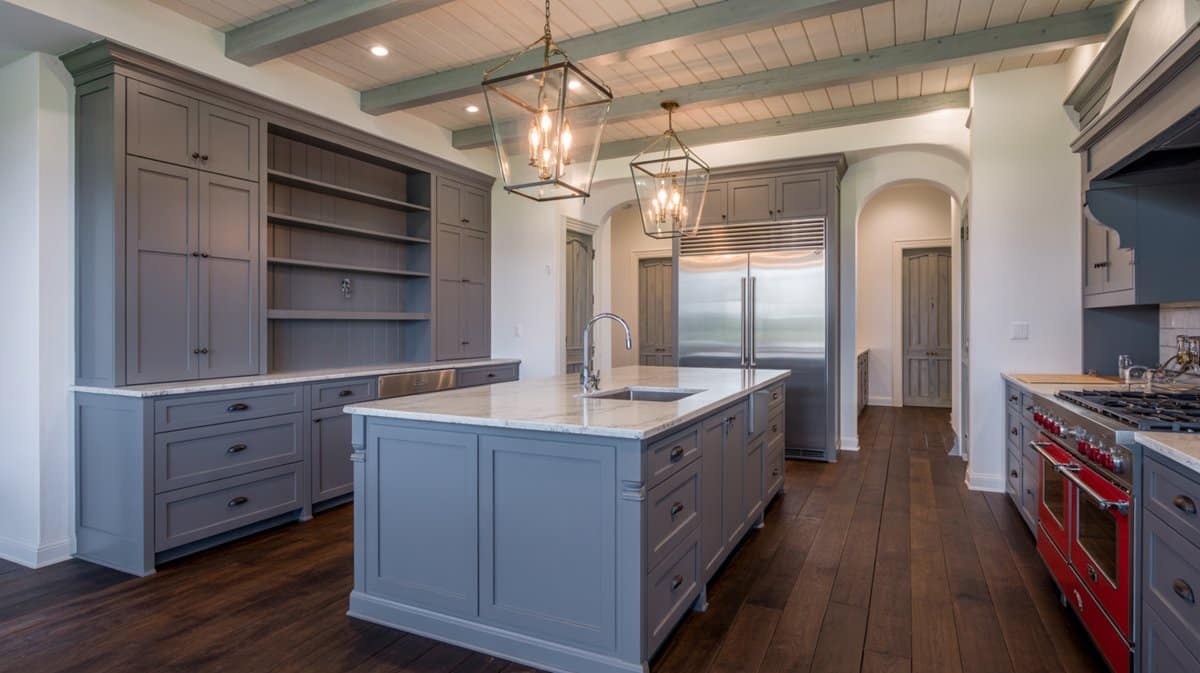
An almost blue slate gray color was painted on the base cabinets of this kitchen to give a fun and refreshing vibe yet retaining the understated chic look of the existing cabinets.
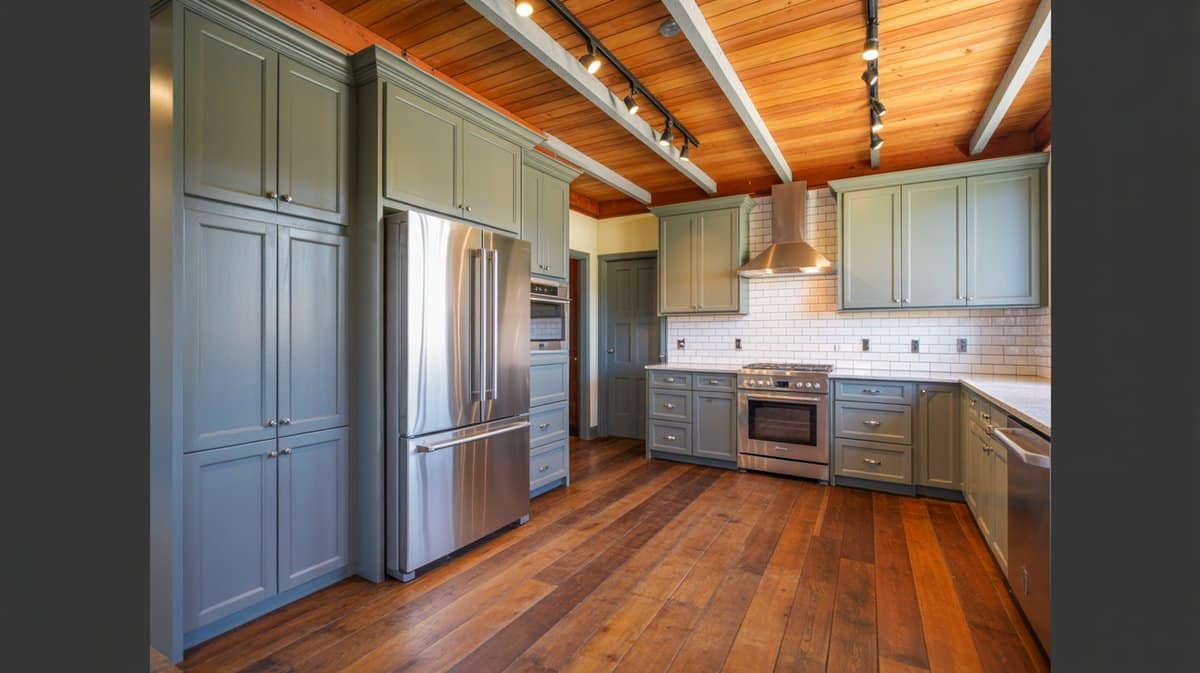
Dark gray definitely looks good with this contemporary kitchen design, especially when combined with the solid wood flooring and ceiling planks. It adds a subtle sophisticated appeal to small kitchen space that is sure to have a timeless appeal. The layout positions the stainless steel appliances in a triangle pattern. The under-counter microwave is in the corner and the dishwasher is conveniently located next to the refrigerator.
A light cool-toned gray is perfect to use if you instantly want to give your cabinets a modern update. Paired with stainless steel handles and appliances, this combination makes your kitchen look modern.
A portable island is useful for small kitchen spaces or for those who want the ability to position an island counterspace exactly where you want, when you want.
Classic French style kitchens tend to be a little busy with its details and panelings, but using light finishes such as white or light grays helps tone it down to make the kitchen look less crowded/heavy despite the intricate details.
A small kitchen with simplified French style cabinetry painted in light gray is able to capture the romantic appeal of classic kitchens, but gives it a more refreshing vibe. The combination allows the kitchen to look good with both classic accessories as well as contemporary stainless steel pieces.
This dainty kitchen pairs a cool-toned gray kitchen island with a taupe kitchen cabinet, adding a bright yet subtle pop of color to the kitchen space. This way, the kitchen retains its warm ambiance, while having a brighter centerpiece to balance out the colors.
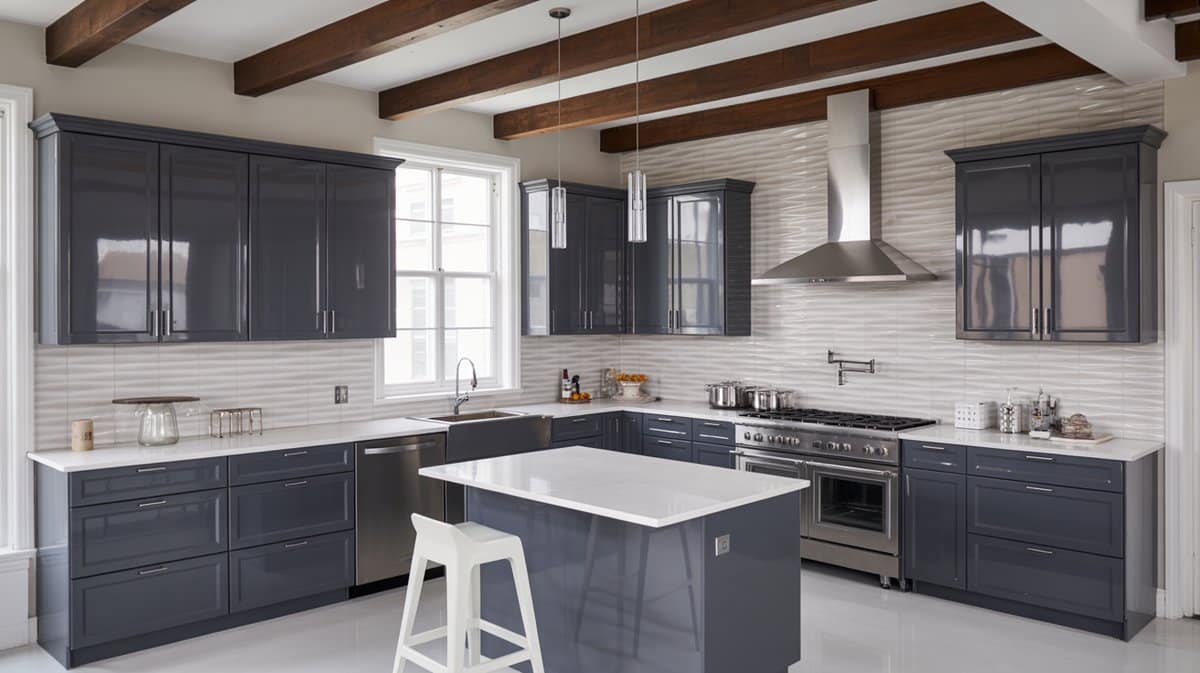
When used on contemporary kitchen spaces, dark gray cabinets with glossy finish gives it an elegant appeal and provides a bold contrast against plain white walls. Using dark gray is especially ideal as this kitchen also uses plain white solid surface for its countertops.
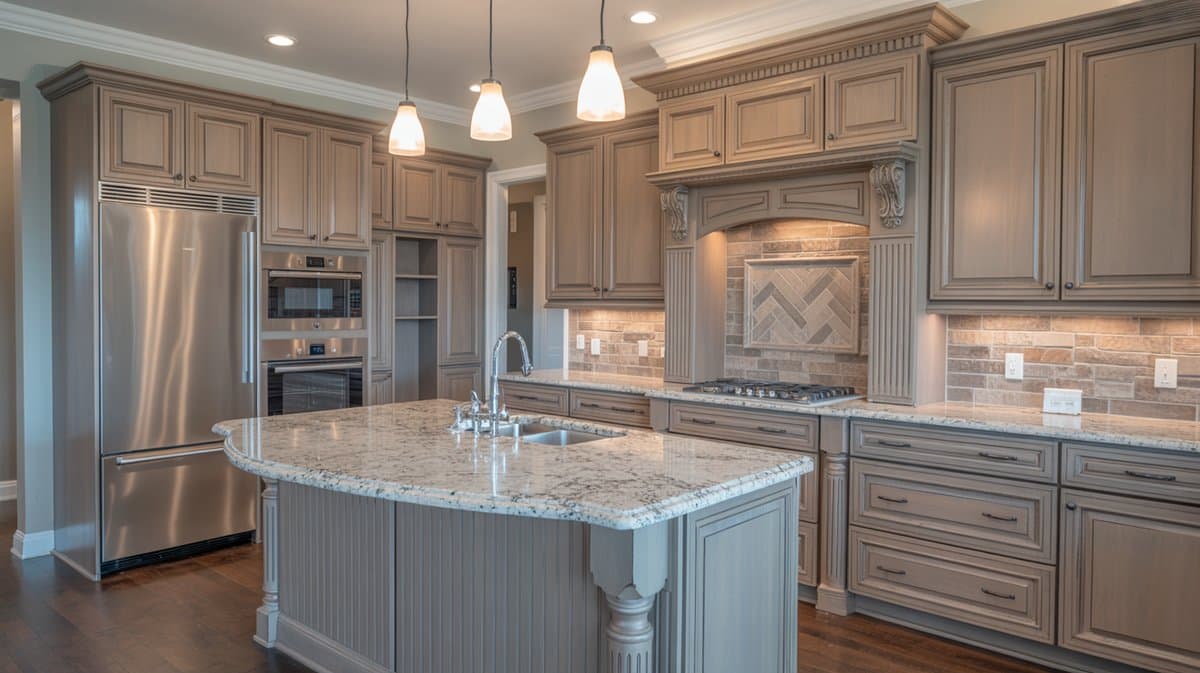
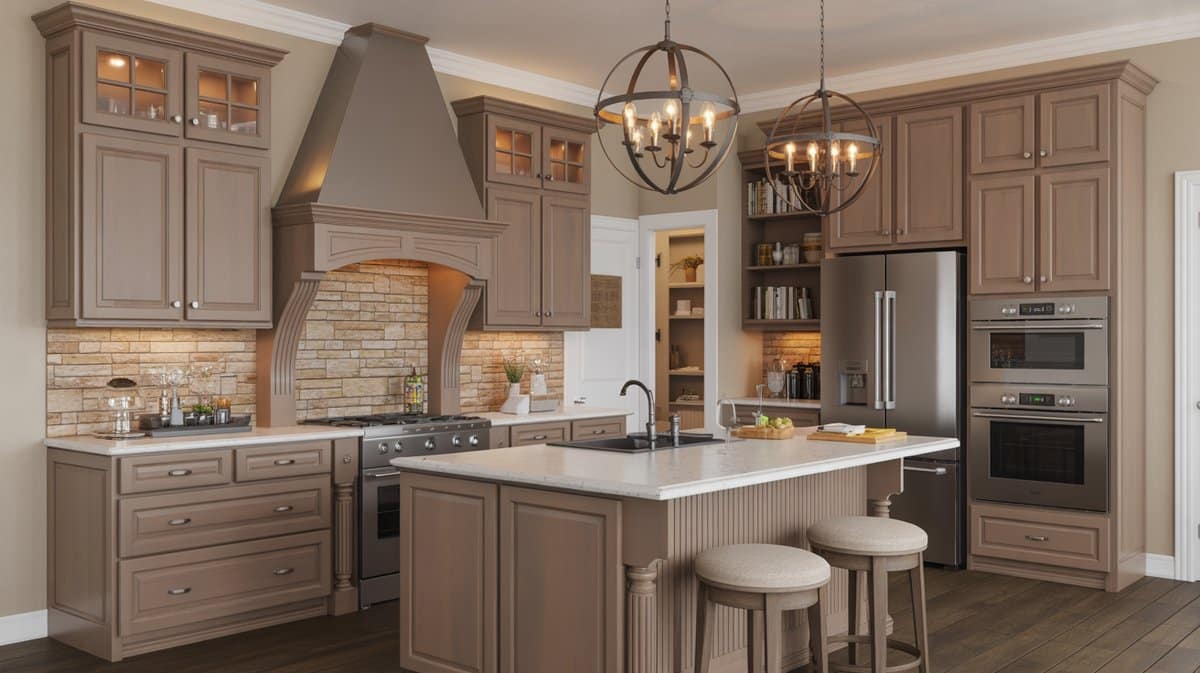
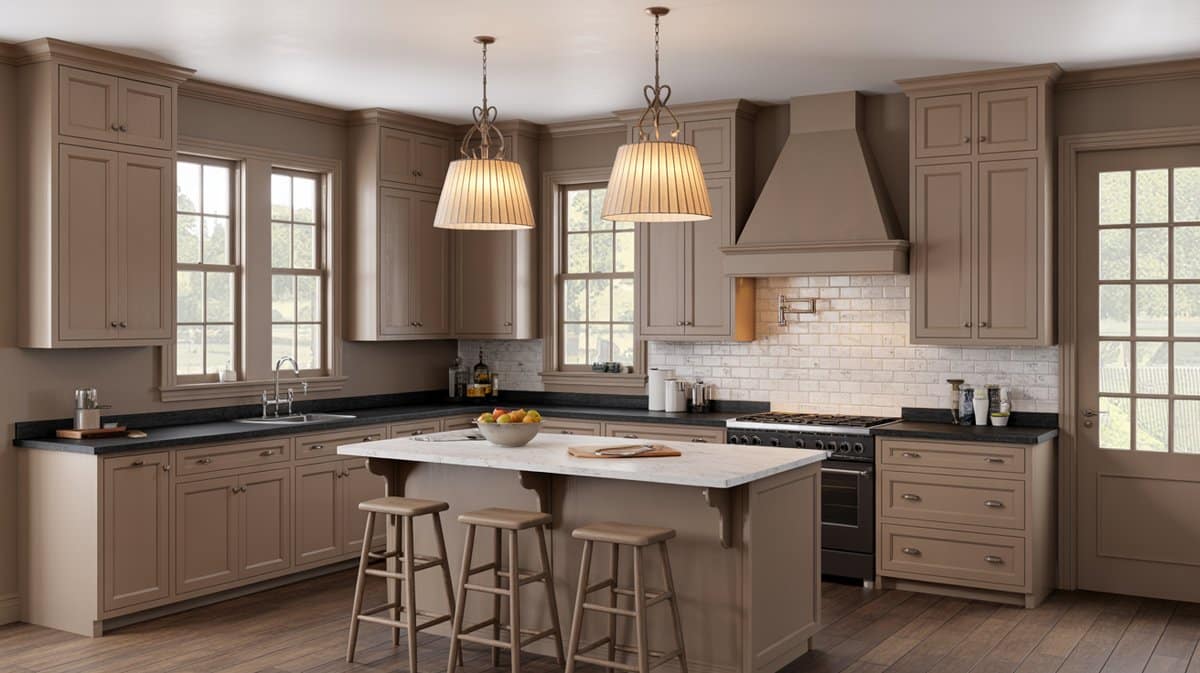
The light, warm-toned gray used in this classic kitchen gives it a more updated feel, while still maintaining a homey country feel that matches well with the architecture and finishes of the space.
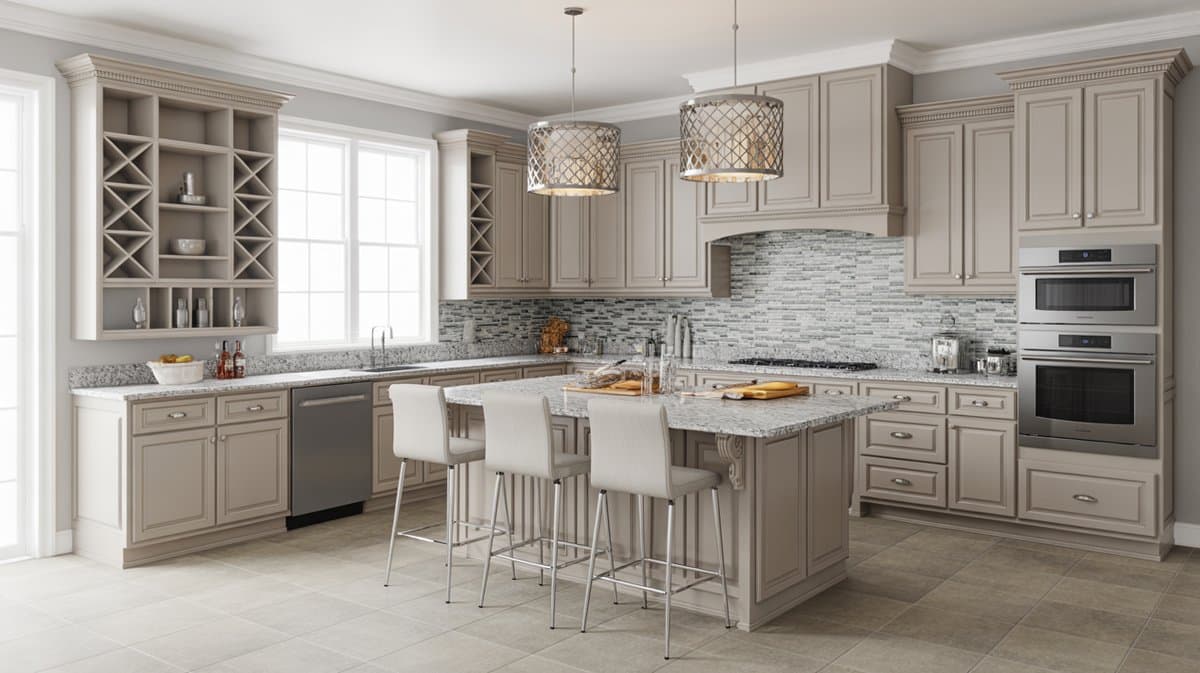
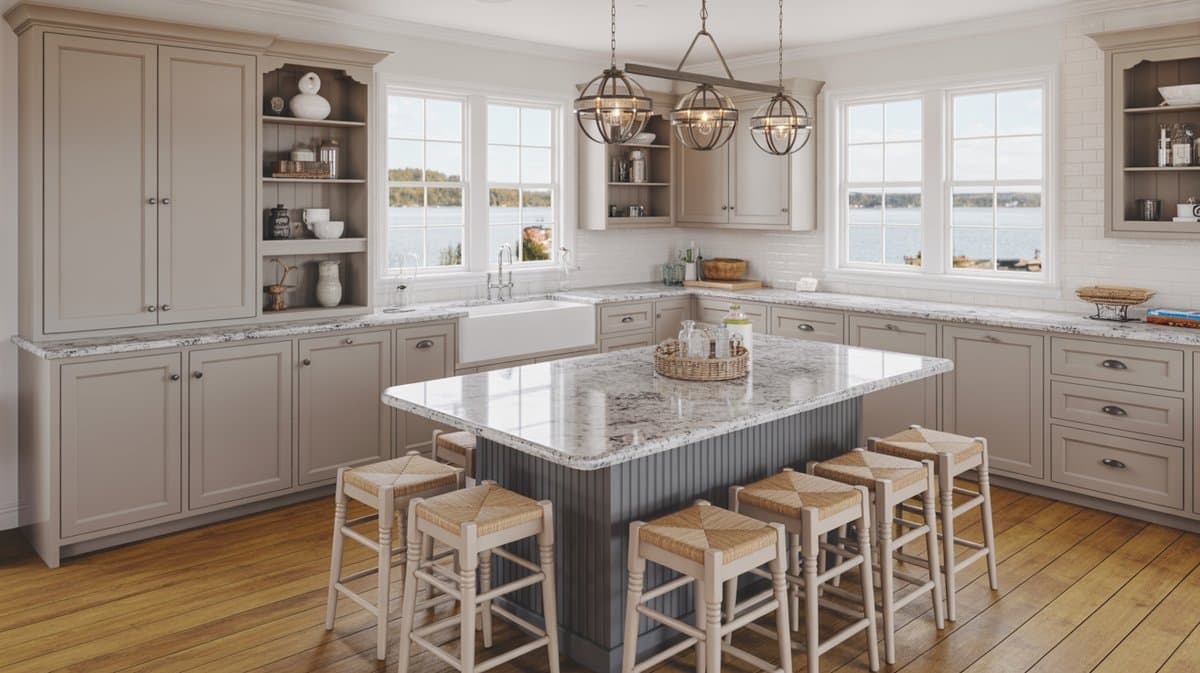
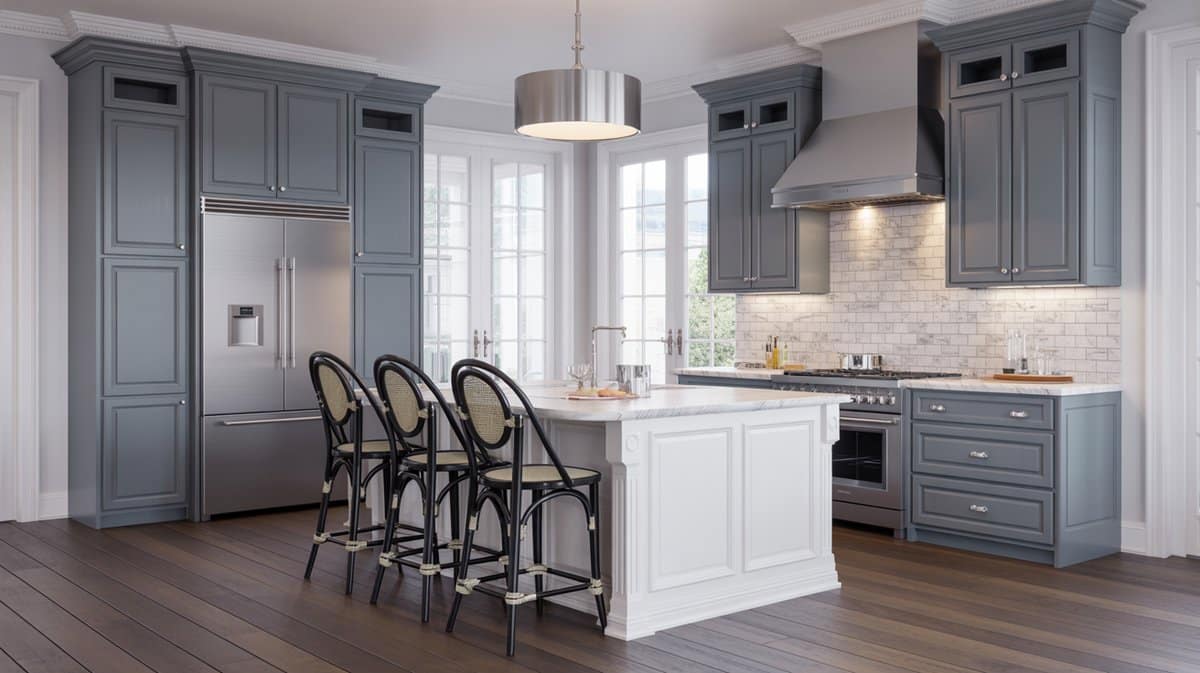
As this kitchen has more space, it is able to play around with the layout more. The cabinets are classic country in form, but with the use of a cool-toned light gray color for its finish. The layout appears to look more refreshing and modern, especially as it is paired with silver and stainless steel finishes as seen on the barstools and the drum lights. Pantry storage with an interesting glass paneled door and cabinets that go to the ceiling allow for optimum organizational needs.
Aside from plain gray finish, you can also apply other finishing techniques to your kitchen cabinets. This example uses a rustic paint finish, giving the cabinets a shabby chic/country vibe that definitely complements the natural solid wood flooring. These rustic style cabinets looks especially more attractive when paired with gold handles and accessories.
Using beige-gray for the kitchen gives this classic English style kitchen a refreshing update that looks young, modern and subtly elegant.
You can also choose to just paint a certain section of your existing cabinetry in gray. In this example, the country style kitchen retains the white color on the cabinets against wall, but paints the kitchen island in gray to bring more attention to the area, making it the focal point.

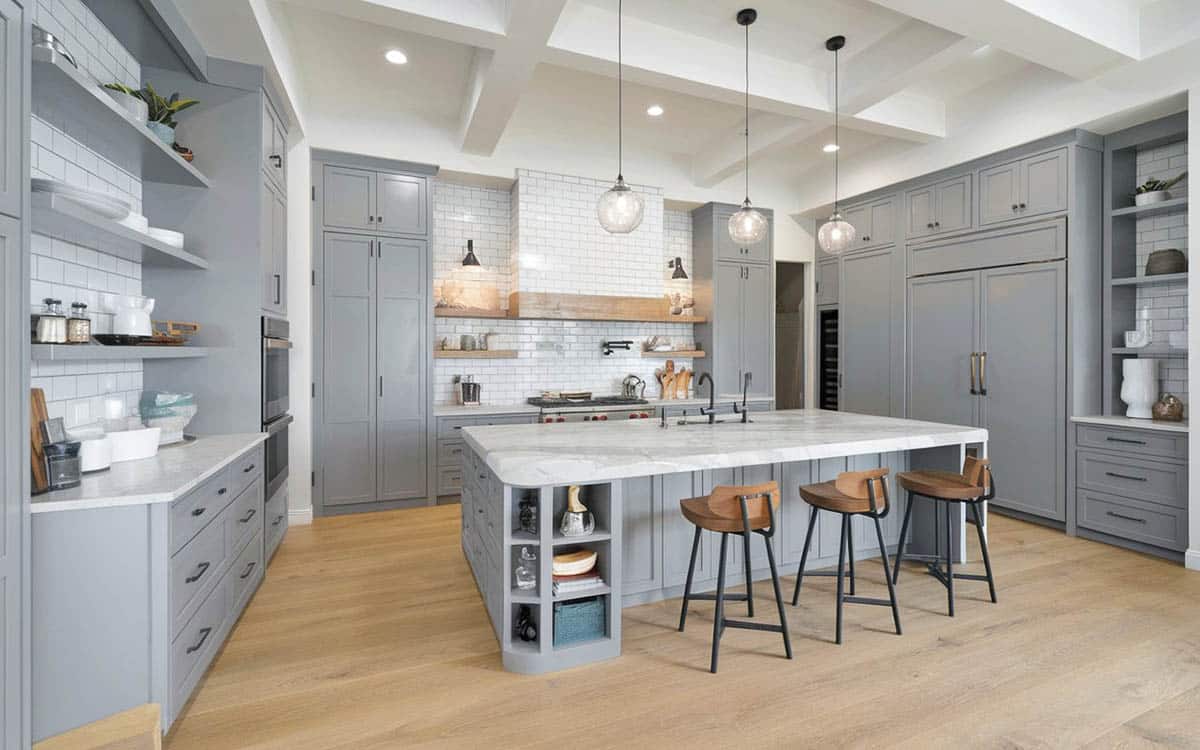
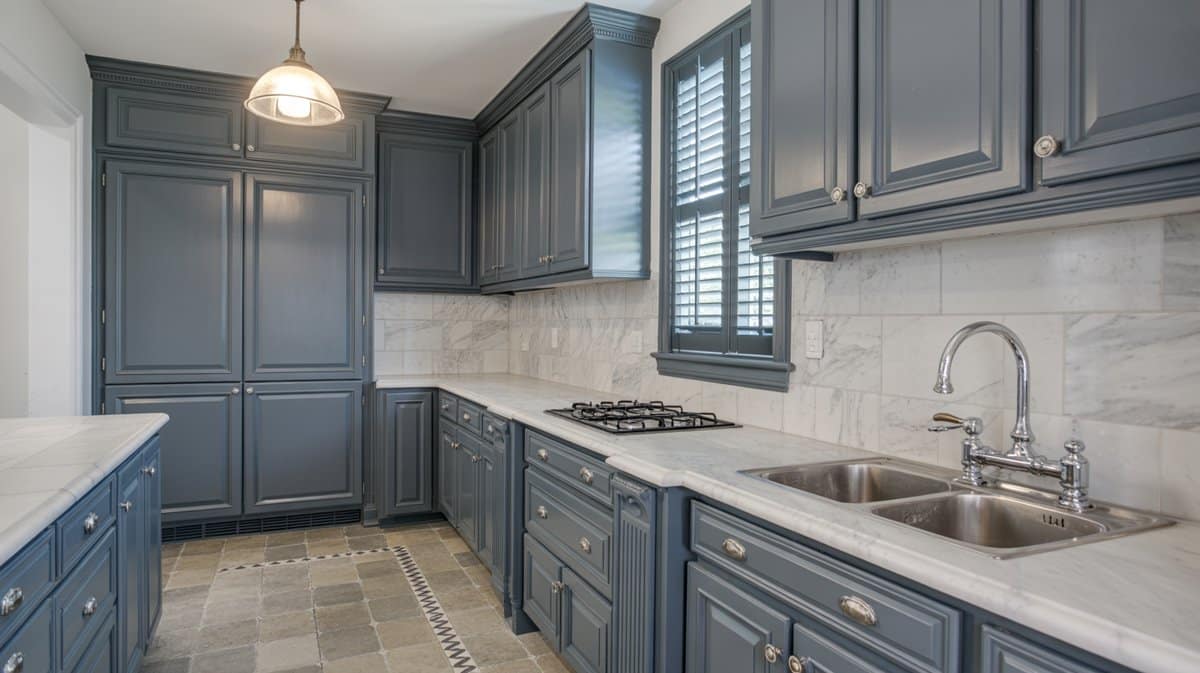
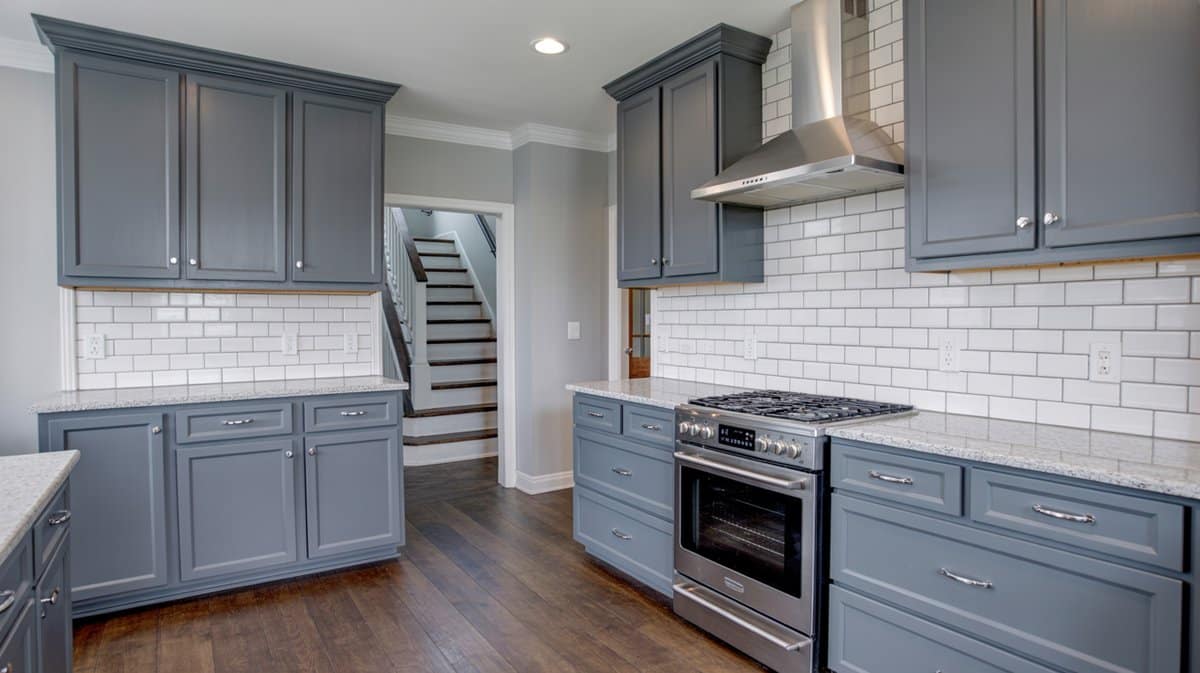
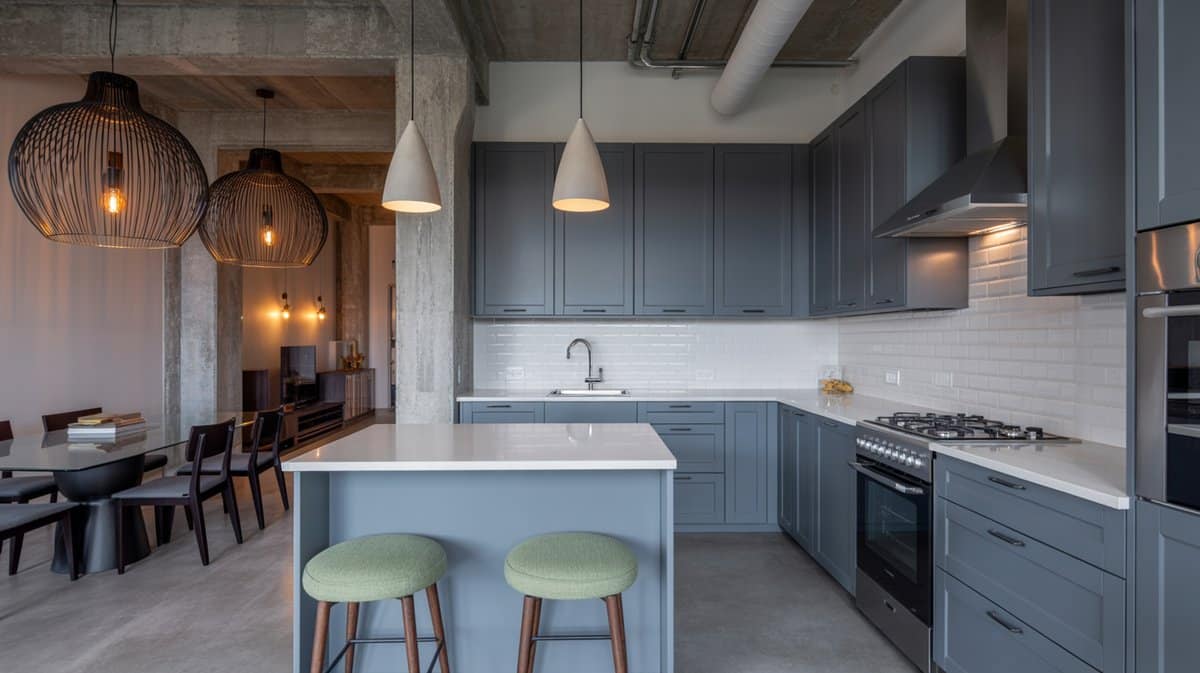
Another excellent example of a transitional kitchen that uses a more neutral gray. The cool grey Shaker cabinet doors are paneled but use a more contemporary proportion. Since the kitchen is quite small, using a mirror for the backsplash is a genius idea to help give the illusion of a bigger space.
Even for smaller kitchens, dark gray can still be used for your cabinets. To do this, you simply have to use lighter-colored finishes for other surfaces such as the backsplash and the countertop.
This example shows a very small kitchen which used dark gray for its paneled cabinets. It was paired with white granite countertop, plain white subway tiles were used on the backsplash and stained wood floors.
Plain light gray finishes also look great with dark wood finishes. It helps counter-balance the heavy texture on the flooring, and provide a neutral medium to transition the wood and the flat white wall finish. Using neutral gray instead of warm-toned gray helps balance balance the rustic and the modern details of the space, especially since the ceiling uses wood finish as well.
Modern spaces such as this design also look good with light gray. Light gray laminates were used for the modular cabinets to give it a light & clean feel, as well as give a subtle contrast against the flat white paint on the walls and ceiling.
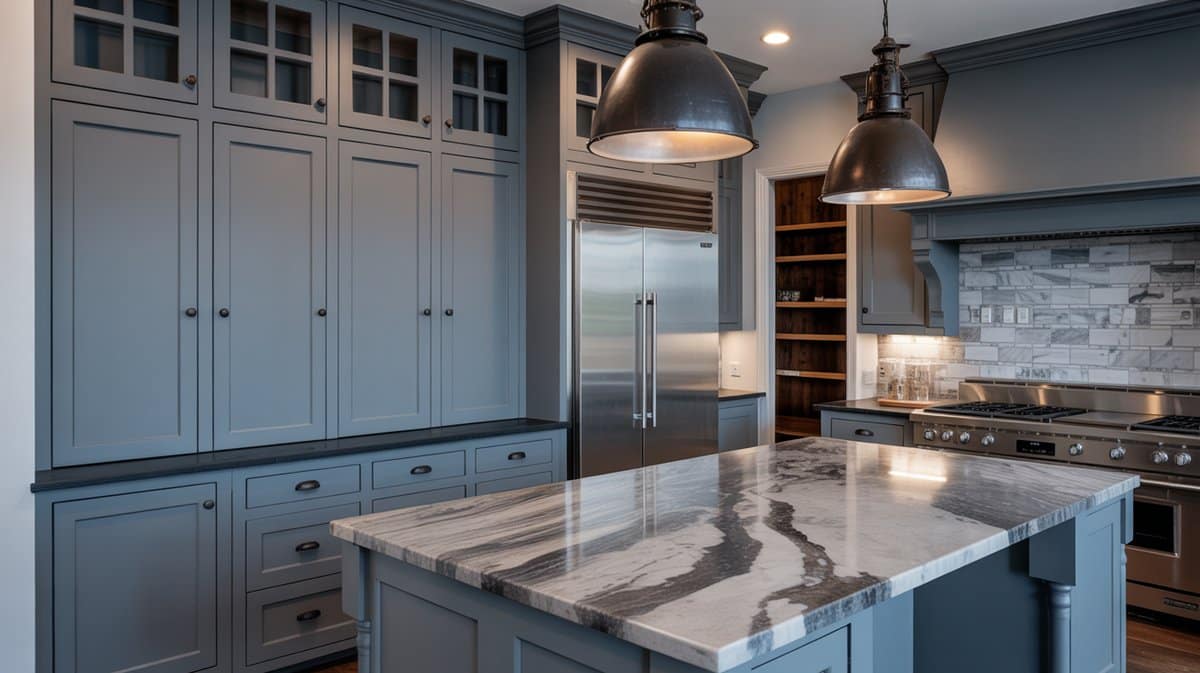
Marble countertops and backsplash look especially good with cool toned gray cabinets, and instantly give it a more contemporary feel, even if it retains a classic panel design and handles. Elements such as waterfall countertops, natural lighting and a mixture of colors can help keep the design interesting and attractive.
For those with a smaller kitchen without an existing island there are portable islands available to purchase. These can provide the look you want, as well as more counter space for meal preparation or can be used as a place for eat-in dining.

This greige (grey-beige) kitchen island is multi-purpose, serving as a kitchen island, a breakfast nook/counter and also a divider to separate the kitchen space from the other areas. The stainless steel countertop makes it easy to clean and maintain, creating a sleek and durable finish.
Aside from glossy laminates, you can also opt to use a matte or textured laminate finish for you modular cabinetry. For this two tone kitchen, dark gray laminates with a textured matte finish was used, giving the space a somewhat masculine appeal.
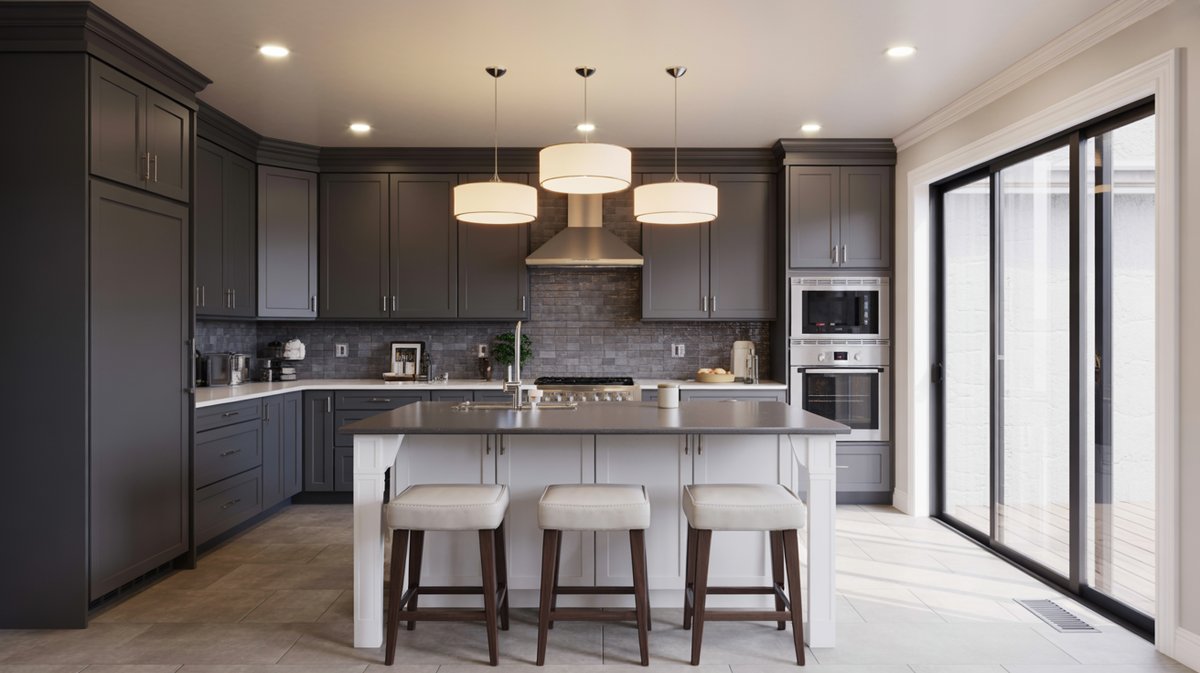
Another ideal application for dark gray kitchen cabinets would be on industrial-inspired designs. This example is a more refined industrial-inspired kitchen design which uses dark gray paneled cabinets combined with stainless steel and black metal finishes to achieve the masculine feel of industrial spaces, but in a simpler and subtler form.
One large kitchen island with seating and one with a built in sinks provide plenty of space for meal preparation and eat in dining. Two different faucets provide ample space for meal prep and clean-up. One faucet has an extra large gooseneck spout for large pots and pans. An interesting feature of the breakfast bar island is the pet food bowl nook.
Rustic finish wood tiles and solid wood countertop already give enough rustic texture to the small kitchen space, so a plain light gray cupboards with a cool undertone was used to balance out the textures of the wood finishes.
Classic French style cabinet panels with a light neutral tone gray finish gives this kitchen feel more up-to-date. It does away with overhead cabinets to help make the space feel bigger. The lovely French doors creates an inviting experience and compliments the other elements in the room.
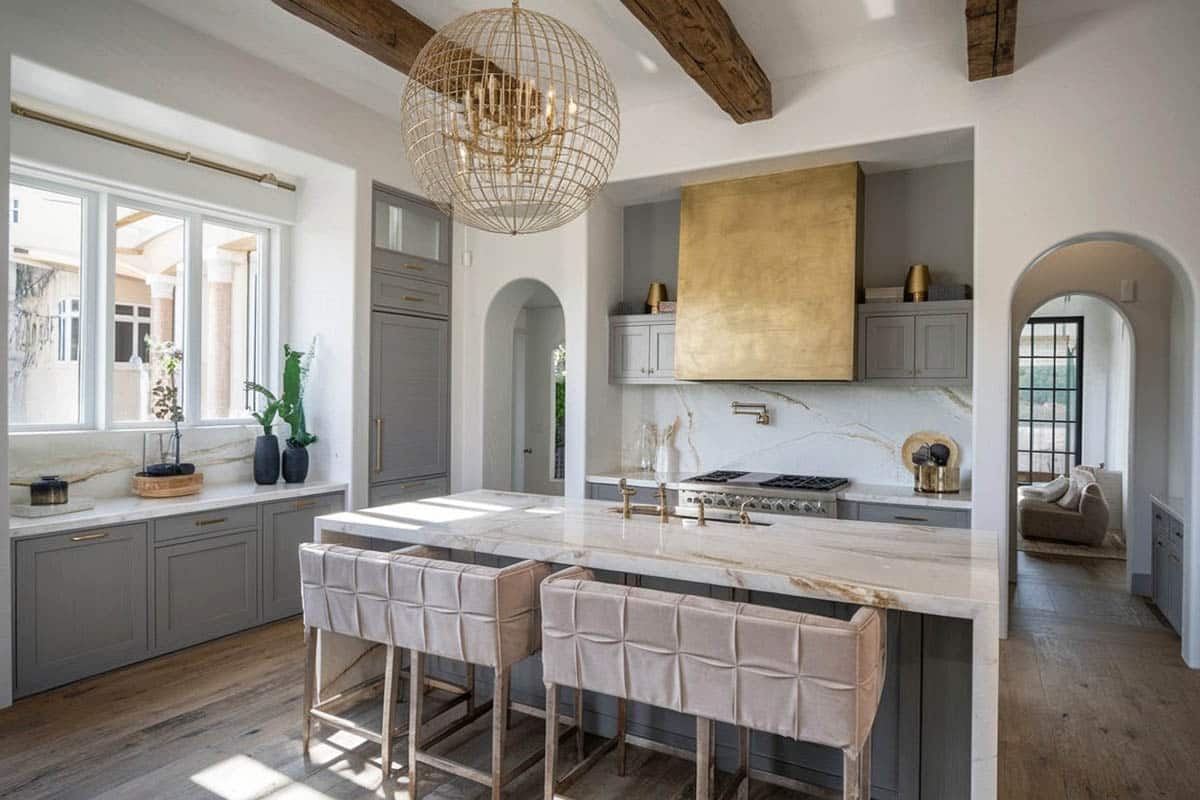
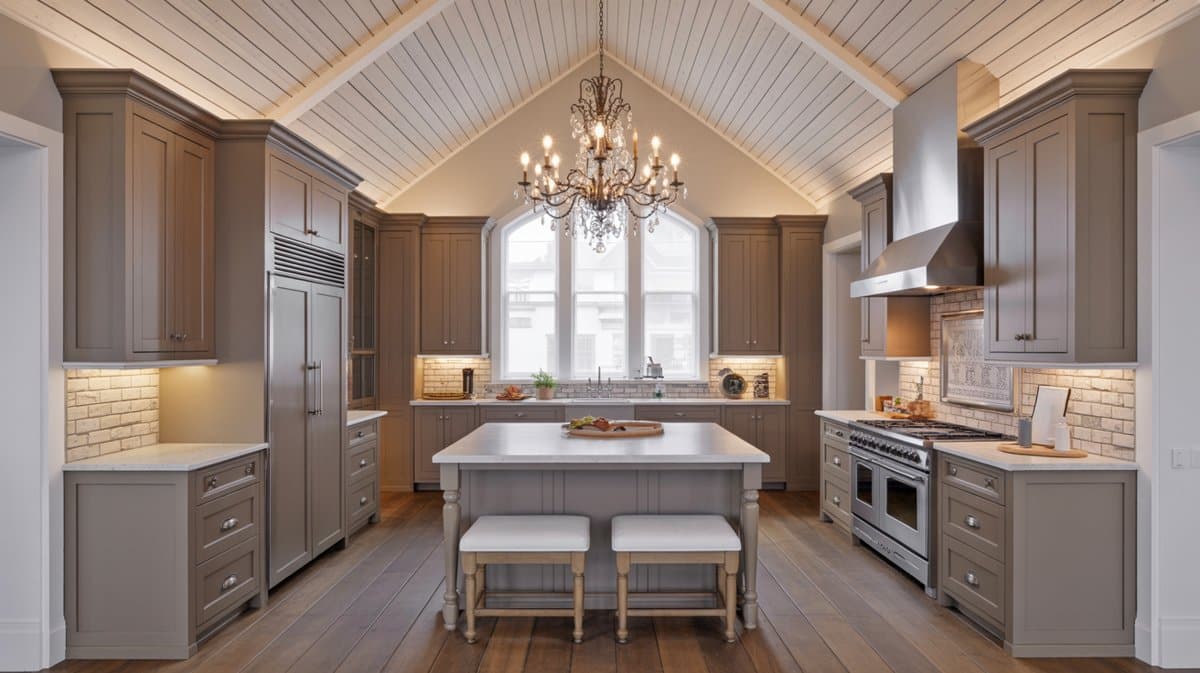
The combination of dark gray cabinet finish with classic cabinet paneling and gold finish range hood above the oven gives this small kitchen a very simple yet elegant feel. Combined with plain white walls, dark wood flooring and white natural stone countertop, this kitchen is a great example of understated elegance. The upholstery on the large dining benches coordinate with the grey in the cabinets and other decor pieces.
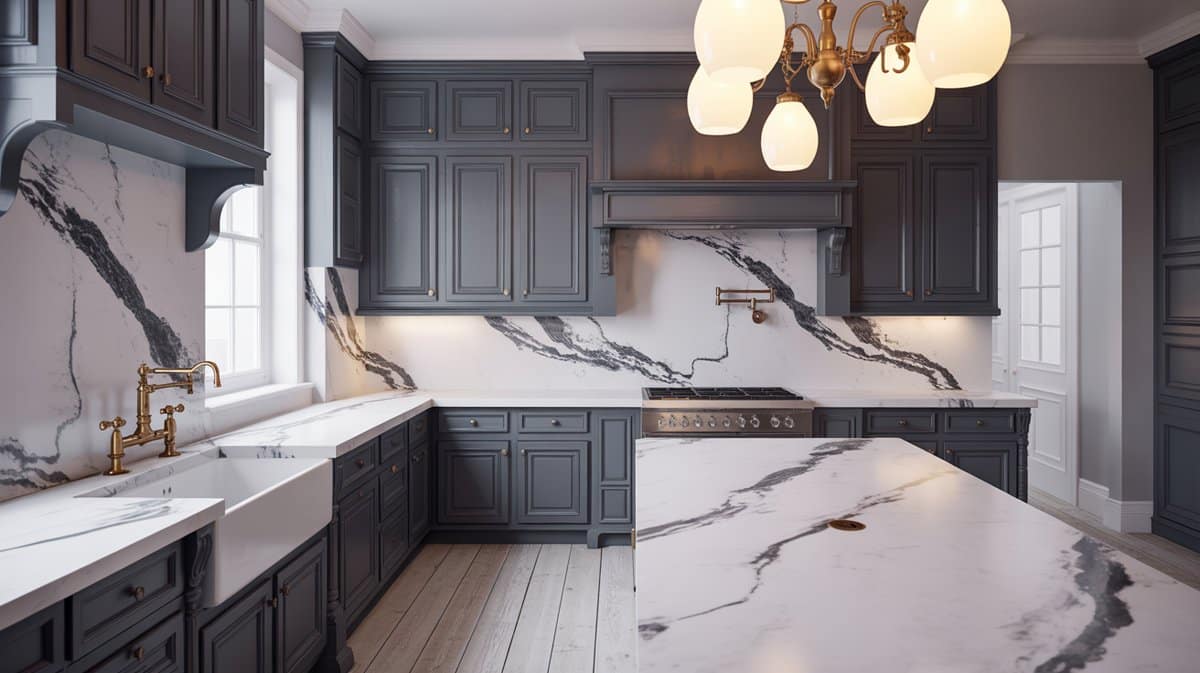
This kitchen design with dark gray cabinets offers a stylish contrast against the white marble countertops and matching backsplash wall. The kitchen features plenty of contemporary features such as a multi pronged chandelier light, apron sink, gold finishes, and French windows.
To showcase highly specific designs, some images on this website use advanced AI-generation software to illustrate ideas and room inspiration. See our editorial policy to learn more.