Everything You Need to Know About Clapboard Siding
Clapboard has always been one of the more popular options when it comes to sidings. Its distinct look and durability make it enticing for homeowners. We take a look below at what makes this type of siding stand and maintenance tips.
What Is Clapboard Siding?
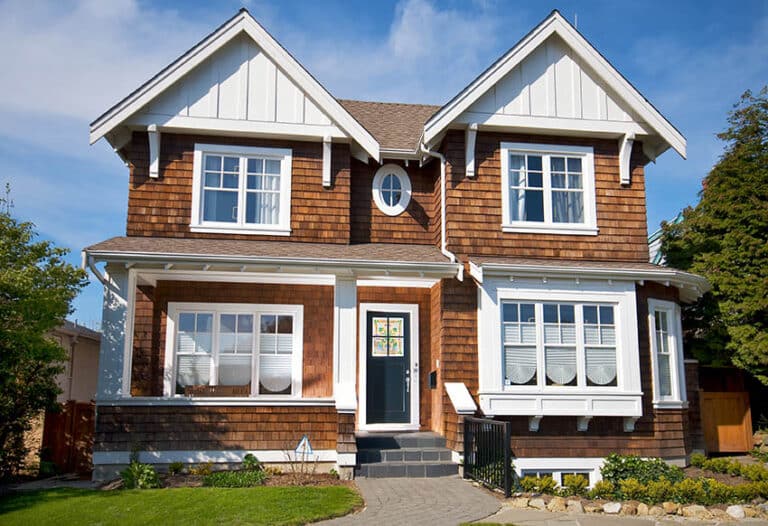
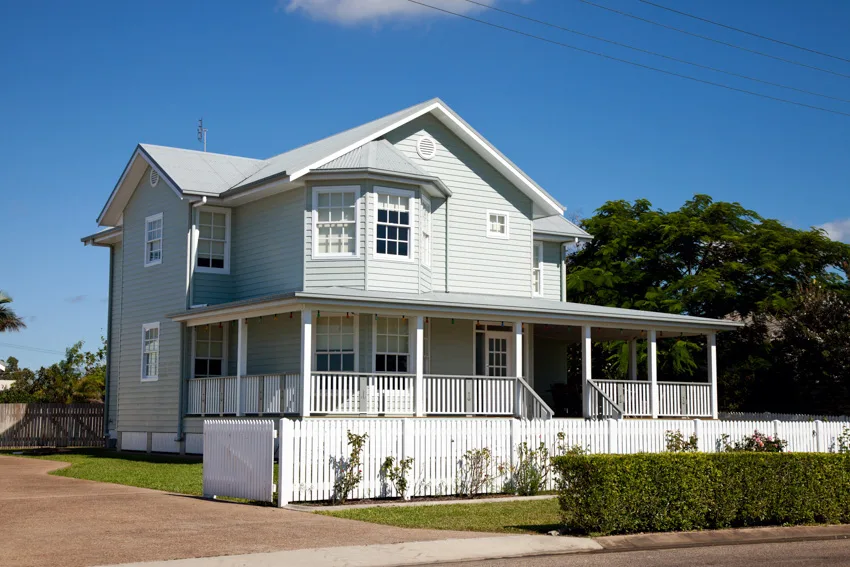
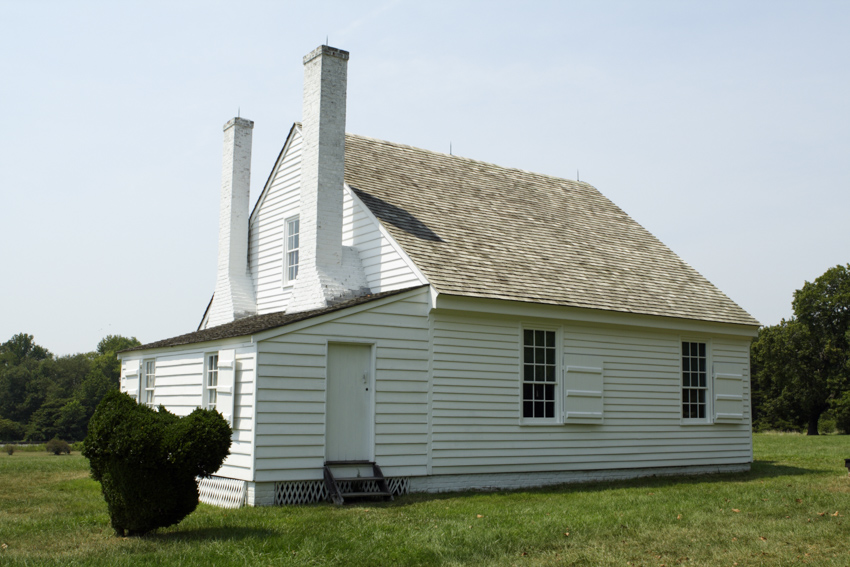
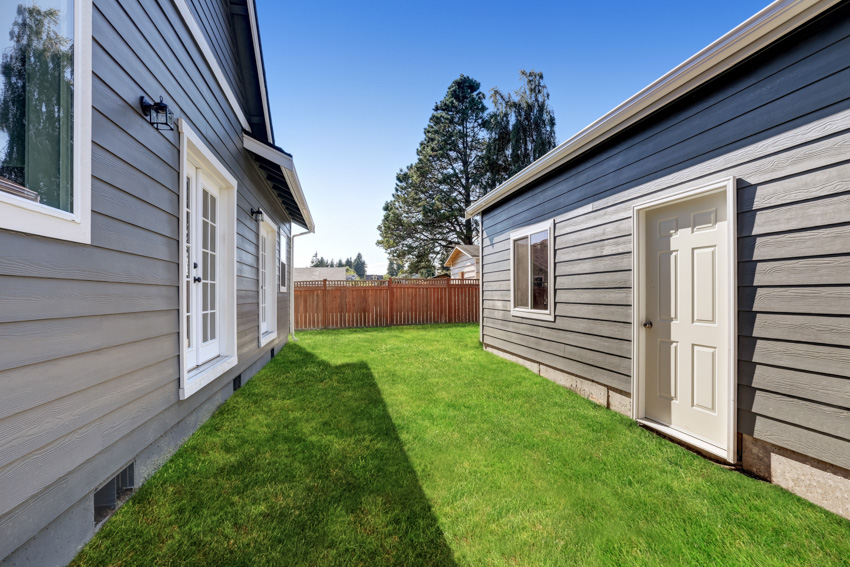
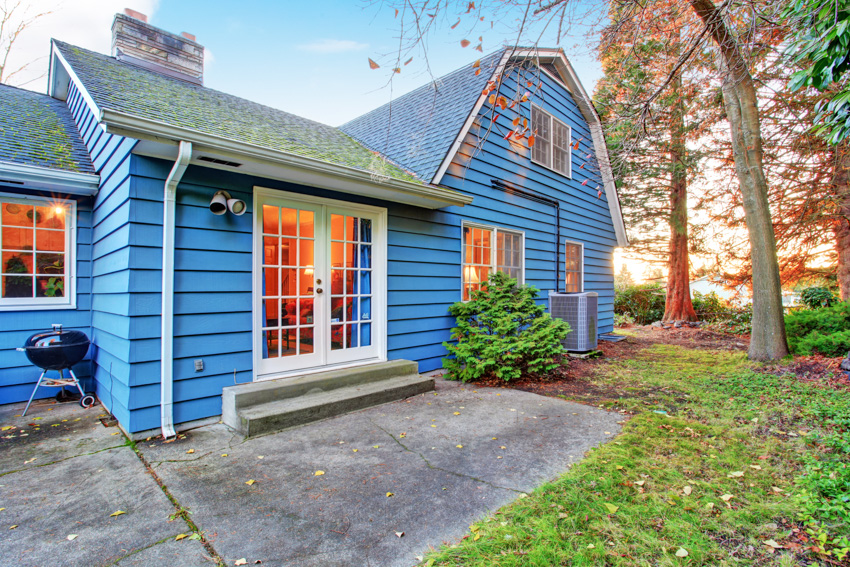
Made of horizontally thin overlapping wood boards, clapboard is an exterior cladding that has protected American houses from the weather since colonial times. Also known as lap siding or bevel siding, the name clapboard originated from the Dutch word klappen, meaning “to split”. Originally the logs of white pine, hemlock, spruce, or cypress were split by hand to make clapboards.
One of the advantages of using clapboard siding is that it is a sustainable product since it is naturally produced; and if properly cared for, it can last for generations. Many homeowners prefer the natural charm clapboard siding provides, even if it can be expensive, depending on wood type and grade.
To give the clapboard a rustic aesthetic, authentic look and help protect the wood from water damage and other natural elements, it can be painted, stained, charred, or can be applied with treatments.
Types Of Clapboard Siding
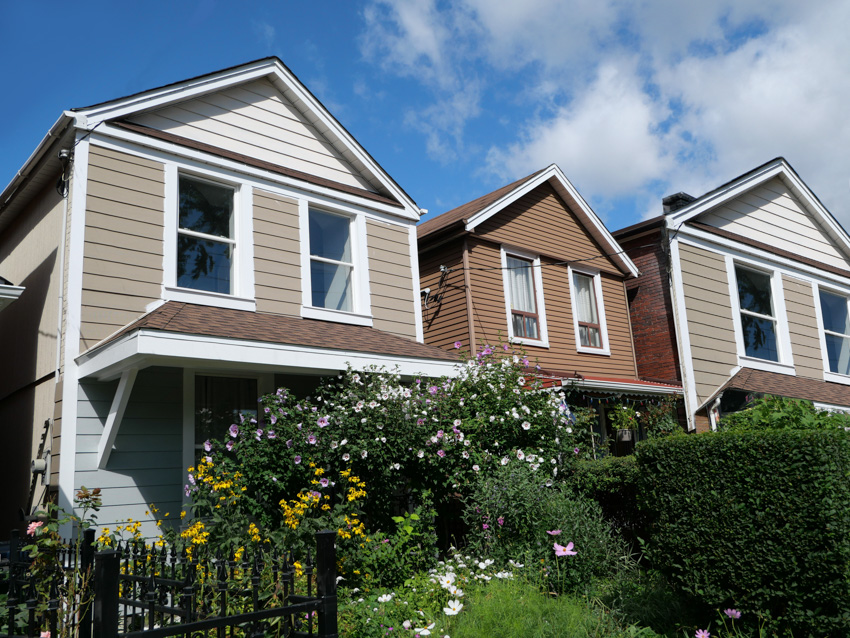
These days, clapboard siding comes in a variety of woods, widths, and lengths, as well as artificial materials such as vinyl, composite, and cement fiber siding, that mimic the clapboard look.
Wood Clapboard Siding
When choosing to install wood clapboard siding, it is best to have over a 3/4″ to 1″ air space above the waterproof house wrap layer when installing the wood clapboard siding in order to allow the backside of the wood to air dry after a rainfall.
If you are using white cedar, red cedar, and fir, these types of wood can be used as siding without treatment since they are more naturally weather resistant than others. While pine wood and spruce should be treated with stain or paint.
If you prefer a unique and rustic look, you can apply charring on the wood before installation, it also acts as a protective coating for your wood clapboard siding. Wood clapboard siding is a more sustainable exterior shell for houses.
Cedar
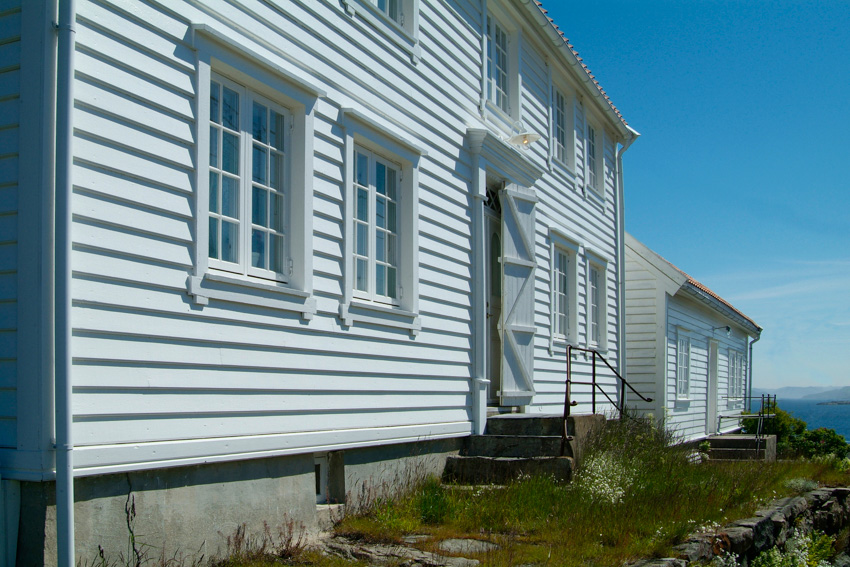
The western red cedar is still the best choice for a clapboard siding. It is free of pitch and resin, which means it absorbs stains, oils and paint finish exceptionally well, and as long as it’s installed properly and well maintained it can last the lifetime of the house because it is naturally resistant to rot, decay, and insect attacks.
Cedar clapboard siding is naturally beautiful, and the scent of natural wood offers an earthly and reassuring sense of warmth in a home. The clear grade texture of cedar can give you a crisp, contemporary look, while the knotty texture offers an added rustic charm to your home.
Pine
This is one of the standard types of exterior wood siding that is less expensive than other species of softwoods.
The knot-free pine can be hard to get with longer lengths, and pine clapboard siding can be prone to breaking and splitting.
Make sure that when you choose to use pine clapboard siding, it is important to keep it sealed and well maintained since pine is not a rot-resistant wood.
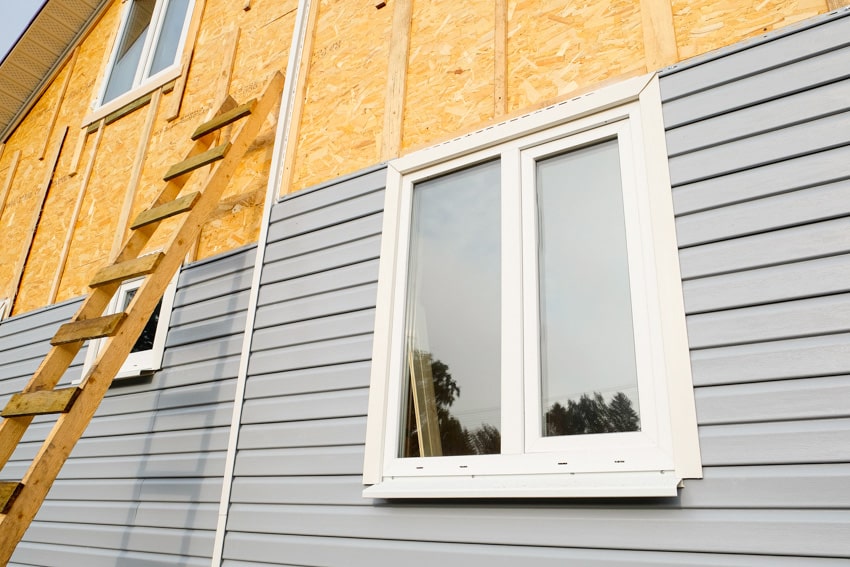
Vinyl Siding

This type of alternative to clapboard is made from plastic resin also known as PVC. As technology improved, vinyl siding is made more durable and effective and a good alternative to clapboard.
Clapboard vinyl siding comes in a wide variety of colors, patterns, and texture and is affordable than wood clapboard siding, it can cost an average of $1.60 per square foot, including the cost of installation. Although vinyl siding lacks in providing proper insulation, you can opt for insulating it, but that will add to the overall cost.
The vinyl siding has lower maintenance requirements since it doesn’t have to be painted regularly as clapboard does, and only needs to be cleaned every so often to maintain your home’s exterior.
Composite Siding
This type of exterior siding is made of scrap wood that is compressed together with resins and treated with chemicals that ward off fungi and insects. Oftentimes, composite clapboard siding comes pre-primed and ready to be painted, while other types are readily available in many colors, styles of finish that imitates real wood and it also comes with smooth or embossed textures.
Composite clapboard siding can last up to 30 years and only need repainting every 5 to 10 years.
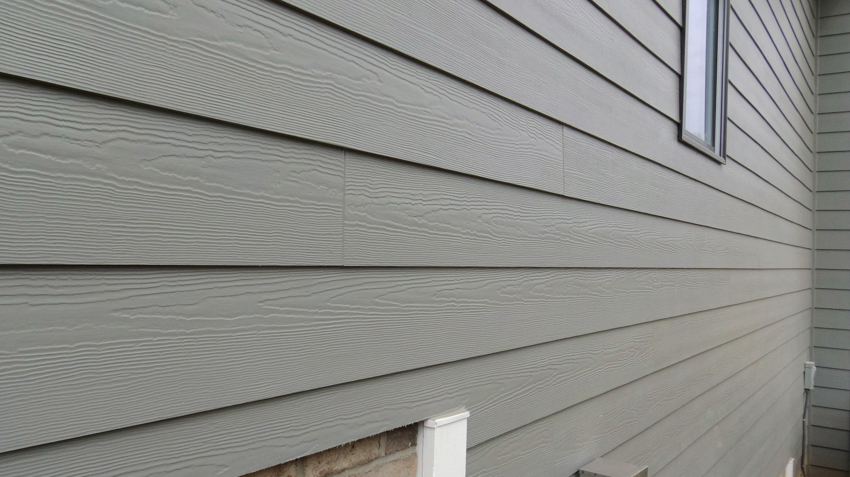
Cement Fiber Siding
This material is made from sustainable materials such as sand, cement, and wood pulp, that are compressed together to form planks or shingles. These inert materials are a great choice for an eco-friendly siding because they won’t release toxins into the environment. The cement fiber clapboard siding comes already primed and painted and in various finishes that replicate the look of painted wood.
Some styles have a modern smooth finish and others have a more rustic rough-hewn look. Fiber cement generally costs $3 to $4 per square foot for materials, and it has maintenance-free durability.
The paint finish for cement fiber clapboard siding can last for 15 years without fading or chipping. It can withstand extreme weather conditions and it is resistant to rotting, warping, and cracking. Cement fiber clapboard siding is also made to be fire-resistant and will not ignite when exposed to direct flame or extreme heat.
Pre-painted Siding
All pre-finished siding is going to be easier to manage over unfinished siding. It offers a perfectly uniform, fully coated house exterior since the process involves running the clapboard siding through a machine that coats each piece completely on all four sides with primer and paint.
A set of machine rollers apply the finish and is then brushed to make the finish more even. Additionally, pre-painted clapboard siding uses water-based pigment paints that reduce V.O.C emissions and lumber from sustainable sources.
Clapboard Siding Sizes
Traditionally, clapboard was made from 3/4″ thick solid lumber that come in varying widths, but the most popular are 6″ and 8″ widths.
6-inch clapboard siding: This is the traditional width cut of a clapboard from the log, producing the wood’s true vertical grain. This plain board siding has a standard lumber dimension of 1-foot length by 6 inches width by ¾ inch thick.
8-inch clapboard siding: This width size is generally used for re-sawn boards which produce a random grain clapboard siding; commonly seen in the bevel siding version of clapboard.
This plain board siding has a standard lumber dimension of 1-foot length by 8 inches width by ¾ inch thick.
12-inch clapboard siding: This width size can result in a faster installation and fewer seams since it comes in a standard dimension of 16 feet length by 12-inch width by 3/8 inch thickness.
Siding Cost
The cost of this siding type on average is $3.50 to $6 per square foot, for materials only. Clapboard siding can range from $6.50 to $10.50 per square foot after installation depending mostly on the type of wood it is made from and grade of the wood. Depending on the project scope and complexity, trim options, natural wood siding costs $9.50 to $15.50 per square foot with installation.
Some factors to consider are the rise in the prices of lumber and your home’s location – prices are going to be higher in affluent areas where the use of natural wood is considered first-class material. For an average 2,000 square foot sized home, it will cost between $19,000 and $31,000 to install natural wood clapboard siding.
Here are some other types of clapboard siding cost ideas:
• Vinyl clapboard siding costs $3 to $7 per square foot
• Aluminum/Steel clapboard siding costs $5 to $9 per square foot
• Fiber cement clapboard siding costs $5 to $9 per square foot
How Long Does Clapboard Exterior Siding Last?
This type of siding serves as your home’s first line of defense against severe weather conditions and other natural elements. Keep in mind that the expected lifespan of siding largely depends on a variety of factors. Wood clapboard siding, under the best circumstances, can last decades but with high and with meticulous maintenance. On average, wood siding can last a considerable amount of time of about 20 to 40 years.
Depending on the wood used and upon regular maintenance, each wood type below has a unique characteristic that can dictate its life span.
Lifespan of clapboard siding by types of material
• Pine siding can last more than 20 years
• Fir siding can last more than 30 years
• Cedar siding can last more than 75 years
• Redwood siding can last more than 75 years
• Cypress siding can last more than 100 years
Vinyl siding is a popular choice when it comes to clapboard siding and actually lasts about 60 years and requires low maintenance.
Aluminum/steel clapboard siding is one of the regularly used clapboard siding materials due to its durability. It is projected to have a life expectancy of 40 years or more if properly taken care of.
Fiber cement clapboard siding is also gaining popularity due to its attractive, durable, low maintenance, and inexpensive cost features; it has a lifespan of 25 to 40 years.
How To Replace Clapboard House Siding?
If your wood clapboard siding shows signs of extensive damage, warping, or cracking, it may be time for a full replacement. We strongly suggest that you replace damaged panels on your clapboard house immediately, especially panels that have warping, cracks, or any other major damages.
Step 1 – Once you have identified the damaged clapboards, you can remove them by using a thin pry bar and a hammer.
We recommend you start with the easiest one to remove. It is better to start at one end of the butt joint, working your way across horizontally until it comes free.
Step 2 – Next is to measure the location of the old one and then take measurements out of the first clapboard and add 1/32″ extra, this additional length helps secure the board for a watertight seal.
In order to prevent breakage while cutting, remember to always cut from the finished side, start cutting from the top edge, and cut toward the thicker end.
Step 3 – Insert flashing or tar paper between joints to provide additional protection, before installing the new clapboards. Secure the flashing underneath the clapboard by stapling it in place and start the installation from the bottom and work your way up.
Step 4 – Slightly tap the board into position, then hammer it into place; do this for the next clapboards. Apply a coat of primer and put on a top coat of finish paint after the new clapboards are installed.
How To Install Clapboard On The House
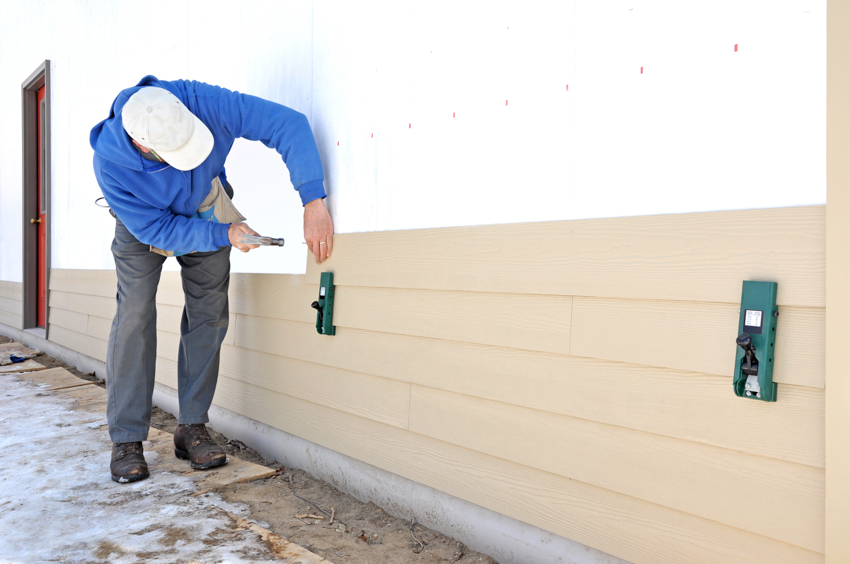
Step 1 – Measuring the Exterior Walls
In order to determine the amount of stock needed for the clapboards siding project, you should order, measure the height and width of all the walls to get the total square footage of the surface area.
You need to subtract 15 square feet for each window and 20 square feet for each door; after which, multiply the total square feet of an area by 12. Then divide by what you want left showing (called the “reveal”), this will then give you the total footage needed for your project.
Remember to add 10% to 15% contingency when ordering the wood siding.
Step 2 – Check Wall for Damage and weatherproof the walls
Check and replace any insulation or damaged plywood sheet and install a new moisture barrier. Secure it to the plywood using 2” roofing nails.
Make sure you start from the bottom of the wall and work your way up and overlap the moisture barrier a couple of inches each time in order to create a breathing space.
This way, it will keep wind and water out of the wall cavities and provide an escape route for condensation.
Step 3 – Install the Starter Course
Cut 1 1/2 inches off the top of a clapboard for a starter strip by running it through the table saw with its groove facing the blade. Brace its thickest edge 1/8 inch above the water table; secure it to every other stud with one 7d nail.
Next, line the lower edge or butt edge so that it covers the starter strip this will become the starter course. Make sure you apply sealant along the corner boards, leaving 1/16 inch space along the corner board. Hammer in one 7d nail into each stud, an inch above the siding’s butt edge.
If you need to put together clapboards in case it isn’t long enough to span a wall, splice two together with a 45-degree scarf joint. Make sure you apply a sealant to the ends, as you fit them together, with a nail making sure the board is overlapping at ½ inch to the side of the joint.
Step 4 – Make a Story Pole
In order to make your story pole, you have to measure the height of your wall by holding the length of the clapboard vertically, making sure that one end is aligned with the butt edge of the starter course. Mark it and this will now be your “story pole”
Place the pole vertically alongside the corner board and line up its end with the starter course as before, and repeat the process to create a matching set of marks on the opposite corner board.
Step 5 – Hang Following Courses
As you start hanging the following siding, make sure you align the butt edge with the story-pole. Next is to nail the clapboard to the studs and try to follow the chalk line to align the butts.
Alternate the location of the joints as you work up the wall and cut the top of the board to fit beneath the window.
Step 6 – Fit Siding Around Windows
Always remember to apply sealant under and around the windowsill after cutting the siding to fit around the bottom of the window before sliding the notched piece of siding into place. Nail the clapboard to the studs.
Step 7 – Siding Around Windows and Doors
As you continue to install the siding and as the vertical clapboards come into contact with doors and windows, cut each plank to size to fit properly on top of the required flashing.
For the flashing, you need to bend a 3-inch-wide piece of flashing over the membrane and the window casing making sure that it extends by ¼ inch and fasten the flashing’s top edge with nails.
Install a piece of waterproofing membrane above the head casing and provide 2 inches of overhang to the casing on each side of the window; do the same for the door and continue installation from left to right, securing clapboards in place.
How to Install Siding Video
Clapboard Exterior Siding Maintenance
Essential points to keep in mind when it comes to maintenance:
• Wood must be properly finished with paint or can be stained; and treated with a clear sealer. Remember that wood clapboard siding if left unprotected could be susceptible to rot and decay due to moisture.
Applying a top coat will help protect your wood panels from moisture, rotting, and other weather damage.
• Make sure that your wood paneling doesn’t have direct contact with the ground in order to avoid potential rotting and other fungal growth.
Remember to maintain a 6 inches ground clearance and 3/4inch to 2 inches off the roof to prevent water damage.
• In cleaning this siding, just use a simple solution of water and soap or detergent and hose it down with water. Stay away from using a pressure washer to avoid any paint chips or other damages to the material.
• For wood clapboard siding, resealing or re-painting your wood siding every 2 to 5 years is essential not only in order to protect it against moisture and other water damage, but also to make them look good and extend its life span.
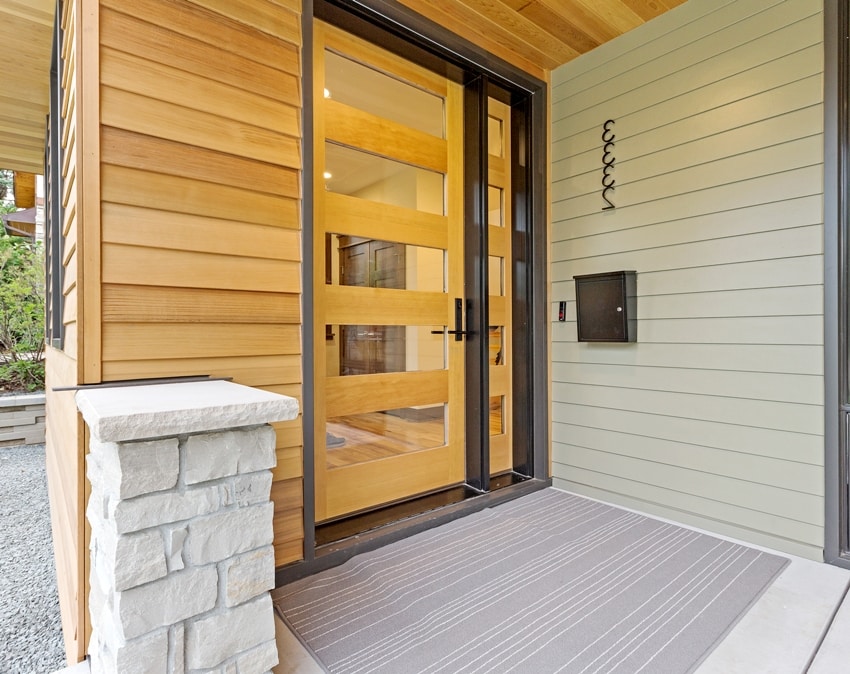
Dutch Lap Vs Clapboard
Dutch lap and clapboard siding are two different styles of exterior siding. Clapboard is known to be the traditional style wherein the planks are flat, made from long boards fixed horizontally on top of each other with a back-angle. On the other hand, Dutch lap is an application technique that has a distinct style feature that is the grooves on the boards that create dimension on the walls.
This is achieved by having one plank slightly cover the other. Dutch lap is used in a more modern-style home which has a more trendy appeal. Both the Dutch lap and clapboard siding are durable and both protect your home from rainwater and other natural elements.
As for the cost, Dutch lap is a bit more expensive than a clapboard since Dutch lap has a specific installation method. Clapboard on the other hand is less expensive since the installation method is quite basic. See more related content in our article about the different exterior wood siding types on this page.
To showcase highly specific designs, some images on this website use advanced AI-generation software to illustrate ideas and room inspiration. See our editorial policy to learn more.

Upload a photo and get instant before-and-after room designs.
No design experience needed — join 2.39 million+ happy users.
👉 Try the AI design tool now