Sunken Living Room Floor Plans: Layouts for Split-Levels, Conversation Pits & Great Rooms

A living room that is sunken has a quality that walls don’t; it manages to divide the space without blocking it, so the room appears to be a distinct area even though you can still see across it. The five sunken living room floor plans listed below apply to the kind of situations that most people would encounter in a home. One has a split-level entrance that drops directly from the foyer. Another has a lounge that is open to the kitchen. A third is a long and narrow room with windows on one side. A fourth is a small family room constructed around a conversation pit. The fifth is a large great room with a corner fireplace that serves a dual purpose. All plans indicate a drop step of between 6 and 7 inches, since that has been determined to be the optimal depth. The drop has to be shallow enough to give the impression of a slight change in level and yet still deep enough to make the seating area feel distinct from the rest of the room.
Sunken Living Room in a Split-Level Entry Layout
As you descend from the foyer into this split-level layout, it has the effect of a wall, which is why the living room seems private once you enter.

This is a good representation of what a sunken living room in a split-level house would look like. You enter through a 36 inch door into a 6 foot long foyer and then step down into the living room. There is no hallway and no transitional area; instead, you immediately enter the lower-level living space. Once inside you’ll find along the left side a sofa extending for 8 feet with a console built behind it. This console can be used as a drop zone for holding keys and mail so that you don’t need to leave some of the floor space for an entry table in the foyer. There are two side tables beside the sofa, and the television is on the opposite wall, over 11 feet away.
A media wall measuring 24 by 72 inches, with a height of just over 11 feet, can be viewed at a comfortable distance from the sofa. There is an open path across the front of the room since the coffee table is positioned 4.7 feet from the TV wall. 36 inch pathway spaces at the top and bottom of the seating prevent the arrangement from feeling cramped, and it is possible to walk behind or in front of the sofa without having to bump into other guests.
Dimensions:
- Living room width: 20 feet, with a 17 foot seating zone
- Foyer: 6 feet wide by 8 feet deep, with a 36 inch entry door
- Sofa: 8 feet by 3 feet, with an 8 foot by 15 inch console behind it
- Sofa to TV: 11.17 feet; coffee table to TV: 4.7 feet
- Coffee table: 24 by 48 inches; TV wall: 24 by 72 inches
- Step down: one step at 6 to 7 inches
Design Tips:
- Place a low light on the console behind the sofa, as this will light up the edge of the step from above and will remove the need for an installed light fixture on the wall.
- Choose a console with a shallow depth of about 15 inches, since going deeper may get in the way of the 36-inch walkway behind the sofa and make the room seem too tight.
- Use the same type of flooring in the foyer and in the living room for a cohesive design. If you change the material, it makes the step appear as if it were separating two distinct rooms, rather than forming a single, continuous space.
Open-Concept Sunken Lounge off the Kitchen Floor Plan
A sunken lounge area just off the open-plan kitchen creates a visual boundary that it normally would lack.
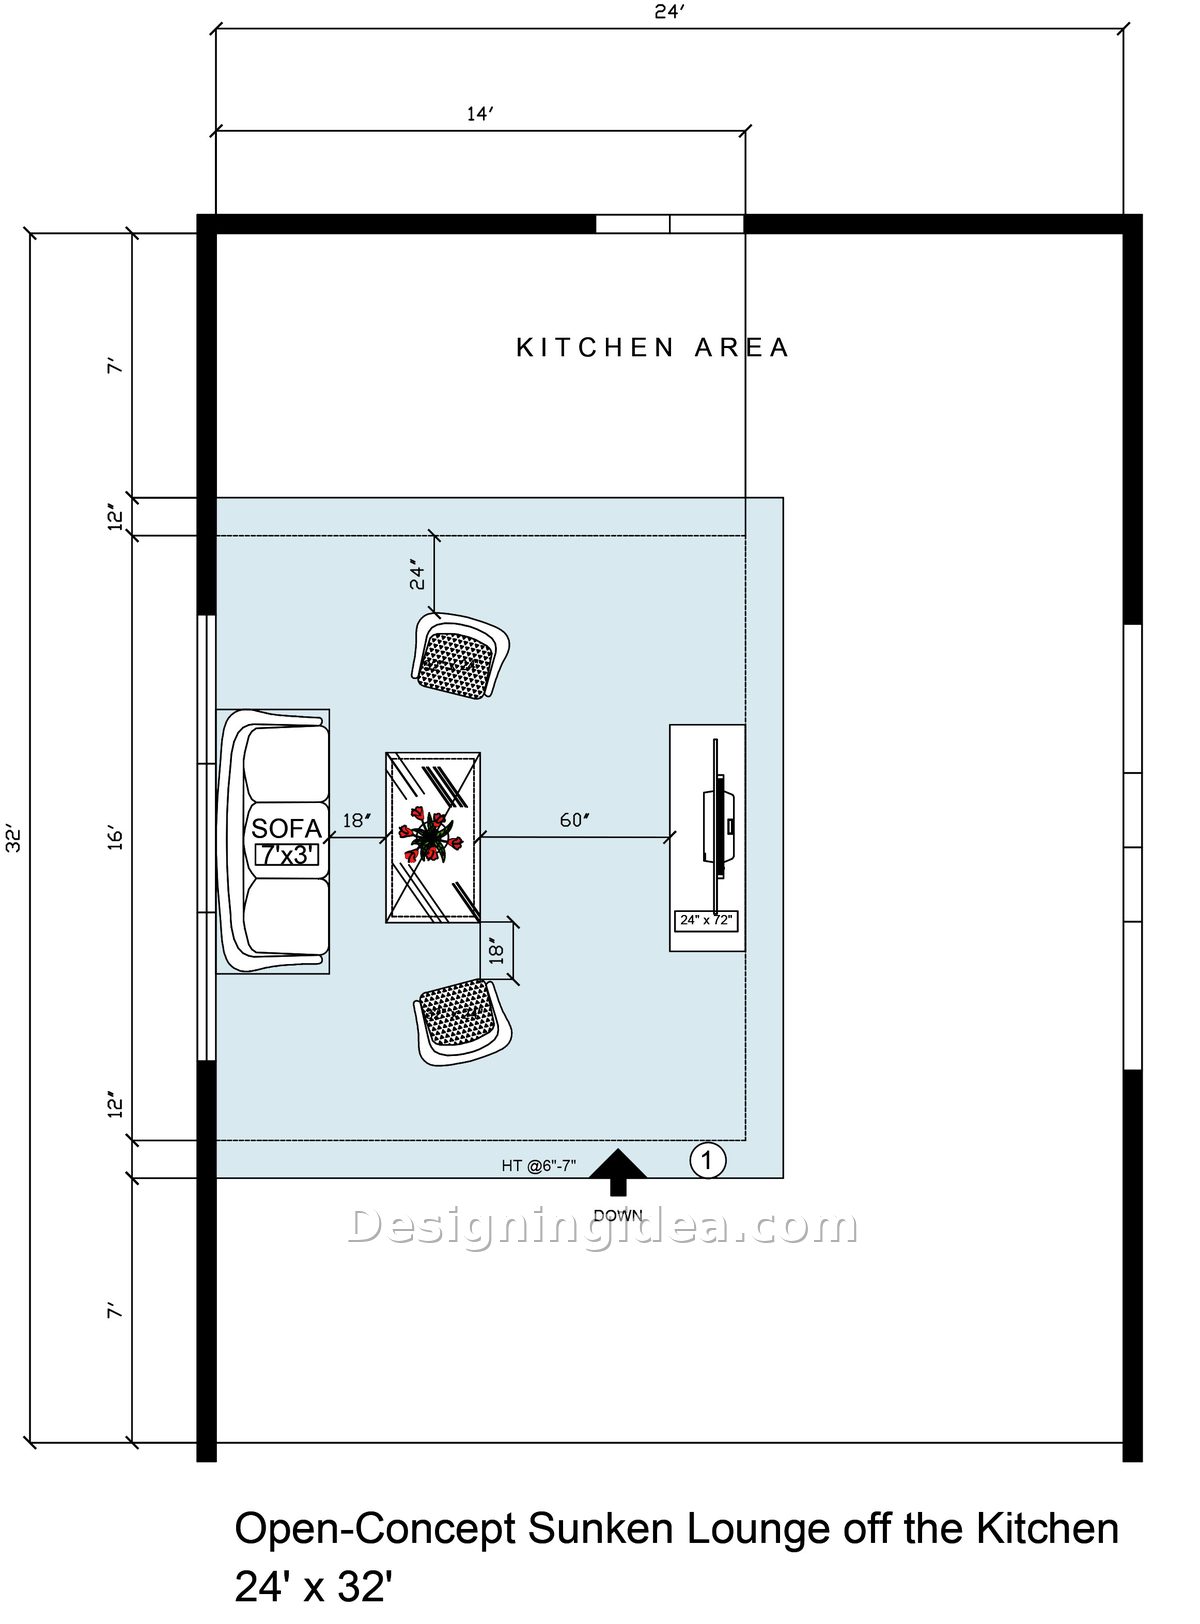
An open-plan arrangement is fine until you realize that there’s a sofa floating in the middle of nowhere with a kitchen island behind it. This creative layout corrects that problem by lowering the lounge area by six inches below the kitchen floor for dramatic effect. The sunken section is about 14 feet wide and 16 feet deep within a room that is 24 feet by 32 feet. In this design, the sofa is sized at 7 feet by 3 feet and placed on the left wall, with two lounge chairs facing in, and a TV placed on the right on a console measuring 24 by 72 inches. The coffee table is set 60 inches from the wall with the TV, making the distance from the sofa to the screen a little more than 10 feet. This arrangement is comfortable for viewing a television of that size without anyone feeling as if they are too far from the screen.
On the top and bottom edges of the sunken area, there is a 12 inch clearance for the steps, the kitchen being 7 feet deep above it and there being 7 feet of open floor below, which is intentionally designed so you have space to walk around the lounge rather than having to go directly through it. This way it ensures that anyone moving from the kitchen to the opposite side of the house doesn’t have to pass between the sofa and the TV screen. The figures for the 18 inch gaps around the coffee table and the 24 inch clearance behind the chairs are the ones you should keep if you enlarge or reduce this plan.
Dimensions:
- Overall room: 24 feet by 32 feet
- Sunken lounge zone: about 14 feet wide by 16 feet deep
- Sofa: 7 feet by 3 feet; TV: 24 by 72 inches
- The coffee table is 60 inches in size, which places the sofa at a distance of 10.5 feet from the screen.
- Coffee table clearance: 18 inches all around
- Chair clearance: 24 inches behind
- Kitchen zone: 7 feet deep across the top of the plan
- Step down: one step at 6 to 7 inches
Design Tips:
- Cover the step edge with the same material as the kitchen toe kick or the island base for a more cohesive design. This helps link the two areas together so the drop appears intentional rather than an accidental addition.
- There’s no need for an area rug as the lowered floor already establishes the seating area, and a rug within a drop as a designated area.
- If you’re cooking with guests, then face the sofa towards the kitchen rather than the TV wall for better entertaining. Position it about 10 feet away; this way, the chairs will give you a good view of the screen.
Narrow Sunken Lounge Along a Window Wall Design
The bench is built into the window frame so it acts as additional seating and recovers some of the floor space that a narrow room cannot afford to lose.
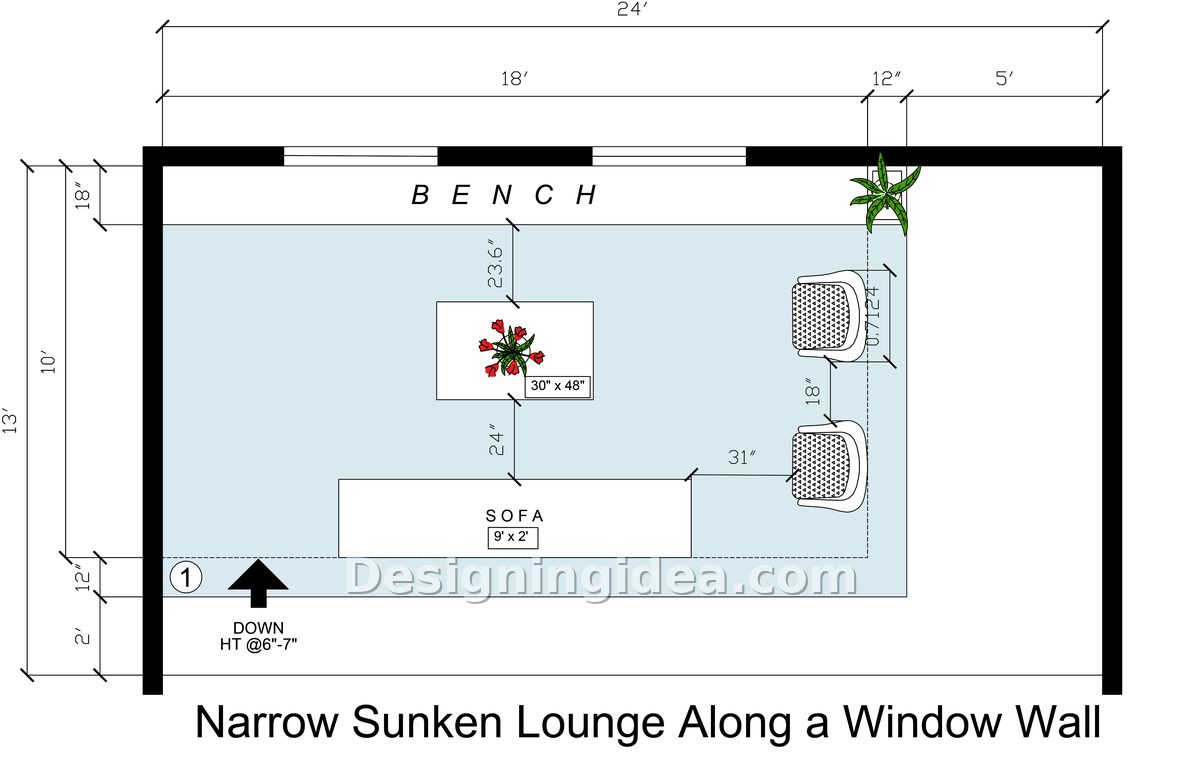
It can be difficult to deal with long and narrow rooms. For instance, if you place a sofa on each of the long walls, then you end up with a corridor. This design scheme prevents that by putting an 18-inch bench underneath the wall with the window, so it creates an aesthetically pleasing structure that differs from the sofa. The sunken section is 18 feet long and 10 feet wide within a room that is 24 feet by 13 feet. At the lower end there is a sofa that is 9 feet by 2 feet, a coffee table that measures 30 inches by 48 inches and is placed 24 inches in front of this sofa, with two chairs stacked at the right end with their backs turned towards the sofa. This pair of chairs on the right-hand side makes the arrangement work, since rather than having two sofas face each other down what feels like a corridor, you end up with a proper conversation triangle.
The bench has the additional function of keeping the window wall entirely open which allows daylight to reach the living room floor and makes the room seem wider than only 13 feet. The distance between the bench and the coffee table is 23.6 inches, leaving enough space for people to pass through without strain. There is only one access point and in such a narrow room this single entry means the traffic enters at one end and comes to a stop there instead of going through the middle to access other parts of the home.
Dimensions:
- Overall room: 24 feet by 13 feet
- Sunken area: 18 feet by 10 feet
- Window bench: 18 inches deep, running the full 18 foot wall
- Sofa: 9 feet by 2 feet; coffee table: 30 by 48 inches
- Bench to coffee table: 23.6 inches; sofa to coffee table: 24 inches
- Walkway to the chair pair: 31 inches; 18 inches between chairs
- Step down: one step at 6 to 7 inches, with a 12 inch tread
Design Tips:
- Add storage inside the bench by using hinged lids instead of drawers since they require extra space that will interfere with the walking path.
- Place the art or a mirror on the wall behind the sofa, as this is the largest area to accommodate it. A mirror can help brighten and visually enlarge the narrow space.
- At the right end, use chairs with no arms or ones with low backs so you don’t obstruct the line of sight down the room and keep the openness which is the hallmark of a sunken floor design.
Conversation Pit in a Compact Family Room Layout Ideas
Following the blueprint for a traditional conversation pit with built-in seating this design offers benches on three sides without requiring a single piece of loose furniture.
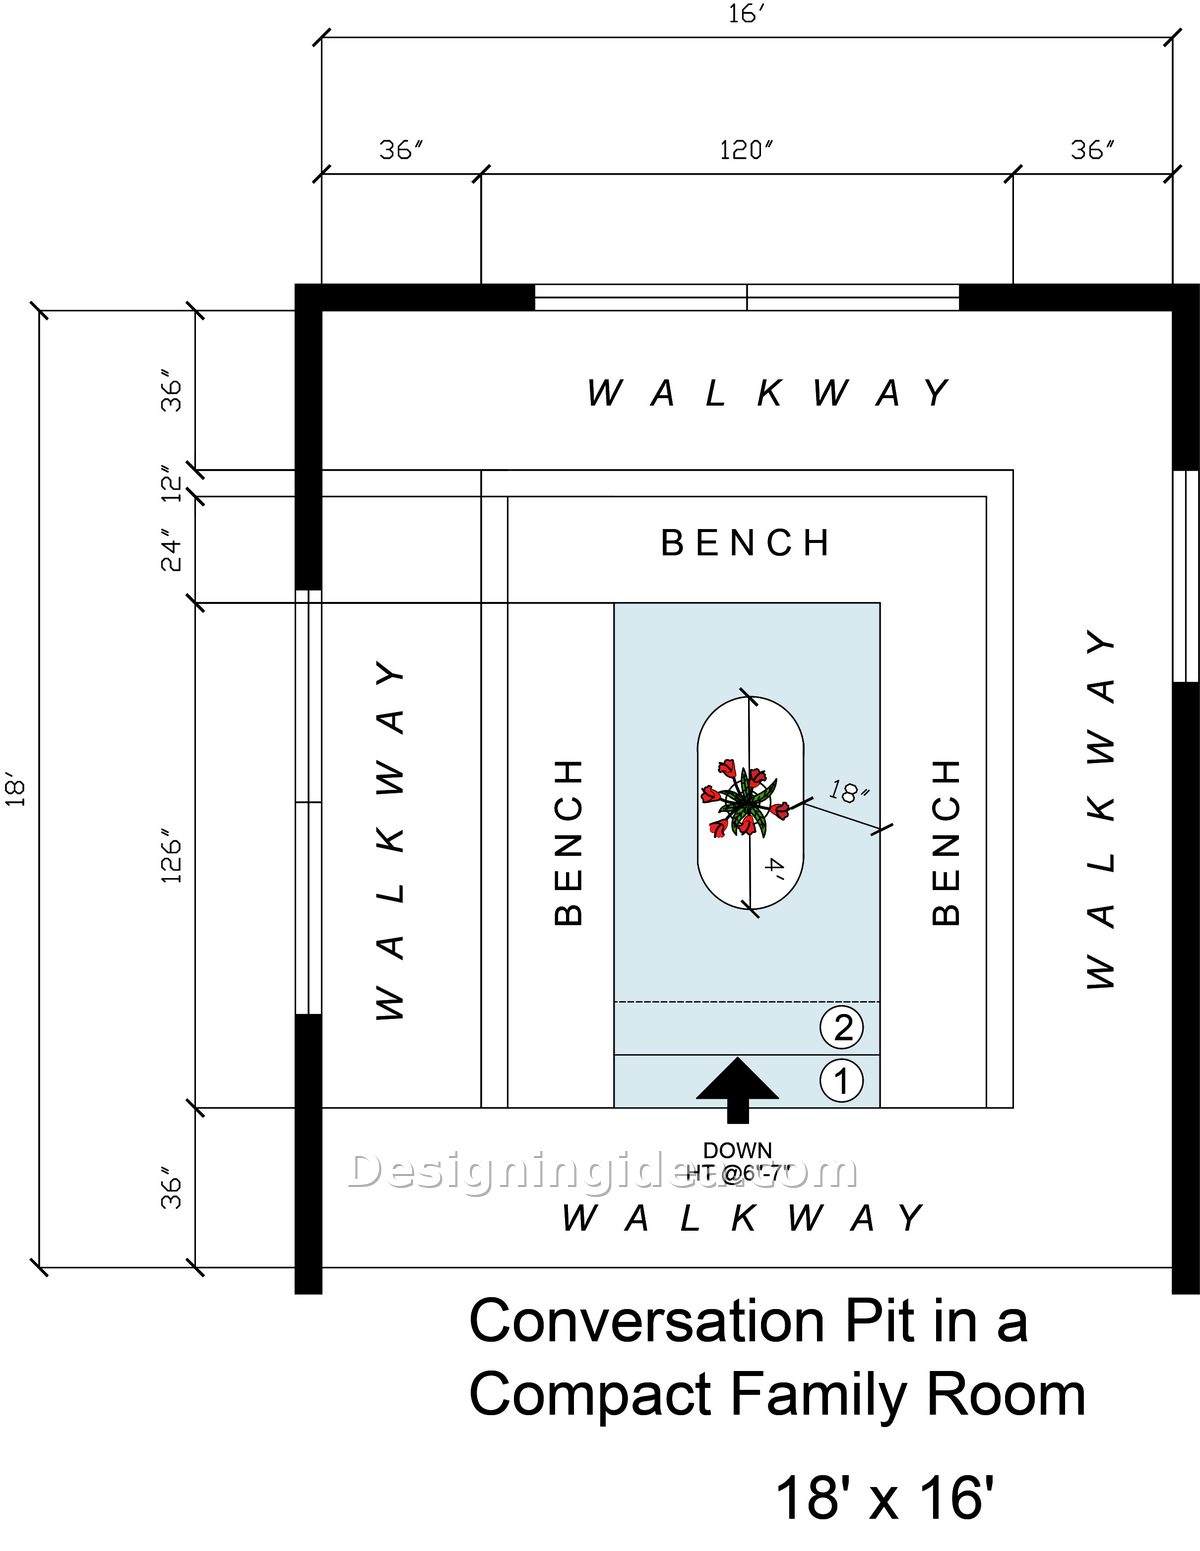
That is exactly the type of arrangement people imagine when they hear the words, conversation pit, and it functions more effectively in a small room than you would anticipate. The dimensions of the room are 18 feet by 16 feet, with the pit itself measuring 120 inches wide and 162 inches long, and it has built-in benches around three of its sides. There is also a 36 inch walkway that wraps around the perimeter giving it plenty of access along its sides. The entire design depends on this perimeter walkway, so there’s no need for anyone to go through the seating in order to cross the room if needed. With this layout you end up with a well-defined social area and a focused route for traffic, with both fitting within 288 square feet.
This conversation pit features two steps down (labeled 1 and 2), and to go down two levels, you need a 6- to 7-inch drop for each step. This is a greater drop than the one-step plans mentioned above, which is why the pit feels like a room within a room rather than just a slightly lower section of floor. The depth of the bench is maintained at 24 inches around. In the center there is a small table which is a 4 feet long oval with 18 inches between it and the seating. The reason it is kept small is so that people can face one another and have room to easily walk around.
Dimensions:
- Overall room: 18 feet by 16 feet
- Conversation pit: 120 inches wide by 126 inches deep
- Perimeter walkway: 36 inches on all four sides
- Bench depths: 12 inches and 24 inches depending on the side
- Center table: 4 feet by 18 inches
- Step down: two steps, labeled 6 to 7 inches
Design Tips:
- Place a single continuous cushion on each bench instead of using individual seat pads, since the gaps between the cushions are notorious for gathering crumbs and can move whenever anyone sits.
- Place the outlets in the lower face of the bench, not in the floor of the pit, to cut down on tripping hazards.
- Light the sides of the two-step section using built-in wall lamps. You can also add built-in LED light strips to the two-step drop since it can be one that people tend to misjudge when it’s dark.
Large Sunken Great Room with Corner Fireplace Floor Plan
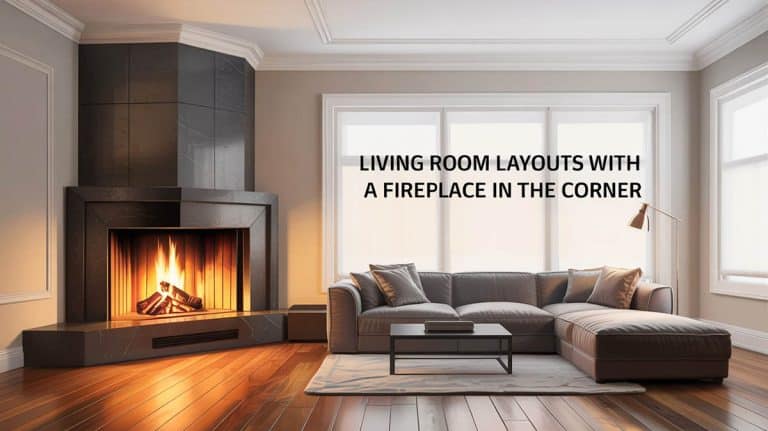
To define and create a focal point in a sunken open great room, a corner fireplace creates a diagonal layout that makes the large rectangular space feel luxurious rather than empty.
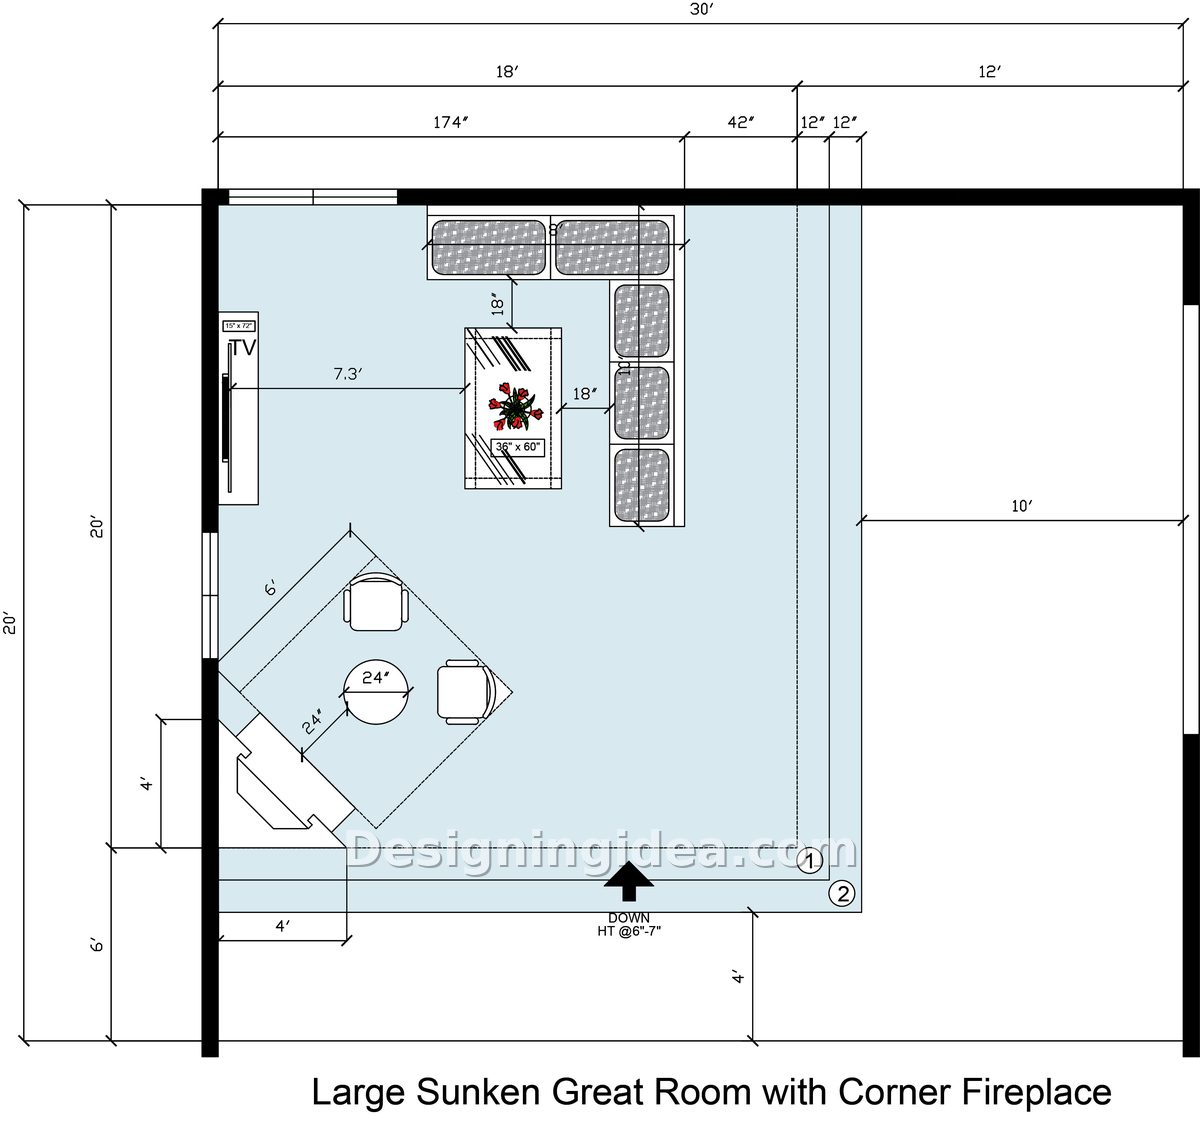
One of the primary problems with large rooms is that there is so much floor space that people end up sitting too far apart, which makes it awkward to easily talk to one another. This great room, measuring 30 by 20 feet, overcomes that problem by creating two distinct areas for sitting and conversations within a single sunken space. The central area extends along the top and the right side, featuring modular sectional seating arranged in the shape of an L and a table measuring 36 inches by 60 inches in front of it. On the left wall, there is a television measuring 15 by 72 inches located 7.3 feet from the coffee table and about 11 feet from the seating. This is an adequate viewing distance for a screen of that size and places the entire media setup in the upper part of the room for a less formal arrangement.
What makes this plan interesting is the lower left corner, which focuses on a more intimate conversation zone and focal point. In this corner, there is a fireplace measuring 6 feet wide with two chairs and a 24 inch round table next to it. This forms a second, smaller sitting area where one can relax, the seats being positioned away from the TV, and as a result, the room can be used by two groups at the same time for entertaining or relaxation. For instance, one person can read by the fire while another watches a game.
The sunken area comes to a stop at a distance of about 10 feet from the right wall, leaving a full-height section of floor on that side for a transition area to the dining room, a kitchen, or other functions. There are two steps that lead down from the bottom edge and are placed so you land on the open floor zone rather than directly behind the seats.
Dimensions:
- Overall room: 30 feet by 20 feet
- Sunken zone: about 20 feet wide by 20 feet deep, with a 10 foot strip of floor beyond it
- Coffee table: 36 by 60 inches, with 18 inch clearances to the seating
- TV: 15 by 72 inches, 7.3 feet from the coffee table and about 11 feet from the seating
- Corner fireplace: 6 foot diagonal wall with a 24 inch round table
- Step run: 4 feet wide, two steps labeled 6 to 7 inches
Design Tips:
- Make sure that the fireplace chairs are light enough to easily move easily. This way, if you decide on gathering as one group, you can do so without extra effort.
- If you would like more of a divider for the sofa area, place the modular seating right up to the edge of the step and don’t float it. In a room of this width.
- Use the 10 foot flooring space on the right either for a console or for two tall plants, not for additional seating since it’s a transition area and having chairs which no one sits in could make the great room look cluttered.
Getting the Step Right
In each plan the drop is stated as 6 to 7 inches and that figure is carrying more weight than the layout does.
A height of six or seven inches is less than that of a typical stair, and this is done purposely since it appears to be a level change rather than a staircase. This way people step down without having to think about it. It also keeps you code compliant as the International Residential Code defines a stair as a change in elevation consisting of one or more risers. So a single step down into a living room is a stair, and the stair rules apply to it. The ceiling on riser height is 7 3/4 inches. A 6 to 7 inch drop sits just under that on purpose.
Take it to 8, and you have built something an inspector can fail if not done correctly. There is no minimum riser height in the code, which surprises people. That doesn’t make shallower safer. A 2- or 3-inch lip is something people can catch a toe on because, at that depth, the eye reads it as a flat floor. If you’re dropping the room at all, drop it far enough to be seen to help prevent accidents. Two steps bring one more rule, which is that risers in the same flight have to match within 3/8 inch, so a 7 inch step followed by a 5 inch step is out of the question, even though both are under the maximum.
Step treads need at least 10 inches of depth. This is worth checking on a conversation pit, where the step and the bench line can often be the same piece of woodwork. Handrails and guards are two things people assume a sunken room needs, and they usually don’t. A handrail is required at four or more risers, so a one- or two-step drop doesn’t have that restriction. A guard is required only where the drop is more than 30 inches, which is roughly four times deeper than anything found in these floor plans. If you want a rail anyway, for an elderly grandparent or a kid who is still learning the room, the code puts it between 34 and 38 inches.
When you’re incorporating this into a house that already exists, the drop must originate from somewhere. In the case of a split-level home, it already does. With a slab, you have the option of raising the surrounding floor or of cutting into the slab, which can be incredibly expensive. No matter what the plan is, you should light under the edge or on the face of the step; a strip of LED placed under the nose of the step has little cost and can enhance the room as a design feature and prevent unwary guests from tripping.
The building codes have a number for lighting steps as well. An interior stairway needs a light source capable of putting at least 1 foot-candle at the center of the treads. The wall switch requirement only kicks in at six risers or more, which a sunken room like these don’t reach. So where you put the switch is completely up to you. Everything above is the model code, and both the 2021 and 2024 editions agree on every figure shown. Check with your local building department, as they can adopt their own edition and amend it, so always confirm with them before anyone does any remodeling work. Once the drop itself is settled, the next question is what goes into it, and that comes down to how you arrange the seating.
To showcase highly specific designs, some images on this website use advanced AI-generation software to illustrate ideas and room inspiration. See our editorial policy to learn more.