50 Interior Designer Home Office Built In Ideas

If you find yourself working from home, then you’ll want a desk that can closely replicate the functionality of the one in your office. Whether for simple tasks like taking notes or paying bills to get some paperwork done, you need a personalized workspace that will help encourage your productivity, while keeping all your things organized.
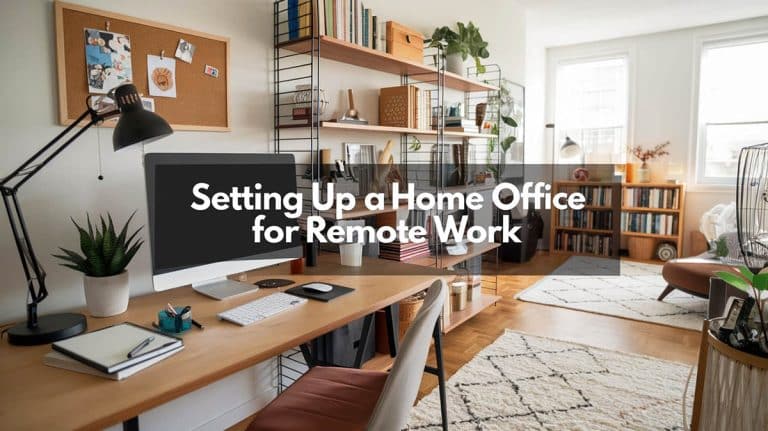
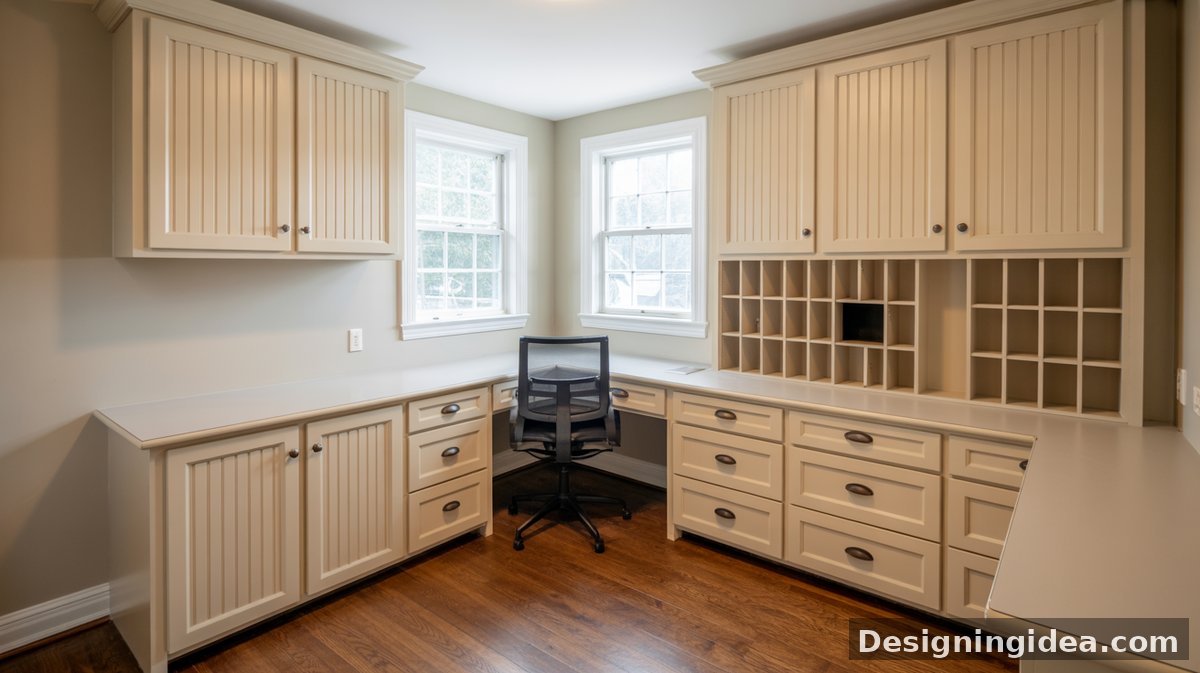
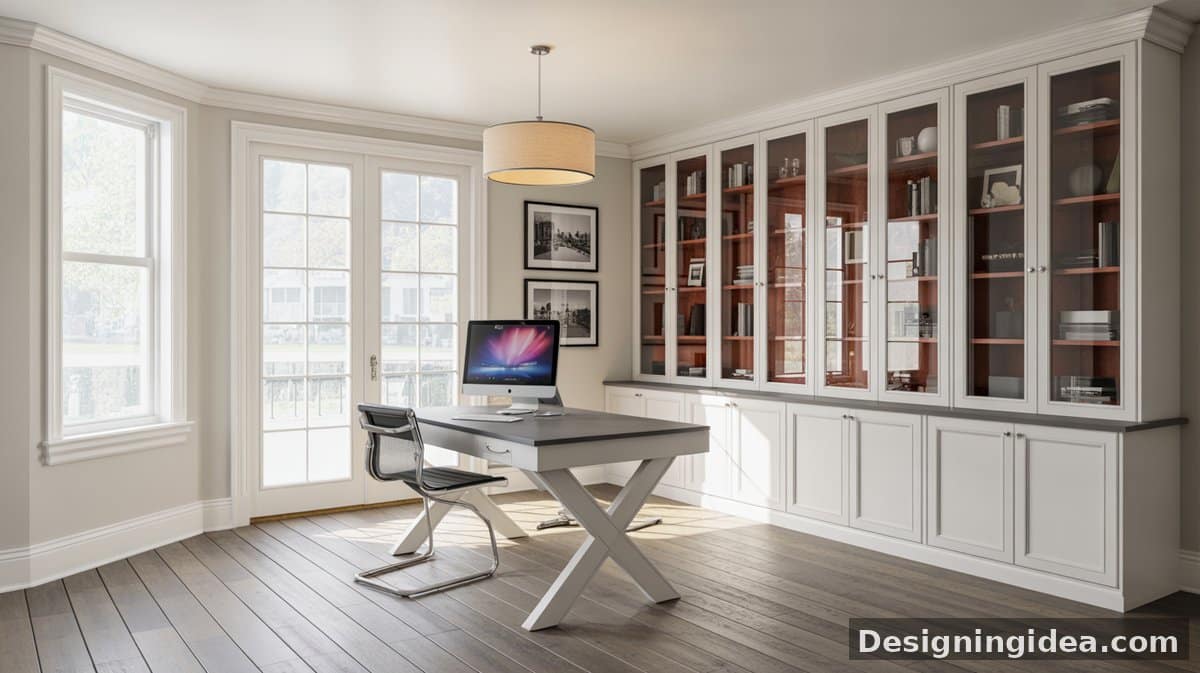
Home office built ins are the best solution to helping maximize your space, optimizing your storage, and promoting your creativity at home. The most optimal built in storage systems combine different types of shelving, cabinets and drawers because they provide an organized way to store items of all types, shapes, and sizes. The built in home office in the picture above has tall cabinets which are flanked by open shelves that serve as a display for books and other decor. The bottom part makes use of drawers which keeps clutter out of sight.[toc]
Here we give you some of the best built in home office ideas that you can try out for your home. Whether you’ve got a tiny corner or an entire room for a home office, we have just the right tips and ideas to inspire you.
Built In Office Cabinets
Nobody wants to work in a messy home office and the best way to prevent clutter from building up in your space is to have some organized storage on hand. Storage such as cabinets and shelving are the key features of built in home offices. If you are setting up a space where you can work at home, you will be needing stationary, office supplies and equipment for your tasks.
Having a designated storage for each type of item will not only help prevent your home office from looking cluttered but it will also help you efficiently perform your task. When your space and home office storage is organized, the time and effort that you need to look for things is lessened and you can concentrate more on what you are doing.
When it comes to the design of built in office cabinets, the most common type are bookcase cabinets. Bookcase cabinets are typically a combination of shelving and closed cabinets. Usually, the top part of the built in wall unit is filled with shelving and the bottom part is dedicated for the cabinetry.
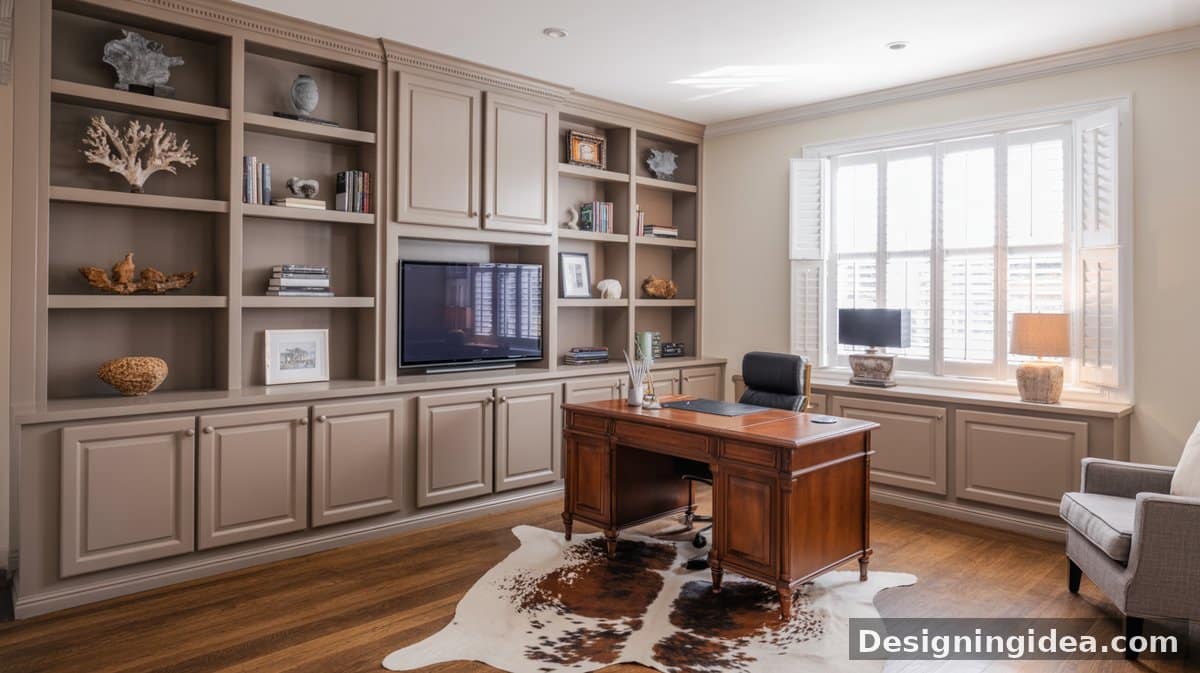
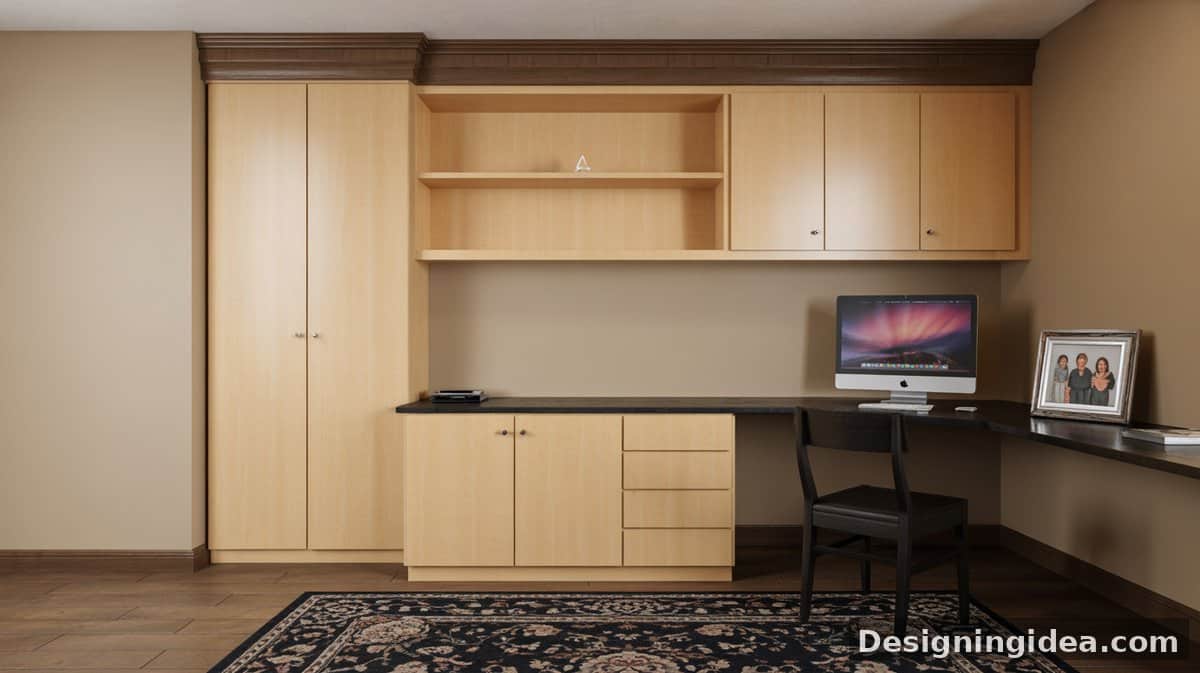
This taupe built in home office with cabinets creates an illusion of a bigger space since it exactly matches the color of the walls. Aside from the built in desk which houses the computer, another tier of shelf serves as a media and tv cabinet.
In planning the design and layout of your home office built in, one of the key tricks to keep in mind is organization. Think about whether you want a desk to take up all the space, or whether you need to leave room for other furniture and storage. When it comes to the built in storage, you do not always need to keep everything tucked in a drawer. Take advantage of vertical space and combine different types of shelving and cabinets that go from the floor to ceiling.
To create effective built in office cabinets, you have to keep in mind standard measurements and dimensions for their design. Having the right height, depth, width, length and spacing will make sure that your built in home office storage is comfortable to use.
Built-in Cabinets & Bookshelf Sizes
Standard dimensions and sizing guide that you have to keep in mind when designing built in office cabinets, shelving and storage systems:
For built in office cabinets and bookshelves:
- Standard height of built in bookshelves for home offices – For ease of access, bookshelves in general should not be higher than 84 inches or 213 centimeters. Small bookshelves are typically between 30 to 42 inches or 76 to 107 centimeters high.
- Standard depth of bookshelves– General purpose bookshelves are typically 10 to 12 inches or 25 to 30 centimeters deep
- Recommended shelf spacing for built in bookshelves – Shelf spacing for bookshelves generally range from 8 to 12 inches or 10 to 30 centimeters.
For built in office shelving:
- Recommended height of highest shelving – Based on the comfortable reach of an average sized person, the highest height of shelving should be between 72 to 78 inches or 182 to 198 centimeters.
- Recommended height of lowest shelving – The lowest shelf should be 3 to 4 inches or 7 to 10 centimeters from the finished floor level.
- Standard shelf depth – Depending on the type of item to be stored, the recommended depth for shelving in built in home offices range from 6 to 24 inches or 15 to 61 centimeters
- Recommended shelf spacing – The recommended shelf spacing generally ranges from 7 to 15 inches or 17 to 43 centimeters. The spacing of the shelving can be varied from top to bottom to balance out your built in storage. Use smaller spacing at the top and larger spacing near the bottom to prevent your built in from looking top heavy.
If you have built in office furniture that spans from wall to wall, try leaving some of the shelves blank as it creates a lighter and brighter feel in the space.
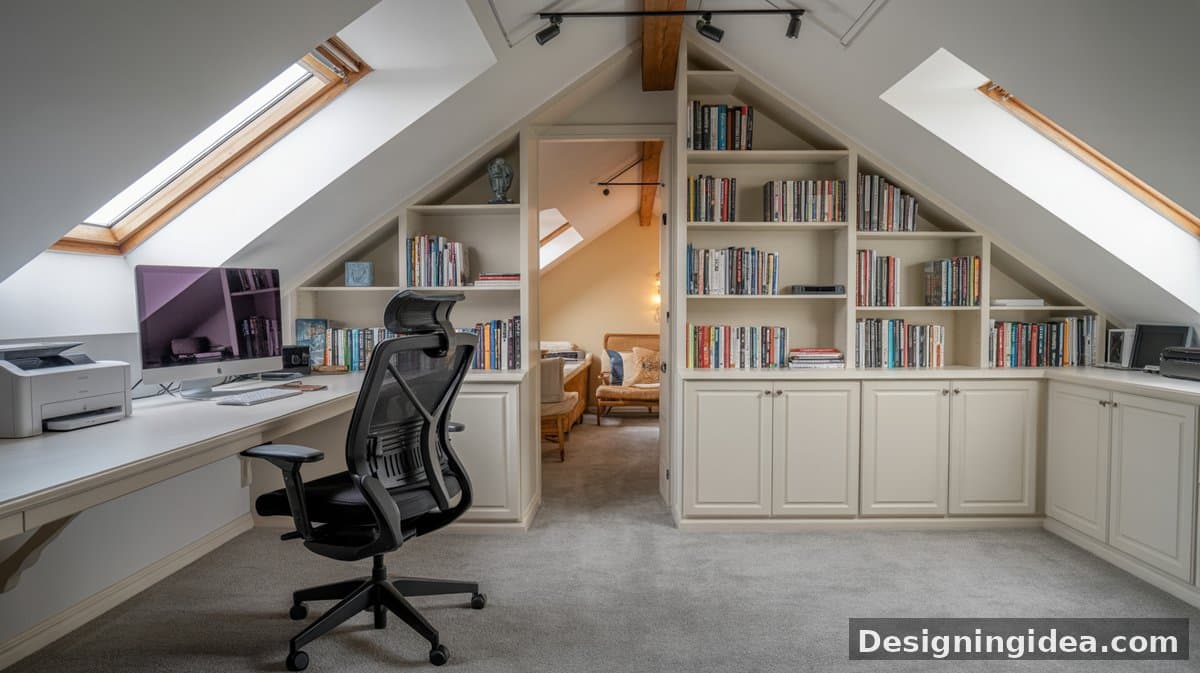
A home office does not always have to be a separate room in your house. You can look for unused areas, wasted space or even awkward corners then transform them into a work station by using a home office built in desk. Many homes, for example, can convert their attic into a simple home office by creating a built in desk in the small nook. The trick to making your attic office inviting is to have plenty of light.
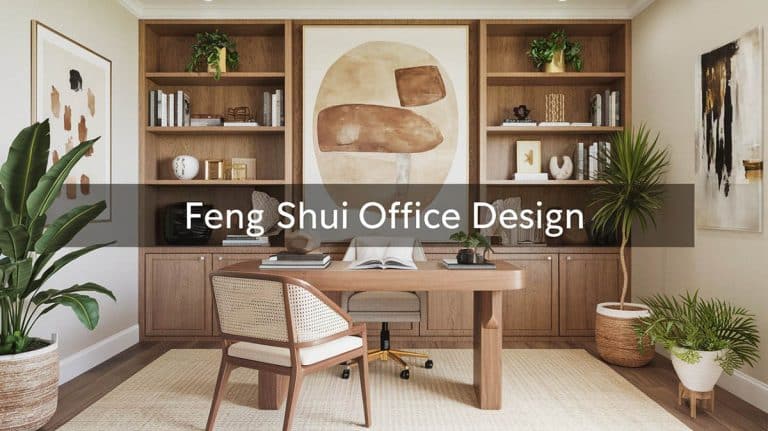
Contrast is a very effective design trick as it heightens the visual interest in a space. For more creative designs check out our gallery of Feng Shui office ideas here. If you have the luxury of space, you can take advantage of it by creating built in home office storage on several walls of the room.
Built In Desk Cabinets

If you have a wall of cabinets somewhere in your home, this will be an ideal spot to put a built in desk. Incorporating a built in desk with cabinets not only maximizes the space in your home and does double duty as a storage and workspace, but it also helps in achieving a clean and seamless look.
Blending a built in desk into cabinetry hides the desktop, while the shelving distracts the eyes and makes the whole home office setup visually disappear into the space.
Built-in desks often include large drawers with platforms for a printer, fax, or other equipment. – Organized Home: Stylish Storage Solutions for Every Room, C. J. Petersen
There are several layouts which you can try to create a built in desk with cabinets, but one of the most effective design tricks to make it seamless is to keep the desktop flushed with the rest of the cabinets. Extending the desktop’s width beyond the face of the cabinets will break the continuity of the cabinetry. In addition to this, the desktop should also be the same height as the cabinets on both sides.
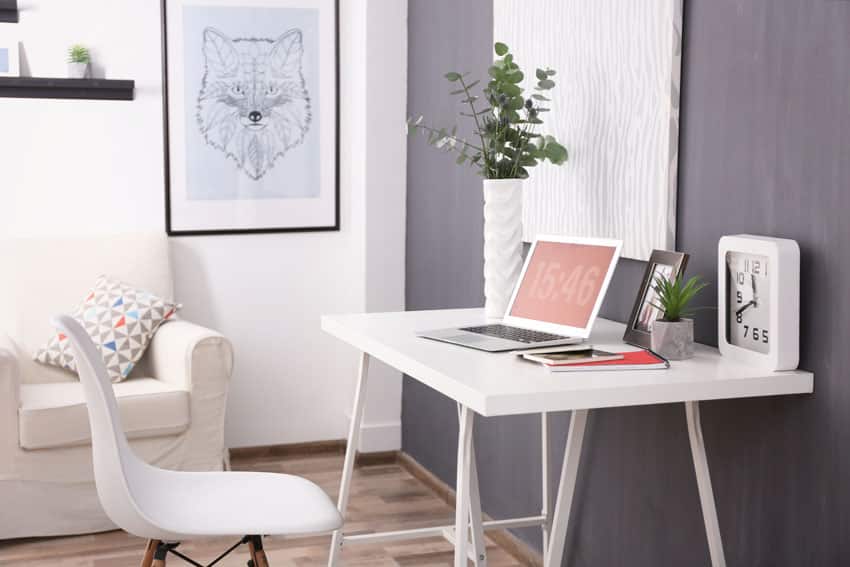
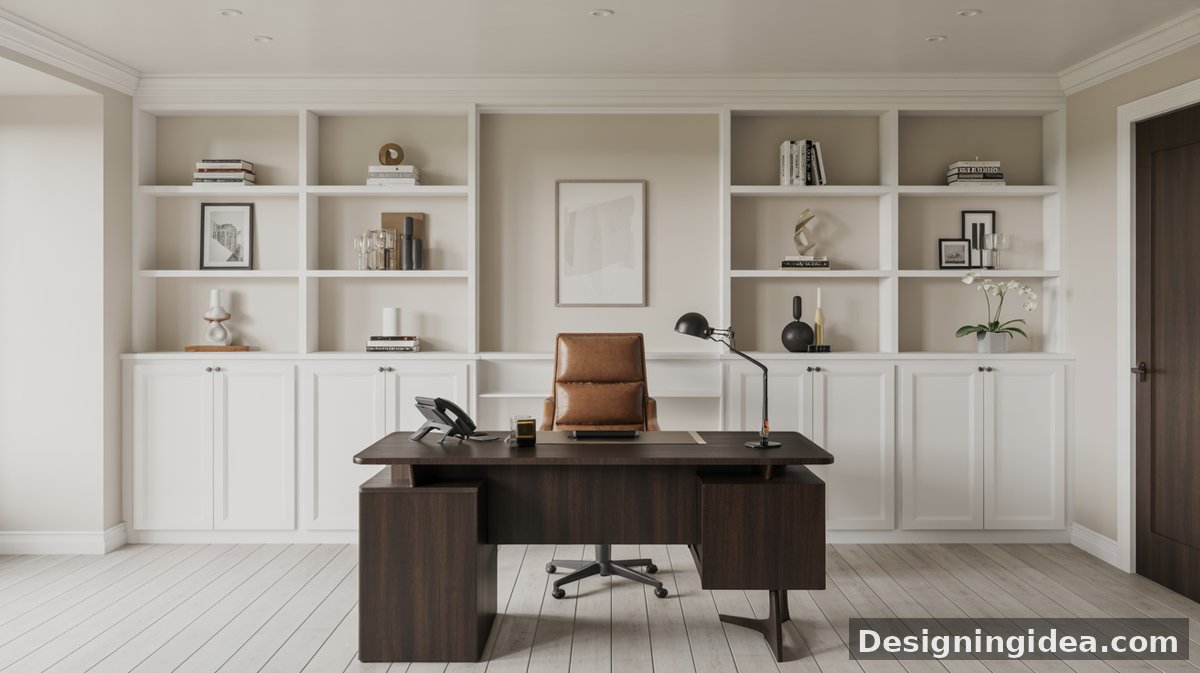
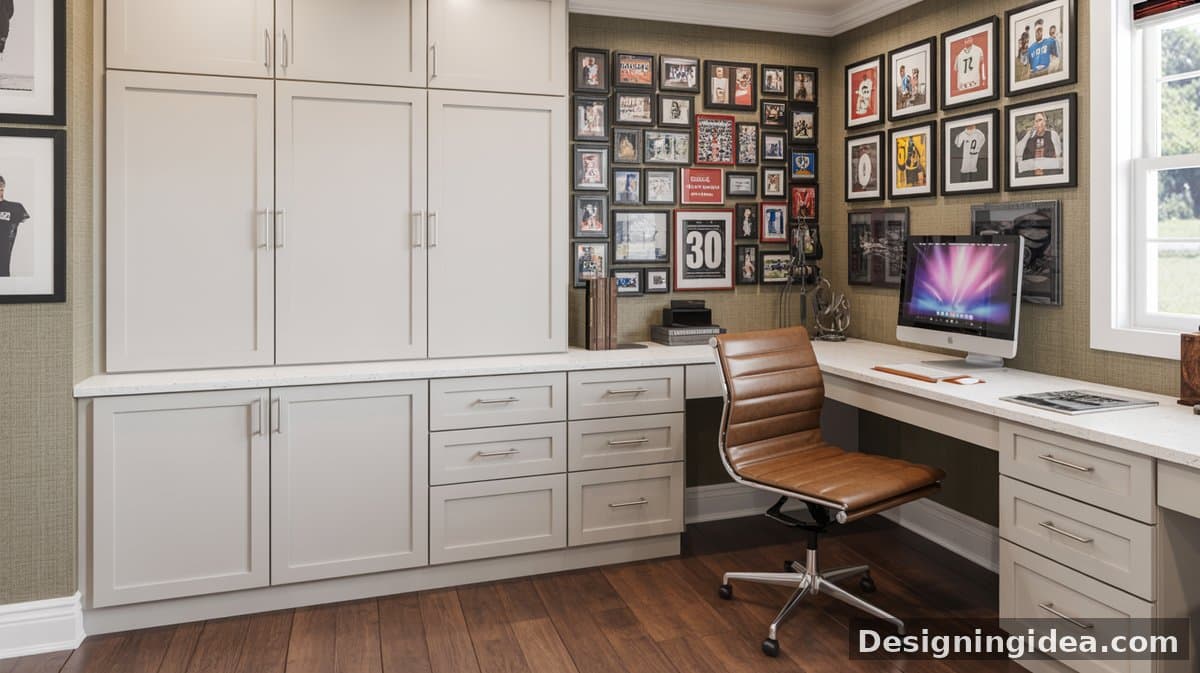
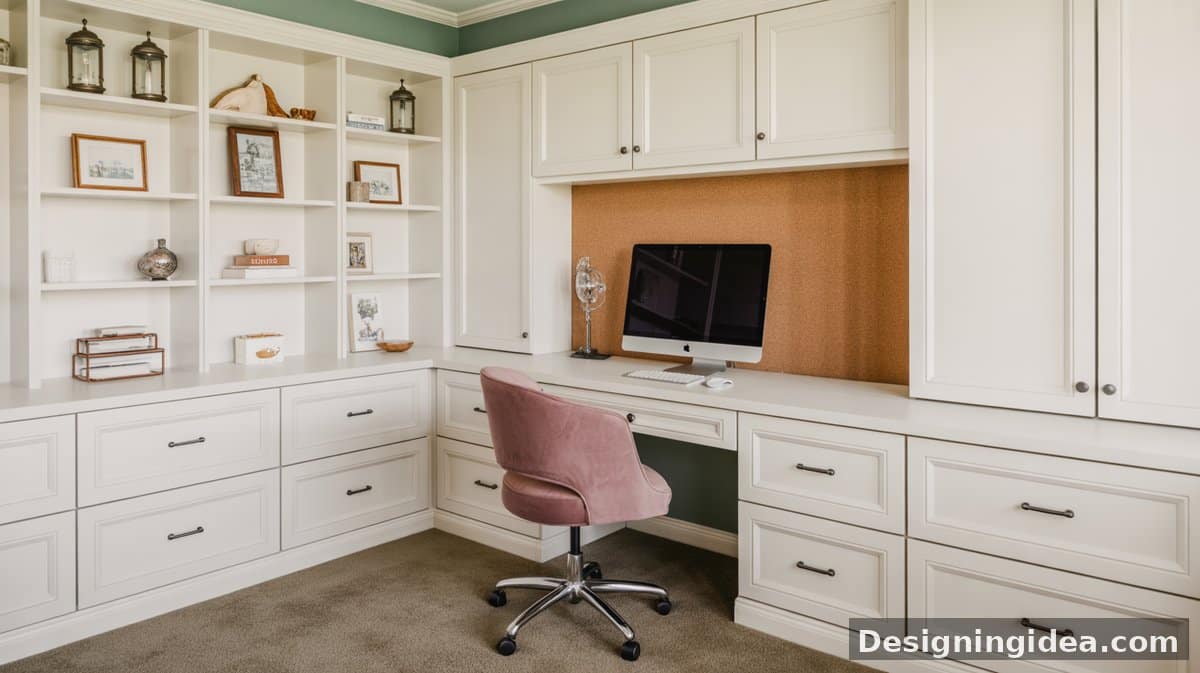
Classic whitecan be easily updated using a fresh wall color and contrasting accessories. The accessories that you put inside also plays a significant role in heightening the overall visual interest of the space. An all white space, for example, can easily look dull and monotonous, but with the use of black and white framed photos and colorful accessories, one can bring in a subtle splash of color that livens up the space.
If you have the luxury of space, you can opt for wrap around built in desks or U-shaped workstations. Another layout to try for home office built-in ideas are L shaped desks. This larger version also allows for two people to work simultaneously at each end of the table. Placing a built in cabinet in between is perfectly positioned since it can be accessed by both users from their respective places easily.
Small desks fit into tiny nooks perfectly and require a minimal amount of space. Thanks to their compact size, they are very versatile and can be installed in small spaces like a corner, under the stairs, or for this case, a hallway.
DIY Home Office Studio with a Built-In Desk
Aside from the option of furnishing your home office with a freestanding desk, one of the best ways to maximize your space at home is to mount it on a wall. The difference between using a freestanding desk and a built in desk is that the latter blends more seamlessly with the design and style of the space.
DIY built in desks can either come with cabinetry and shelving, or it can be as simple as a single piece of floating desktop fixed to a wall. If you need plenty of workspace. You can extend your diy built in desk to an entire length of the wall or create an L shaped layout. The design is ultimately up to you.
The best thing about DIY built in desks is that you can customize it in any way you like and according to your personal needs, specifications and preferences. When it comes to the design and decor, DIY built in desk allows maximum flexibility. You can add homey finishing touches to personalize your workspace and make it more comfortable.
Built in shelving are very practical addition to a home since it can easily convert into a small home office desk. This particular design is very simple, consisting only tiers or ledges, but it offers maximum functionality and can be used by two persons.
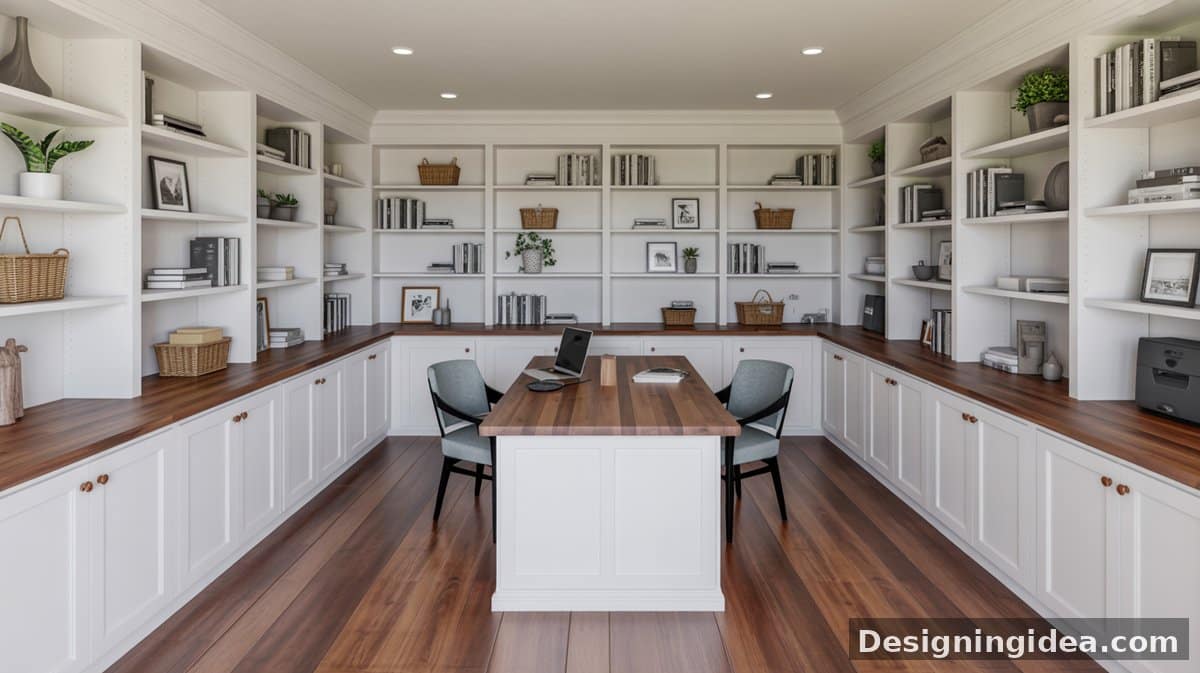
This vast open space is furnished with a very long built in desktop that can serve as a workspace or study space for three. Underneath it are built in drawers for storage.
How to Build a Built-In Desk
Constructing a built in desk can be undertaken as a Do it Yourself weekend project. Making a basic built in desk is a simple task which can be done even by beginners with little to no carpentry experience. As long as you have the right power tools, you can have a built in desk done in 2 days.
Standard measurements and sizing guide:
- Standard height of desks – around 29 to 30 inches or 74 to 76 centimeters high
- Common lengths of desks – 48 inches (120 centimeters), 60 inches (150 centimeters), 72 inches (180 centimeters)
- Common widths of desks – 24 inches (61 centimeters), 30 inches (76 centimeters), 36 inches (91 centimeters)
Design tip : when deciding on the measurements for your built in desk, round off measurements of your desk to the nearest ½ foot to 0.15 meters to make measuring, marking and cutting much easier.
Here is a step by step guide on how to make a simple, fully functional built in desk. For this particular project, the resulting size of the desktop is 2 feet x 4 feet ( 24 inches x 48 inches)
Materials:
- 1 piece of 4’ x 8’ x 1″ thick plywood board ( this will be used for the table top, cut this into a 2 ft x 4ft size or according to your desired desktop size)
- 4 pieces of 2×4 lumber ( this will be used for the legs and seams or support braces, cut this according to your desired length)
- 1.5″ nail brads
- Screws
- Latex wood filler
- Wood glue
Primer
- Enamel paint
- Sandpaper 180 grit
- Sandpaper 320 grit
Tools:
- Protective gear such as safety glasses, respiration mask and gloves
- Pencil
- Tape measure
- Power sander
- Hammer
- Power drill
- Spackling spatula
- Saw horses & wood clamps (optional)
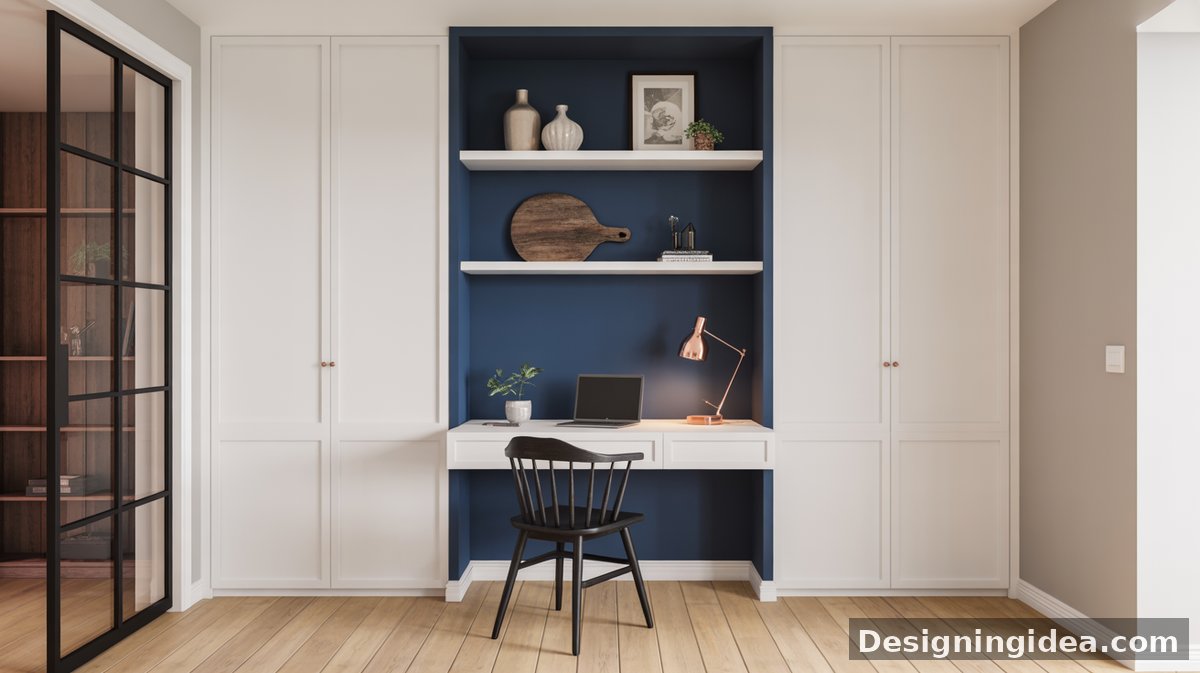
If you plan on making a home office built in nook, paint the wall behind it with a contrasting color. In that way, you do not only have an accent in the space, but it also delineates it from the rest of the room. Take this small DIY built in desk as an example — it stands out in the space with its navy blue wall.
Steps in making a built in desk:
Part 1. Designing your desk.
- Once you have decided on where your built in desk will go, the first step that you have to do is to measure the area where you will be putting it. Stretch the tape measure from one end to another and take note of the necessary measurements. Double check the measurements that you have as these are very critical and significant in gathering the materials that you will be needing for building your desk.
- Decide on a practical size for your built in desk. Based on the standard measurements we have mentioned above, decide on the size of your built in desk. We will create a 2 ft by 4 ft desk for this project.
- Plan the design of your desk. The design of a simple built in home office desk can be as straightforward as a basic table or desktop mounted to a wall. You can customize this according to your needs and preferences — you can include a drawer if you want or a closed cabinet underneath. The design is ultimately up to you. But again for this particular project, we will only be making a simple built in desktop with legs.
Design tip #1: If you do not have enough space for a full built in home office desk, consider installing a floating desk. A floating desk will not need legs and is much easier to make because you only need 1 to 2 pieces of wooden boards which will be used as the desktop, then it will be fastened to the wall using brackets or mounting hardware. Floating desks can be as small as 1.5 feet (0.46 m) x 3 feet (0.91 m), and often require only 1-2 pieces of wood.
Design tip #2: Plywood typically comes in 4 feet x 8 feet size boards with nominal thicknesses that range from 1/8 inch or 3.2 mm to 1 1/4 inches or 31.75 mm.
Part 2. Making your desktop using a 4×8 sheet of plywood.
Design tip : The actual thickness of 2×4 boards is not exactly 2 inches or 5.1 centimeters, but only 1.5 inches or 3.8 centimeters.
Based on the actual size of boards, the exact dimensions of your 2×4 feet desk is 24 inches or 61 centimeters wide. You will be needing this for reference in cutting the braces and legs of your desktop.
- Once you have decided on the design and size of your desk, cut your wood according to the appropriate dimensions. For this particular project’s desktop, measure a 2 feet by 4 feet rectangle on your 1 inch thick plywood board. Mark this using a pencil.
- Using a miter or circular saw , trim your 1 inch plywood according to size.
- Get your 2 feet x 4 feet plywood and run a sheet of medium or high grit sandpaper over the edges of the plywood until smooth to prepare it for finishing. Do this in circular motions and make sure that the wood’s surface is smooth enough to absorb the paint or stain better. For best results, stick with an 80 to 120 grit sandpaper. You can also use an automatic finishing sander as it will get the job done more quickly.
- Finishing your desktop. Using a paint brush or a roller brush, apply 2 to 3 coats of paint or wood stain of your choice to your plywood desktop. Brush the color against the pattern of the wood grain to achieve better results.
- Let the paint dry for at least 24 hours before applying the next coat. Stop applying the paint or stain once you get the desired depth of color that you want. Let the final coat of paint or stain dry for 24 hours.
Design tip : Before applying another coat of paint or stain, make sure that the previous coats are dry to the touch. Also, add one layer at a time and wipe off any excess pigment.
Part 3. Making the legs using 2×4 lumber.
- Make the support braces and seams for the desk. Measure the same width of your desktop, minus the width of the two legs that will go on each side on your 2×4 lumber and mark it using a pencil. Each of your support pieces for this project will be 21 inches or 53 centimeters long to allow for adequate leg room. (24 inches width of desktop minus 1.5 inches width of legs for each side).
These pieces will be used to brace the desk from beneath. Cut it according to size using a saw. You will be needing 2 pieces of 21 inch long 2×4 lumber.
2.Cut your desk legs according to size. Measure 29 inches on your 2×4 pieces of lumber, then deduct 1.5 inches or 3.8 centimeters (to reflect the thickness of the desktop) and mark it using a pencil.
You will be needing 4 pieces of 27.5 inch 2×4 lumber for the legs. Cut it according to size using a saw.
Design tip : The length of your desk legs can vary anywhere from 29 to 31 inches, depending on your desired height for the desk. Adjust the measurements accordingly. For example, if you want your desk to be at least 30 inches off the ground, each of the legs should be 28.5 inches long.
3. Finishing the legs of the desk. Run a sheet of medium grit sandpaper to the cut pieces of 2×4 lumber and sand them until they are smooth for finishing. Using a paint brush or roller brush, apply a coat of paint or wood stain to the legs of the desk. Allow the paint to dry then apply the next coat. Do this until you achieve your desired color. Once finished applying the last coat, make sure to let the finished legs dry completely for 24 hours before attaching them to the desktop.
Design tip : There are other options for table legs which you can explore to give your built in desk a different look. This is not limited to simple 2×4 wooden legs. You can use a variety of items for a more unique design.
You can also purchase pre-made legs at local home improvement and hardware stores. They sell them in a variety of shapes, sizes and materials like metal and wood. Not only will this save you time and effort, but it will also help you create a built in home office desk that suits the style that you want.
Part 4. Attaching the legs to the desktop.
- Attach your desk legs to the bottom of your desktop. Using an electric drill, place 2 pieces of wood screws on the outer edge of each leg and into the end of the support or brace on each side of the desktop.
To ensure that your desktop is fastened securely to the legs, place a piece of wood screw every 7 inches or 18 centimeters apart along the length of the support.
Test your desk for stability. Jostle your desk gently to see if it is stable. Make the necessary adjustments to the screws if needed.
Part 5. Adding the hardware and incorporating additional features.
Adding hardware such as handles and cabinet knobs is optional and will depend on the design of your desk. Most accessories come with their own instruction manual on how to attach them.
Built-In Furniture for the Office
Aside from DIY built in office furniture, some other options you can explore are custom made and ready made built in office furniture. Custom made built in furniture can be commissioned from skilled cabinet makers and cabinet manufacturers, while ready made built in office furniture can be bought from furniture stores and home improvement stores.
When you order custom made built in office furniture from a cabinet maker, the work typically begins with the assessment of the space, then they will be taking the necessary measurements that they need to tailor your built in home office furniture. Based on your specific needs and requirements, the supplier will create a layout and design of the built-in wall unit.
Once the design is finalized, production commences based on the materials and finishes you and the supplier agreed on. Production typically runs anywhere from two weeks to a month. The last step is the installation of custom-made home office furniture in your home.
Ready made home office built-in furniture on the other hand are offered off the rack. Some popular stores like IKEA, typically offer drawer units, shelving and desks. Although these are freestanding, you can also mount them to a wall using the right hardware and support. DIY built-in home office furniture and ready-made home office furniture are generally less expensive than the custom-made option.
One effective way to keep your home office built-in ideas from looking cluttered is to display themed and color coordinated items on the shelving, and keep all the loose office supplies in the drawers. Long built in desks are also extra useful if you are working with multiple monitors. Not only is there enough room for your computer hardware, but you can also maneuver the space comfortably.
Unused Home Office Spaces with Built-In Elements
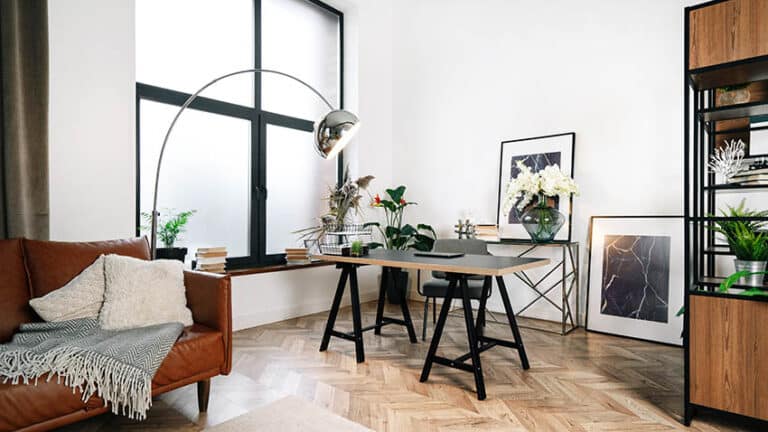
Window seat – A window seat is a great alternative to sitting at the desk and can be used for contemplation or relaxation. An alternative to built in home office furniture is a freestanding desk, which is shown above.
Closet space – An unused walk-in closet can be converted to a usable space for work with little trouble. It generally has access to electricity outlets and with the help of Wifi extenders, it can be added to your network for a reliable connection.
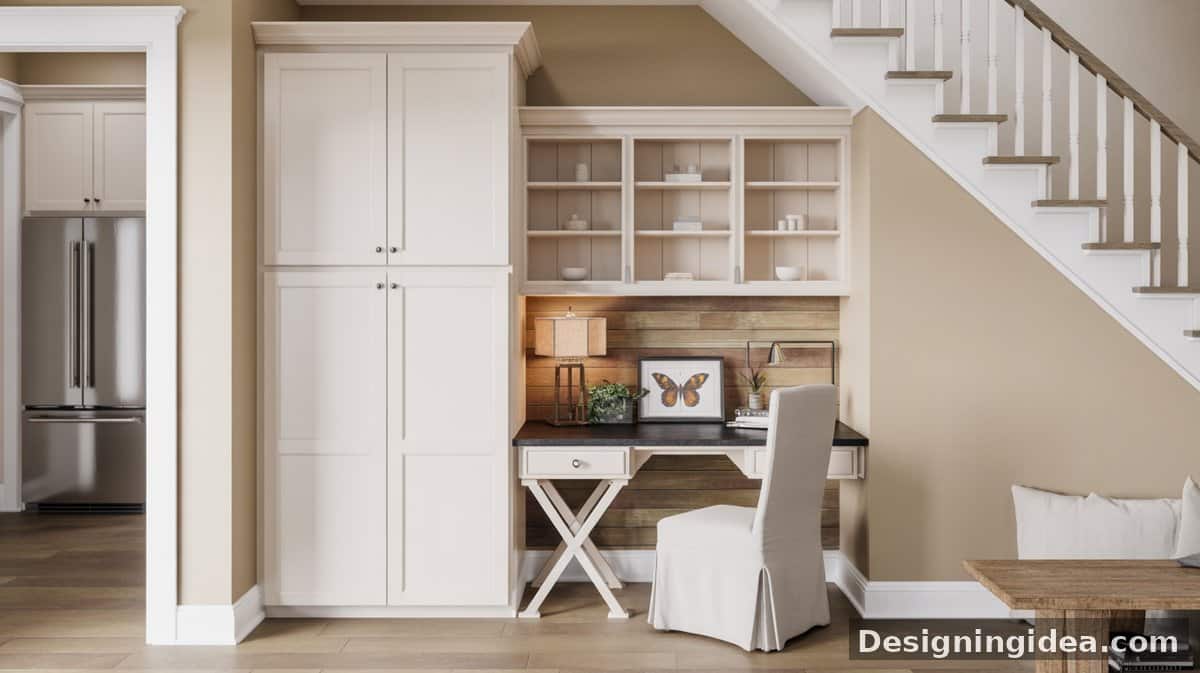
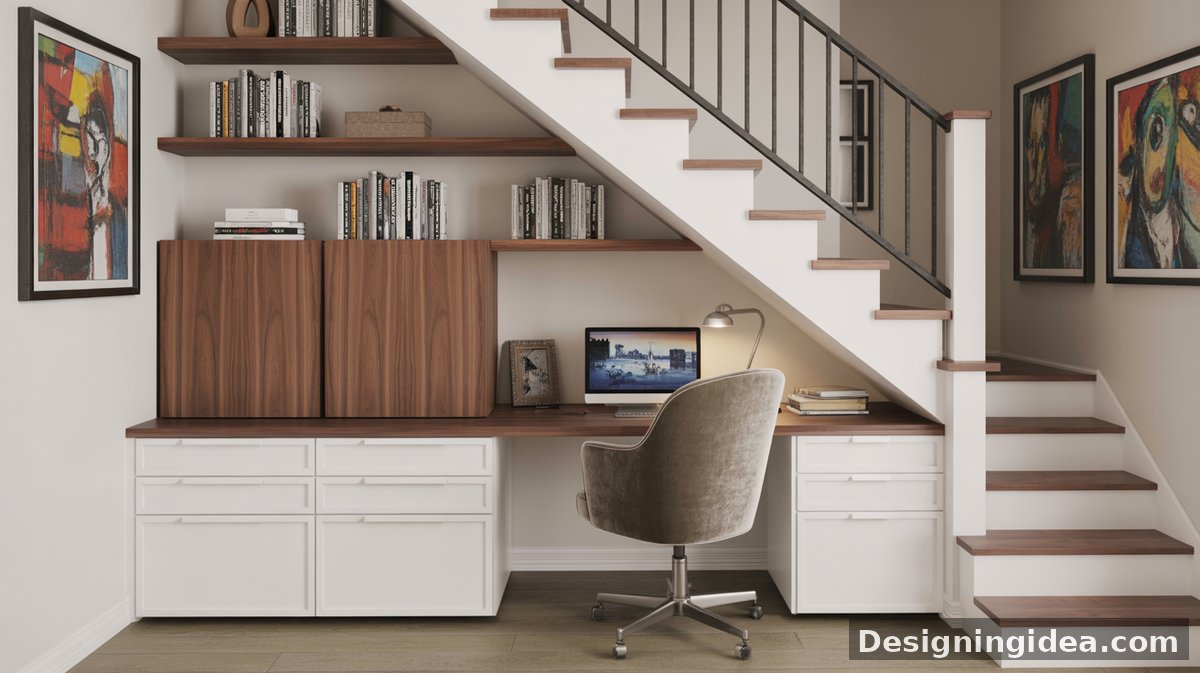
Area under the stairs – Another often neglected area in the home is the space beneath the stairs. While the most common solution home owners try for this are built in storage, you can also opt to furnish it with a built ind desk and shelves, just like the one shown above. One can maximize the space under the stairs using an L shaped desk with cabinets , drawers and overhead shelving.
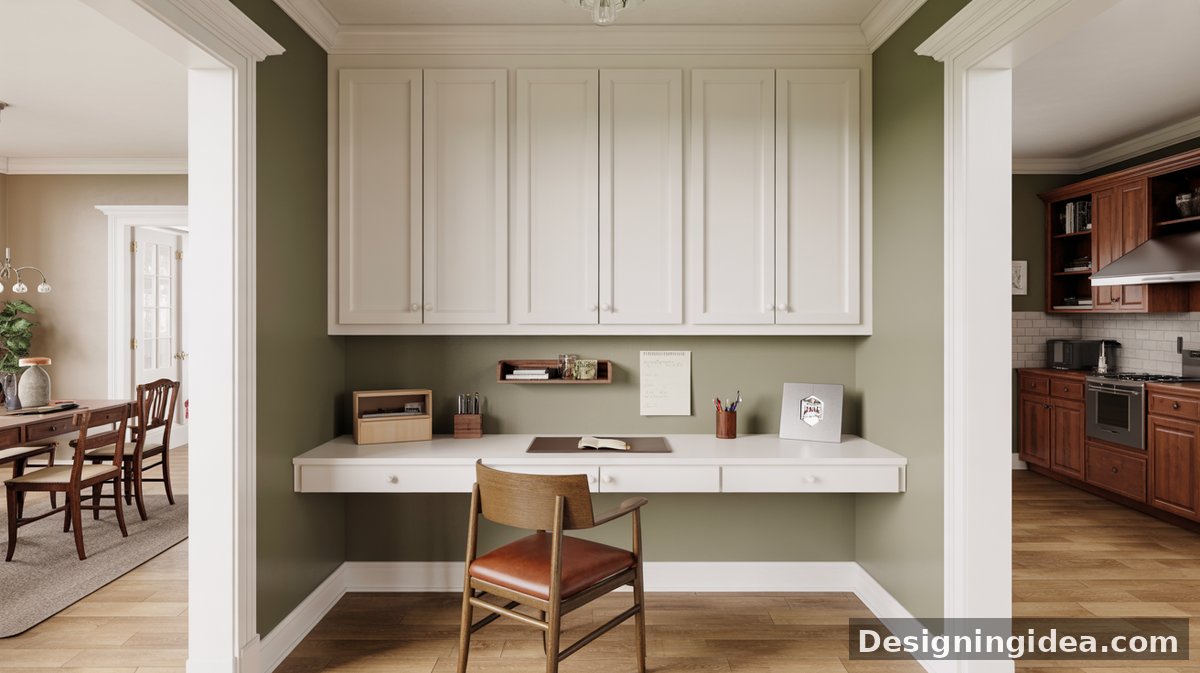
Inside the kitchen – Another ideal spot to place a built in home office is the kitchen. Kitchen desks are perfect for doing quick tasks such as taking notes or organizing bills, but they can also be used if you want to hangout for a while and read a book while enjoying a cup of coffee. Visit this page to see more kitchen home office nook ideas.
What You Need to Know About Adding Built-Ins to Your Office
Cabinets and storage are two of the most important components of a home office. Although you can buy ready made storage systems and filing cabinets, having them built into a wall helps you optimize your space and use its full storage capacity.
Costs for Office with Built-In Designs

Built-in offices typically consisted of a desk or workspace and a wall storage system such as cabinets or shelving. Compared to ready made furniture, any type of built in is considered to be more expensive because it is custom made.
Depending on several cost factors, a home office built-in ideas can take anywhere from $500 to $10,000 or more. But on average, a custom made built in office with a desk, shelves and cabinets cost around $2500 for the whole set, including both materials and labor. For built in office units installed by professionals, expect to pay the typical amount range of $1000 to $4000.
The price of a built in office would depend on a number of cost factors such as (1) the design of the built in, (2) the materials used, (3) the accessories included (4) type of finish and (5) carpentry labor.
Design pertains to the layout and number of shelves and type of storage system that you plan to include on your integrated office. Expect to pay more if you have a more complicated design. In the same way, a built in office that has plenty of storage would cost more than a simple integrated home office with a few numbers of shelves.
Larger built in offices will require more materials and will take more time to build, thus they cause the overall cost to go up accordingly.
The materials used in a built in home office also plays a significant role in the total cost of the project. In fact, the materials used take up the second highest cut of your budget. Wood is the most common material used in constructing home offices, but there are also other alternatives to solid wood such as plywood and MDF (medium density fiberboard).
For the shelving glass ledges with metal brackets can also be used, depending on the design and style of the integrated home office.
Plywood, veneer, poplar and pine are some inexpensive materials which can be used for integrated home office ideas. While cherry,walnut and oak are some of the most expensive materials available in the market. White pine is the cheapest type of wood which can be used for this type of project and it costs around $1.95 per board foot. On the other hand, walnut is the most expensive type of wood and costs almost four times more than pine, which is around $7.25 per board foot.
Aside from the materials, the type of finish also takes up a sizable part of the overall cost of an integrated home office. Finishing may either be paint, wood stain, polyurethane, veneer or laminate, to name a few.
This not only depends on the appearance you want to achieve for your home office, but also the type of material you use.For instance, high quality solid wood such as cherry and walnut look best when treated with a coat of clear wood stain, while poplar or pine wood can be treated with enamel paint.
The most cost effective option is to treat your integrated home office with two coats of clear finish. Adding a coat of wax or stain will of course cost you more. Special finishes are also more expensive than regular finishes since they typically require more time and effort to achieve a textured effect.
Accessories include all hardware used such as cabinet handles, hinges, pulls and knobs. Additional features such as electrical outlets, fixtures and special lights are also cost adding factors to integrated home offices. This takes the least part of your budget.
The last cost factor which significantly affects the cost of an integrated office is the labor. Cabinet makers and craftsmen typically charge $50 to $100 per hour. They charge more than a handyman as they are skilled and have years of cabinet making expertise.
This rate can still vary depending on where you live. Depending on the size of the project, an integrated office can take anywhere from a week to a month to plan, layout, build and install.
If you plan on getting a designer to help you out with the design of your integrated office, expect to pay $200 to $500 more for the drafting of the working drawings and the detailed specification of your built in. The total designer fee will also depend on how elaborate the layout and design of your integrated office would be.
Are California Closets Expensive?
California Closets is a US based company that specializes in custom made closets and cabinets. They have built their reputation as a leader in premium and luxury space management in their more than three decades of experience in the industry. Today, they have more than 100 showrooms worldwide which are ready to assist their clients with their space planning and custom made cabinetry needs.
What is the average price of California Closets? An article by Better Homes and Garden (BHG) once stated that the typical cost for a standard storage system by California Closets ranges around $1500 to $5000. But just like any other custom made cabinetry by any supplier, the cost can vary depending on the design and size of the project.
Since all clients have different needs, requirements and specifications, the cost of one project relative to another is actually incomparable. The overall price will change depending on your location, the size of your space, the product line you choose, how customized you prefer your integrated office to be, the finishes you select, and the accessories you wish to include. From the options that they present, there can be hundreds of combinations of the layout, materials and finishes which you can create.
The bottom line is, are California Closets expensive? Based on the reviews of previous clients and the quality of service and product that they provide, California Closets are more pricey compared to other suppliers. But despite this, their price is very reasonable and worth it.
They provide all the needed service starting with the planning of the integrated design, such as the inspection and measurement of the space, then they sit down with you to discuss your needs and preferences in terms of the design. Production, implementation and installation is also included in a standard job contract.
Quotations for integrated in offices can sometimes be overwhelming, but you have to keep in mind that what you are commissioning for is something tailor made according to your specifications, using only the best quality of materials. Anything custom made is an investment, and in the long run, it is worth every penny.
The blank wall in between the shelving of this built in home office serves as a display for dainty indoor plants. This design creates a much needed visual break in a space that has a monochromatic color scheme.
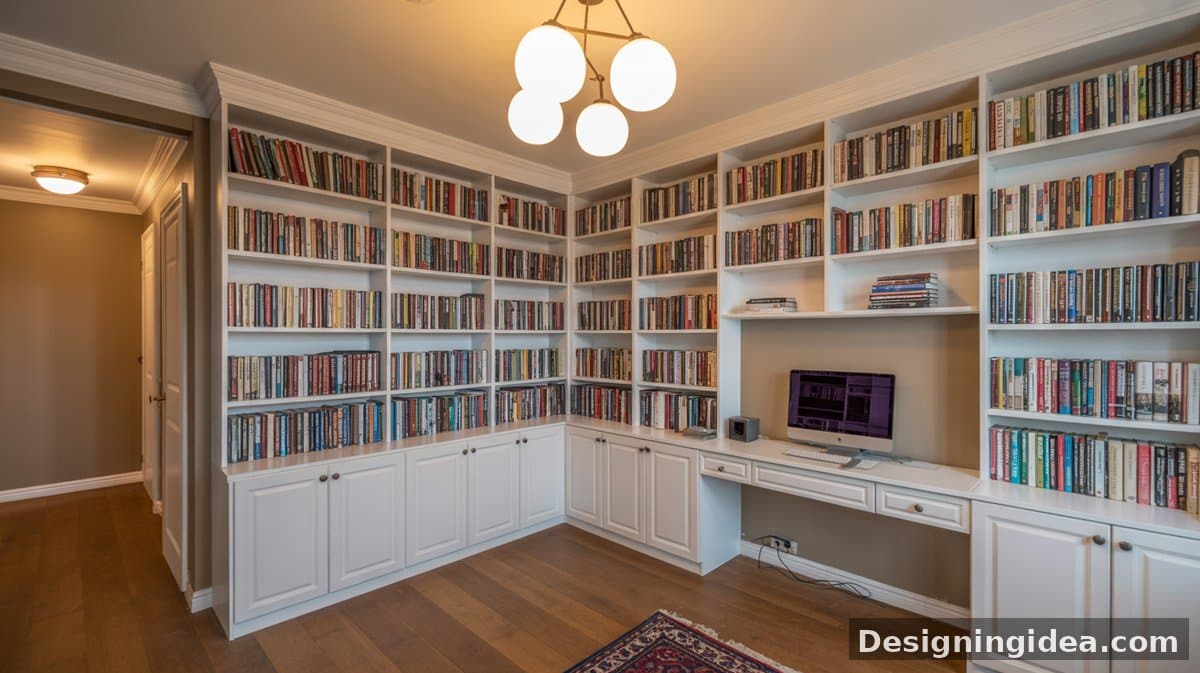
Sometimes, all you need is shelving to creating a stunning built in home office. This particular design has slate colored shelves that span from floor ceiling and to create a bit of contrast in the space, the accessories and books displayed are all color coordinated in white.
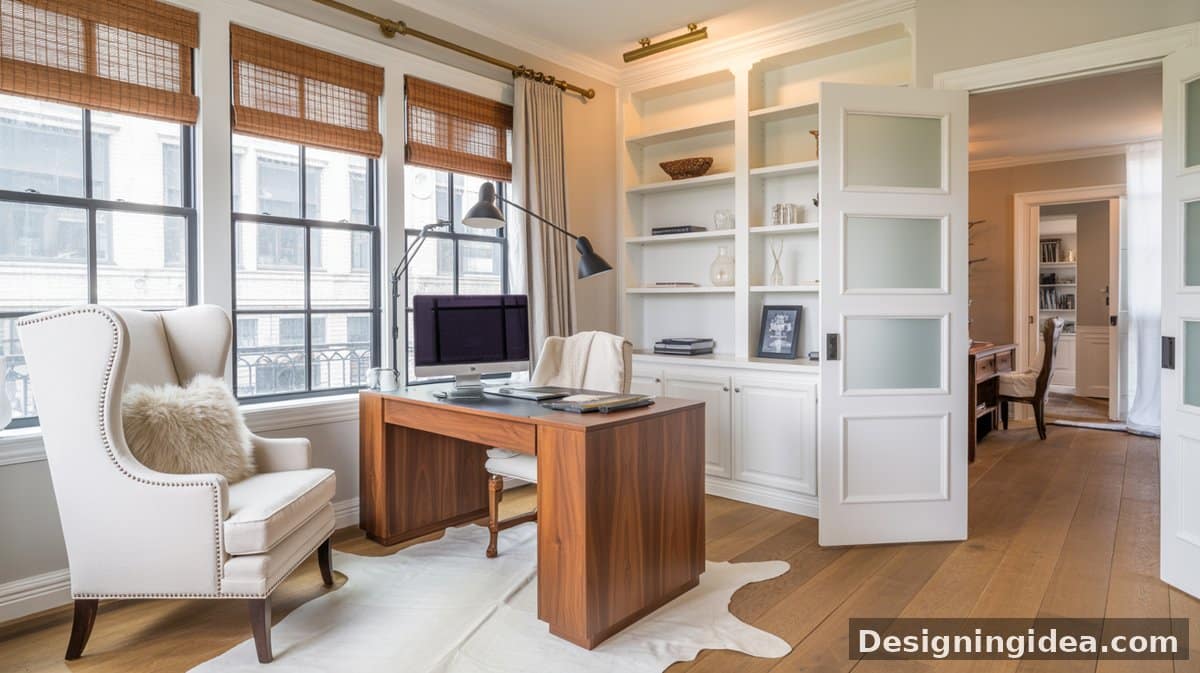
This built in home office has the perfect location — near large windows where you can enjoy plenty of natural light. Shelves, like the ones above, are suitable beside windows since they maintain the openness and airiness of the room.

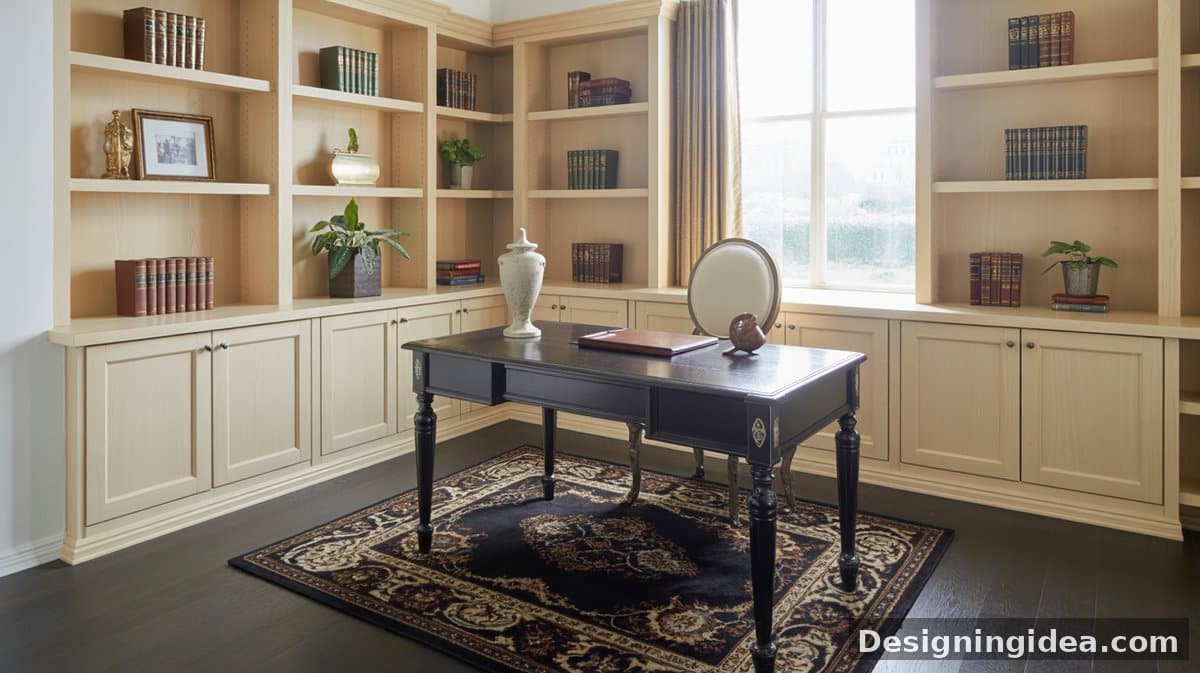
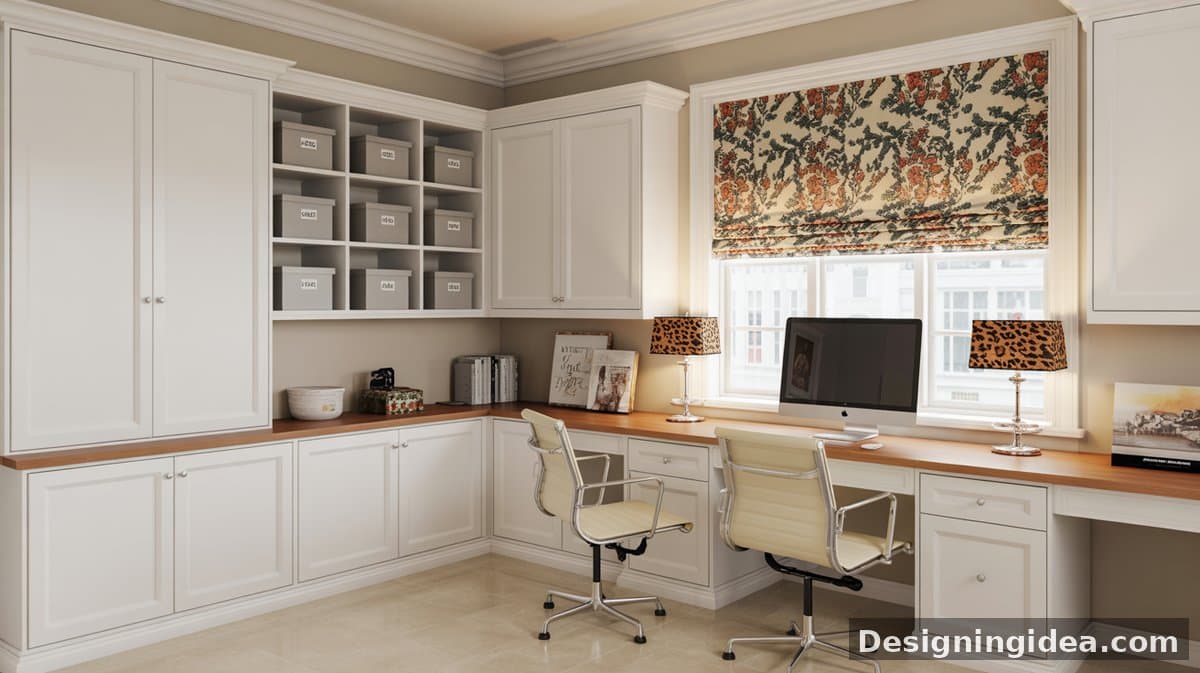
To make your home office built-in ideas more exciting, try introducing exotic patterns with your decor, like the traditional motif area rug in this Contemporary classic space.
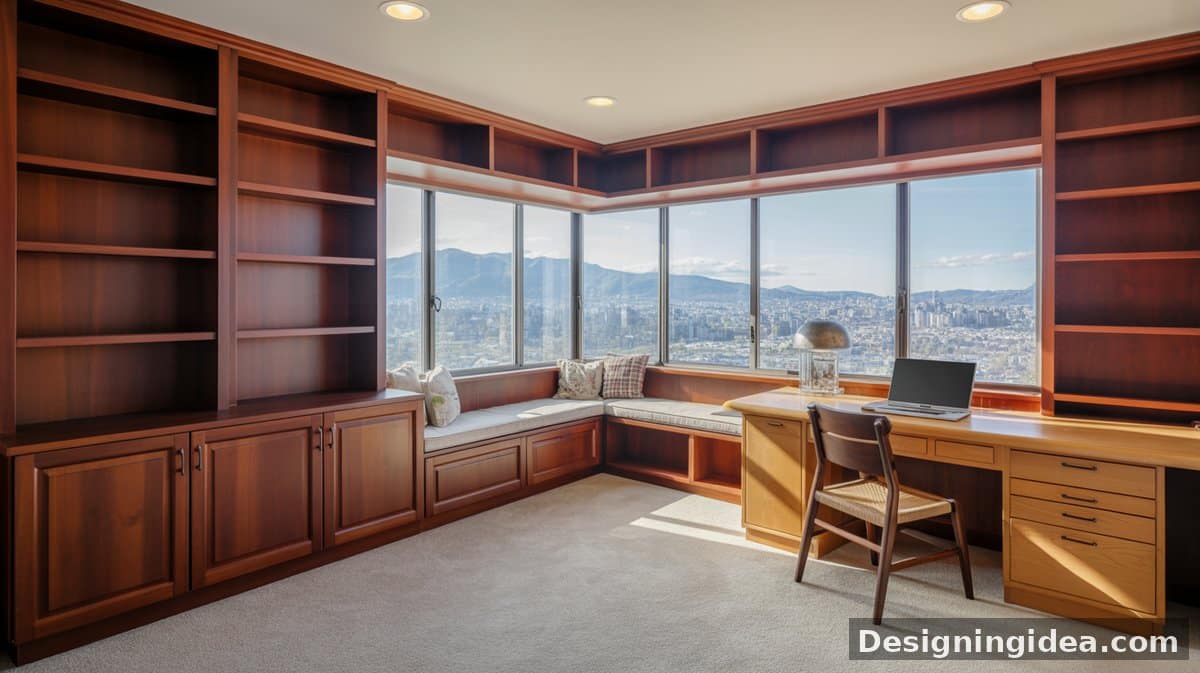
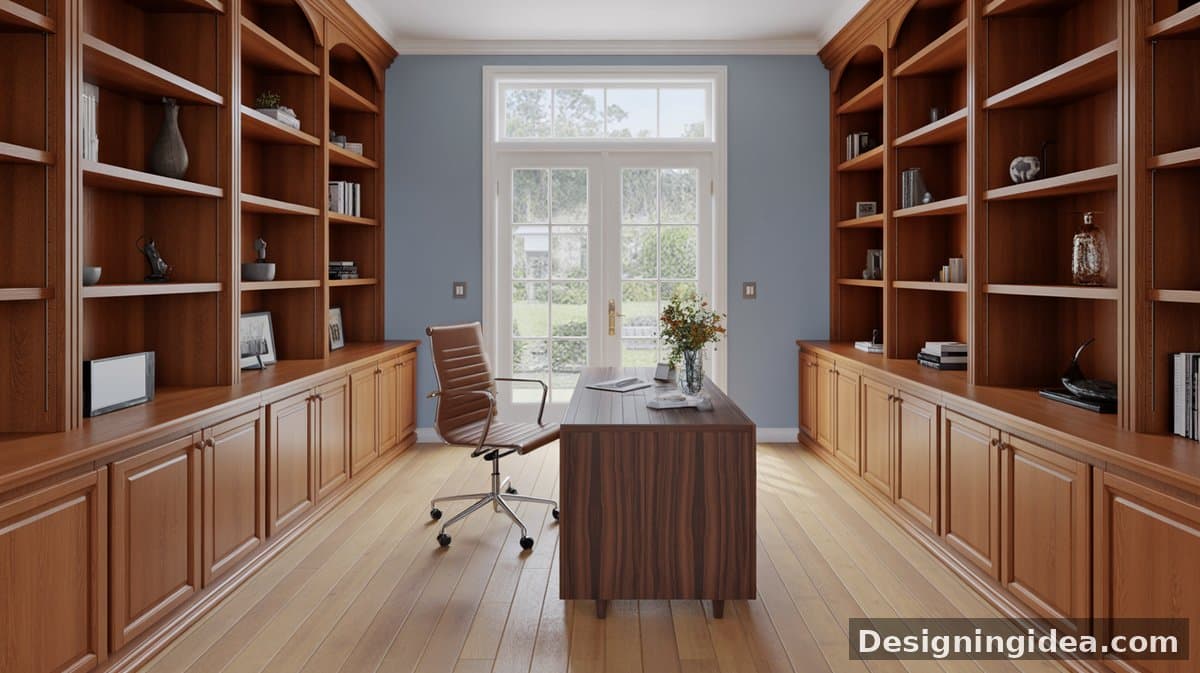
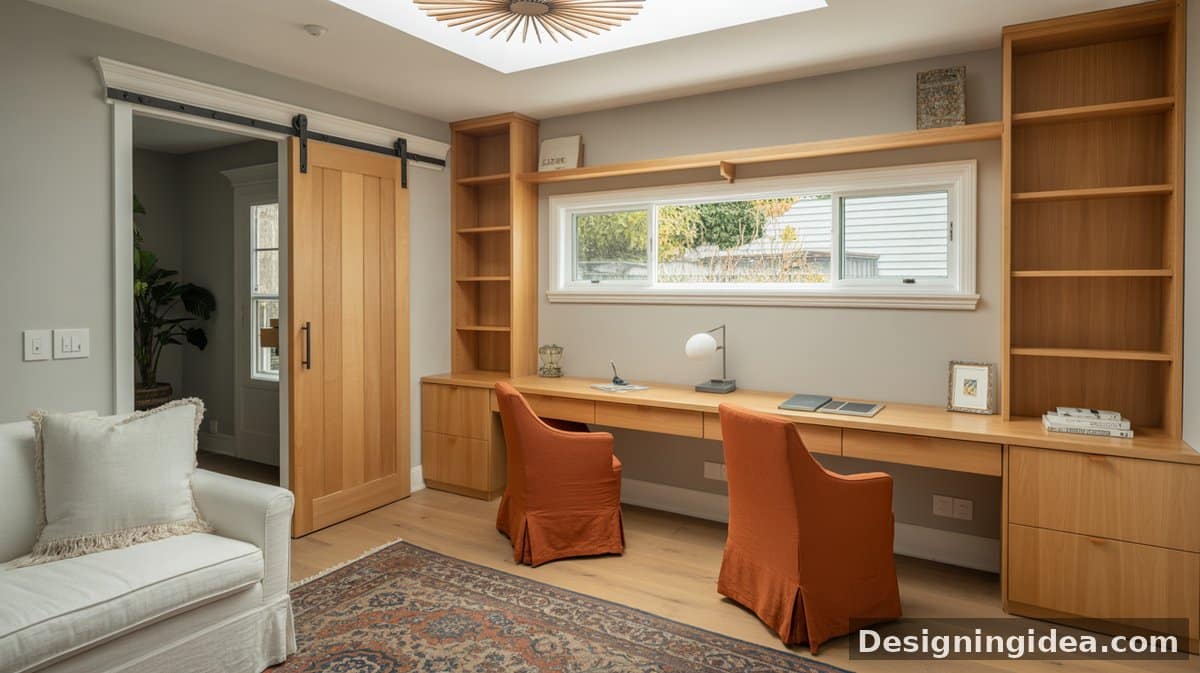
The home office built in design above takes advantage of the stunning views by complementing the large windows with cushioned seats. The rich undertone of dark stained floor to ceiling wooden shelving not only gives warmth to the space but also renders a very luxurious feel.
Well planned home office built in ideas with desks, such as the one shown above, do not only help in keeping your space from looking cluttered, but they can also improve the efficiency of your work flow. With this type of desk, you can easily navigate through your workspace without any mess getting in your way.
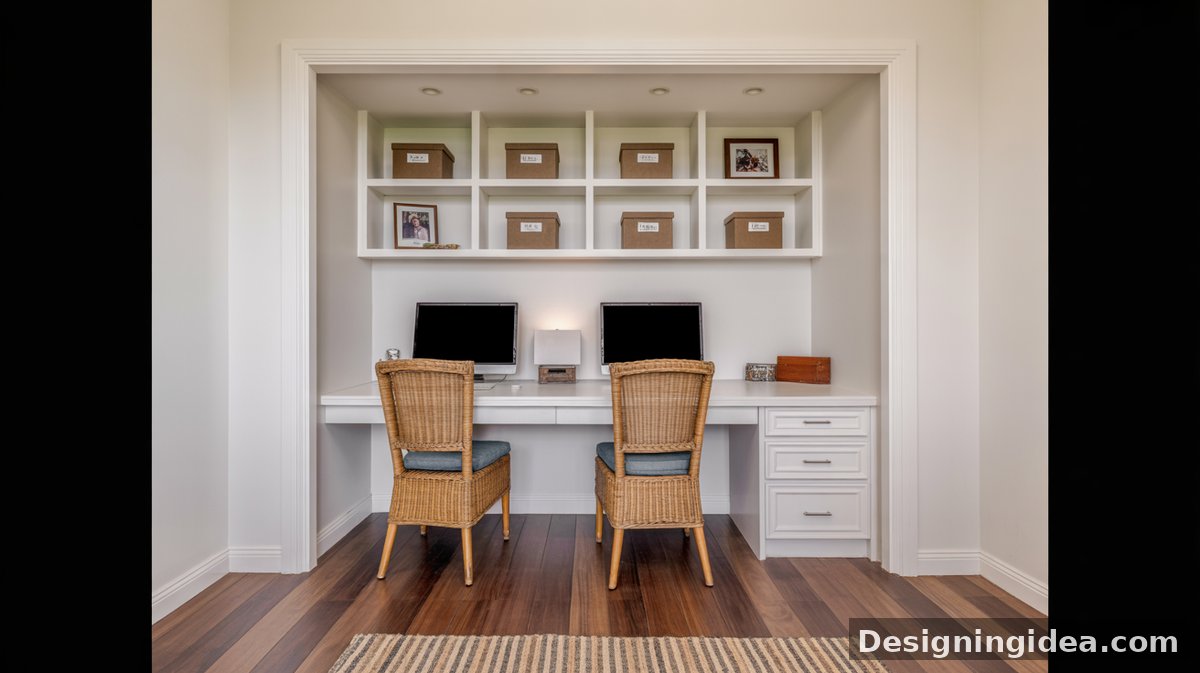
The accessories that you put in your home office built ins plays a significant role in heightening the overall visual interest of the space. An all white space, for example, can easily look dull and monotonous, but for the home office design shown above, the use of black and white framed photos and blue and orange accessories brings in a subtle splash of color that livens up the space.
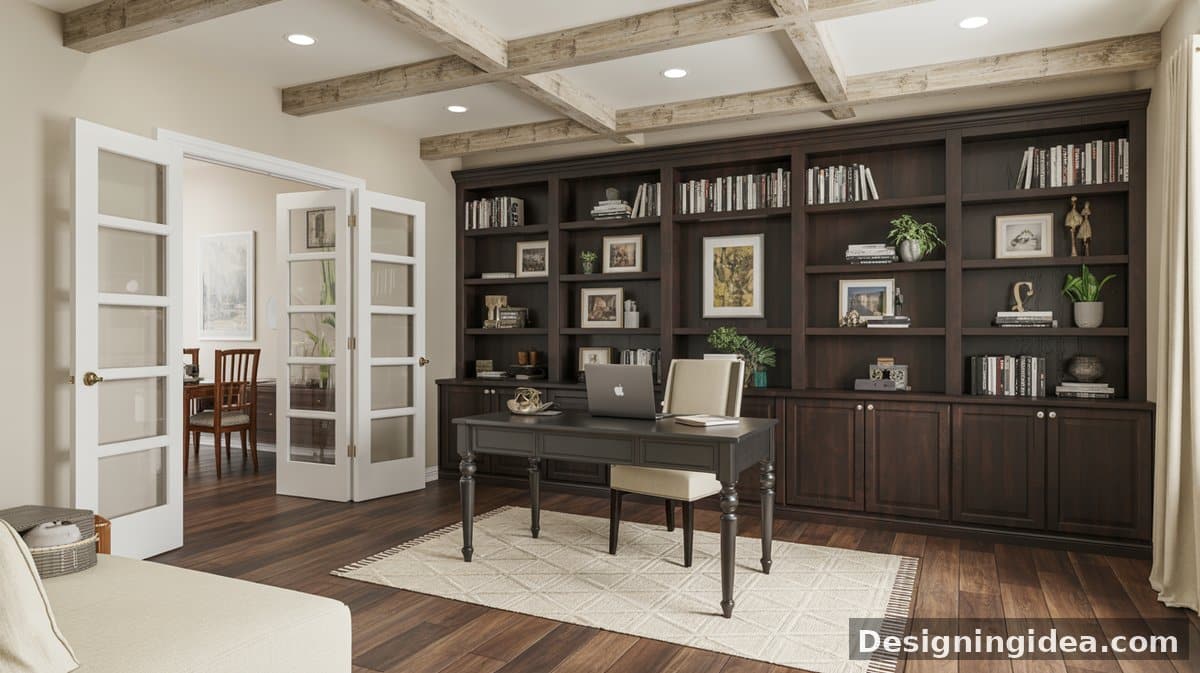
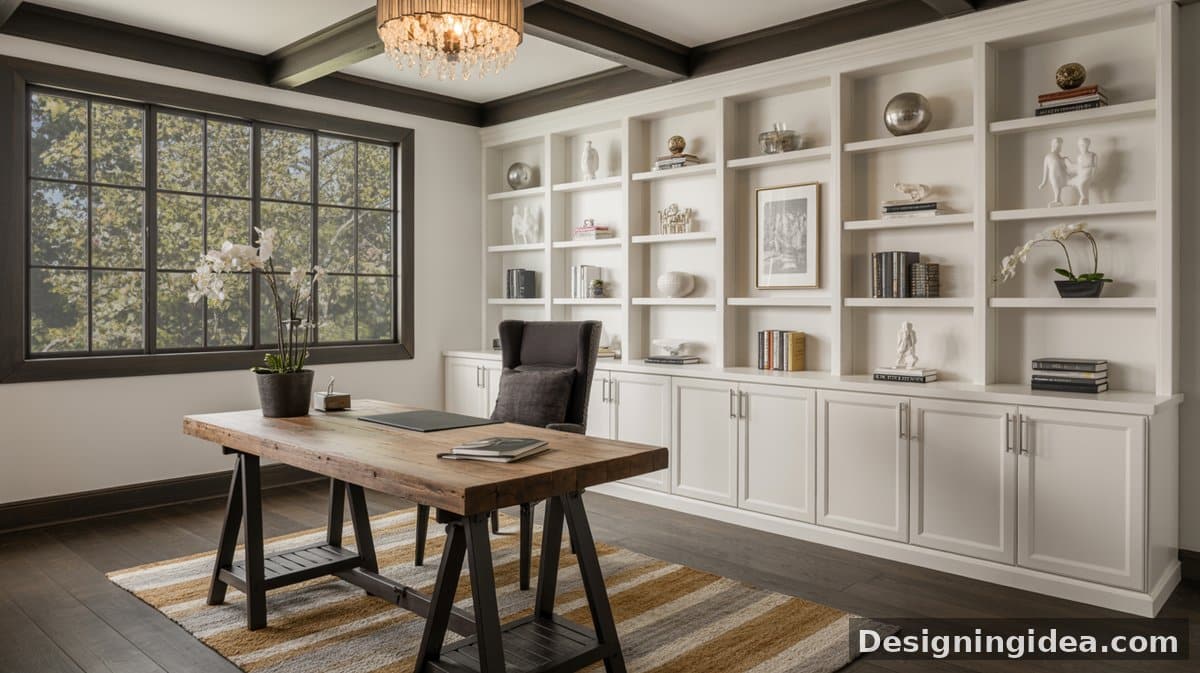
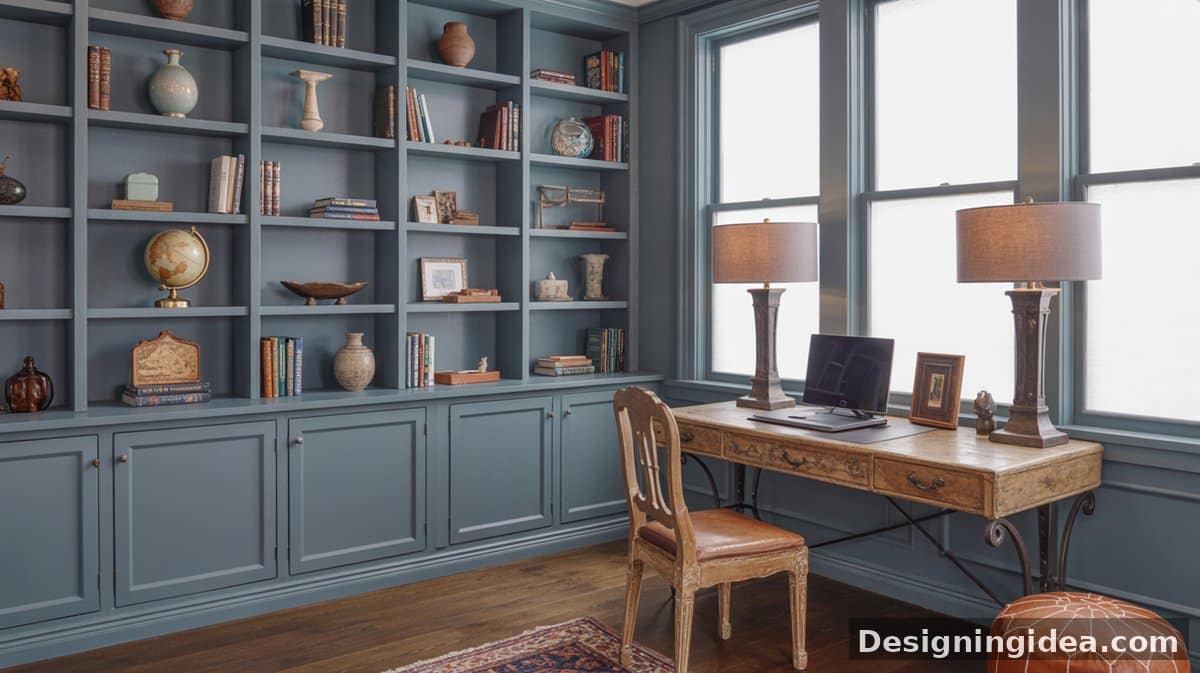
This room features dark espresso floor-to-ceiling bookcases surrounding a black turned-leg desk with a cream task chair, woven area rug, and French doors on dark hardwood floors.

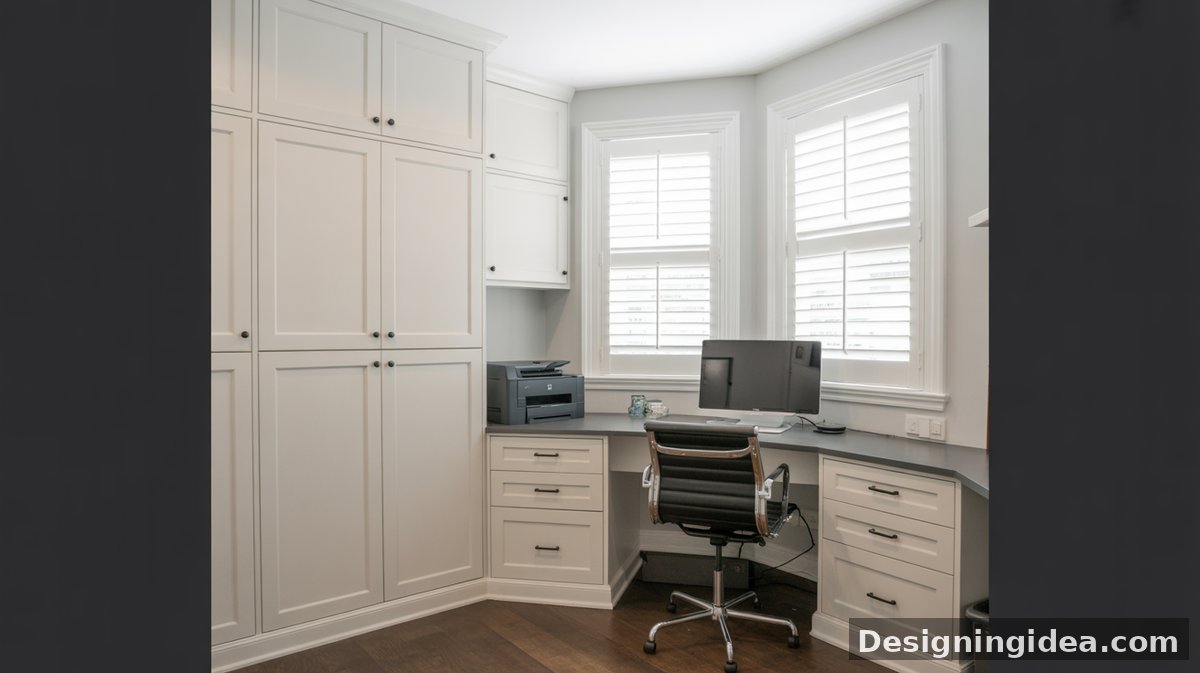
Here you can see the built in with a full wall of shelving, drawers and under cabinets. The simple trims and paneled design of the cabinetry is the perfect detail to match the contemporary classic theme of the space.
The sharp black outline of this built in home office desk is the perfect accent to a light wooden finish. It gives the space more character and dimension too.
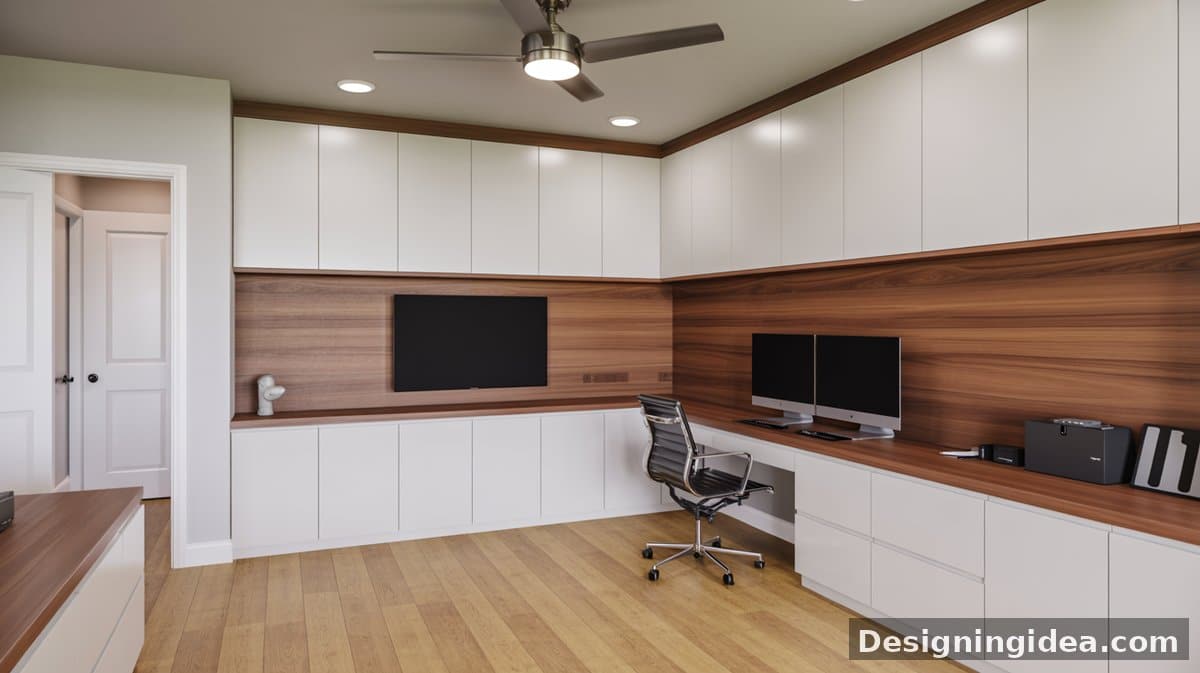
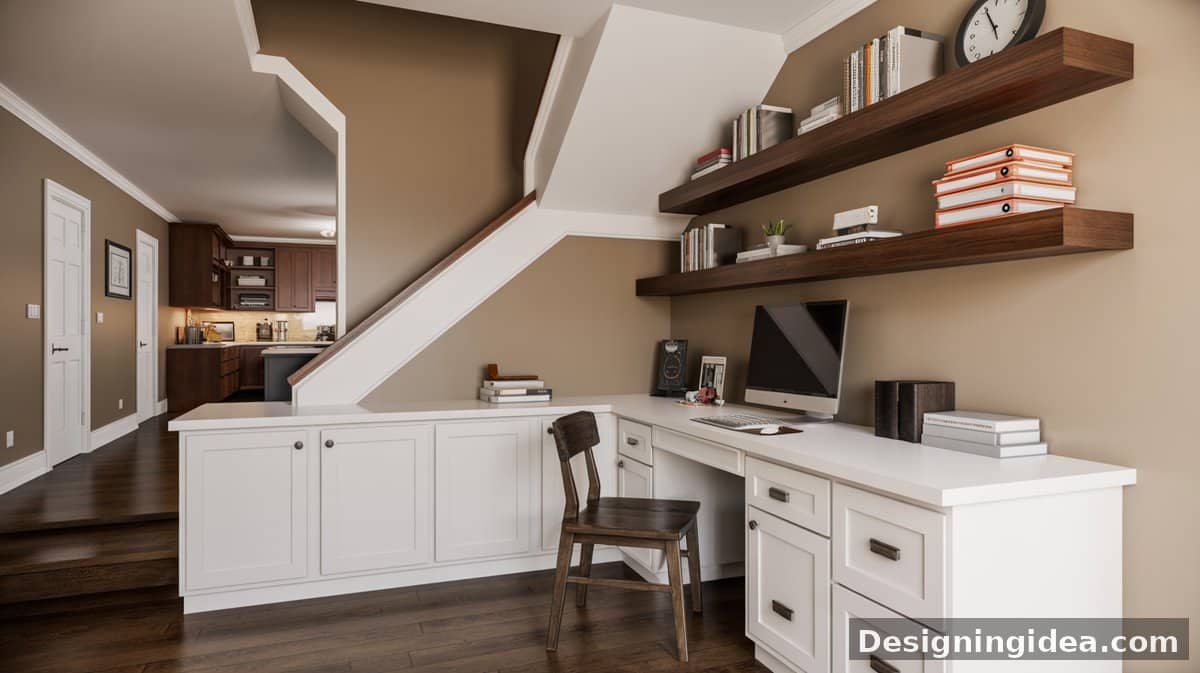
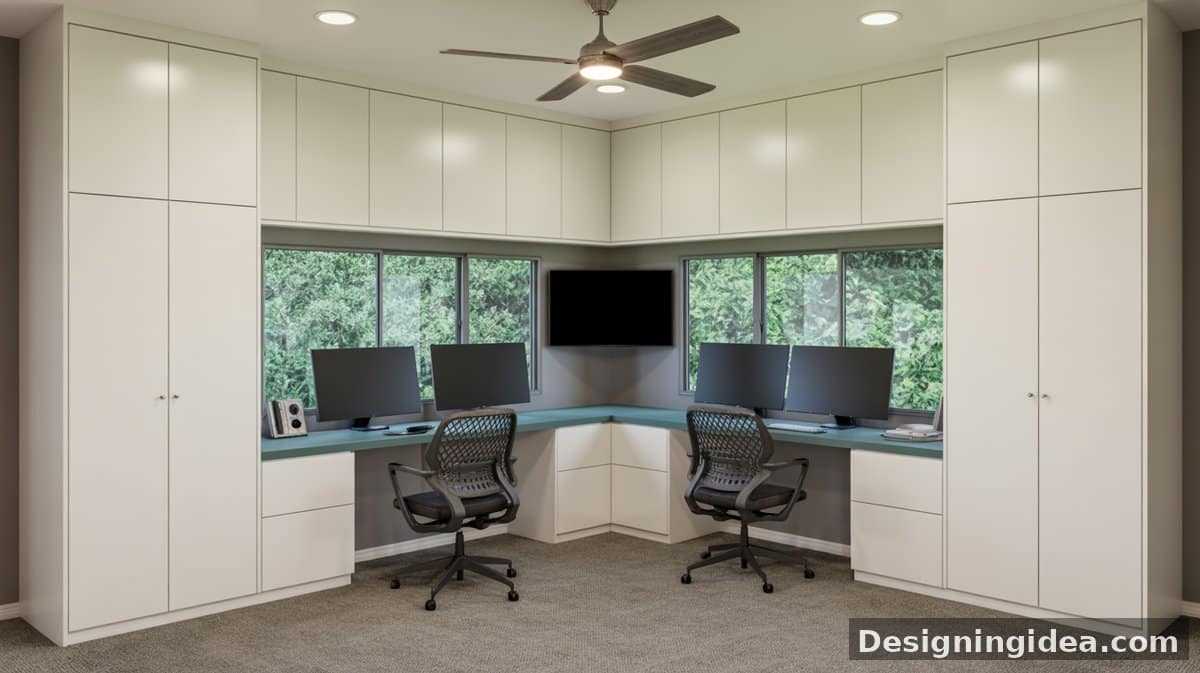
This design showcases white flat-front upper and lower L-shape cabinets that feature a walnut backsplash, dual monitors, a wall-mounted TV, a ceiling fan, and light oak floors.
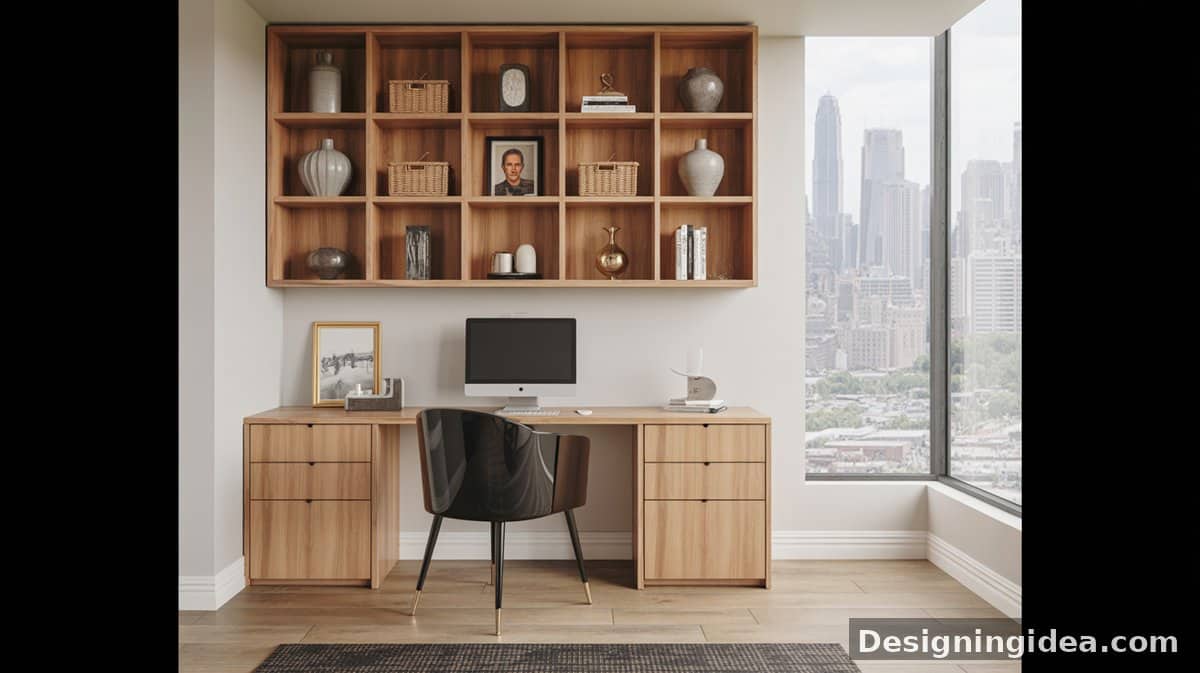
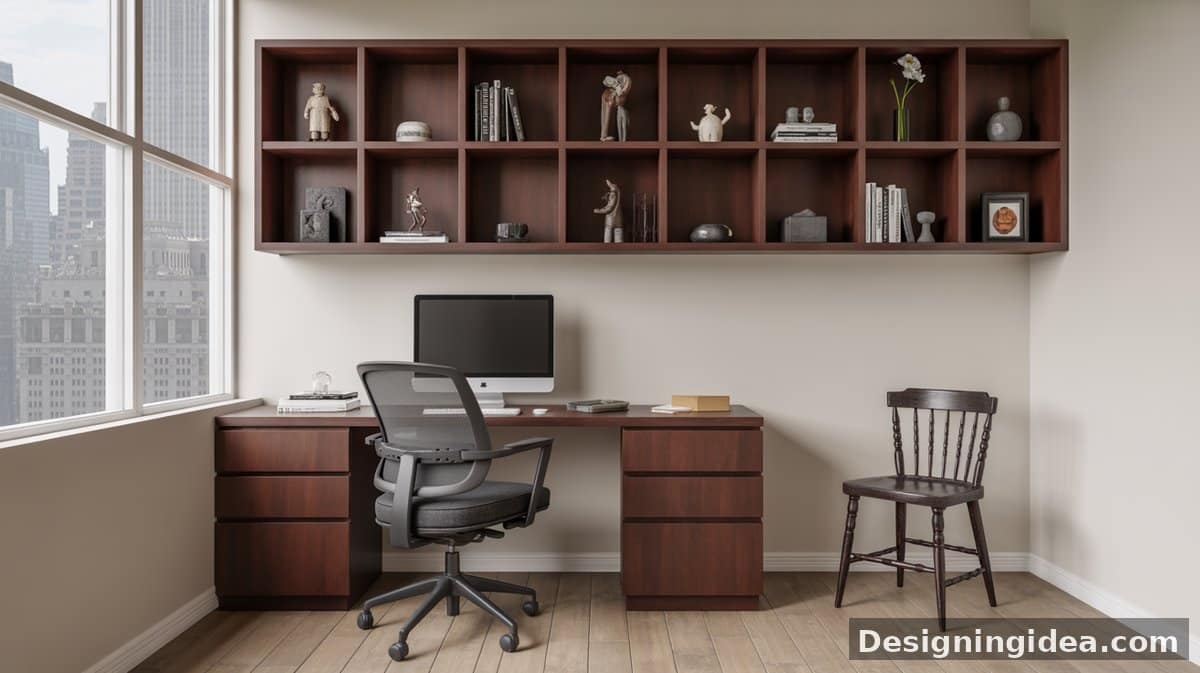
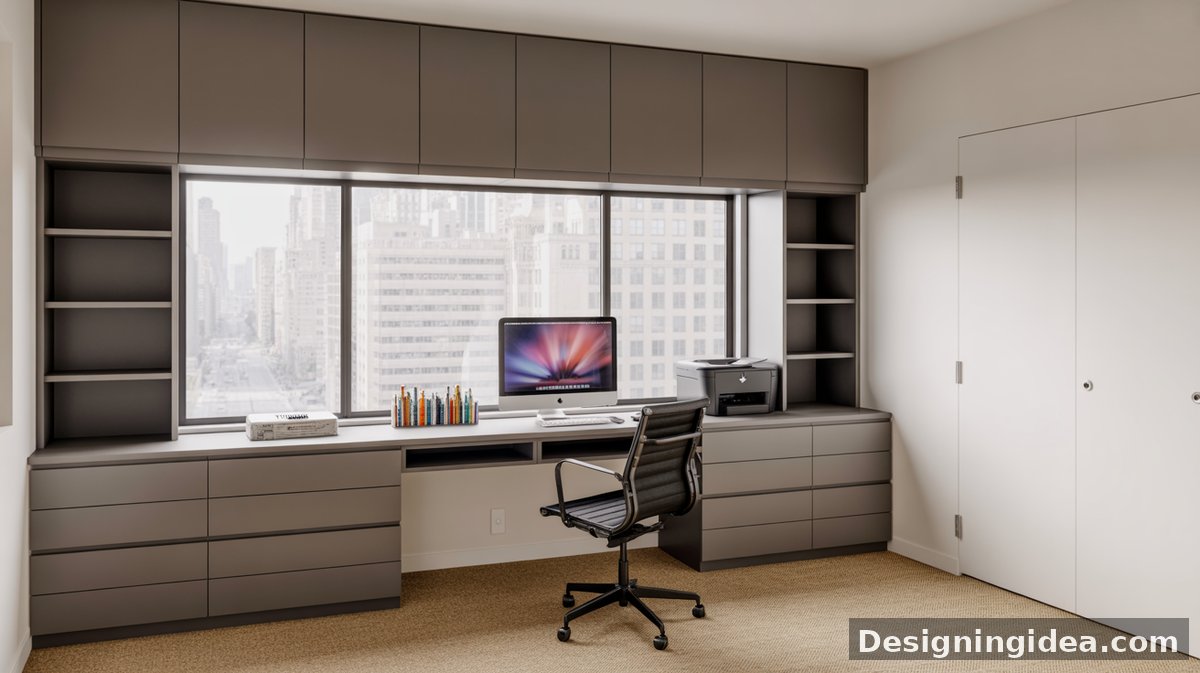
Painted cube shelves hold vases and baskets above a corner desk with a dark chair, floor-to-ceiling city view window nearby.

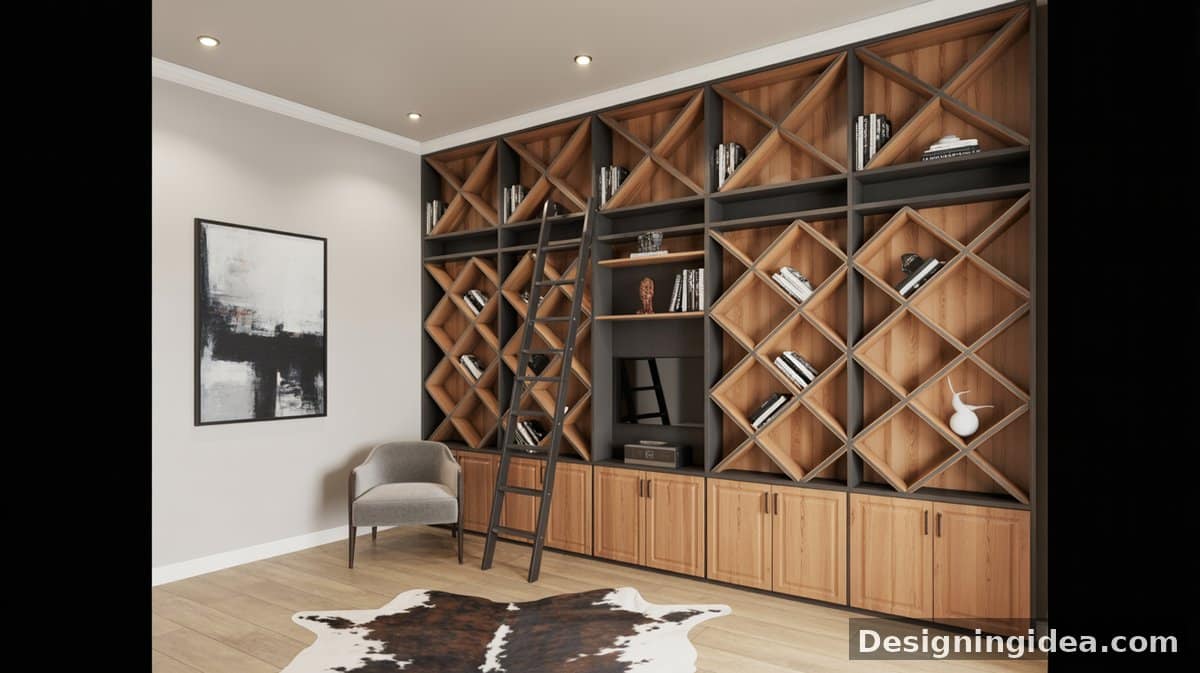
This stylish custom geometric bookshelf offers an creative twist to its contemporary library space.
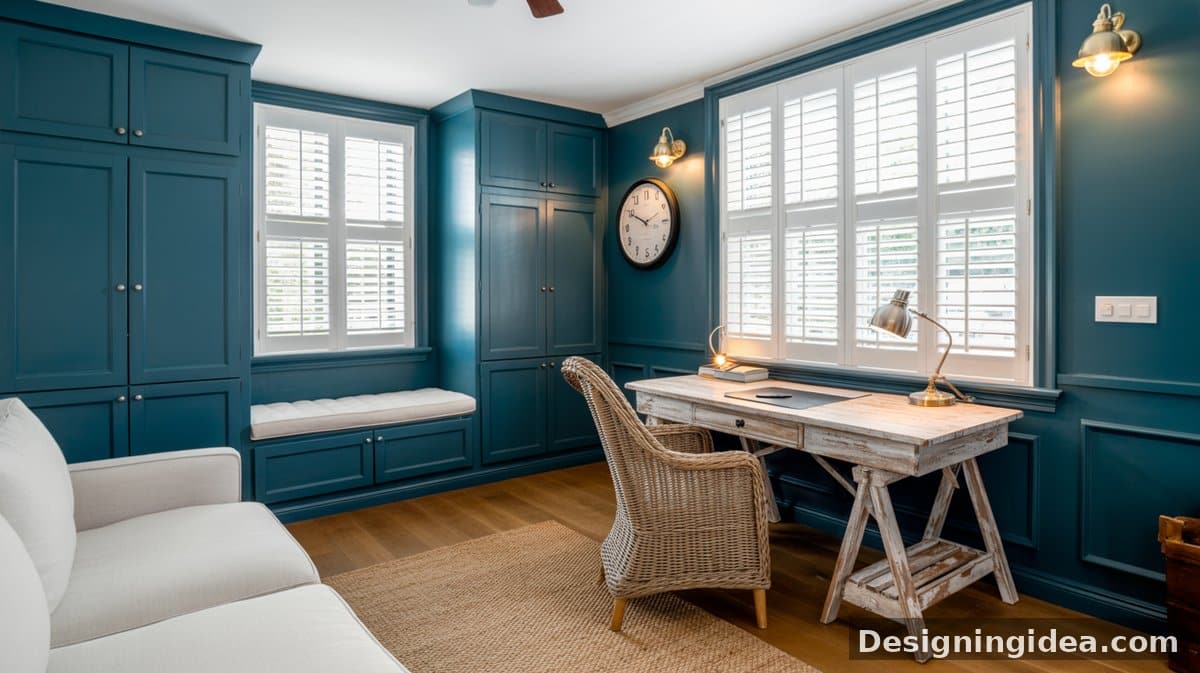
Teal blue shaker upper cabinets cover the walls above a whitewashed sawhorse desk with a wicker chair, plantation shutters, and brass wall sconces.
Render an inviting atmosphere in your home office by using wooden and natural finishes. These type of finishes and materials exude warmth and can help bring an encouraging vibe.
Plan the design of your desk. The design of a simple built in home office desk can be as straightforward as a basic table or desktop mounted to a wall. You can customize this according to your needs and preferences — you can include a drawer if you want or a closed cabinet underneath. The design is ultimately up to you. But again for this particular project, we will only be making a simple built in desktop with legs.
Get creative with the way you style your home office built-in ideas by using antique furniture as a work desk. This cozy home office fuses contemporary and traditional details by combining simple streamlined wall to wall shelving with a rustic antique console that doubles as a workspace.
The stylish gray hue of this home office’s built in cabinets contrasts so well with the white desk in this contemporary space. Instead of using a small built in desktop, the counter is extended, giving more room for different work essentials and decor. The home office has a style similar to a kitchen space which is perfect for food lovers.
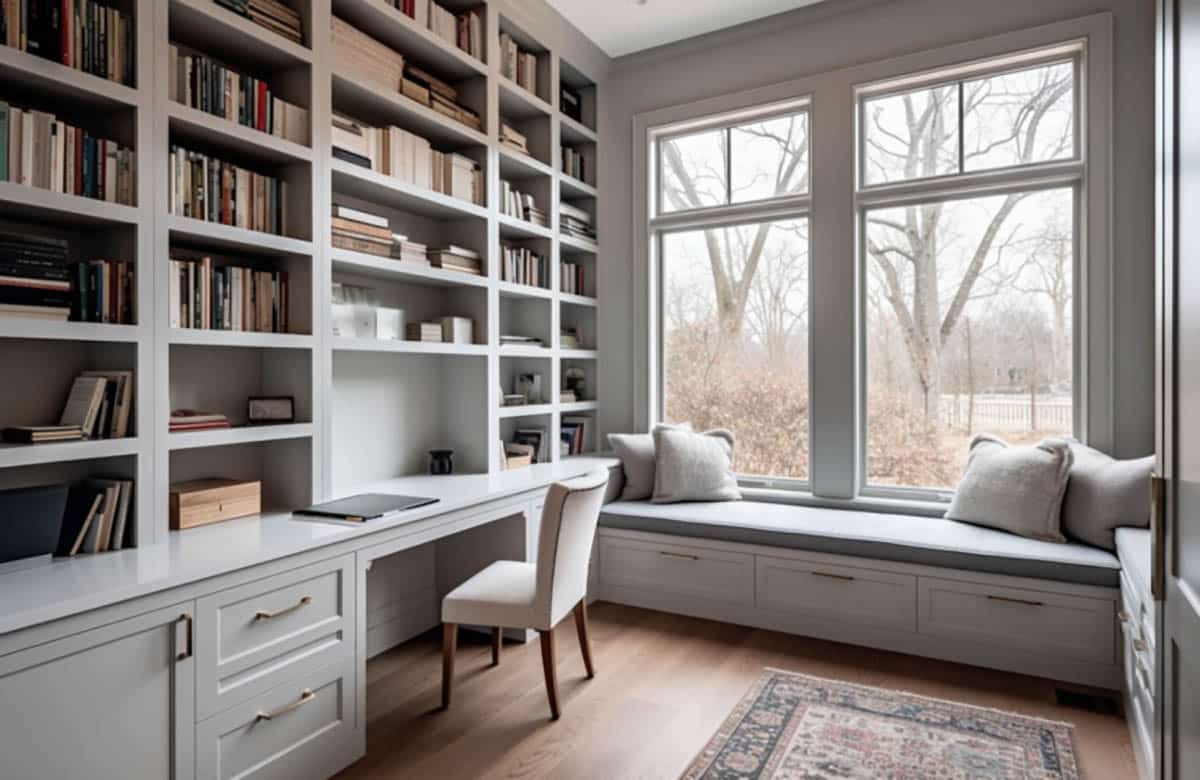
This cozy home office features a built-in window seat. A window seat is a great alternative to sitting at the desk and can be used for contemplation or relaxation. An alternative to built in home office furniture is a freestanding desk, which is shown above. Built ins are permanently fixed to a wall; in some cases, this may not be the best solution to your setup, especially if you rent out an apartment. Freestanding desks are also ideal for multipurpose rooms since you can easily move them if you want to change the layout of the space.
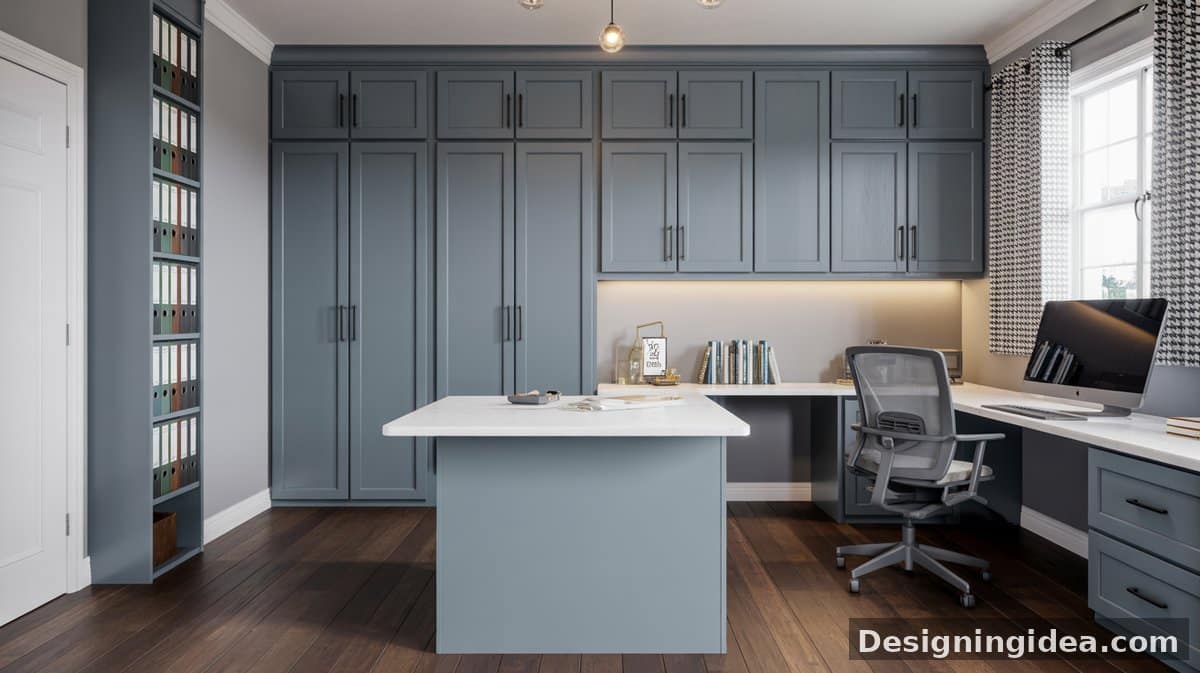
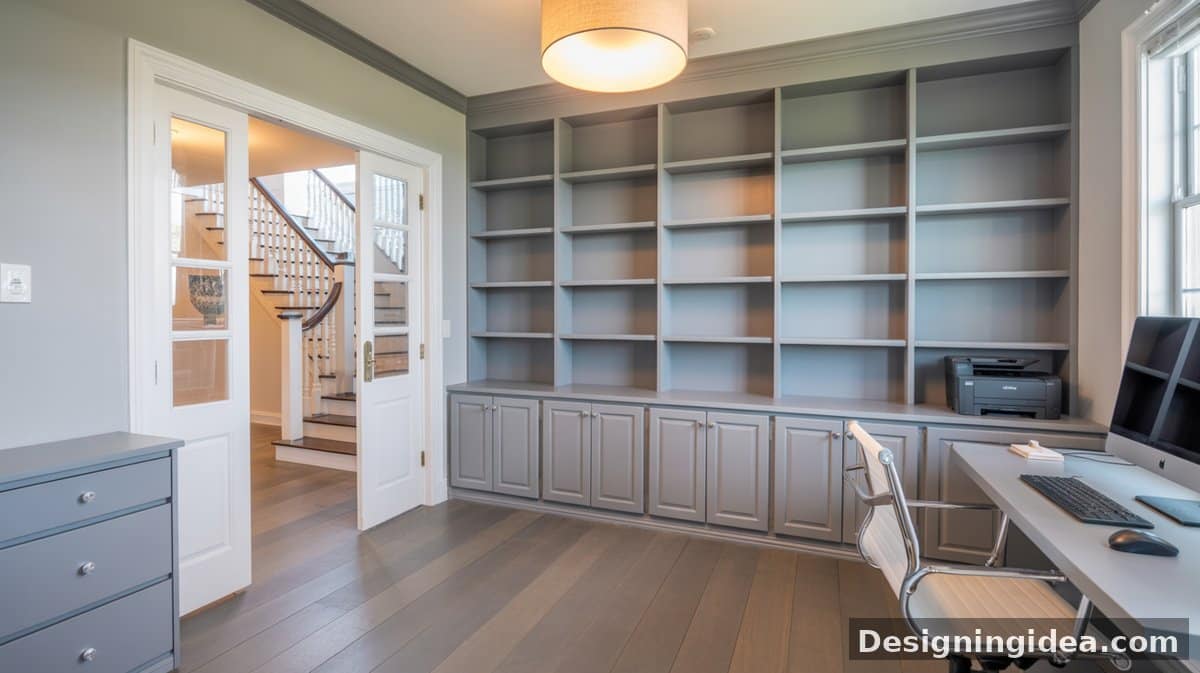
Slate gray shaker floor-to-ceiling cabinets flank a corner desk with a white island top, a gray mesh task chair, patterned curtains, and dark hardwood floors.
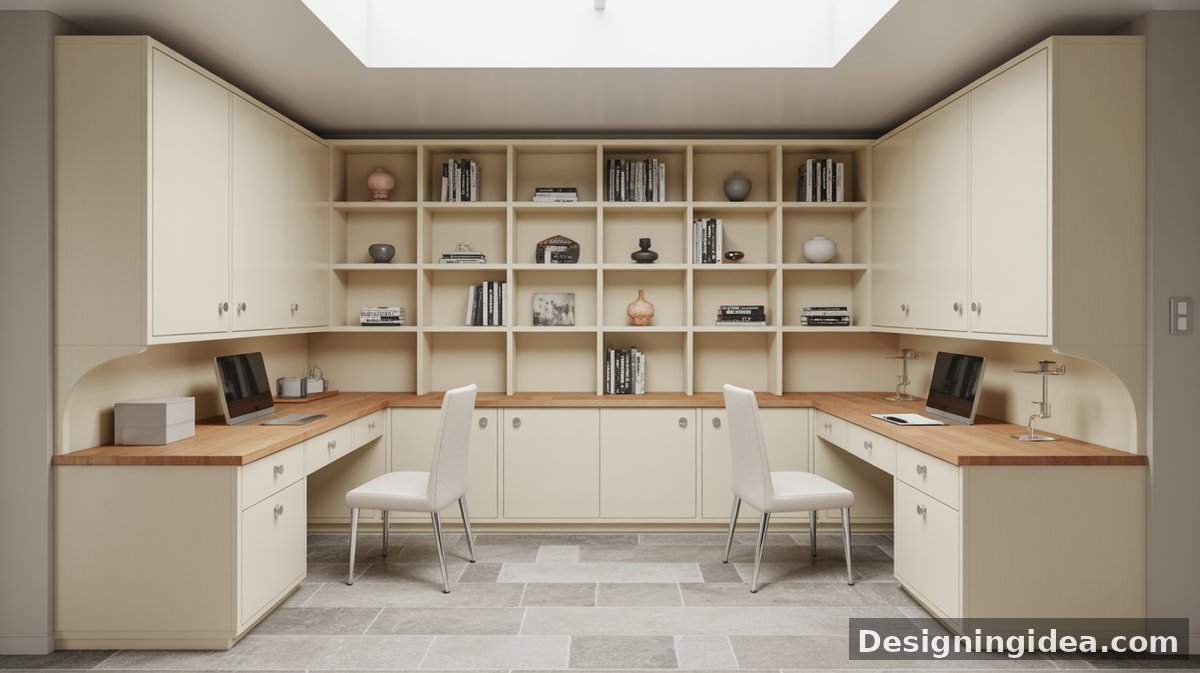
Built in shelving are very practical additions to a home since they can easily convert into a small home office desk. This particular built in home office design is very simple consisting only of three tiers of ledges, but it offers maximums functionality and can be used by two persons.
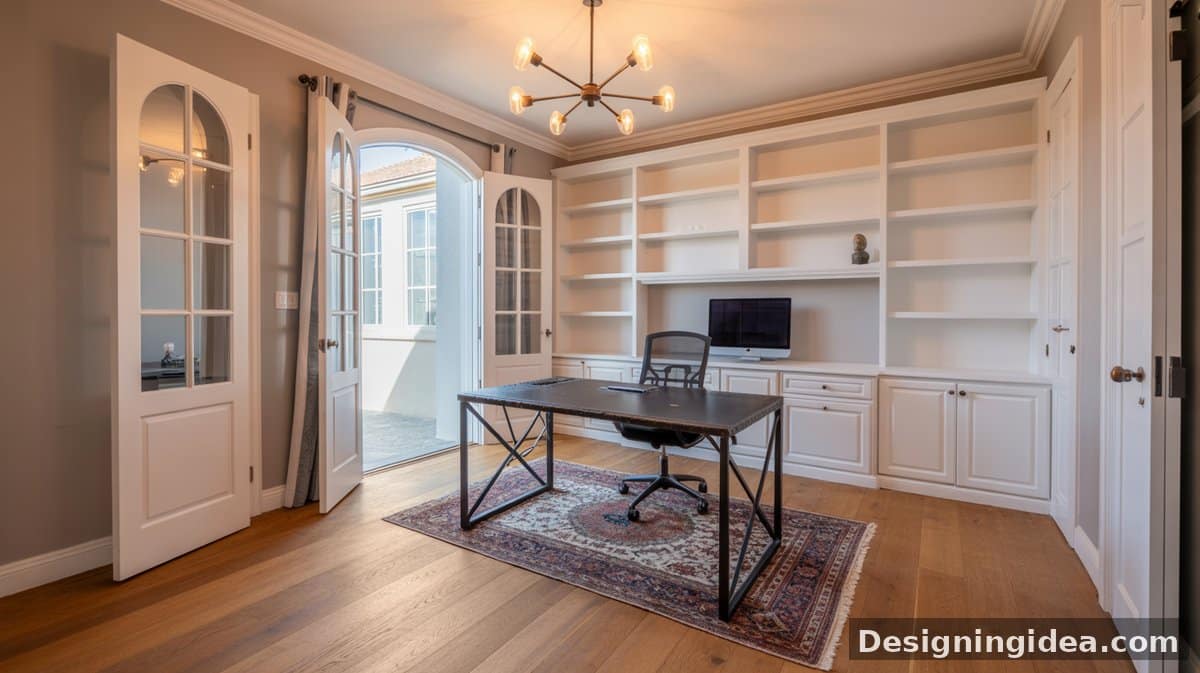
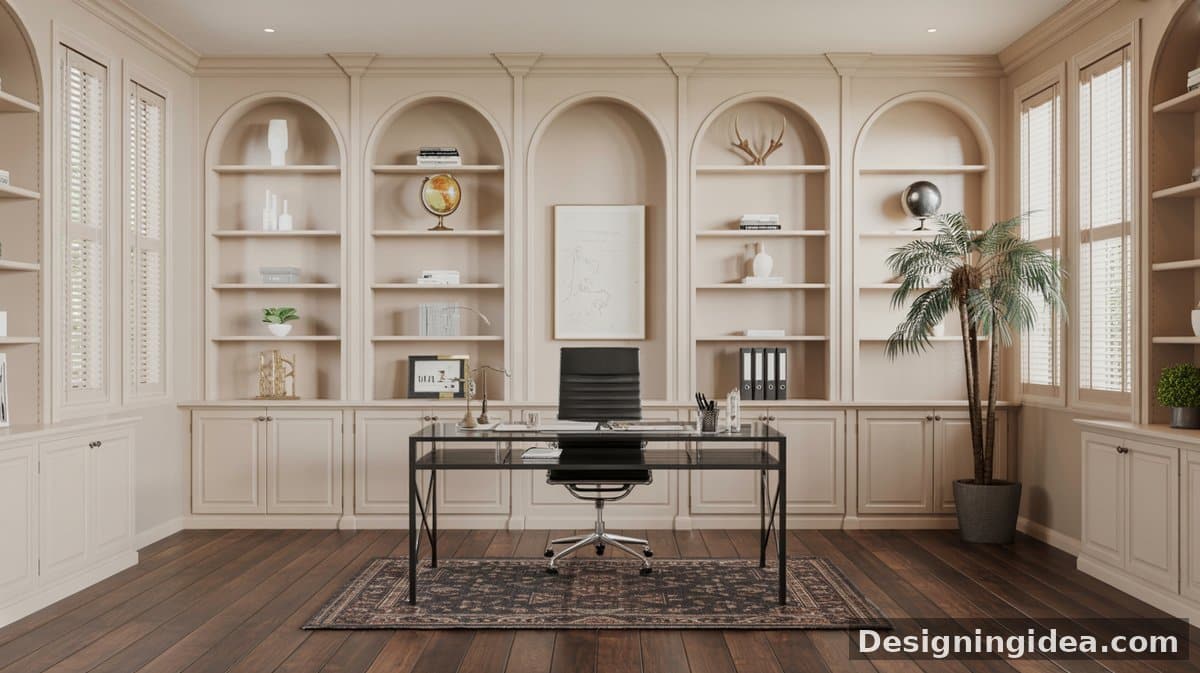
White open shelving surrounds an arched opening to an outdoor courtyard, with a dark X-base industrial desk on a Persian rug and wood floors.
Built-in desks often include large drawers with platforms for a printer, fax, or other equipment. – Organized Home: Stylish Storage Solutions for Every Room, C. J. Petersen
A large floor-plan gives plenty of opportunities for home office built-in ideas. This design devotes an entire wall to its custom built-in shelving with drawers and cabinets.
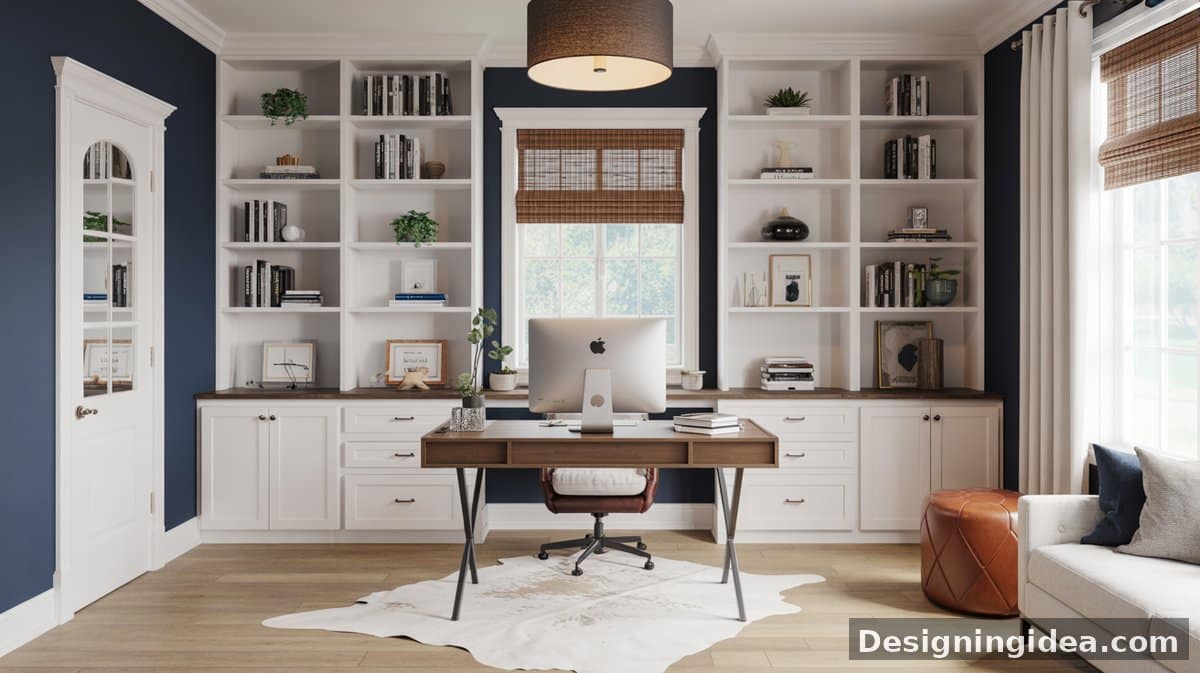
White open shelves flank a center window with bamboo shades against navy blue accent walls, with a walnut sawhorse desk, leather chair, and cowhide rug.
Home office built in storage provides a place for you to store equipment and materials such as files, supplies or notebooks. Also, it gives you a designated area to display books and other decorative items.
This particular home office built in also maximizes the space under the stairs using an L shaped desk with cabinets , drawers and overhead shelving. Matching its style and color matches with the kitchen cabinetry produces continuity in the design and makes it more cohesive.
When you order custom-made built-in office furniture from a cabinet maker, the work typically begins with the assessment of the space, and then they will take the necessary measurements to tailor your built-in home office furniture. Based on your specific needs and requirements, the supplier will create a layout and design of the built-in wall unit.
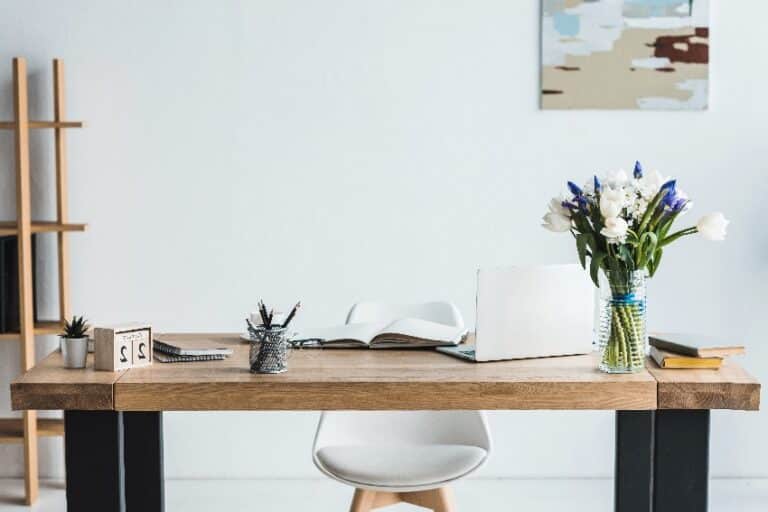
This bright and airy home office is furnished with floor to ceiling built in shelving and cabinets in beige paint. The freestanding desk and metal office chair in the middle matches the clean and fresh look of the interior.

This home office design features built-in shelving to each side and above the beautiful French doors.
Turn your own personal library into a space for studying and working by dedicating a small space for a built in desk. The home office built in design above features a small work table just enough to accommodate a computer.
Classic white built in home office can be easily updated using a fresh wall color and contrasting accessories. This charming home office oozes with a soft, feminine vibe by pairing the white built in desk with refreshing light apple green walls and posh pink accessories.
Compact built in desks, such as the one shown above, are perfect if you only need a space for a laptop. Adding some built in cabinets can help you organize your office supplies and while also freeing up your worktable from any clutter.
Instead of incorporating the desk to the built in shelving, this small home office design makes use of a freestanding table to maximize the wall unit for book storage.
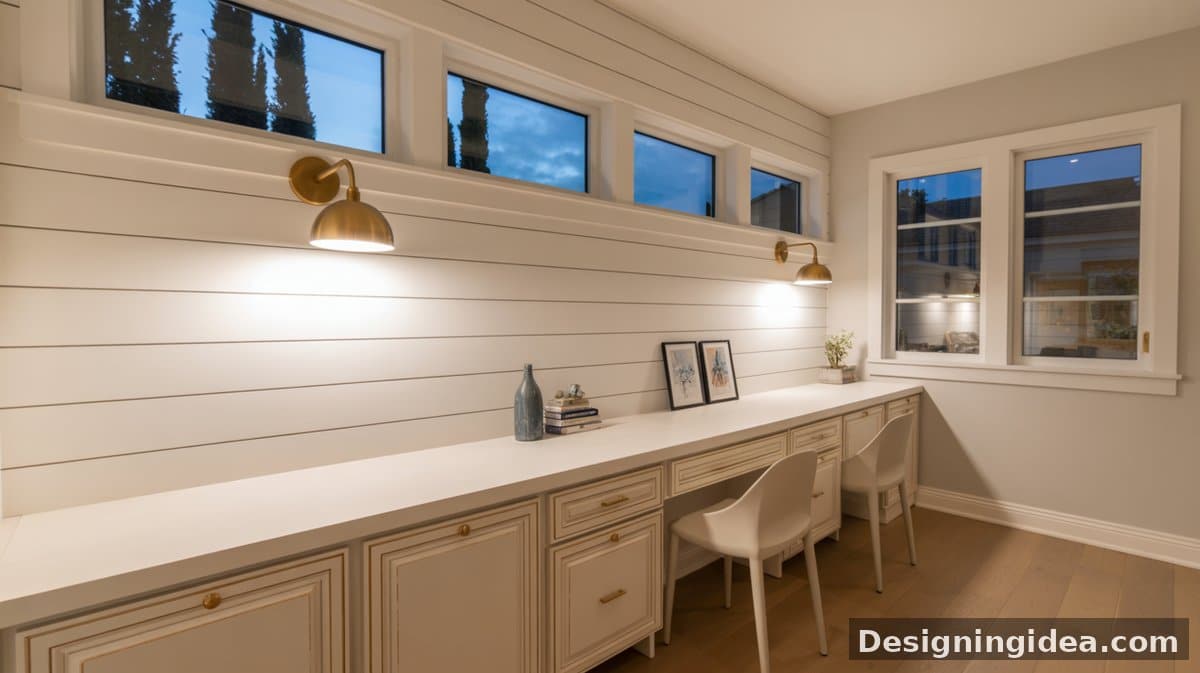
The trick to making you built in home office inviting is to have plenty of light. For example, this small space beside the window is the perfect spot to build a charming built in home office as it takes advantage of natural lighting.
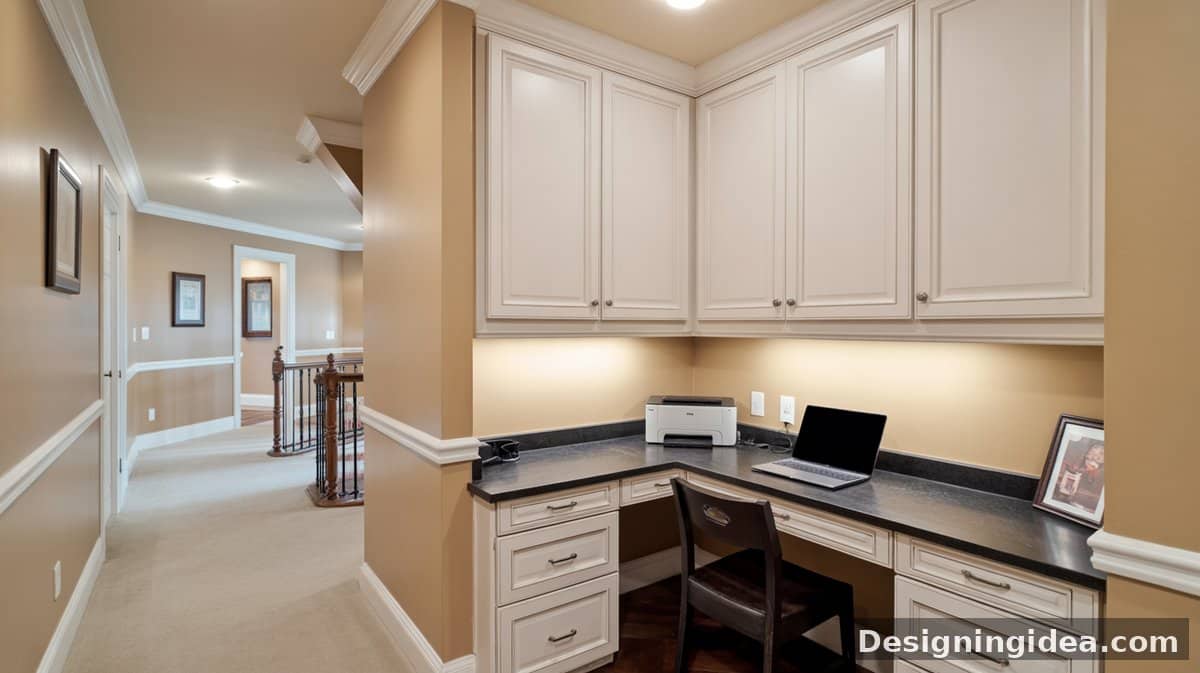
Small built in home office desks fit into tiny nooks perfectly and require a minimal amount of space. Thanks to their compact size, they are very versatile and can be installed in small spaces like a corner, under the stairs, or for this case, a hallway.
Here is an example of an L-shaped DIY home office built in. Most small built in desks are simple work spaces just enough for a laptop, but it can be made more functional by adding overhead cabinetry.
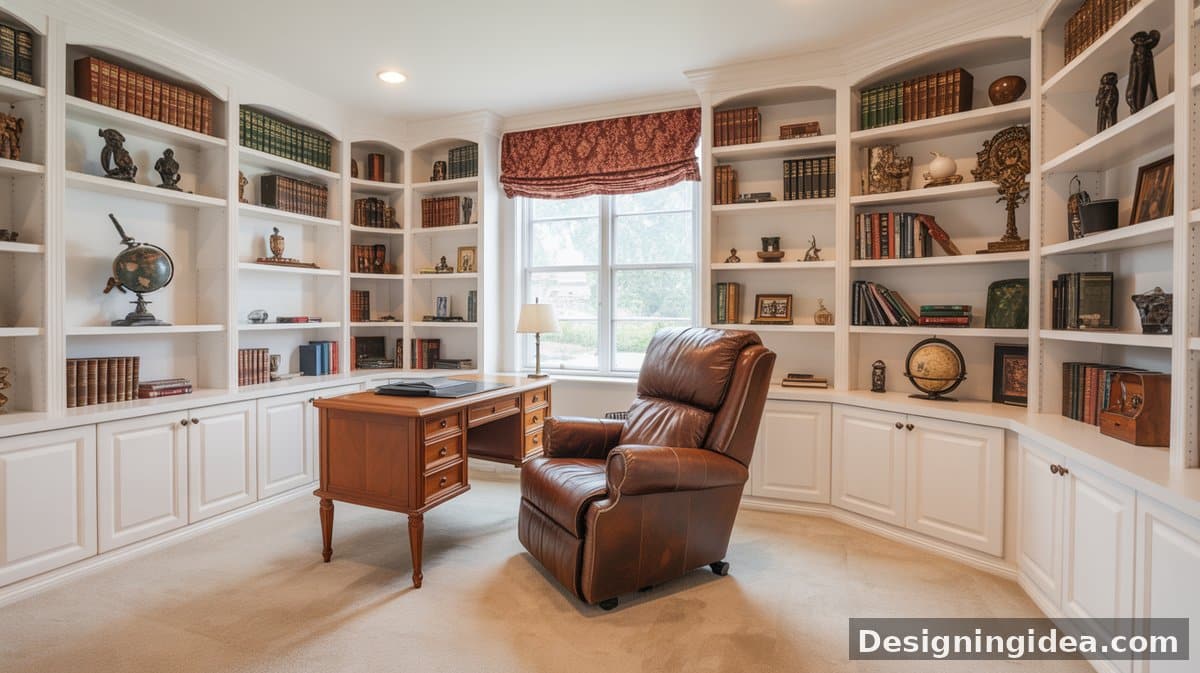
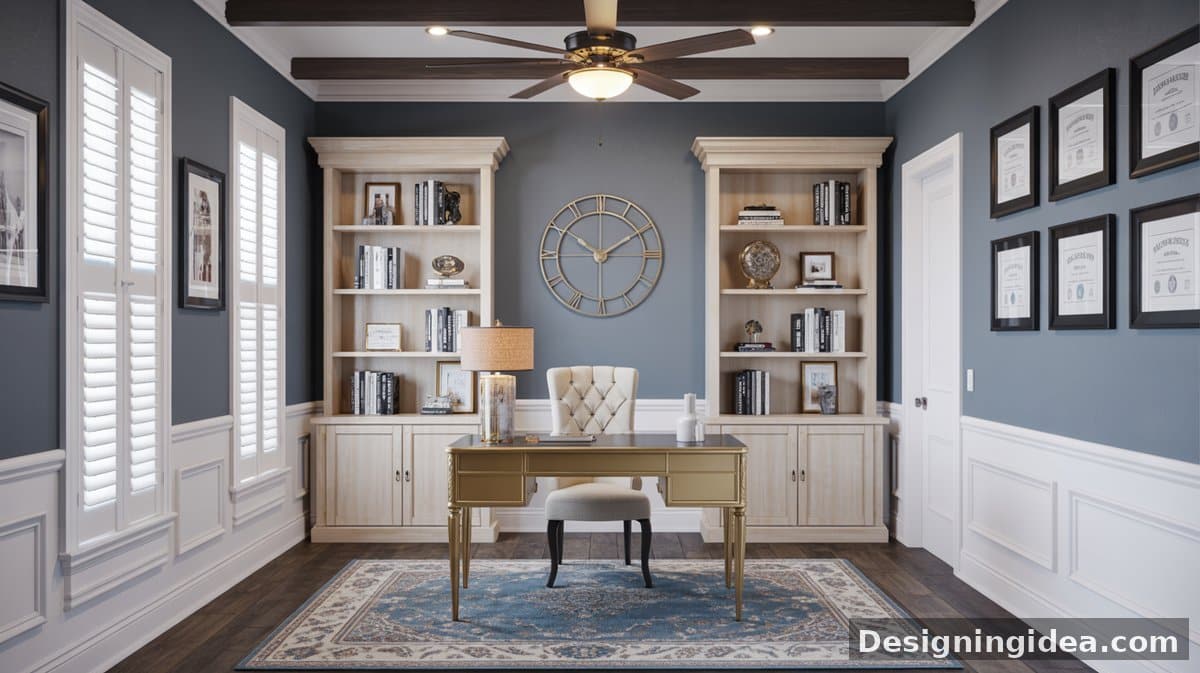
Traditional home office built-in ideas combine a formal vibe with comfort. This design features floor to ceiling built in shelves with shaker style cabinets below and at the center is a freestanding solid wood desk that is complemented by a brown suede armchair.
For more related home office built-in ideas see our gallery of built-in bookshelves here.
To showcase highly specific designs, some images on this website use advanced AI-generation software to illustrate ideas and room inspiration. See our editorial policy to learn more.

Upload a photo and get instant before-and-after room designs.
No design experience needed — join 2.39 million+ happy users.
👉 Try the AI design tool now