Uneven Floor Transition Ideas
In this gallery of uneven floor transition ideas, you’ll see tips on how to make a flooring threshold, blending carpet to hardwood, and tile to wood floor transitions.

Floor transitions are floor features that allow you to switch from one floor type to the other. They’re useful for when you have varying heights on the floors of the different areas in your home.
The most common among these is with hardwood floors. Different flooring usually requires a floor transition so that they can pair well with doorway entrances, for example, as well as other design elements in the home.
This usually requires transition pieces of narrow strips of wooden slats known as thresholds that effectively hide the gap between two floor types. These allow you to seamlessly bridge the differences either in height, or material, design, and so on and so forth.[toc]
Why Are Floors Uneven To Begin With?
Believe it or not, uneven floors are far more common than you would actually think. And this does happen a lot. There will be instances wherein floors can sag, curve, or just downright have different levels, resulting in an uneven surface.
There can be a myriad of reasons why floors are uneven. It may be that your home is built on a foundation that has poor load-bearing structures. It may also be possible that moisture has started to damage your floor joists, causing some wooden or even concrete parts to expand.
The thing is that uneven floors aren’t commonly caused by problems in the actual structure of your home. Oftentimes, it may be an issue related to the floor installation, or maybe your floor joist beams which are usually made out of wood, started to bed and eventually crack. All of these things can lead to the mind-boggling problem of having uneven floors in the home.
Solutions for Transitioning Uneven Flooring Materials
We asked interior designer Jennifer Eldridge to explain some of her methods for solving issues with uneven flooring. Here are a few of her tips for what flooring products to use to solve this problem:
When installing the flooring for a home, whether it’s carpet, hardwood, or laminate, it’s essential that each different flooring change is a smooth transition. One would hope that the same flooring type would transition smoothly between two rooms, but often, this is not the case.
Almost all flooring types have a seam at some point in the installation, and it looks best if the seam is placed where the two floors meet. This way, it can be covered with a transition strip.
Another issue arises when the floors meet at two different levels. A transition can also be used for 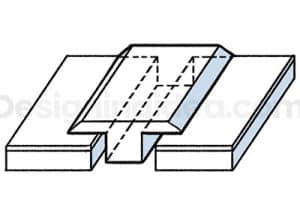
First, the contractor or homeowner must measure the gap between each flooring to decide which transition strip they need. The type of transition strip required also depends on the type of flooring that it is attached to.
The first type of transition strip is called a T-Bar. It is made of solid wood and is ideal for transitioning from hardwood to another hard surface of a similar height, such as ceramic tiles or hardwood.
The top portion overlaps the edge of the laminate flooring and then gradually slopes down to the tile floor.
An End Bar is used when hardwood or laminate flooring meets a door, step, or other flooring type.
One side is notched to cover the edge of the flooring; the other side has a bullnose shape or gentle slope.
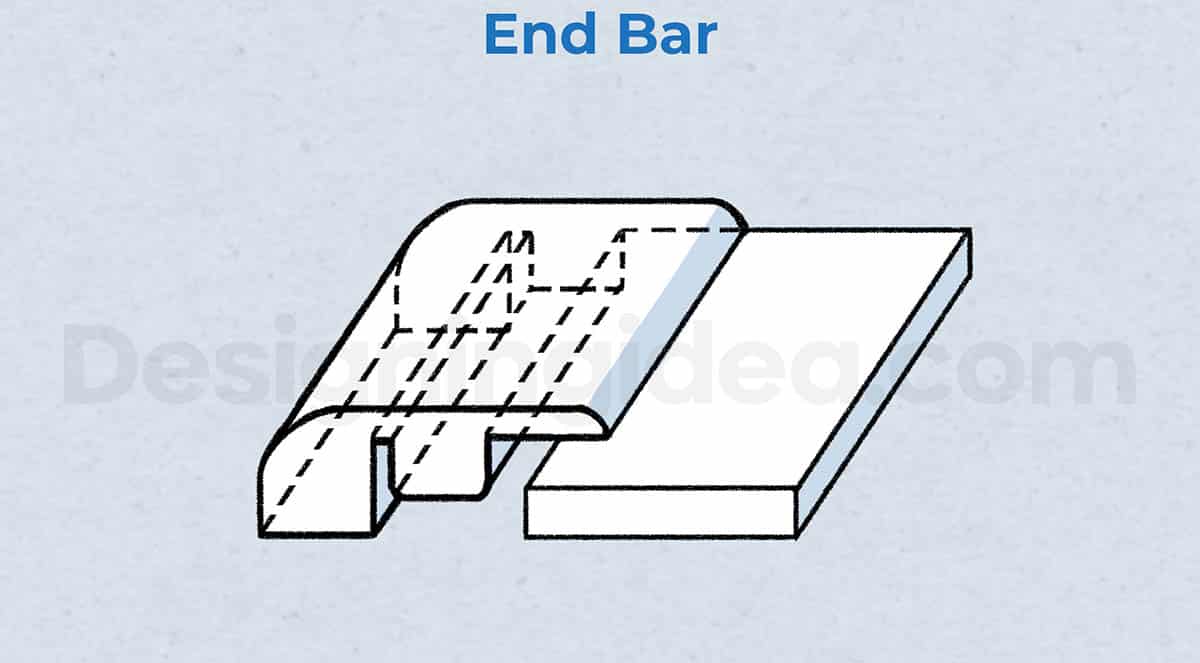
It is a perfect way to join two different types of flooring with unequal heights. It also covers the edge of the hardwood or laminate where a skirting board, or baseboard, cannot be used and ensures it stays in place.
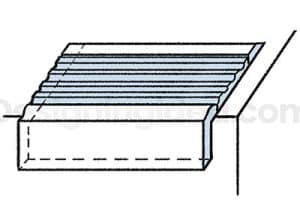
Stair Nosing can also be used to bridge a large gap between one floor height and another, usually if the gap is greater than half an inch.
There are few solutions to a large gap between two flooring elevations, as many of the above options will not properly line up with the metal track it’s mounted on.
Another solution to this problem is reducer molding, as long as you can find one that is long and high enough to accommodate the drastic height difference and provides a gentle slope.
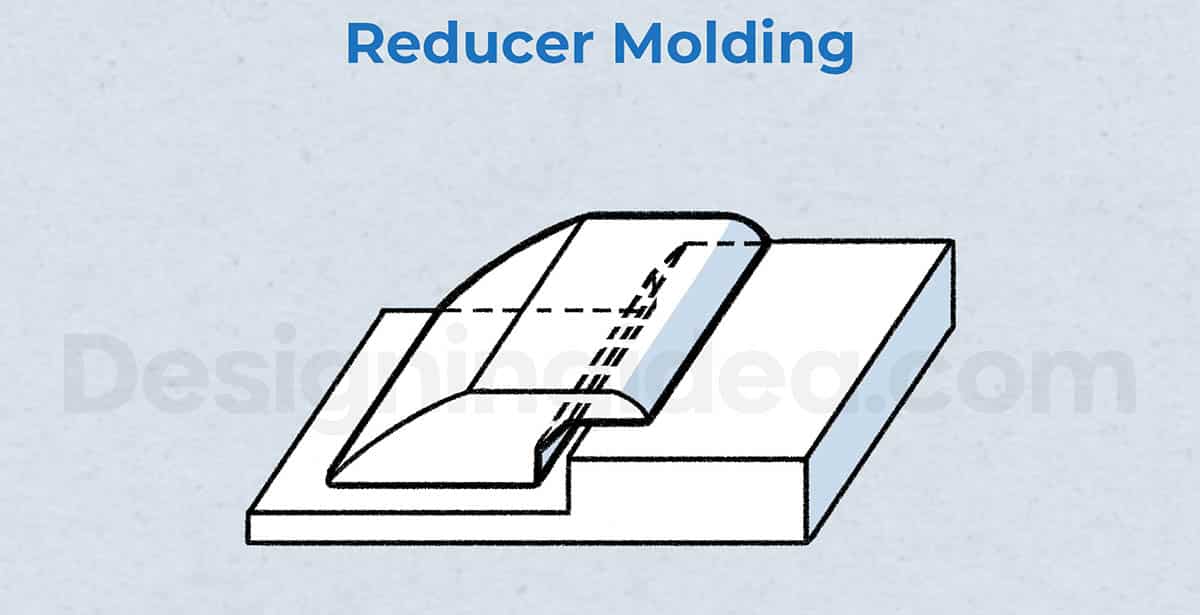
A reducer molding can bridge the gap between two uneven-height surfaces even if they are made of different materials. The slope of the reducer strip helps prevent tripping and looks more aesthetically pleasing.
How To Transition Uneven Floors

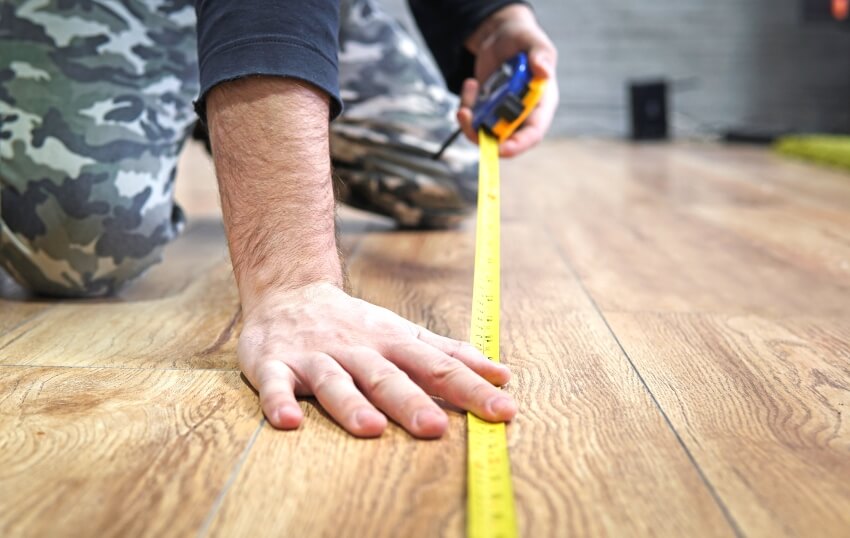
Measure the Height Difference Between the Two Areas.
You can go about this with the use of a basic measuring tape. This will give you a rough idea of how uneven your floors actually are.
Make sure that you press the tape measure tightly on the floor surface area below to really get a close-to-perfect calculation of the height difference.
Measure Out the Width of the Transition Area.
It may be a doorway or an area where two different types of floors meet. Make sure that you mark the areas out as well with something temporary, such as chalk or whatever is easily available to you.
Mount Your Adapter Plate and then Your Transition Strip.
This strip is an amazingly simple piece of either metal or wood whose main aim is to bridge the gap between two of your uneven floors.
Mounting the adapter plate will take you only an hour or less. Make sure that you keep the height difference measurement between the two floors in mind the whole time.
Gluing
You are going to need some construction glue to keep everything together. For doorways, the trick is usually in closing the door first and then sticking your transition wedges under it.
If you’re not fixing uneven floors along a doorway but are instead dealing with a flat surface, you can get this done with the use of composite board cut to a shape that will fit into the tile.
Take extra care to make sure that the frayed edges are smoothed with extra glue and are hidden out.
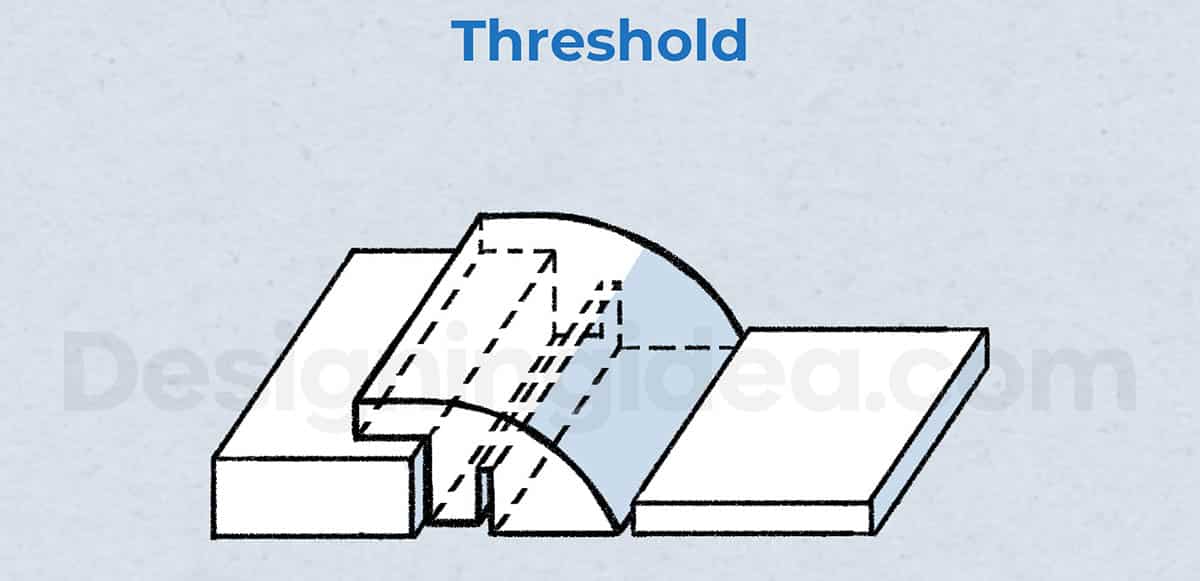
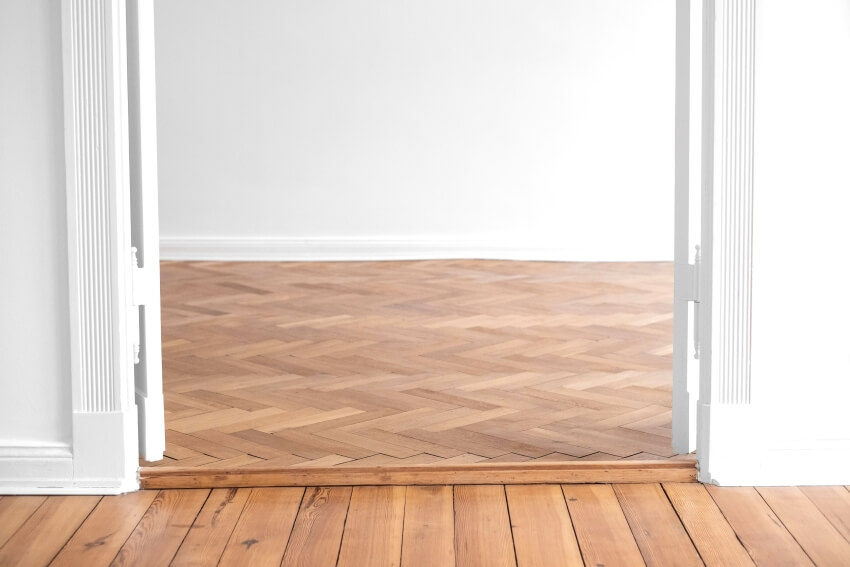
How To Make A Threshold For Uneven Floors

Thresholds placed between two uneven floors aren’t as complicated as you would think. They really are just pieces of tapered-off hardwood. A threshold is essentially synonymous to the transition piece that’s being placed in between the two-floor types.
This is oftentimes located right by the door jamb in order to prevent the appearance of the floors from having some sort of “edge” or “lip”.
Installing a threshold requires a piece of matched hardwood and a belt sander. The threshold wood types don’t necessarily have to exactly match that of the floor, but you do need to make sure that it will be able to fit the width of the door jamb exactly to make your floor appear seamless.
Actual installation. If you have your hands on a standard threshold piece that fits your measurements for the floor gaps exactly, all you need to do is to place it right inside the door jamb on the floor smack in the middle or right in between the two floors that have a gap.
If this isn’t the case, you can simply find any wood slat that’s generally thicker and have a wood shop run a planer through it until you get the desired thickness. If you have a planner at home and you’re handy with it, you can even opt to do this yourself.
Using a pencil, draw a line along your flooring’s front edge, known as the front lip. This will mark out exactly how big or what shape your threshold should take to fit snugly on the floor gap.
Angling. Remove the hardwood slat or threshold from the floor and turn it upright. Draw another line from the leading edge going to the front. Do the same along the high corner at the back of the piece as well as on the sides.
What you should be seeing now is an angled line crossing both ends coming from the higher corner all the way to the line that you drew out with a pencil. This angling drawn on represents the height difference that makes the two floors uneven.

Then you proceed with the actual adjustment of the threshold. Some woodworkers may opt for a band saw.
Others may opt to use a tilted table saw to cut along the angle, but the safest route to go would be to just use a belt sander. It works just fine, and if you’re handy with the tool, you can test it out as you go along.
Sanding. Position the threshold or the hardwood slat on the worktable and use some scrap wood about a half-inch thick positioned behind the edge away from you so you can easily tilt the slat up from the back. If the angle is steep, you can opt for a thicker piece of scrap wood.
Attach an 80-grit sanding belt on your sander. Clamp both ends of the threshold to ensure that it’s secure and stable. Make sure that when you hold the sander up, it’s perpendicular to the grain of the wood of the threshold piece.
You can now begin sanding the wood down with the goal being to eventually flatten the line you’ve drawn on. Tilt the sander slightly forward and make sure that you move it back and forth do shave the wood down according to your angled line.
Make provisions for the sander to lay flat on the angle you’ve created. Sight it from the end and across the workpiece in order to check your progress every once in a while.
Check the fit once you’re done. You have the option to switch to an orbital sander until the threshold is snugly fitting from top to bottom.
Tile Uneven Floor Threshold Ideas
There are a variety of floor reducers and threshold design patterns that can help you with transitioning from tile to wood flooring.
Metal Transition Strips

They’re great for breaking up two different flooring materials while at the same time, they can bring in a classy element to the overall aesthetic.
They’re great for breaking up classing floor colors and, among other things, for the unevenness of the floor. Metal strips can be quickly angled and fashioned with the right tools.
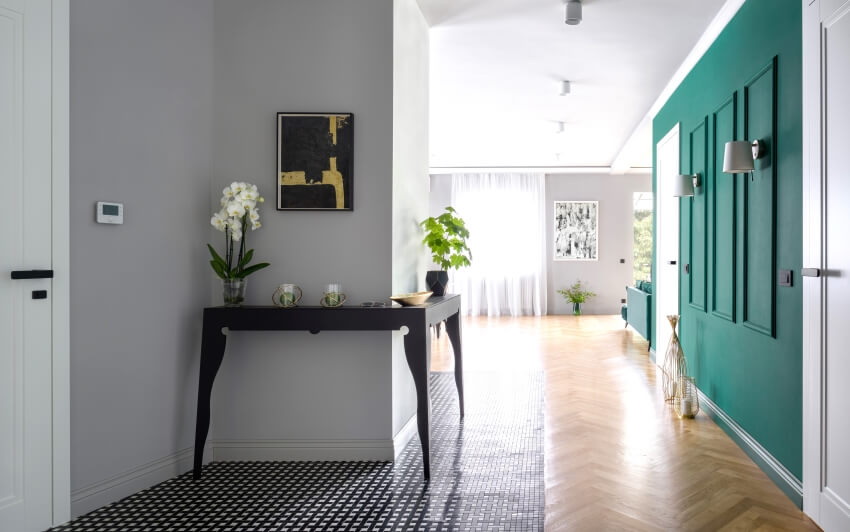
Inlaying

This is great for entryway floor transitions and can replace the need for a rug. Rugs are usually separate areas in the home. Inlaying is much cleaner with little to no maintenance at all.
Oscillating Tool
This technique looks a bit more intimidating but with a little bit of time and care, it can be totally doable. This can be great for floor transitions for small spaces, and the secret is really in taking it one tile at a time. You are going to need an oscillating tool to pull this one off.
The oscillating tool will aid in making straight and accurate cuts on the tiles. Once you’ve laid down the main pattern of the first-floor type, mark the second-floor type by using the first type as a tile guide.
Always keep the grout line in mind the whole time. The use of an oscillating tool can be complicated, so if you aren’t handy with this, it would be best to leave it to the professionals.
Glass Mosaic Tiles
Instead of having to suffer through an eye-assaulting transition, the mosaic tiles will serve as a bit of an accent. Since it usually involves a layer of mortar backing, it makes it easy to adjust the levels.
Uneven Tile To Wood Floor Transition

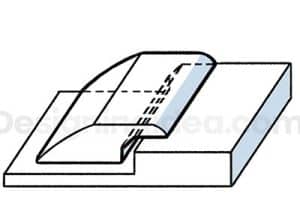
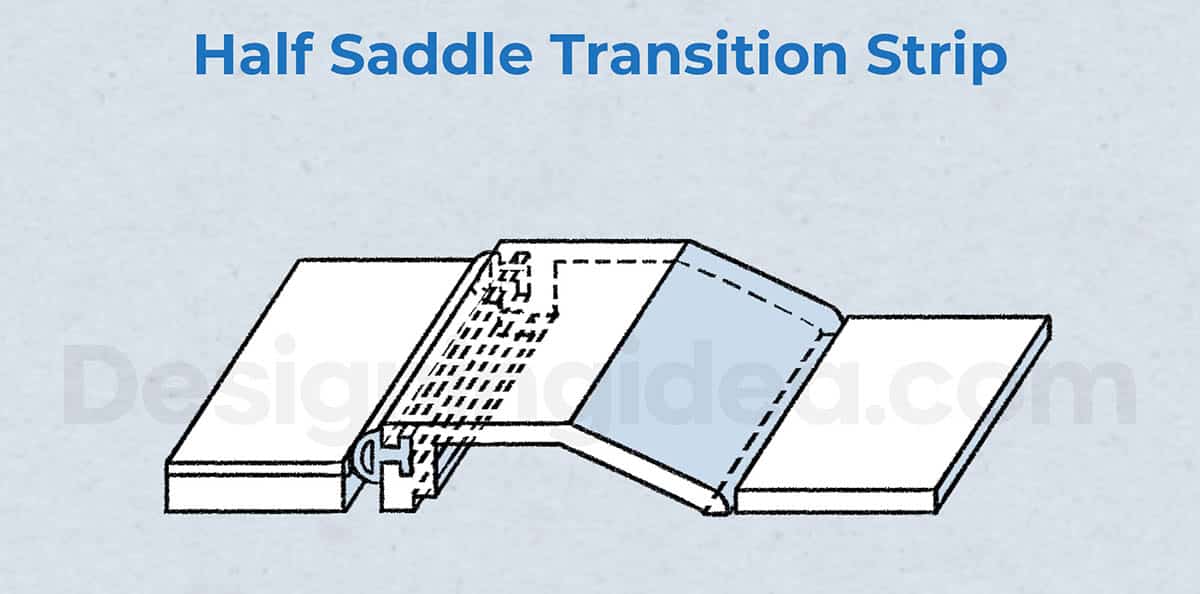
Full Saddle and Half Saddle Transitions
Full saddle transitions are used for two types of flooring that are of the same level, while half saddle transitions are designed to bridge uneven flooring.
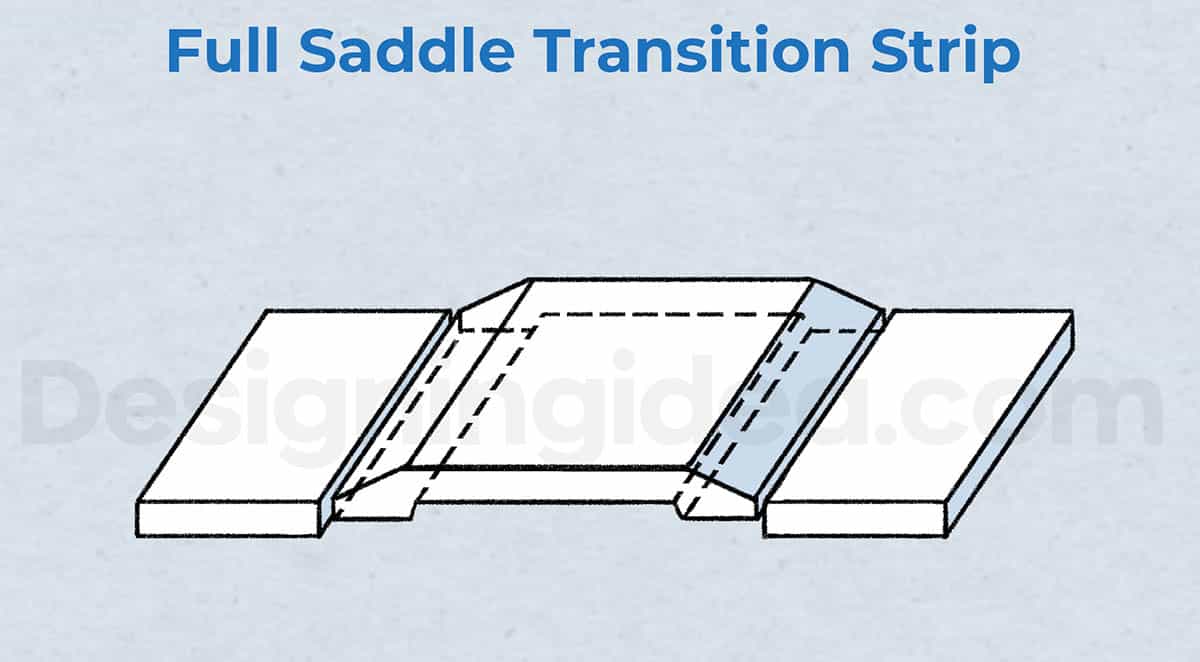
This example of a full saddle transition is ideal for spanning the entire width of the meeting of the two different materials.
Even if your flooring is level, bumping tile up against wood is bound to have small gaps in the middle, and this can collect dust and other things that you wouldn’t want to accumulate further down the road.
You need to make sure that these gaps are covered because the long and short of it is that for as long as there are different floor types, there’s bound to be some level of unevenness. These saddle transitions cover up those gaps beautifully and are perfect for tile-to-wood floor transitions.
Flush Transitions
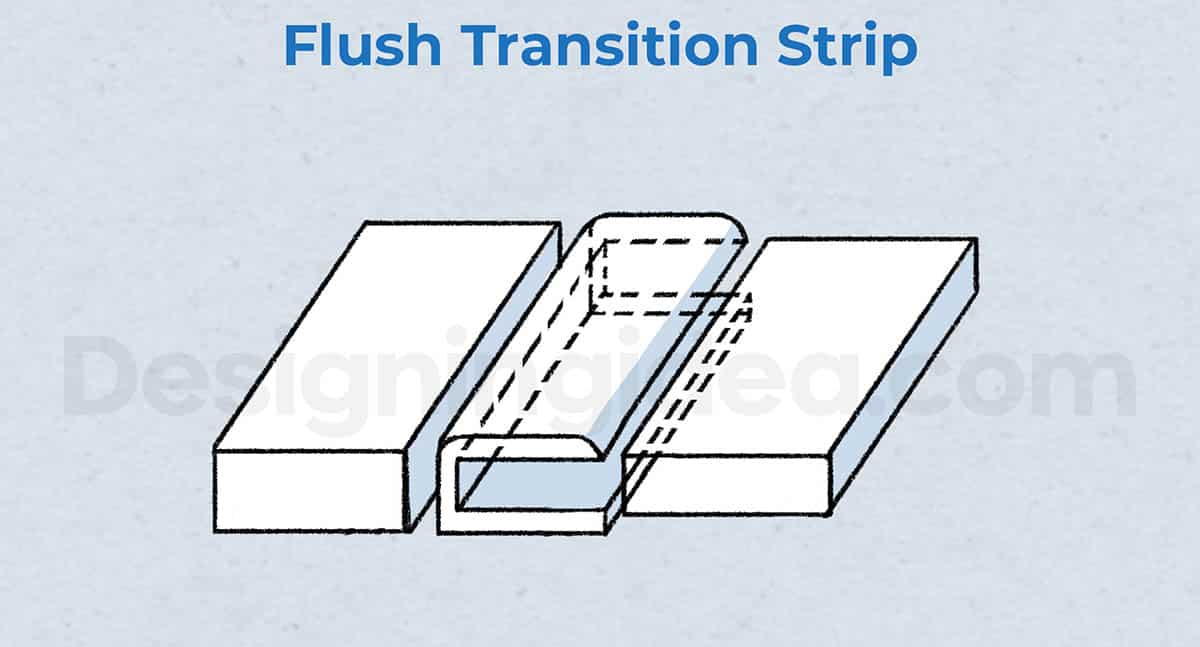
These floor transitions are way more attractive, and they also tend to function better. However, they also tend to be a bit more difficult to install.
Flush transition strips can have different forms and might, at times, require a little ingenuity and improvisation.

They can be applied when the levels or heights of the two floors are minimal, but they might not be suitable if the height difference is more than half an inch.
Hardwood Connecting Floor Strips
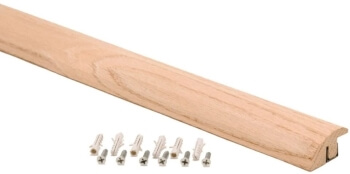
The concept behind hardwood transition strips is easy to understand and simple. It is a single transition strip made out of hardwood.
It functions as a ramp that connects the higher tile floor to the lower hardwood floor level. It can have a lip-over design over the tile floor, or it can meet it directly. See more types of floor tiles here.
Stair Nosing
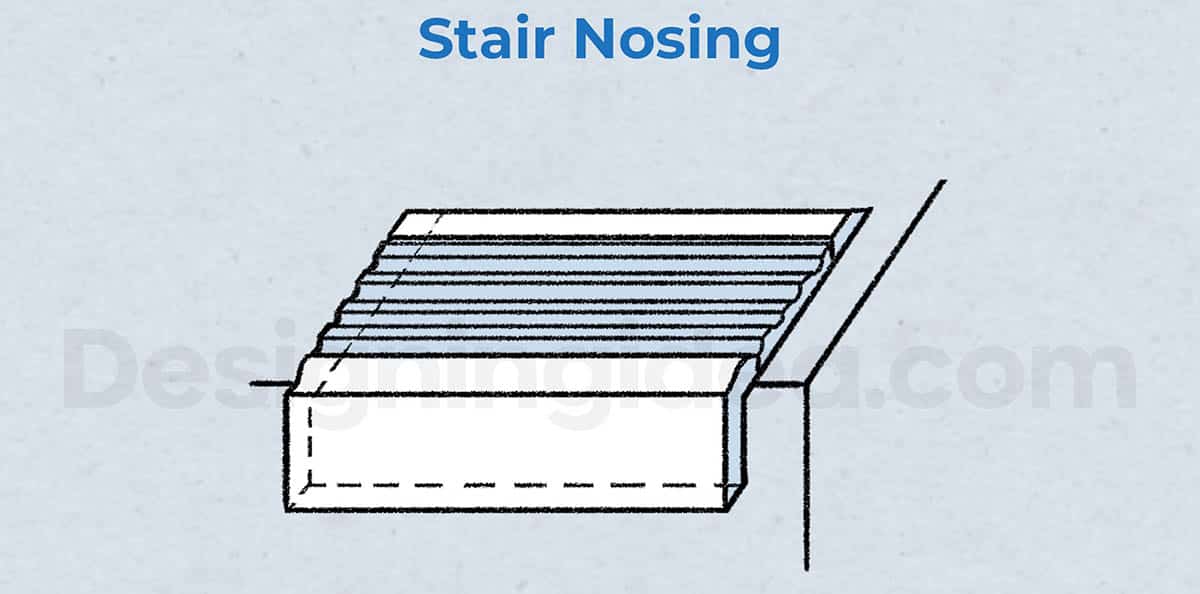
A stair nosing or edging helps prevent slipping while ascending or descending stairs. They play a vital role in stair safety, have a variety of uses, and are often required to be compliant with building codes, especially in commercial locations.
The edging material is often more visible allowing for one to easily see the step transition at a glance. You can frequently find these strips with round or square with slightly rounded edge profiles. A round edge will not be as noticeable as a more square edge profile.
The nosing material is also installed to help protect the stair edge from wearing down and damage from high foot traffic. Popular materials include aluminum, composite, wood, or a combination of one of these with rubber non-slip textured surfaces.
Surprisingly, it is advised to both nail and screw these stair treads down to maximize structural integrity and keep them from coming loose over repeated impact.
Stone To Hardwood Connector Strips

This is typically made out of granite or marble. This joins the lower floor level with the higher tile floor level by directly abutting itself against the tile and employs the use of a hardwood trim piece to connect it seamlessly with the lower floor.
Carpet To Hardwood Transition Ideas

Carpet Edge Gripper
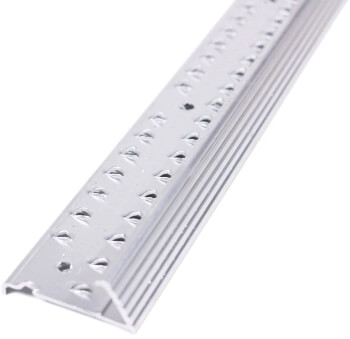
This type of threshold is recommended when the height difference between the hardwood floor and the carpet floor is substantial. This is essentially an aluminum strip made for a carpet transition to another material.
The carpet is tacked to the toothed side of this aluminum strip while the smoother side tacks on into the subfloor.
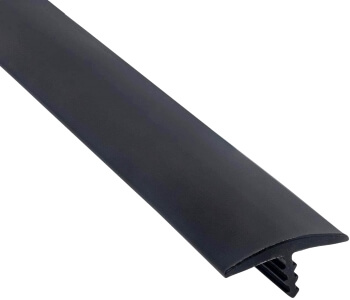
T-molding
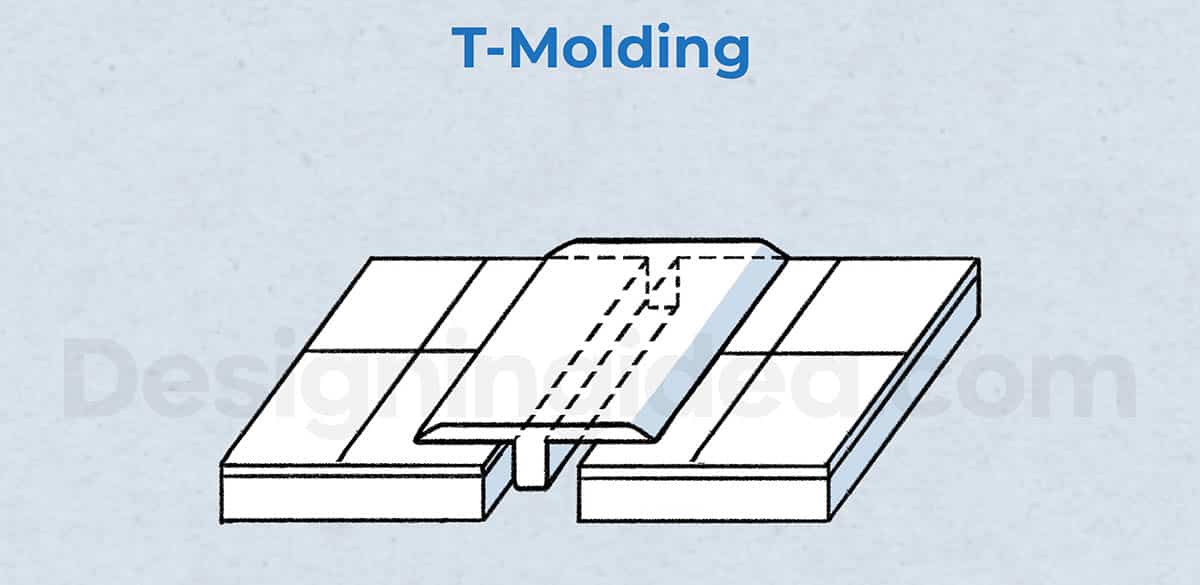
As the name suggests, a T-bar, or T-molding is a threshold that’s shaped like a “T”. It goes into the small gap in between the carpet and the hardwood floor.
The two pieces sitting on both sides will have each sitting or leaning on one of the floor types. It can be made out of hard plastic (Polyethylene), foam, rubber, wood or metal.
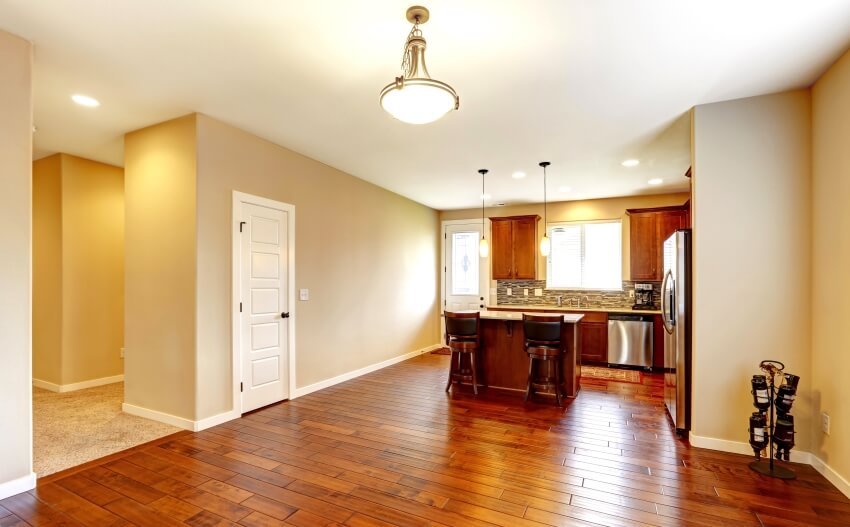
Transition Two Different Wood Floors Meeting
To first address the obvious question, “Can you put two different types of wood flooring right next to each other?”.
The answer to this is a careful yes. Yes, you can do this, but you also need to make sure that this is done right. Just slapping them on right next to each other with no transition at all will make your floors look mismatched and terrible.
You need to make your design choices conscious and really keep everything with the end in mind. The transitions need to be well thought out and deliberate, or else it will look like an unattractive accident.
Case in point, a classic example is that your floor transitions shouldn’t happen smack right in the middle of the room. Instead, having it happen in a doorway would make so much more sense.
If that’s not a possible option for you, you might need to leverage bordering to protect the aesthetics.

Here are some ways to transition two types of wood floors.
T-molding
This is great for blending two different wood colors. This also happens to be the easiest of all the transition tricks in the book. T-moldings may not always look great, but they’re pretty effective in getting the job done. If the transition happens to be in a door threshold, you’ll barely even notice it.
The thicker stem piece is attached to the subfloor, so the T-shape is installed upside down. The thinner arms are then placed right beside or under the two different floor types.
It’s a gentle type of transition, and it can’t handle floors with extreme level or height differences. Subtle differences are manageable, though.
Transition Strip or Seam Binder
It looks like the top piece of a T molding. It’s essentially a wood slat that’s typically nailed down and works like a seam. It effectively ensures that the two wooden floor types are bound to each other via this thin strip.
It’s a rather simple solution, but use this with care, and it can look haphazard and tacked on. If you happen to be in a hurry or caught in a pinch, this can work. It just doesn’t happen to be the best option.
Thin Metal Transition
Metal transitions have become popular over the past years. They’re typically lightweight and narrow, some being as thin as 1/8 of an inch. They’re also typically chrome-finished and can make your floors look modern, sophisticated, and very well put together.
It looks current and hip and can be quite easy to install. they work with a variety of materials, such as hardwood, engineered wood, tile, bamboo, laminate, cork, and vinyl flooring.
All you need to do is to make sure that you leave a thin gap in between the two wooden floor types, use the proper adhesive, and mount the thin metal transition strip right there.
Threshold Piece

This rectangular and flat slat of wood is made out of hardwood and oftentimes mimics the thickness of hardwood floors. It can be several inches wide and, in certain instances, can be made out of stones such as marble and granite.
A threshold piece is relatively easy to install, comes in a pre-cut length, and can look very attractive, especially when applied to a wider surface and somewhere significant like a door entryway.
Visit our guide to wood floor patterns for more related content.
To showcase highly specific designs, some images on this website use advanced AI-generation software to illustrate ideas and room inspiration. See our editorial policy to learn more.