What Is LRV in Paint? How Light Reflectance Value Works

Have you ever found what you thought was the perfect paint color, went to the store, brought it home, and painted only to discover it doesn’t look anything like you expected? There’s a scientific reason this happens, and when you understand why, it can transform how you approach color in your home. Light Reflectance Value, or LRV, is an often-used measurement that tells you how much light a color reflects or can absorb. Let’s take a closer look at LRV, so you can understand how to use it.
Understanding Light Reflectance Value
Light Reflectance Value or LRV ranges on a percentage scale from 0 to 100, with 0 representing an absolute black, which absorbs all light, and 100 representing a pure white that reflects all light. Most colors are found somewhere in the middle of this spectrum, and all have an LRV number printed on the back of the paint chip. You’ll usually see it as a simple number, such as LRV 63 or 12. This number tells you how a color will actually look on your wall more than almost any other factor.

Upload a photo and get instant before-and-after room designs.
No design experience needed — join 2.39 million+ happy users.
👉 Try the AI design tool now
Why LRV Matters
When I’m choosing color, I almost always start with LRV because it affects how a color looks in different lighting conditions and room sizes. A color with an LRV of 70 will make a room feel bright, open, and airy. That same color family with an LRV of 20 can create a cozy atmosphere, but may also make a small space feel cramped.
As you know, natural light changes throughout the day, and your artificial light fixtures add another layer of complexity. This means that a soft gray with an LRV of 60 might look lovely displayed in the showroom, under their bright commercial lighting, but look dimmer when painted in your bedroom with minimal natural light. It may even look dull and lifeless, forcing you to repaint again. For this example, the LRV hasn’t changed at all, but the amount of available light to reflect has diminished.
Breaking down The LRV Spectrum
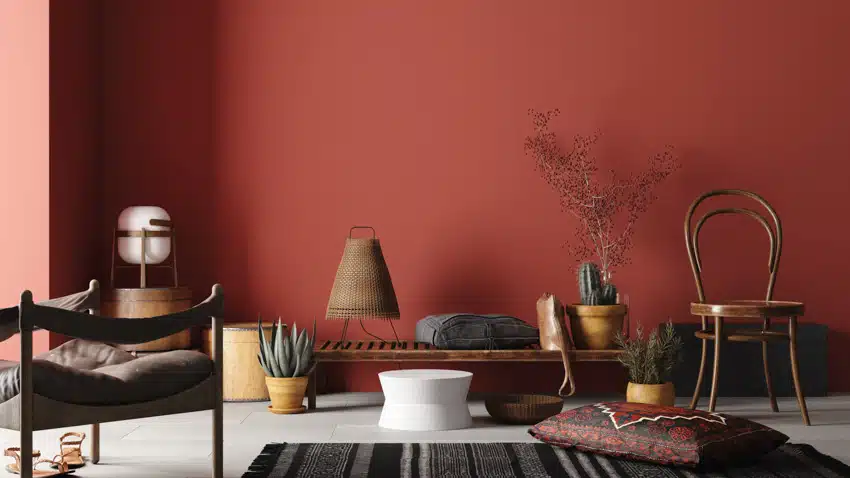
Let me break down the LRV ranges I work with most often. Colors with LRVs between 0 and 20 are those with deep, saturated hues like navy, charcoal, forest green, and chocolate brown. These colors will absorb more of the light that hits them, creating drama and depth. I love using them in large rooms with abundant natural light or in spaces where you want a sense of intimacy, like a formal living space or dining room.
Going up to LRVs ranging from 20 and 50, and you’ll find more medium-toned colors that offer the best of both worlds. These can be colors like soft taupe’s, sage greens, dusty blues, and warm terracotta hues. These have enough depth to feel substantial but will still reflect enough light to keep spaces from feeling too heavy. This is a versatile range that works well in most rooms.
Colors with LRVs ranging between 50 and 70 are your light, airy shades. These are the hues like soft whites, pale grays, light beiges, and pastel tones that make up the majority of wall colors in more contemporary homes. They reflect a lot of light, making the rooms they’re in feel larger and brighter. Finally, you can find LRVs above 70 that are reserved for the brightest whites and near-whites that maximize light reflection.
How Light Direction Transforms LRV
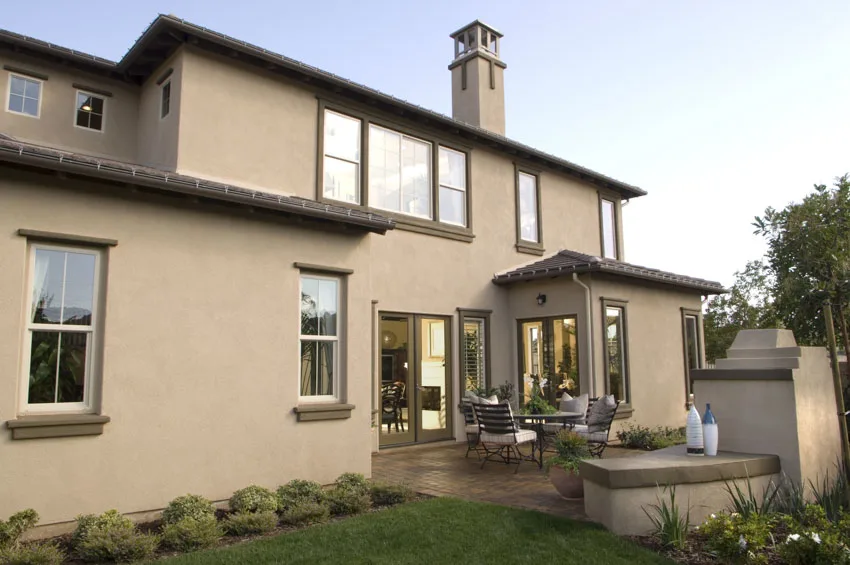
It is important to clarify that the direction your windows face changes how LRV performs in your space. North-facing rooms in the U.S receive a cool, indirect light throughout most of the day, which can make colors appear darker than their actual number suggests. In these spaces, I typically recommend colors with LRVs around 60 or higher to make up for the lack of bright, direct sunlight.
South-facing rooms are flooded with warm, consistent light all day, giving you more flexibility when it comes to choosing an LRV. In this environment, even colors in the 30 to 40 range can feel bright and welcoming. This is because there’s abundant natural light to reflect. East-facing rooms get beautiful morning light that’s often cooler and brighter, then it shifts to more indirect light in the afternoon. West-facing rooms do the opposite, starting out dim and ending the day with a warm, golden afternoon sun that can make colors appear much lighter and warmer than you might expect.

Adjacent Color Rule
Here’s something that sometimes catches people by surprise, and it’s the LRV contrast between adjacent rooms and surfaces that can affect how your colors read. If you paint a room with an LRV of 50 but your trim has an 85 number, that wall color will appear significantly darker than if you had used trim with an LRV of 70. Your eye constantly adjusts to the difference based on the surrounding contrasts.
You’ll also want to consider the LRV of flooring, cabinetry, and large furniture when choosing wall colors. A dark hardwood floor with an LRV of 10 to 15 will make colors appear lighter in contrast. If you have light oak floors with an LRV around 40, your wall paint needs to be chosen more carefully to avoid washing out the entire space or creating a lack of contrast that doesn’t look appealing.
Small Spaces and Your LRV Strategy
I’m sure you’ve heard the old rule about painting small rooms in light colors, and it isn’t wrong, but it’s a little incomplete. You’ll find that higher LRV colors of 60 and above reflect more light and make smaller spaces feel more open. However, I’ve seen inviting powder rooms and home offices painted in colors with LRVs of around 30 that feel perfect because the lighting was designed to work with the lower reflectance value. The key to this is understanding that low LRV colors in small spaces work best when you have adequate artificial lighting. If you’re trying to force brightness into the space, it will always feel uncomfortable.
Testing Colors with LRV in Mind
When testing paint samples, I like to look at them at different times of day and under your room’s lighting conditions. It also pays to understand what you’re actually seeing. If you’re testing two grays, one with an LRV of 55 and one with an LRV of 65, the difference might seem subtle on a small sample surface. But when you paint it across an entire wall, it can mean the difference between a room that feels cozy and one that feels expansive.
To get a good read of your conditions, paint large sample areas of at least two feet by two feet on different walls in the room. Then watch how the morning light affects the sample versus the afternoon light. Notice how the color shifts as the available light changes, and realize that this isn’t the paint changing color; it’s the LRV doing exactly what it’s supposed to do with the available light.
Artificial Lighting and LRV
Your lighting fixtures also impact how LRV performs after dark. Warm-toned bulbs with a range of 2700K to 3000K make tones feel richer and can compensate to a degree for lower LRVs. Meanwhile, cool-toned bulbs that are 4000K and above enhance the reflective qualities of higher LRV hues but can make lower ones feel flatter and duller. With this in mind, a room painted in a color with an LRV of 25 will need more ambient lighting and carefully placed fixtures to prevent it from feeling closed-in at night. On the other hand, a room with an LRV of 70 might need dimmable fixtures, so you’re not overwhelmed by brightness during the evening hours.
The Finish Factor
The paint finish is another detail that affects how LRV impacts your space. A flat or matte finish will reflect less light, making the hue appear true to its stated LRV number. A satin or eggshell finish adds a sheen that can make the hue appear slightly lighter. Semi-gloss and high-gloss finishes will reflect light more directly, potentially increasing the perceived LRV by several points. As a general rule, I use flat finishes in low-traffic areas for the most accurate color representation, satin finishes in main living areas for minimal light-reflection alteration, and glossier finishes for the trim, doors, and cabinetry to create contrast and highlight the architectural details.
Creating Flow with LRV
When designing a whole-home color scheme, I use LRV to create intentional transitions between spaces. Moving from a room with an LRV of 70 to one with an LRV of 30 can feel jarring. Instead, I prefer to step down gradually, for instance, using 70 in the main hallway, 55 in the living room, and 40 in the study. This creates a natural flow that guides you through the home, but still allows each space to have its own character.
The 10-point rule is a general guideline that states you try to keep adjacent spaces within 10 to 15 LRV points of each other. The only reason you wouldn’t want this is if you want to create a dramatic transition deliberately for effect. Open floor plans require even more attention to their LRV because you see multiple colors simultaneously, and you want them to relate to each other without being disorienting.
Your LRV Action Plan
Start by finding the LRV of any colors you’re considering, and you’ll find that most paint manufacturers list this information online or on the back of paint swatches. Measure the natural light in your space at different times of day using an app like Lux Light Meter. Notice where the light is strongest and where there are shadows. Consider your existing elements, like the flooring, furniture, countertops, etc. These aren’t changing, so your wall color needs to work with them. Think about how you want each area to feel and use higher LRVs to create energy and openness, and lower LRVs to create intimacy and calm.
Avoid painting a sample and hoping for the best. Watch how the LRV performs throughout the day and under your artificial lighting at night. Trust what you see, not how it looks under the artificial light of a store or on a computer screen.
Understanding how LRV works gives you the knowledge required to break the rules if you want. You can have rooms with dramatic contrast as long as the room has enough natural light to support it. Knowing how it works won’t make color selection foolproof, but it will give you a framework for making more informed decisions.
You’ll also want to consider the undertones of a color. For instance, having a room with a cool blue undertone may clash with your oak flooring. LRV tells you how much light reflects, while the undertones determine what color the reflected light shows. You can have two paints with the same LRV and find that they look different in the same room, because of their undertones. For example, a neutral gray may skew more green, blue, or purple depending on it. You’ve got to get them both right to match all of the other elements in your design.
Quick Reference: LRV Guide for Every Room
| LRV Range | Light Behavior | Best Room Types | Lighting Needs | Design Effect | Popular Colors |
|---|---|---|---|---|---|
| 0-20 | Absorbs 80-100% of light | Large rooms, dining rooms, libraries, powder rooms | Requires substantial artificial lighting; 3-4 light sources minimum | Dramatic, intimate, cocooning | Navy (LRV 5-9), Charcoal (LRV 6-12), Deep Forest (LRV 8-15) |
| 20-35 | Absorbs 65-80% of light | Living rooms with good natural light, bedrooms, and home offices | Needs strong natural light OR layered artificial lighting | Bold but livable, sophisticated depth | Rich Taupe (LRV 22-28), Slate Blue (LRV 25-32), Olive Green (LRV 20-30) |
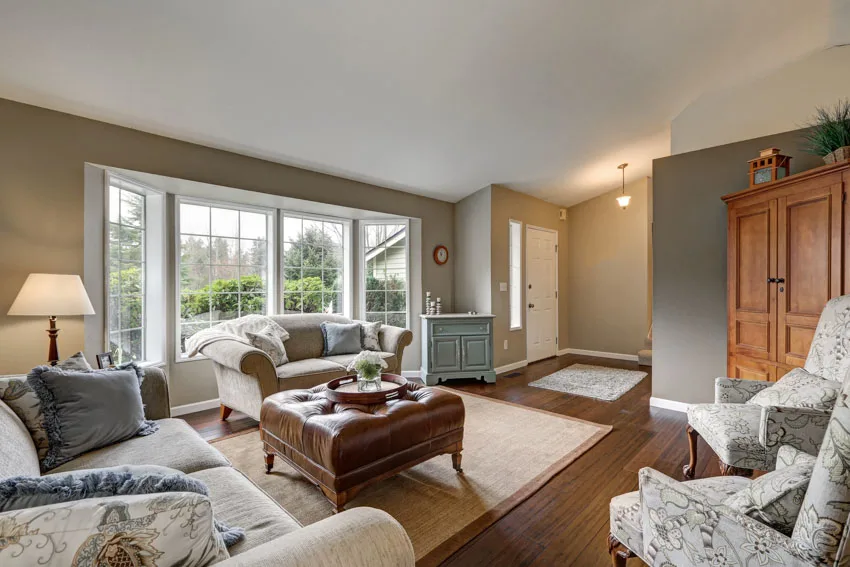
| 35-50 | Balanced absorption/reflection | Most living spaces, bedrooms, kitchens, and family rooms | Moderate lighting; works with standard fixtures | Versatile, grounded, substantial | Greige (LRV 38-45), Soft Sage (LRV 40-48), Warm Gray (LRV 42-50) |
| 50-65 | Reflects 50-65% of light | Hallways, smaller bedrooms, bathrooms, and offices | Standard residential lighting is sufficient | Bright yet colorful, spacious feel | Light Gray (LRV 52-60), Pale Blue (LRV 55-63), Soft Beige (LRV 58-65) |
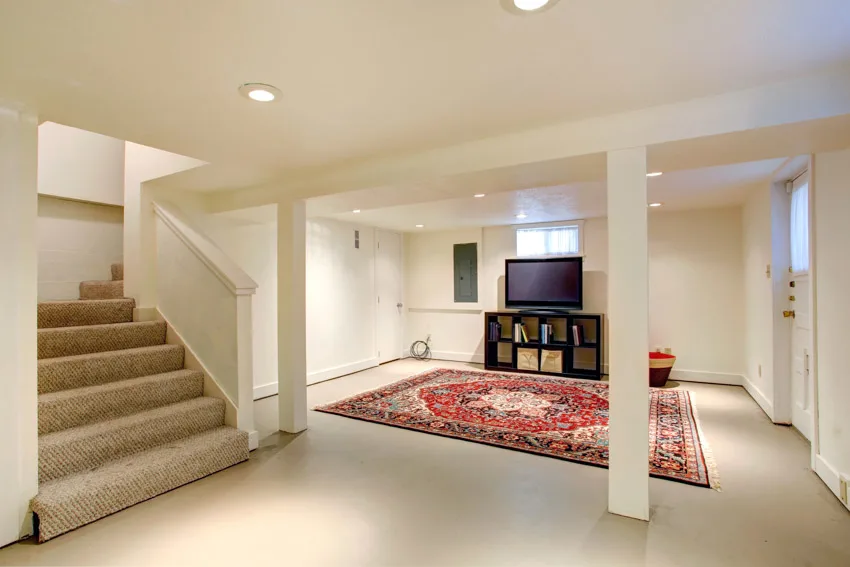
| 65-80 | Reflects 65-80% of light | Small spaces, dark rooms, north-facing rooms, basements | Minimal lighting needed; maximizes available light | Airy, expansive, fresh | Soft White (LRV 68-75), Cream (LRV 70-78), Pale Greige (LRV 72-80) |
| 80-100 | Reflects 80-100% of light | Ceilings, trim, small dark spaces, maximizing brightness | Very little artificial light is needed during the day | Ultra-bright, clean, architectural | Bright White (LRV 82-88), Pure White (LRV 89-94), Designer White (LRV 85-92) |
Room-by-Room LRV Recommendations
| Room Type | Ideal LRV Range | Why It Works | Tip |
|---|---|---|---|
| Master Bedroom | 45-65 | Calming but not cave-like; works with table lamps | Go 5-10 points darker on the accent wall behind the bed |
| Kitchen | 55-75 | Reflects light for tasks; feels clean and spacious | Higher LRV compensates for upper cabinet shadows |
| Bathroom | 60-80 (main) / 40-60 (powder) | Bright for grooming; powder rooms can be dramatic | Use high-LRV on the ceiling to bounce light down |
| Living Room | 40-65 | Versatile for day/night use; supports multiple activities | Match LRV to the largest furniture piece within 10 points |
| Dining Room | 25-50 | Creates intimacy; works well with chandelier lighting | Lower LRV enhances evening ambiance with dimmed lights |
| Home Office | 50-70 | Bright enough for focus without glare on screens | Avoid LRV above 75 to reduce eye strain |
| Hallways | 60-75 | Maximizes light in typically dim transitional spaces | Use 10-15 points higher than adjacent rooms |
| Nursery/Kids Room | 55-70 | Cheerful and bright; supports play and learning | Higher LRV helps during nighttime checks with minimal lighting |
Natural Light Direction Impact on LRV
| Window Direction | Light Quality | LRV Adjustment Needed | Recommended LRV Shift | Color Temperature Effect |
|---|---|---|---|---|
| North-Facing | Cool, indirect, consistent | Increase by 10-15 points | Choose LRV 60+ for brightness | Colors appear grayer and cooler; add warm undertones |
| South-Facing | Warm, direct, bright all day | Maximum flexibility | LRV 30-70 all work well | Colors appear truest; most forgiving direction |
| East-Facing | Cool morning, dim afternoon | Moderate increase by 5-10 | LRV 50-65 provides balance | Morning blues/greens pop; afternoon needs good artificial light |
| West-Facing | Dim morning, warm afternoon glow | Slight increase by 5 points | LRV 45-65 optimal | Afternoon sun intensifies warmth; colors shift golden |
| No/Minimal Windows | Entirely artificial | Increase by 15-20 points | Choose LRV 65+ minimum | Depends on bulb choice; warm bulbs (2700K) recommended |
LRV Contrast Guidelines for Trim and Walls
| Wall LRV | Recommended Trim LRV | Contrast Level | Visual Effect |
|---|---|---|---|
| 0-30 (Dark) | 80-90 (Bright White) | High (50+ point difference) | Dramatic, architectural, defines moldings sharply |
| 30-50 (Medium) | 75-85 (Soft White) | Medium-High (30-40 point difference) | Balanced, classic, highlights trim without overwhelming |
| 50-65 (Light) | 70-85 (White/Off-White) | Medium (15-25 point difference) | Subtle definition, modern, soft contrast |
| 65-80 (Very Light) | 80-90 (White) | Low (10-15 point difference) | Minimal contrast, seamless, contemporary flow |
| Monochromatic Look | Same LRV or within 5 points | Minimal | Walls and trim blend; architectural details recede |
Finish Impact on Perceived LRV
| Paint Finish | Light Reflection Style | LRV Perception Shift | Best Use Cases |
|---|---|---|---|
| Flat/Matte | Diffuse, absorbs light | True to stated LRV | Living rooms, bedrooms, ceilings, low-traffic areas |
| Eggshell | Slight sheen | Increases perceived LRV by 2-3 points | Most wall surfaces, family rooms, hallways |
| Satin | Soft glow | Increases perceived LRV by 3-5 points | Kitchens, bathrooms, high-traffic areas, kid’s rooms |
| Semi-Gloss | Noticeable shine | Increases perceived LRV by 5-8 points | Trim, doors, cabinets, furniture, accent details |
| High-Gloss | Mirror-like reflection | Increases perceived LRV by 8-12 points | Modern cabinets, furniture, doors, decorative accents |
To showcase highly specific designs, some images on this website use advanced AI-generation software to illustrate ideas and room inspiration. See our editorial policy to learn more.