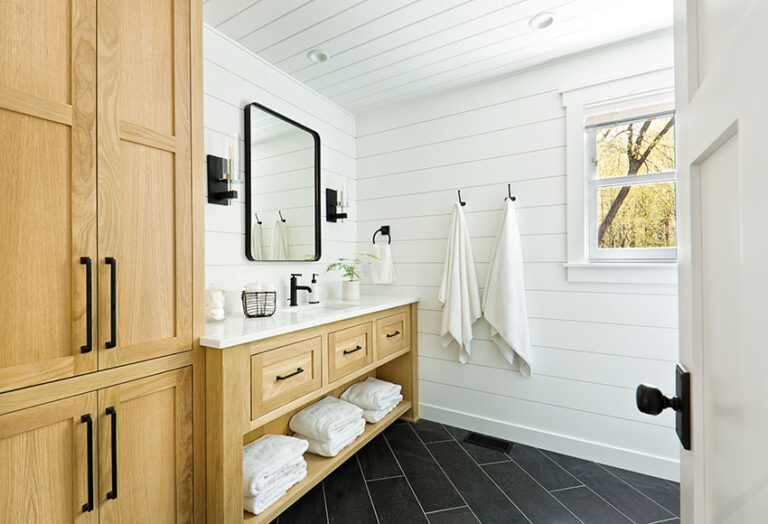
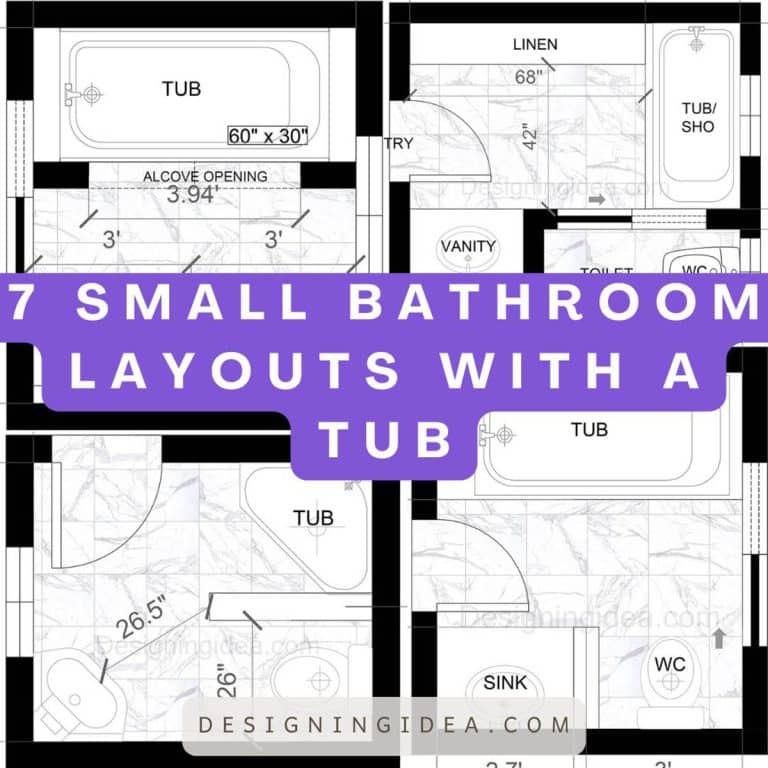
5 Stylish 8×8 Bathroom Layout Designs with a Shower

Getting the most out of a 64 square-foot, 8×8 bathroom layout with a shower can pose challenges to successfully fit all of the important elements without the space feeling too constrained. These 5 architect-designed bathroom floor plans share some creative ideas to fit all your must-have essentials for designs with excellent function and style. [toc]
8×8 Corner Shower Bathroom Floor Plan
Placing a neo-angle shower in the corner is a space-saving technique that will allow you to better use the room’s floor space.

You’ll find more bathroom layout options by room size in our main guide.
Floor Plan Details: This 8×8 bathroom layout uses a corner shower with a neo-angle design that help facilitate a better traffic flow and water containment due to its unique shape. Standard neo-angle showers measure from 36″ to 42″ on each side and offer additional visual appeal over a traditional straight-edged enclosure. This design places the enclosure in the upper right corner, facing the door. The sink is located on the upper left wall with a large mirror. The toilet is positioned against the lower right wall.
Design Tips:
- Use a vanity with a cabinet for storing bathroom products.
- A vanity around 48″ wide could fit into the space provided.
- Add towel bars on the left and right hand walls for washing.
- Consider the above toilet shelving or a cabinet for additional storage.
- Install larger mirrors to help reflect light and help make the smaller room appear larger.
8×8 Bathroom Layout With A Closet Next To A Shower/Tub Combo
Using a shower and tub combo in this bathroom layout, saves room that can be used for a linen closet.
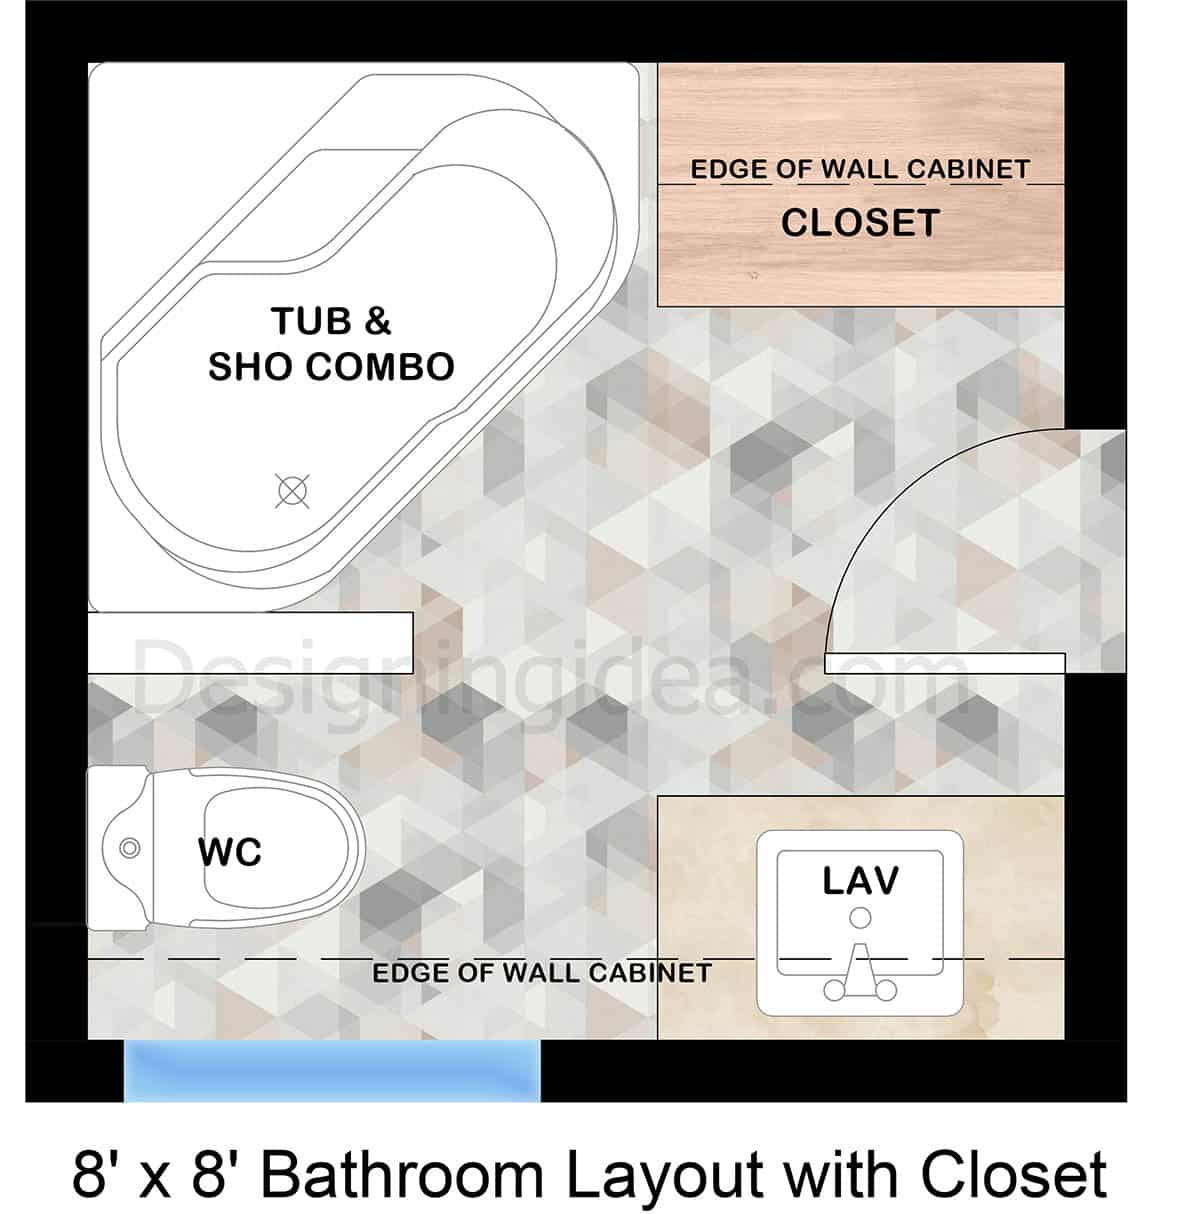
Floor Plan Details: This square room was designed to save space by using a tub and shower combo, that allows for a storage closet for towels, and other essentials. The closet is placed adjacent to the tub on the upper side with the toilet and vanity on the lower side. The standard tub/shower combo measures 60″ long by 30″ to 32″ wide. Using a 24″ to 30″ wide and 18″ to 24″ deep closet could work in the space provided. The vanity sink on the other side could be from 24″ to 36″ and not interfere with the toilet which needs a minimum of 24″ front clearance and 15″ from the center to any obstruction on either side.
Design Tips:
- Maximize the closet space by going vertical.
- Use a wall cabinet against the lower wall over the vanity. (Make sure it leaves 15″ of clearance between it and the side of the toilet.)
- Install a small pony wall or partition in-between the toilet and tub to avoid splashes and moisture issues.
- Consider use built-in niches in the bathtub for essential items like shampoo, and soap.
- Putting the toilet on the bottom wall in the corner helps with privacy.
- Extend the tile work in the shower area up the wall to the ceiling for durability and style.
Bathroom Design With Shower And Tub Across From The Vanity
This efficient bathroom layout uses a shower and tub to save space, while tucking the toilet behind a half-wall for additional privacy.
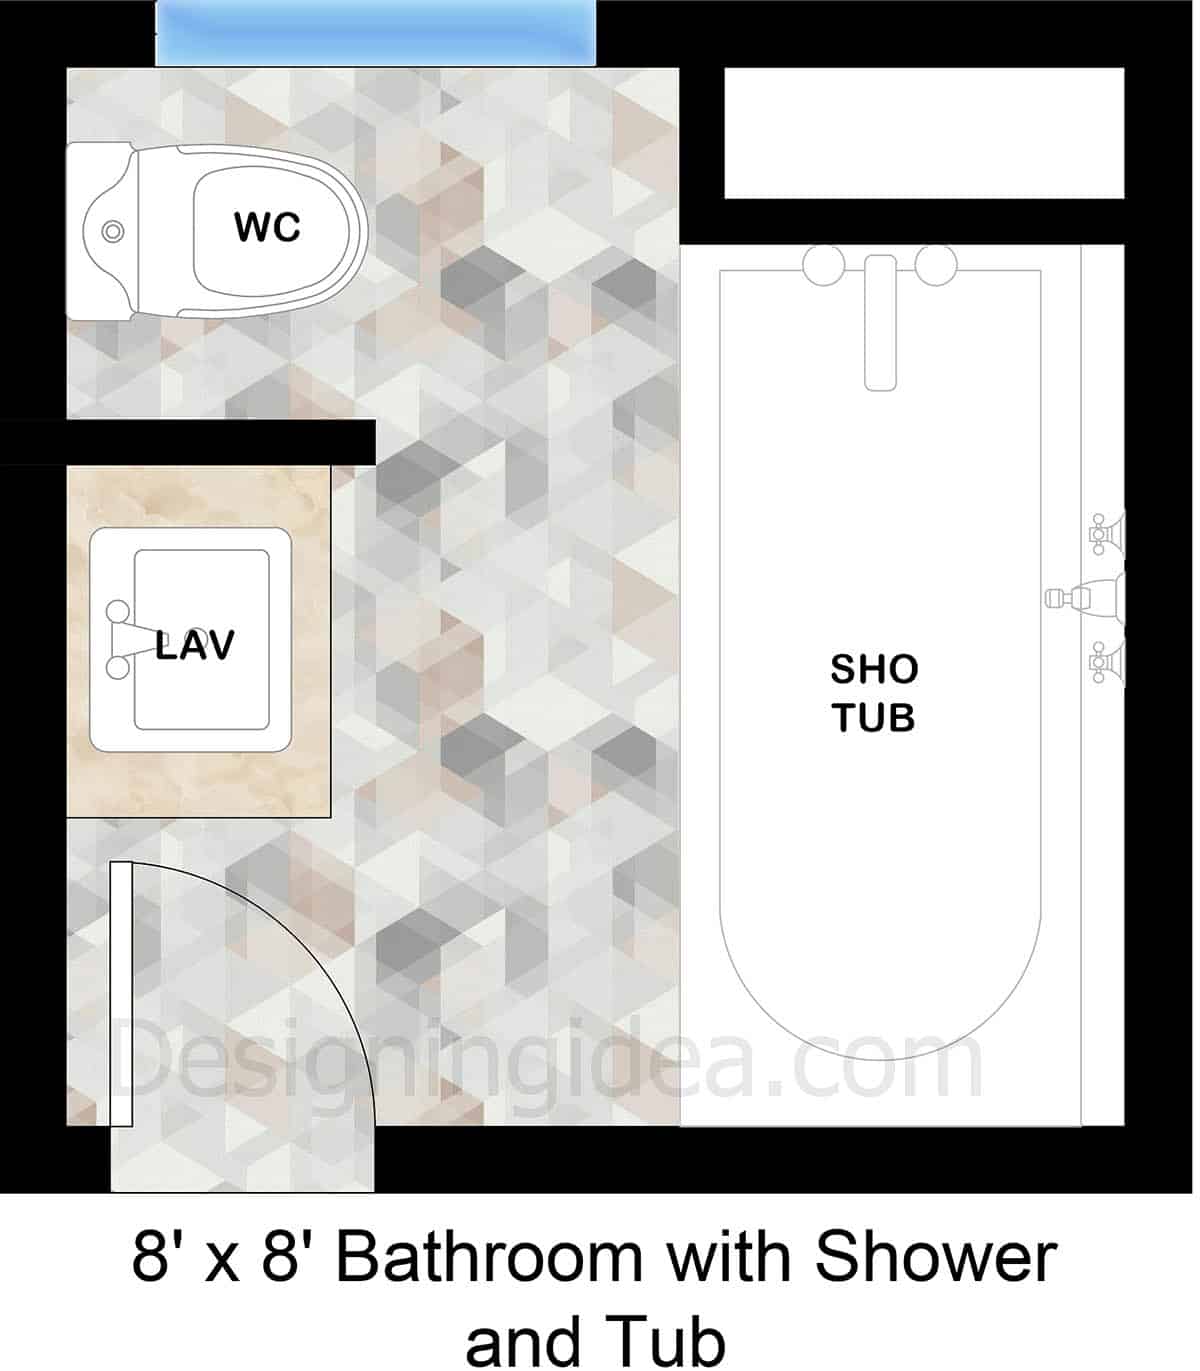
Floor Plan Details: Once again by using a tub/shower combo the 8×8 bathroom layout can save space. The bathing area is placed along the right wall with a small nook for storage. Across from the bathtub on the opposite wall sits the single sink vanity immediately as you enter the room. Next to the vanity is a half-wall partition that provides some privacy to the toilet area. This can be a full partition, or a pony wall that stretches 3 to 4 ft high. The design allows for a good traffic flow and places the sink next to the doorway to enhance accessibility.
Design Tips:
- To save more space for a larger vanity swap the inward swinging door for a pocket of sliding door.
- For the toilet privacy partition, consider a pony wall spanning 3 to 4 feet high for a more open feel.
- Use a built-in cabinet on the opposite wall from the toilet for storage.
- Install a large mirror to add reflectivity to help brighten and enlarge the space.
- A wall-mounted faucet can save counter space so there’s more room for grooming and beauty products.
- Use open shelving behind the toilet or above the tub for essential items or decor pieces.
- Use recessed lighting fixtures for even illumination between areas.
Bathroom Floor Plan With Large Walk-in Shower
Instead of using a standard tub, this bathroom layout uses a large walk-in shower that offers a spacious and luxurious feel.
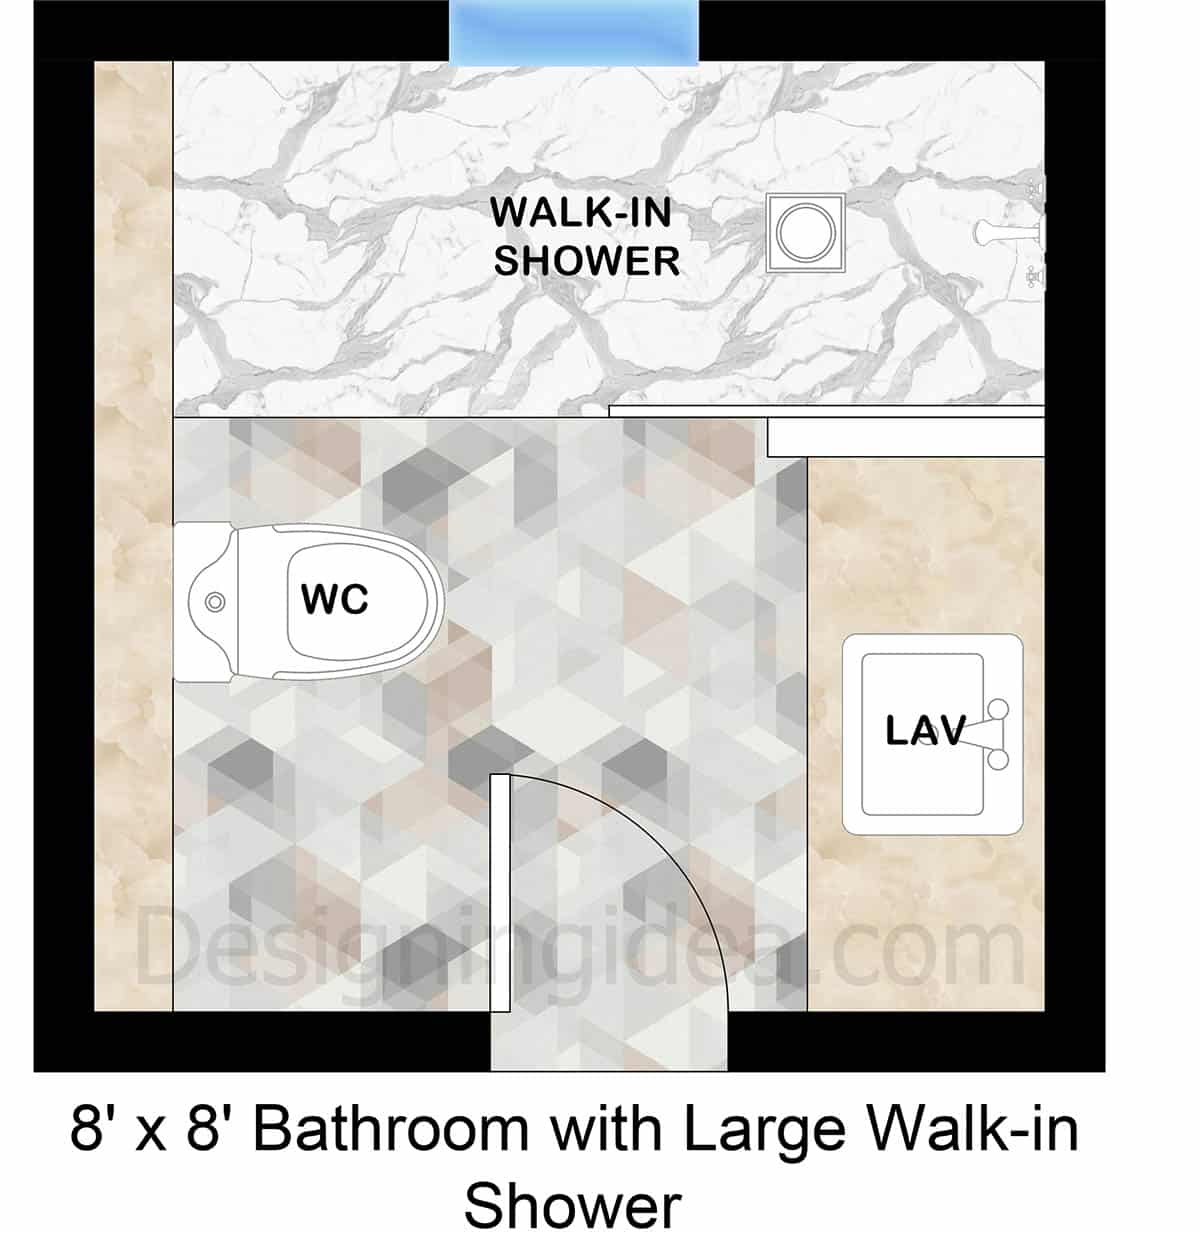
Floor Plan Details: For those who don’t need a bathtub, a luxurious walk-in shower can be perfect for a high-end feel and the ultimate in comfort. This design features the walk-in positioned against the upper wall with room for a built-in bench, different shower heads and even room for couples. A picture window is placed in the enclosure to promote natural light and offer ventilation to help control moisture. When you enter the room the vanity is placed against the right wall with the toilet on the opposite side. The toilet placement is designed to allow for additional privacy by being out of the direct line of sight from the doorway.
Design Tips:
- Install a curbless or zero entry shower for a modern style. You will need a sloped floor to drain properly.
- Add a rainfall showerhead and wall-mounted fixture to increase the spa-like feel.
- Use shower niches for storing essentials.
- Consider frosted glass partitions to offer more privacy while showering.
- The walk-in shower can be shortened to provide additional storage space along the side if necessary.
Wet Room Bathroom With Shower And Bench
With its open-plan design and curbless entry shower area, this wet room feels modern and sophisticated.
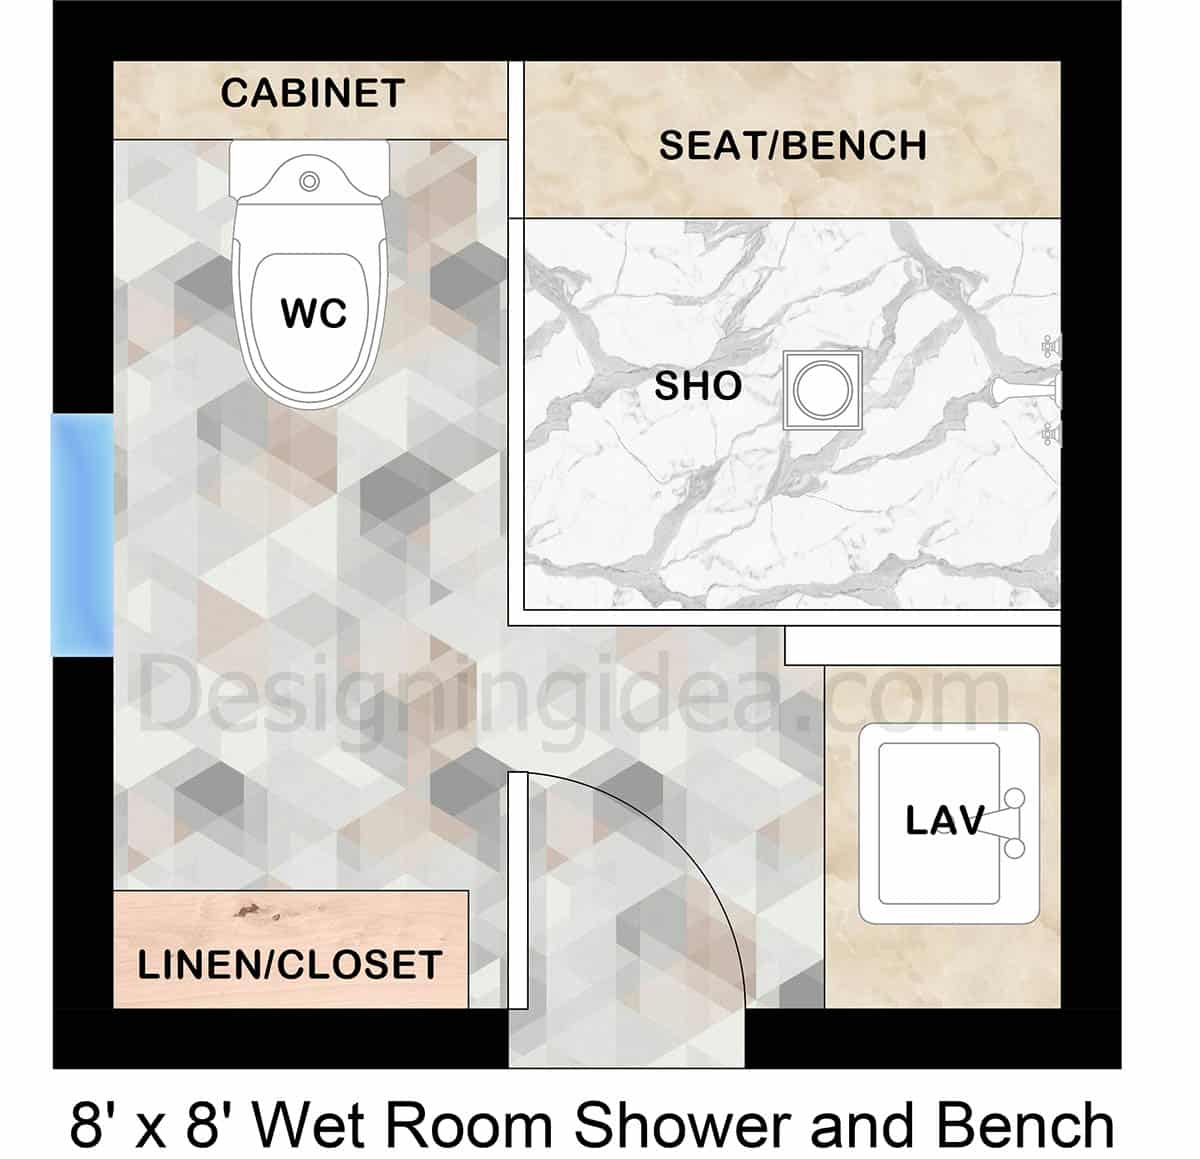
Floor Plan Details: With all waterproof elements, this wet room is designed for its seamless open-plan that looks modern and inviting. The shower features a curbless entry with frameless glass panels to help keep water from hitting the toilet and vanity areas. This setup with a curbless no-lip entry and built-in bench is ideal for those who want to age-in-place or have mobility issues and may need to depend on accessing a wheelchair before showering.
Design Tips:
- A slope of 1/4 inch per foot is recommended to help the water naturally flow into the shower’s drain and not pool in puddles.
- Use slip-resistant water-resistant floor throughout.
- Install glass panels on either side of the shower to prevent water splashes from hitting the toilet and vanity.
- Add a small linen closet and use a vanity with a cabinet to help with storage needs.
- Use at least a 110 to 130 CFM exhaust fan near the showering area to help reduce moisture.
- Include a humidity sensor to turn on automatically when moisture levels increase.
- Add a linear (trench) drain to collect water and give a more stylish look.
- Install a moisture-resistant window in one wall to increase ventilation and allow for airflow.
- Add an over-the-toilet cabinet for storing toiletry items.
Are you planning on designing a 8ft by 8ft bathroom layout? Share your thoughts on how you want to design your compact bathroom space, or any experience or questions you have about the process below in the comments.
To showcase highly specific designs, some images on this website use advanced AI-generation software to illustrate ideas and room inspiration. See our editorial policy to learn more.

Upload a photo and get instant before-and-after room designs.
No design experience needed — join 2.39 million+ happy users.
👉 Try the AI design tool now